Jen wasn’t trying to impress anyone. I’d stopped by her place to borrow a ladder—mine had mysteriously vanished after last year’s garage sale—and the smell hit me before I even got through the front door. That rich, nutty aroma of butter browning with garlic, the kind that makes your stomach forget you already ate lunch. She was standing at the stove in sweatpants, stirring a big skillet with one hand and holding her phone with the other, totally nonchalant about the fact that she was making something that smelled like a five-star restaurant.
“Oh, it’s just chicken and rice,” she said when I asked, shrugging like I’d complimented her on her dish towel. “My mom used to make it. Nothing fancy.”
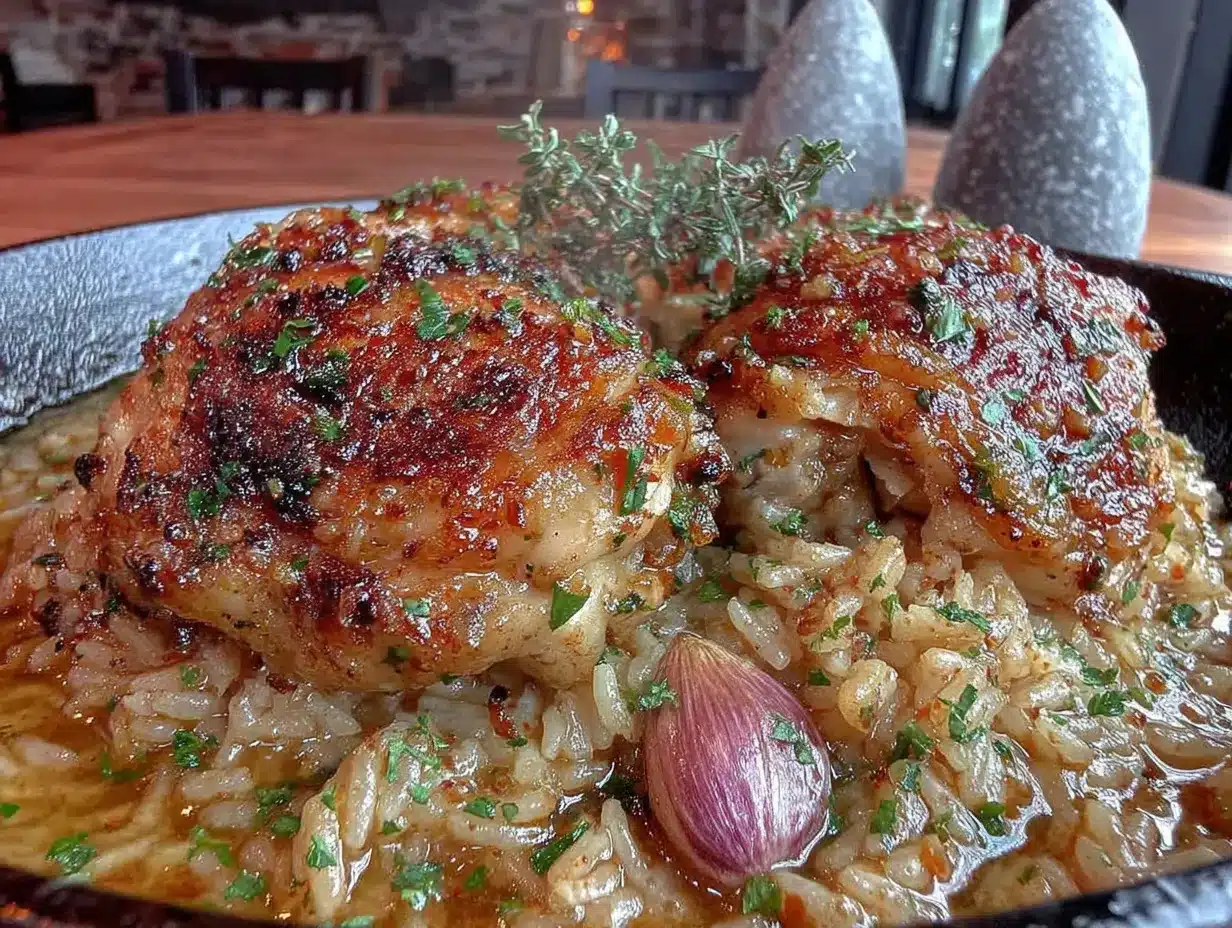
But here’s the thing—when she lifted the lid to check on it, I saw those golden chicken thighs nestled on a bed of fluffy rice, all glossy with garlic butter. And when she finally let me taste it? Honestly, I almost asked if I could just cancel the ladder borrowing and stay for dinner instead. That’s the kind of recipe this is. The kind that makes you rethink everything you thought you knew about a simple one-pan dinner.
I’ve been making this Garlic Butter Chicken and Rice ever since that day, tweaking it just enough to call it my own. Maybe you’ve been there—you taste something at a friend’s house and suddenly you can’t stop thinking about it. This is that recipe. And the best part? It’s so easy, you’ll feel like you’re cheating. Let me show you how it’s done.
Why You’ll Love This Recipe
I’ve tested this Garlic Butter Chicken and Rice at least a dozen times now. I’ve made it for quiet Tuesday dinners and for loud, chaotic family gatherings. Every single time, it delivers. Here’s why this one stands out from the crowd:
- One-Pan Wonder: Everything cooks in a single skillet or Dutch oven. Less cleanup, more time with your guests. That’s a win in my book.
- Simple Ingredients, Big Flavor: You don’t need a specialty grocery run. Chicken, rice, garlic, butter, broth—these are pantry staples that come together like magic.
- Perfect for Hosting: When you’ve got people coming over, you want something that looks impressive but doesn’t chain you to the stove. This dish lets you mingle while it finishes cooking.
- Crowd-Pleaser Status: I’ve served this to picky eaters, foodie friends, and everyone in between. The plates come back clean, and someone always asks for the recipe.
- Unbelievably Comforting: That first bite—the tender chicken, the garlicky rice, the buttery finish—it’s the kind of meal that makes you close your eyes for a second. Pure comfort.
What makes my version different? It’s all in the technique. I sear the chicken first to get that crispy, golden skin, then I toast the rice in the garlic butter before adding the liquid. That extra step builds layers of flavor you just don’t get from dumping everything in and hoping for the best. Trust me, it’s worth the extra five minutes.
What Ingredients You Will Need
This recipe uses simple, wholesome ingredients that work together to create something truly special. Most of these are probably in your kitchen right now, which makes this perfect for last-minute hosting or a cozy weeknight dinner.
For the Chicken
- 4 bone-in, skin-on chicken thighs (about 1.5 lbs) – I prefer thighs for their juiciness, but you can use breasts if you watch the cooking time. Bone-in adds more flavor to the rice.
- 1 teaspoon salt – I use fine sea salt for even seasoning.
- 1/2 teaspoon black pepper – Freshly ground is best here.
- 1/2 teaspoon paprika – Adds a subtle warmth and beautiful color.
- 2 tablespoons olive oil – For searing. Avocado oil works too.
For the Garlic Butter Rice
- 3 tablespoons unsalted butter – I recommend Kerrygold for its rich flavor, but any good butter works.
- 6 cloves garlic, minced – Don’t skimp here. Garlic is the star of this show.
- 1 1/2 cups long-grain white rice – Basmati or jasmine are my go-to choices. Avoid short-grain; it gets too sticky.
- 3 cups chicken broth – Low-sodium gives you control over the salt. Homemade is amazing if you have it.
- 1/2 cup dry white wine (optional) – Adds acidity and depth. Skip it and use extra broth if you prefer.
- 1/2 teaspoon dried thyme – Earthy and aromatic. Fresh thyme works too—use 1 teaspoon.
- 1 bay leaf – For that subtle, woodsy background note.
For Garnish
- Fresh parsley, chopped – A handful for color and freshness.
- Lemon wedges – A squeeze of lemon right before serving brightens everything up.
- Flaky sea salt – Optional, but I love the little bursts of saltiness.
Ingredient Tips: Look for chicken thighs with the skin still attached—that crispy skin is pure gold. If you’re using frozen chicken, thaw it completely in the fridge overnight and pat it very dry with paper towels before seasoning. Wet chicken won’t sear properly.
Substitution Guidance: Need a dairy-free option? Use ghee or a high-quality vegan butter. The flavor will change slightly, but it’ll still be delicious. For a gluten-free version, this recipe is naturally gluten-free as long as your broth is certified gluten-free. And if you’re out of white wine, just add an extra 1/2 cup of broth with a squeeze of lemon juice.
Equipment Needed
One of the best things about this recipe is how little equipment it requires. Here’s what you’ll need:
- A large, heavy-bottomed skillet or Dutch oven – I use a 12-inch cast-iron skillet or my trusty Le Creuset Dutch oven. Both hold heat beautifully and go from stovetop to oven if needed. If you don’t have either, a stainless steel pan with a tight-fitting lid works great.
- Sharp knife and cutting board – For mincing garlic and chopping parsley. A microplane works wonders for garlic if you want it extra fine.
- Tongs – For flipping the chicken without tearing the skin. Silicone-tipped tongs are gentle on non-stick pans.
- Measuring cups and spoons – Precision matters for the rice-to-liquid ratio.
- Wooden spoon or spatula – For stirring the rice and scraping up those delicious browned bits from the pan.
Budget-Friendly Options: Don’t have a Dutch oven? No problem. A deep non-stick skillet with a lid works perfectly. Just make sure it’s at least 12 inches wide so everything fits without overcrowding. I’ve even made this in a large stainless steel pot in a pinch—just watch the heat to prevent sticking.
Preparation Method
Let’s get cooking! This recipe comes together in about 45 minutes, and most of that time is hands-off while the rice does its thing.
- Prep the chicken (5 minutes): Pat the chicken thighs dry with paper towels. This is non-negotiable—wet skin won’t crisp up. Season both sides generously with salt, pepper, and paprika. Let them sit at room temperature for 10 minutes while you get everything else ready.
- Sear the chicken (8-10 minutes): Heat the olive oil in your skillet over medium-high heat until it shimmers. Place the chicken skin-side down in a single layer. Don’t crowd the pan—if your skillet is smaller, work in batches. Let the chicken cook undisturbed for 5-6 minutes until the skin is deep golden brown and crispy. Flip and cook for another 2-3 minutes. The chicken won’t be fully cooked yet—that’s okay. Transfer to a plate and set aside.
- Build the garlic butter base (3 minutes): Reduce the heat to medium. Add the butter to the same skillet and let it melt, scraping up any browned bits from the bottom with your wooden spoon. Those bits are pure flavor. Add the minced garlic and cook for 30-60 seconds until fragrant. Don’t let it burn—burnt garlic turns bitter.
- Toast the rice (2 minutes): Add the rice to the garlic butter and stir constantly for about 2 minutes. You’ll notice the rice turning slightly translucent at the edges and smelling nutty. This step is what makes the rice so flavorful.
- Add the liquid (1 minute): Pour in the white wine if using, and let it sizzle for about 30 seconds. Then add the chicken broth, dried thyme, and bay leaf. Stir everything together and bring it to a gentle boil.
- Return the chicken (1 minute): Nestle the chicken thighs back into the rice, skin-side up. They should be sitting on top of the rice, not submerged. This keeps the skin crispy while the rice cooks below.
- Simmer and cook (20-25 minutes): Reduce the heat to low, cover the skillet with a tight-fitting lid, and let it simmer gently. Do NOT lift the lid during cooking—the steam is what cooks the rice perfectly. Set a timer for 20 minutes.
- Rest and finish (5 minutes): After 20 minutes, turn off the heat and let the skillet sit covered for another 5 minutes. This resting time lets the rice absorb any remaining liquid and fluff up beautifully.
- Garnish and serve (2 minutes): Remove the lid carefully (watch for steam!). Fluff the rice with a fork, remove the bay leaf, and sprinkle with fresh parsley. Squeeze a lemon wedge over everything just before serving. That bright acidity cuts through the richness perfectly.
Sensory Cues: When the chicken is searing, you should hear a steady sizzle—not a frantic pop. If it’s popping, the heat is too high. When the rice is toasting, the aroma should be nutty and warm, like popcorn. And when you lift the lid at the end, you should see fluffy, separate grains of rice with no standing liquid. If there’s still liquid, let it cook covered for another 3-4 minutes.
Cooking Tips & Techniques
I’ve made this Garlic Butter Chicken and Rice more times than I can count, and I’ve learned a few things the hard way. Here are my best tips to make sure yours turns out perfect every time.
Don’t skip the sear. I know it’s tempting to just dump everything in and save time, but that golden, crispy skin is where so much flavor comes from. Plus, the browned bits left in the pan—called fond—are the foundation of your garlic butter rice. Without them, the rice tastes flat.
Measure your liquid carefully. Rice is finicky about ratios. For long-grain white rice, the magic number is 2:1 liquid to rice. I use 3 cups of broth for 1.5 cups of rice because some liquid evaporates during simmering. Too much liquid and you’ll get mushy rice. Too little and it’ll be crunchy. Trust the measurements.
Keep the lid on. I cannot stress this enough. Every time you lift that lid, steam escapes, and your cooking time gets thrown off. If you’re tempted to peek, just don’t. Set the timer and walk away. I once checked on it “just for a second” and ended up with slightly undercooked rice. Lesson learned.
Use room-temperature chicken. Taking the chill off the chicken before searing helps it cook more evenly. Cold chicken can lower the pan temperature too much, leading to steaming instead of searing. Just 10-15 minutes on the counter makes a difference.
Toast the rice properly. This step is easy to rush, but don’t. Stir the rice constantly in the garlic butter until you see the edges turn slightly translucent and you smell that nutty aroma. It takes about 2 minutes, and it’s the secret to rice that’s flavorful all the way through, not just on the surface.
Variations & Adaptations
One of the things I love about this recipe is how flexible it is. Here are some ways to make it your own:
Dietary Variations
- Dairy-Free: Swap the butter for ghee or a good vegan butter. Ghee adds a slightly nutty flavor that works beautifully with garlic.
- Gluten-Free: This recipe is naturally gluten-free as long as your broth is certified gluten-free. Some broths contain hidden gluten, so check the label.
- Low-Carb/Keto: Replace the rice with cauliflower rice. Cook the cauliflower rice separately and serve the chicken on top. The garlic butter sauce is keto-friendly as-is.
Flavor Twists
- Lemon Herb: Add the zest of one lemon along with the garlic, and swap the thyme for fresh rosemary. The lemon brightens everything up beautifully.
- Spicy Kick: Add 1/2 teaspoon of red pepper flakes with the garlic. A drizzle of sriracha or chili oil at the end is also fantastic.
- Mushroom Lover: Sauté 8 ounces of sliced mushrooms after removing the chicken and before adding the butter. They add an earthy depth that pairs perfectly with the garlic.
Different Proteins
Chicken thighs are my favorite, but this works great with bone-in chicken breasts (increase cooking time to 30-35 minutes) or even turkey thighs. I’ve also made it with Italian sausage links—just brown them whole and slice before serving. Each protein brings its own personality to the dish.
Serving & Storage Suggestions
This dish is designed to impress, so let’s talk about how to serve it like a pro.
Serving Temperature and Presentation: Serve this Garlic Butter Chicken and Rice straight from the skillet—it’s gorgeous. Place the skillet on a trivet in the center of the table and let everyone help themselves. The crispy chicken skin on top of the fluffy rice is a visual showstopper. Garnish with fresh parsley and lemon wedges for a pop of color.
What to Serve Alongside: A simple green salad with a lemon vinaigrette is perfect—it cuts through the richness. Steamed green beans or roasted asparagus also work beautifully. For bread, a crusty baguette or garlic bread is ideal for sopping up any extra garlic butter from the bottom of the pan.
Storage Instructions: Store leftovers in an airtight container in the refrigerator for up to 4 days. The flavors actually get better as they meld together. To reheat, add a splash of broth or water to the rice and warm it in a covered skillet over low heat, or use the microwave in 30-second bursts. The chicken skin won’t be as crispy, but the flavor will still be amazing.
Freezer Tips: This dish freezes well for up to 3 months. Let it cool completely, then transfer to a freezer-safe container. Thaw overnight in the fridge and reheat gently. I like to freeze individual portions for easy lunches.
Nutritional Information & Benefits
Here’s a rough estimate per serving (based on 4 servings):
| Nutrient | Amount |
|---|---|
| Calories | 520 |
| Protein | 32g |
| Fat | 22g |
| Carbohydrates | 48g |
| Fiber | 1g |
| Sodium | 780mg |
Health Benefits: Chicken thighs are rich in protein, iron, and B vitamins, which support energy metabolism. Garlic is known for its anti-inflammatory and immune-boosting properties. The butter provides fat-soluble vitamins A, D, E, and K, while the rice offers quick energy from complex carbohydrates.
Dietary Considerations: This recipe is naturally gluten-free and can be made dairy-free with simple substitutions. It’s not low-carb or keto-friendly unless you swap the rice. If you’re watching sodium, use low-sodium broth and reduce the added salt.
Conclusion
This Garlic Butter Chicken and Rice has become my go-to for so many occasions. It’s the dish I make when I want to feel like I’ve got it all together, even on a hectic weeknight. It’s the recipe friends ask for after they’ve eaten at my house. And honestly, it’s the meal that reminds me why I love cooking—because good food shared with good people is one of life’s simplest, greatest pleasures.
I’d love for you to try this and make it your own. Maybe you’ll add extra garlic (I won’t judge), or swap in your favorite herbs. Whatever you do, I hope it becomes a staple in your kitchen too. If you make it, let me know how it turns out—drop a comment below or tag me in your photos. Happy cooking, friend!
Frequently Asked Questions
Can I use chicken breasts instead of thighs?
Absolutely. Boneless, skinless chicken breasts will work, but they cook faster and can dry out more easily. Reduce the simmering time to 15-18 minutes and check the internal temperature—it should reach 165°F. Bone-in breasts take about 30 minutes. Just keep an eye on them.
Why is my rice mushy?
Mushy rice usually means too much liquid or overcooking. Make sure you’re using the correct 2:1 ratio of liquid to rice, and don’t lift the lid while it’s simmering. Also, let it rest for 5 minutes after cooking to absorb any excess moisture.
Can I make this in a slow cooker or Instant Pot?
Yes! For the Instant Pot, use the sauté function to sear the chicken and toast the rice, then pressure cook on high for 6 minutes with a natural release. For a slow cooker, sear the chicken first, then add everything and cook on low for 4-5 hours. The rice will be softer, but the flavor is still great.
How do I get crispy chicken skin if I’m using a non-stick pan?
Non-stick pans don’t get as hot as cast iron, so the skin may not crisp as well. Pat the chicken very dry, use a little more oil, and don’t move it while it sears. If you’re still not getting crispiness, finish the chicken under the broiler for 2-3 minutes after the rice is done.
Can I double this recipe for a crowd?
Definitely. Double all ingredients and use a larger pot or Dutch oven. You may need to sear the chicken in batches to avoid overcrowding. Increase the simmering time by 5-10 minutes, and check the rice for doneness before serving. It’s perfect for potlucks and family gatherings.
Pin This Recipe!
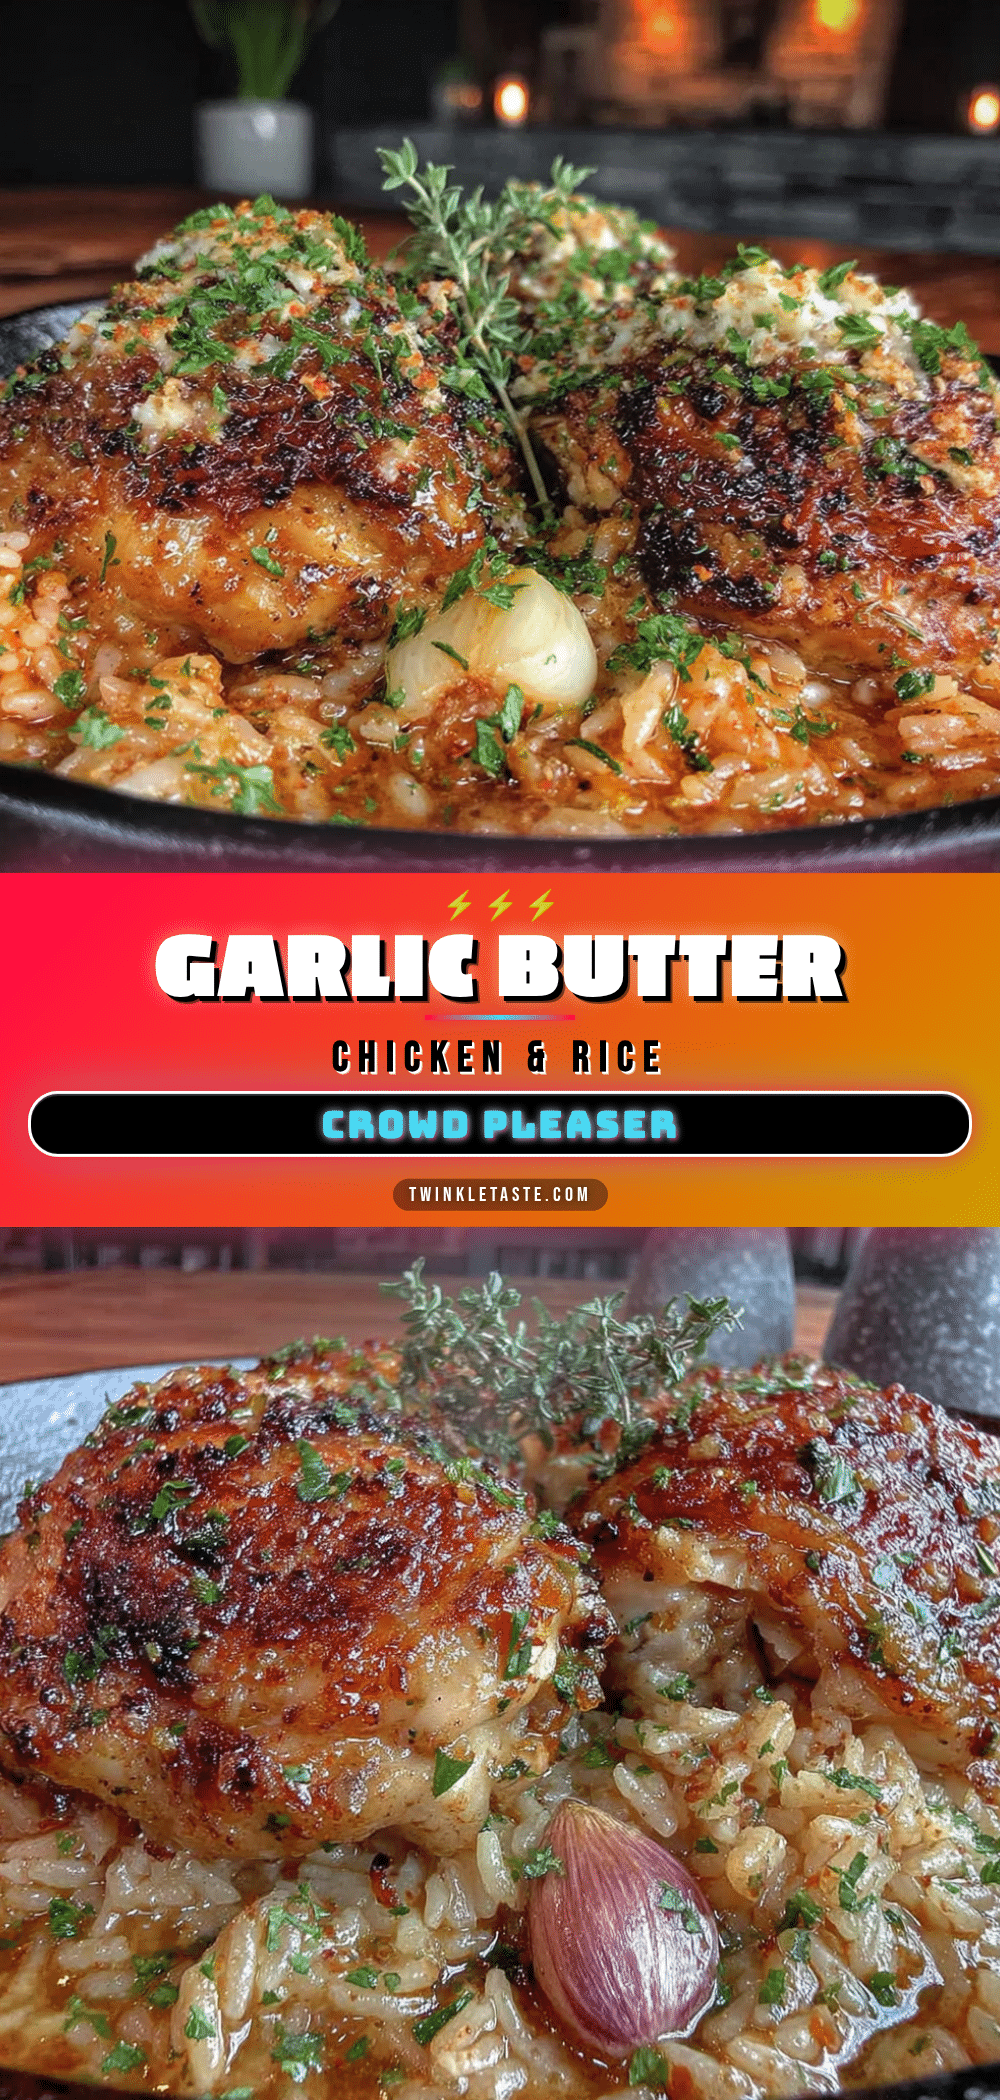
Easy Garlic Butter Chicken and Rice: Best One-Pan Dinner

This one-pan wonder features golden, crispy chicken thighs nestled on a bed of fluffy, garlic butter rice. It’s a simple yet impressive dish that’s perfect for weeknight dinners or entertaining guests.
- Prep Time: 15 minutes
- Cook Time: 30 minutes
- Total Time: 45 minutes
- Yield: 4 servings 1x
- Category: Main Course
- Cuisine: American
Ingredients
- 4 bone-in, skin-on chicken thighs (about 1.5 lbs)
- 1 teaspoon salt
- 1/2 teaspoon black pepper
- 1/2 teaspoon paprika
- 2 tablespoons olive oil
- 3 tablespoons unsalted butter
- 6 cloves garlic, minced
- 1 1/2 cups long-grain white rice (basmati or jasmine)
- 3 cups chicken broth (low-sodium)
- 1/2 cup dry white wine (optional)
- 1/2 teaspoon dried thyme
- 1 bay leaf
- Fresh parsley, chopped (for garnish)
- Lemon wedges (for garnish)
- Flaky sea salt (optional, for garnish)
Instructions
- Prep the chicken: Pat the chicken thighs dry with paper towels. Season both sides generously with salt, pepper, and paprika. Let them sit at room temperature for 10 minutes.
- Sear the chicken: Heat olive oil in a large skillet or Dutch oven over medium-high heat until shimmering. Place the chicken skin-side down in a single layer. Cook undisturbed for 5-6 minutes until the skin is deep golden brown and crispy. Flip and cook for another 2-3 minutes. Transfer to a plate and set aside.
- Build the garlic butter base: Reduce heat to medium. Add butter to the same skillet and let it melt, scraping up any browned bits from the bottom. Add minced garlic and cook for 30-60 seconds until fragrant.
- Toast the rice: Add the rice to the garlic butter and stir constantly for about 2 minutes until the edges turn slightly translucent and it smells nutty.
- Add the liquid: Pour in the white wine (if using) and let it sizzle for about 30 seconds. Then add chicken broth, dried thyme, and bay leaf. Stir and bring to a gentle boil.
- Return the chicken: Nestle the chicken thighs back into the rice, skin-side up.
- Simmer and cook: Reduce heat to low, cover with a tight-fitting lid, and let it simmer gently for 20-25 minutes. Do not lift the lid during cooking.
- Rest and finish: After 20 minutes, turn off the heat and let the skillet sit covered for another 5 minutes.
- Garnish and serve: Remove the lid carefully. Fluff the rice with a fork, remove the bay leaf, and sprinkle with fresh parsley. Squeeze a lemon wedge over everything just before serving.
Notes
Don’t skip searing the chicken—it builds flavor. Keep the lid on during simmering to ensure perfectly cooked rice. Let the chicken come to room temperature before searing for even cooking. Toast the rice in garlic butter for extra flavor.
Nutrition
- Serving Size: 1 serving (about 1 c
- Calories: 520
- Sugar: 2
- Sodium: 780
- Fat: 22
- Saturated Fat: 8
- Carbohydrates: 48
- Fiber: 1
- Protein: 32
Keywords: garlic butter chicken, one-pan dinner, chicken and rice, easy dinner, weeknight meal, comfort food


