My nephew asked why I couldn’t just use a box of cake mix for the cookies. I started to explain why that wouldn’t work—then stopped. He was eight, holding a can of pumpkin puree he’d grabbed from the pantry himself, and he looked so sure. I sighed, grabbed a bowl, and told him we’d try it his way. Honestly, I was already planning how to salvage the batch later.
The kitchen got messy fast. He dumped in the pumpkin without measuring, and I had to fish out a few seeds with my fingers. There was cinnamon on the counter, sugar on the floor, and a smear of butter on the cabinet door. But when those cookies came out of the oven—puffy, golden, smelling like autumn in a jar—I took one bite and just stood there. They were better than my usual recipe. Softer. More tender. With that perfect snickerdoodle tang wrapped in warm pumpkin spice.
I learned something that Tuesday afternoon. Sometimes the best recipes come from letting someone else take the lead. These small-batch pumpkin snickerdoodle cookies have become my go-to for fall gatherings, and every time I make them, I remember that it’s okay to be wrong in the kitchen. Maybe you’ve been there too—stuck in your ways, convinced your method is the only way. Trust me, I get it. But these cookies might just change your mind.
Why You’ll Love This Recipe
These aren’t just another pumpkin cookie. They’re the kind that disappears before you can grab a second one yourself. I’ve tested this recipe at four different dinner parties, and every single time, someone asks for the recipe before they’ve finished chewing. Here’s why they work so well:
- Small Batch, Big Flavor : Makes exactly 12 cookies—perfect for a gathering without a mountain of leftovers.
- No Chilling Required : Mix, scoop, bake. That’s it. You can have warm cookies in under 25 minutes.
- Pantry-Friendly Ingredients : Nothing fancy here. Canned pumpkin, basic spices, and butter you probably already have.
- Perfect for Hosting : These cookies look impressive on a platter but take almost no effort to pull together.
- That Classic Snickerdoodle Tang : The cream of tartar gives you that signature flavor, while pumpkin keeps everything incredibly soft.
What makes these different from every other pumpkin cookie recipe out there? It’s the texture. Most pumpkin cookies turn out cakey or dense. These have that slight chew on the outside with a pillowy center, thanks to the perfect ratio of pumpkin to butter. I spent three batches getting it right—the first was too flat, the second too puffy, and the third? Pure magic.
This is the recipe you make when you want to impress guests without breaking a sweat. It’s comfort food that feels special, but stays simple. And honestly? That’s the best kind of recipe to have in your back pocket.
What Ingredients You Will Need
This recipe uses simple, wholesome ingredients to deliver bold flavor and satisfying texture without the fuss. Most of these are pantry staples, which makes these cookies perfect for last-minute hosting.
For the Cookies
- 1/2 cup unsalted butter, softened (I prefer Kerrygold for its richness, but any good butter works)
- 1/2 cup granulated sugar
- 1/4 cup packed light brown sugar
- 1/3 cup pumpkin puree (not pumpkin pie filling—make sure it’s 100% pumpkin)
- 1 large egg yolk, room temperature (save the white for an omelet)
- 1 teaspoon vanilla extract
- 1 1/4 cups all-purpose flour, spooned and leveled
- 1/2 teaspoon cream of tartar (this gives snickerdoodles their signature tang)
- 1/2 teaspoon baking soda
- 1/4 teaspoon salt
- 1 teaspoon pumpkin pie spice
- 1/2 teaspoon ground cinnamon
For the Cinnamon-Sugar Coating
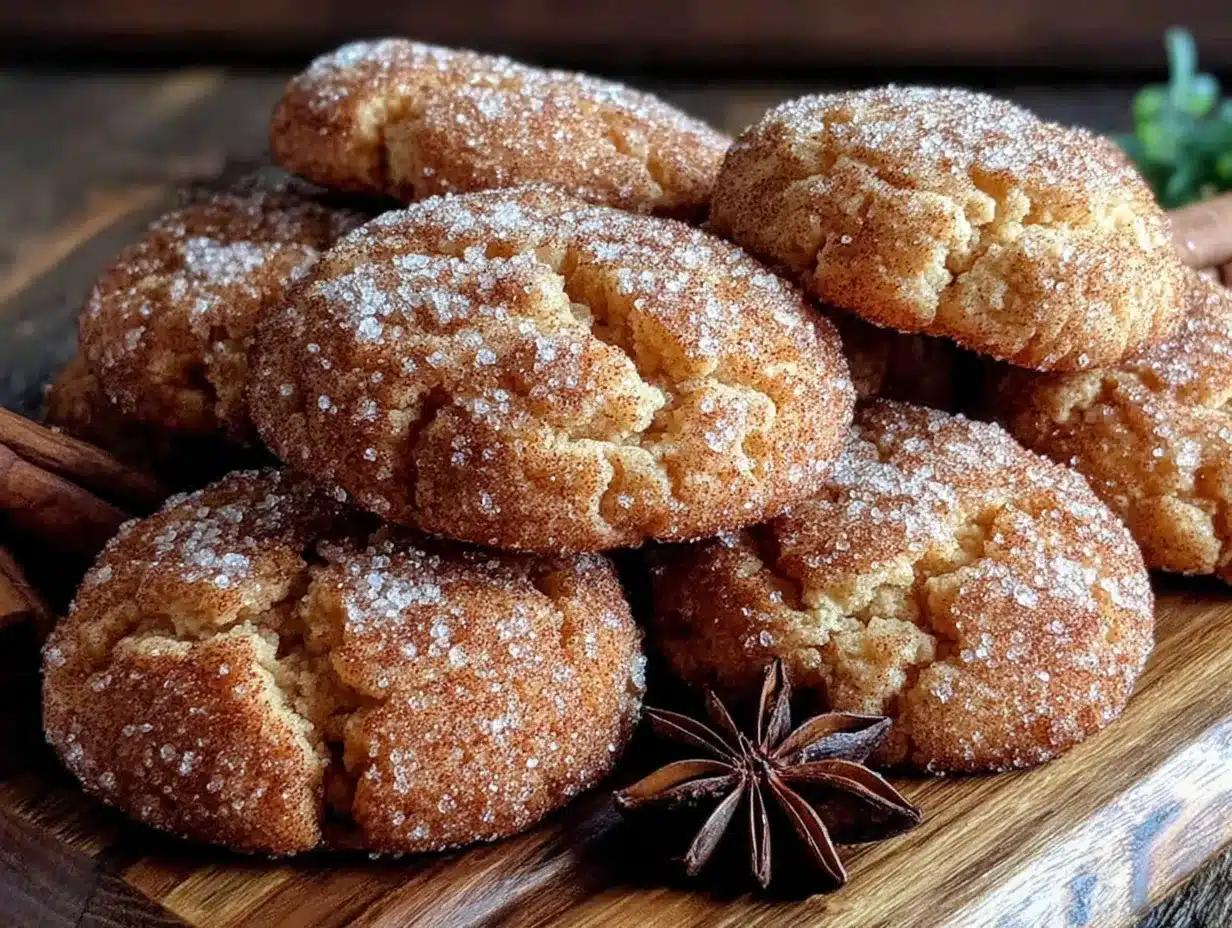
- 3 tablespoons granulated sugar
- 1 tablespoon ground cinnamon
A quick note on pumpkin puree: I’ve tried both store-brand and Libby’s, and they both work fine. Just make sure you blot the pumpkin with a paper towel before adding it to the dough. Pumpkin has a lot of water, and removing some of that moisture keeps your cookies from spreading too thin. I learned this the hard way after my first batch turned into flat, sad discs.
For the cream of tartar, don’t skip it. It’s what makes a snickerdoodle a snickerdoodle. If you don’t have it, you can substitute with 1 teaspoon of lemon juice or white vinegar, but the texture won’t be quite the same.
Equipment Needed
You don’t need much for these cookies, which is another reason I love them for hosting.
- Large mixing bowl and a medium bowl for the dry ingredients
- Hand mixer or stand mixer (a wooden spoon works too, but your arm will thank you for the mixer)
- Baking sheet — I use a light-colored aluminum sheet for even browning
- Parchment paper or a silicone baking mat
- Cookie scoop (about 1.5 tablespoons) for uniform cookies
- Cooling rack
- Small bowl for the cinnamon-sugar coating
If you don’t have a cookie scoop, use two spoons to portion the dough. The cookies will still taste amazing, they just might look a little rustic. And that’s fine—homemade cookies should look homemade.
Preparation Method
Preheat your oven to 350°F (175°C). Line a baking sheet with parchment paper and set it aside.
-
Blot the pumpkin puree. Spread the 1/3 cup of pumpkin puree on a paper towel or clean kitchen towel. Place another paper towel on top and press gently to absorb excess moisture. Let it sit while you cream the butter and sugars. This step makes a huge difference—trust me.
-
Cream the butter and sugars. In a large bowl, beat the softened butter, granulated sugar, and brown sugar together until light and fluffy, about 2-3 minutes. Scrape down the sides of the bowl halfway through. You want the mixture to look pale and airy.
-
Add the wet ingredients. Beat in the pumpkin puree, egg yolk, and vanilla extract until well combined. The mixture might look slightly curdled at this point—that’s totally normal. Don’t panic.
-
Mix the dry ingredients. In a separate medium bowl, whisk together the flour, cream of tartar, baking soda, salt, pumpkin pie spice, and cinnamon. Make sure there are no lumps, especially with the cream of tartar.
-
Combine wet and dry. Gradually add the dry ingredients to the wet mixture, mixing on low speed until just combined. Stop as soon as you don’t see any more streaks of flour. Overmixing will make the cookies tough, so be gentle.
-
Make the coating. In a small bowl, stir together the 3 tablespoons of sugar and 1 tablespoon of cinnamon.
-
Scoop and roll. Using a 1.5-tablespoon cookie scoop, portion out the dough. Roll each portion into a ball between your palms, then roll it in the cinnamon-sugar mixture until fully coated. Place the dough balls on the prepared baking sheet, spacing them about 2 inches apart. The dough will be slightly sticky, so work quickly.
-
Bake. Bake for 10-12 minutes, or until the edges are set and the tops look slightly crackled. The centers will still look soft and puffy—that’s what you want. Don’t overbake, or you’ll lose that tender texture.
-
Cool. Let the cookies cool on the baking sheet for 5 minutes. This allows them to set up properly. Then transfer them to a wire rack to cool completely. Or, you know, eat one warm. I won’t judge.
Cooking Tips & Techniques
I’ve made these cookies more times than I can count, and I’ve messed up plenty along the way. Here’s what I’ve learned:
Don’t skip the pumpkin blotting. I know it seems like an extra step, but it’s the difference between a perfectly soft cookie and a flat, soggy one. Pumpkin holds a lot of water, and that water creates steam in the oven. Too much steam, and your cookies spread into thin pancakes. Blotting removes just enough moisture to keep them thick and tender.
Use room temperature ingredients. Cold butter won’t cream properly, and cold egg yolk can cause the batter to seize. Leave your butter and egg out for about 30 minutes before you start. If you’re in a rush, cut the butter into small cubes and let it sit for 10 minutes—that usually does the trick.
Watch the bake time carefully. Every oven runs a little differently. My old oven baked these in exactly 10 minutes. My new one takes 12. Start checking at the 9-minute mark. The cookies are done when the edges look set and the tops have lost their raw shine. They’ll continue to cook on the hot baking sheet after you pull them out, so don’t wait until they look fully done in the oven.
Make ahead for hosting. You can prepare the dough up to 24 hours in advance and keep it covered in the fridge. Let it sit at room temperature for 10 minutes before scooping and baking. This is a lifesaver when you’re hosting and want fresh cookies without the last-minute chaos.
Variations & Adaptations
These cookies are pretty perfect as-is, but I’ve played around with a few variations that work great for different crowds:
Gluten-Free Version: Swap the all-purpose flour with a 1:1 gluten-free baking flour. I’ve used both Bob’s Red Mill and King Arthur’s gluten-free blends with great results. The texture will be slightly more delicate, but the flavor is spot-on.
Vegan Adaptation: Use vegan butter (I like Miyoko’s) and replace the egg yolk with 1 tablespoon of aquafaba (the liquid from a can of chickpeas). The cookies won’t be quite as tender, but they’re still delicious. I tested this for a friend’s dairy-free dinner party, and nobody guessed they were vegan.
Spice It Up: Add 1/4 teaspoon of ground ginger and a pinch of cloves to the dough for a warmer, more complex spice profile. This is my personal favorite variation—it makes the cookies taste even more like fall.
Add Mix-Ins: Fold in 1/3 cup of white chocolate chips or chopped pecans after the flour is incorporated. White chocolate pairs beautifully with pumpkin, and pecans add a nice crunch. I made these for a potluck once, and they were gone in fifteen minutes.
Serving & Storage Suggestions
These cookies are best served slightly warm, when the centers are still soft and the cinnamon-sugar coating is fragrant. Arrange them on a wooden board or a simple white platter for a gorgeous presentation that looks effortless.
They pair beautifully with:
- A hot cup of spiced chai or apple cider
- A scoop of vanilla bean ice cream for an impromptu dessert
- A small glass of cold milk (classic for a reason)
Storage: Keep the cookies in an airtight container at room temperature for up to 4 days. Place a slice of bread in the container—it absorbs excess moisture and keeps the cookies soft. Trust me on this one. Change the bread slice after 2 days if you’re still working through the batch.
Freezing: You can freeze the baked cookies for up to 3 months. Layer them between sheets of parchment paper in a freezer-safe container. Thaw at room temperature for about 30 minutes before serving. You can also freeze the unbaked dough balls—just scoop, roll in cinnamon sugar, and freeze on a baking sheet. Once solid, transfer to a freezer bag. Bake from frozen, adding 2-3 extra minutes to the bake time.
The flavors actually deepen after a day or two, so don’t be afraid to make these ahead of your gathering. They might even taste better the next day.
Nutritional Information & Benefits
Per cookie (based on 12 cookies):
- Calories: 185
- Fat: 9g
- Carbohydrates: 25g
- Fiber: 1g
- Sugar: 14g
- Protein: 2g
These cookies are a treat, but they do have a few redeeming qualities. Pumpkin is packed with vitamin A and antioxidants, and the cinnamon adds anti-inflammatory benefits. Plus, since this is a small-batch recipe, you’re less likely to overindulge compared to a full batch that makes two dozen.
If you’re watching your sugar intake, you can reduce the coating sugar to 2 tablespoons, but honestly, the cinnamon-sugar coating is what makes these cookies special. Just enjoy one or two and savor every bite.
Conclusion
These small-batch pumpkin snickerdoodle cookies have become my signature fall recipe, and they started with an eight-year-old who didn’t know any better. That’s the thing about cooking—sometimes the best discoveries come from letting go of control and trying something new.
Whether you’re hosting a dinner party, bringing dessert to a potluck, or just want a cozy treat for a quiet evening, these cookies deliver. They’re simple enough for a weeknight, but impressive enough to steal the show at any gathering. The soft texture, the warm spices, that perfect cinnamon-sugar crunch—it all comes together in under 30 minutes.
I’d love to hear how these turn out for you. Did you try any variations? Serve them with something unexpected? Drop a comment below and let me know. And if you share them on social media, tag me—I always love seeing your creations. Happy baking, friends!
Frequently Asked Questions
Can I use pumpkin pie filling instead of pumpkin puree?
No, please don’t. Pumpkin pie filling has added sugar and spices, which will throw off the balance of the recipe. Stick with 100% pure pumpkin puree for the best results.
Why did my cookies turn out flat?
Most likely, you didn’t blot the pumpkin puree enough, or your butter was too soft. Make sure to blot the pumpkin thoroughly and don’t over-cream the butter and sugar. Also, check that your baking soda is fresh—old baking soda loses its oomph.
Can I double this recipe?
Absolutely. This recipe doubles beautifully. Just make sure you use a larger bowl and adjust your baking time if you’re baking multiple sheets at once (rotate the pans halfway through).
How do I know when the cookies are done?
The edges should look set and slightly golden, while the centers will still appear soft and puffy. They’ll continue to set as they cool on the baking sheet. When in doubt, take them out a minute early rather than a minute late.
Can I make these cookies without cream of tartar?
You can, but they won’t have that classic snickerdoodle tang. Substitute with 1 teaspoon of lemon juice or white vinegar, but know that the texture might be slightly different. For the real deal, cream of tartar is worth picking up.
Pin This Recipe!
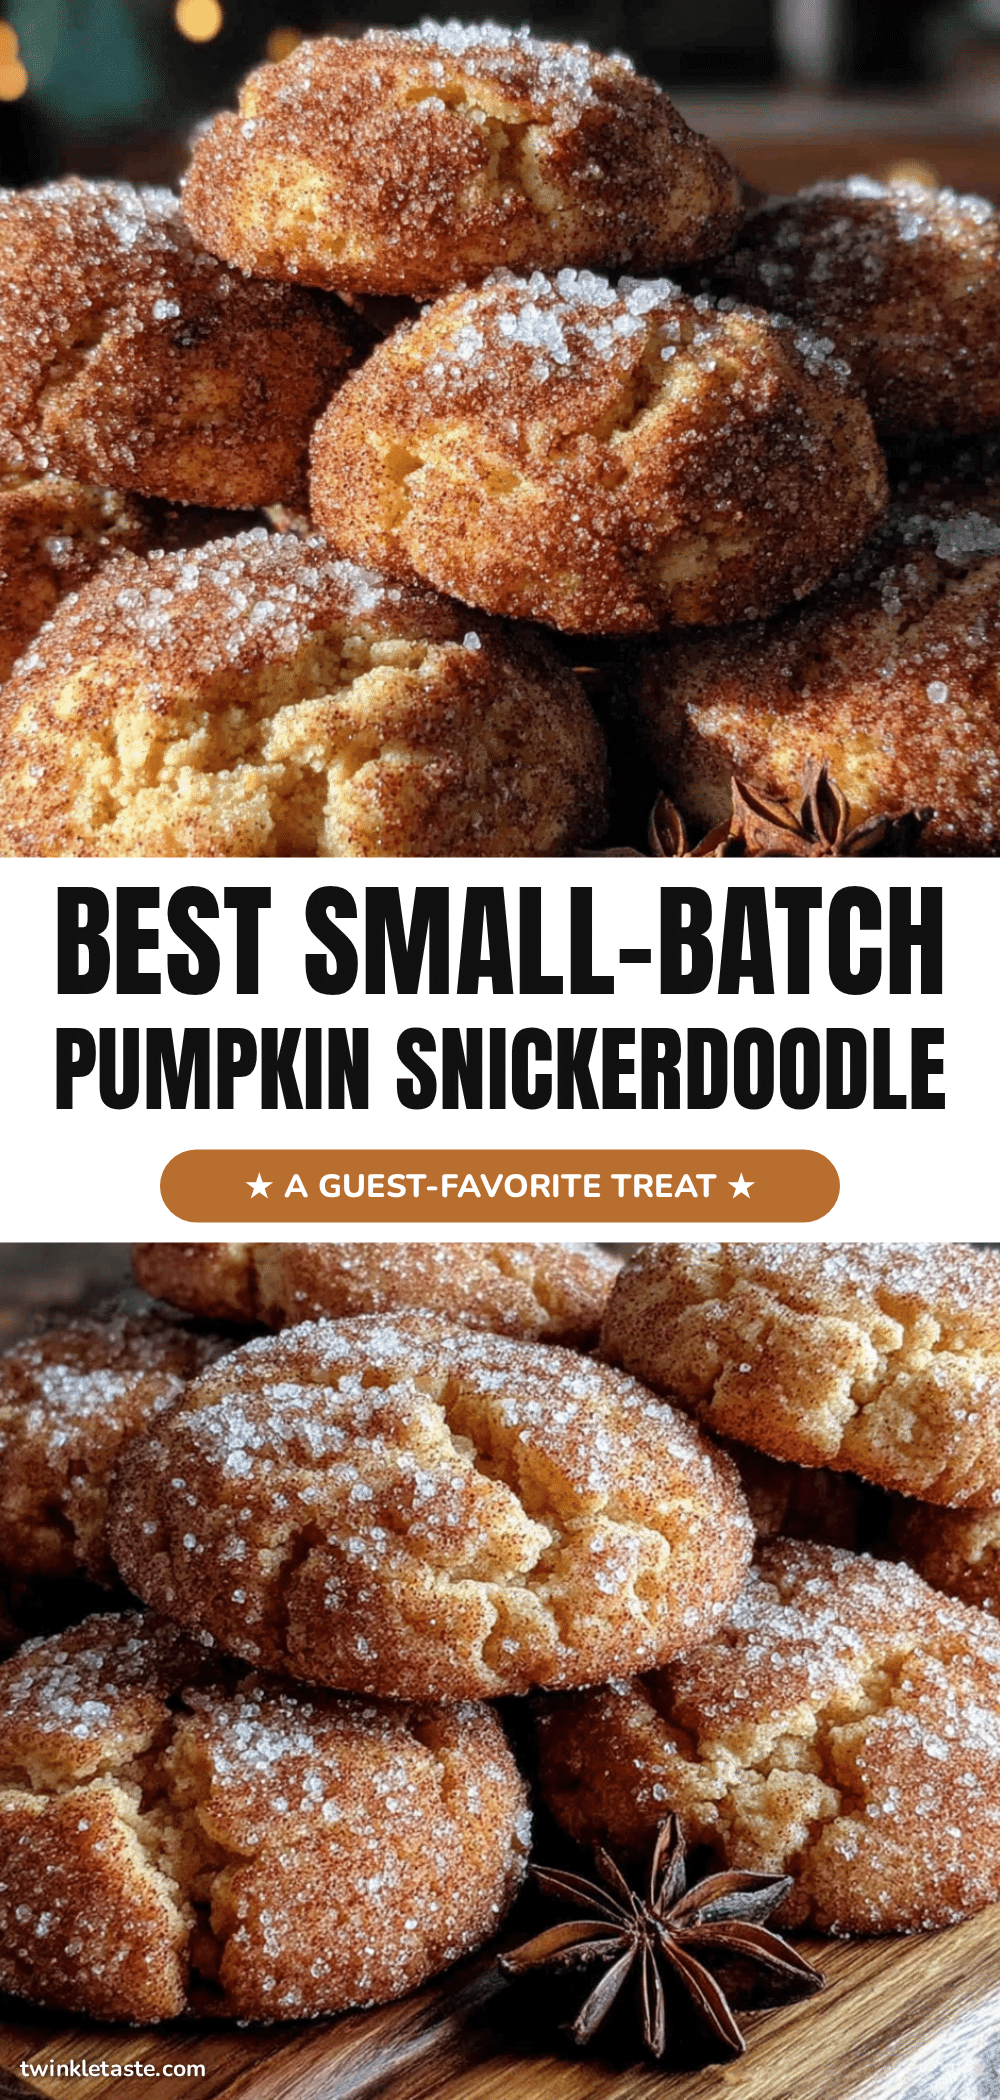
Best Small-Batch Pumpkin Snickerdoodle Cookies
These small-batch pumpkin snickerdoodle cookies are soft, tender, and full of warm pumpkin spice with that classic snickerdoodle tang. Perfect for fall gatherings, they come together in under 25 minutes with no chilling required.
- Prep Time: 15 minutes
- Cook Time: 12 minutes
- Total Time: 27 minutes
- Yield: 12 cookies 1x
- Category: Dessert
- Cuisine: American
Ingredients
- 1/2 cup unsalted butter, softened
- 1/2 cup granulated sugar
- 1/4 cup packed light brown sugar
- 1/3 cup pumpkin puree (not pumpkin pie filling)
- 1 large egg yolk, room temperature
- 1 teaspoon vanilla extract
- 1 1/4 cups all-purpose flour, spooned and leveled
- 1/2 teaspoon cream of tartar
- 1/2 teaspoon baking soda
- 1/4 teaspoon salt
- 1 teaspoon pumpkin pie spice
- 1/2 teaspoon ground cinnamon
- 3 tablespoons granulated sugar (for coating)
- 1 tablespoon ground cinnamon (for coating)
Instructions
- Preheat oven to 350°F (175°C). Line a baking sheet with parchment paper.
- Blot the pumpkin puree: Spread 1/3 cup pumpkin puree on a paper towel, place another paper towel on top, and press gently to absorb excess moisture. Let sit while you cream the butter and sugars.
- Cream the butter and sugars: In a large bowl, beat softened butter, granulated sugar, and brown sugar together until light and fluffy, about 2-3 minutes. Scrape down the sides halfway through.
- Add the wet ingredients: Beat in the pumpkin puree, egg yolk, and vanilla extract until well combined. The mixture may look slightly curdled—this is normal.
- Mix the dry ingredients: In a separate medium bowl, whisk together flour, cream of tartar, baking soda, salt, pumpkin pie spice, and cinnamon until no lumps remain.
- Combine wet and dry: Gradually add the dry ingredients to the wet mixture, mixing on low speed until just combined. Do not overmix.
- Make the coating: In a small bowl, stir together 3 tablespoons sugar and 1 tablespoon cinnamon.
- Scoop and roll: Using a 1.5-tablespoon cookie scoop, portion out the dough. Roll each portion into a ball, then roll in the cinnamon-sugar mixture until fully coated. Place dough balls on the prepared baking sheet, spacing them about 2 inches apart.
- Bake: Bake for 10-12 minutes, or until edges are set and tops look slightly crackled. Centers will still look soft and puffy.
- Cool: Let cookies cool on the baking sheet for 5 minutes, then transfer to a wire rack to cool completely.
Notes
Blot the pumpkin puree to remove excess moisture—this prevents flat cookies. Use room temperature ingredients for best results. Start checking cookies at 9 minutes; they are done when edges are set and tops lose their raw shine. Dough can be made up to 24 hours ahead and refrigerated. For gluten-free, use a 1:1 gluten-free flour blend. For vegan, use vegan butter and replace egg yolk with 1 tablespoon aquafaba.
Nutrition
- Serving Size: 1 cookie
- Calories: 185
- Sugar: 14
- Sodium: 120
- Fat: 9
- Saturated Fat: 5
- Carbohydrates: 25
- Fiber: 1
- Protein: 2
Keywords: pumpkin snickerdoodle cookies, small batch cookies, fall cookies, pumpkin cookies, snickerdoodle recipe


