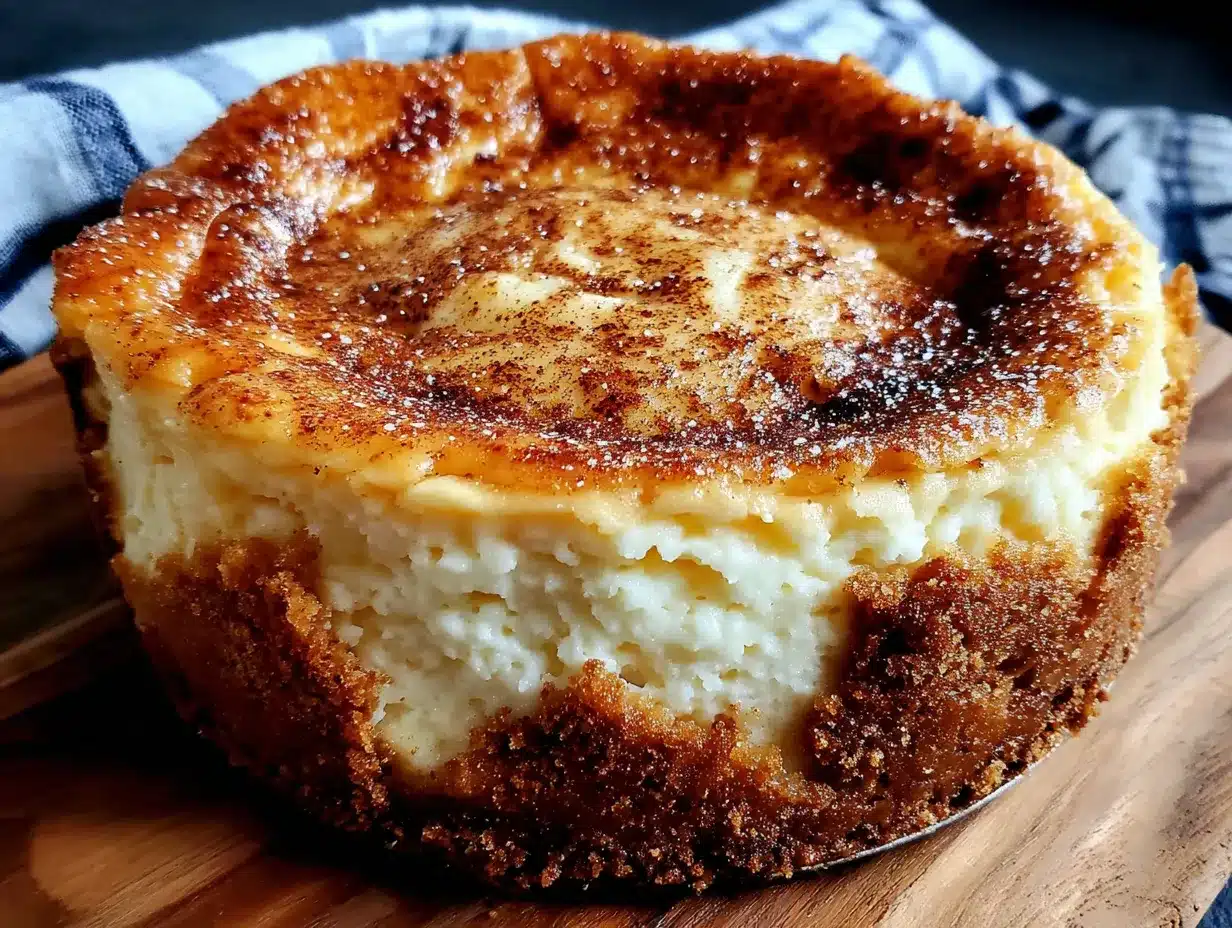
The snap of a gingersnap cracking under the tines of a fork — that’s the sound I was chasing. Not the sweetness of the pumpkin cheesecake, not the creamy tang of the filling, but that first brittle break of a spiced crust giving way. I had been testing crusts for weeks, trying to find one that didn’t go soggy under the weight of a creamy filling. Graham crackers turned to mush. Shortbread held up okay but tasted like butter and nothing else. But a gingersnap? That cookie was born for this job. It stays firm, it crunches loud, and it brings a warmth that makes the pumpkin taste like fall in a single bite. The first time I pressed one of those tiny cheesecakes out of the pan and heard the crust crackle, I knew I was done testing. These mini pumpkin cheesecakes with gingersnap crust are the result of a very specific obsession, and honestly, I think you’ll fall for them the same way I did.
There’s something about the portion size too. A full cheesecake feels like a commitment. A mini one feels like a reward. You get that perfect ratio of crust to filling in every single bite, no awkward knife work required. And the gingersnap crust isn’t just a supporting player here — it’s the backbone. It adds a peppery warmth that plays off the sweet, velvety pumpkin filling in a way that makes you stop mid-bite and just think about what’s happening in your mouth. That’s the kind of dessert I want to make.
So if you’ve been looking for a fall dessert that feels special but doesn’t require a springform pan or a water bath, this is it. These little cheesecakes are forgiving, they’re portable, and they taste like you spent way more time than you actually did. Let me show you how they come together.
Why You’ll Love This Recipe
I’ve tested this recipe more times than I care to admit. I’ve made them with full-fat cream cheese, low-fat cream cheese, and even a version with Neufchâtel. I’ve baked them in a standard muffin tin and a mini cheesecake pan with removable bottoms. I’ve overbaked them (dry and sad) and underbaked them (soupy and sad). Through all those trials, I landed on a version that works every single time, no special equipment required.
- Perfect Portion Control : Each mini cheesecake is just the right size — satisfying without being overwhelming. Great for parties, holidays, or a quiet night when you want something sweet but not a whole cake staring at you from the fridge.
- No Water Bath Needed : I know we all love a good water bath for full-size cheesecakes, but for minis? Totally unnecessary. These bake up creamy and smooth without the fuss.
- That Gingersnap Crust Though : The crust is the star here. It stays crunchy, it’s packed with molasses and spice, and it gives the whole dessert a depth that plain graham crackers just can’t touch.
- Make-Ahead Friendly : These actually taste better the next day. Make them a day ahead, chill them overnight, and you’re golden for your gathering.
- Easy to Customize : Gluten-free? Use gluten-free gingersnaps. Want them extra spicy? Add a pinch of cayenne to the filling. This recipe is a template, not a cage.
I’ve made these for Thanksgiving, for Friendsgiving, for a random Tuesday when I needed a little joy. They’ve never let me down. And I think once you try them, you’ll feel the same way.
What Ingredients You Will Need
This recipe uses simple, everyday ingredients, but a few of them really pull their weight in terms of flavor. Let me walk you through what you need and why it matters.
For the Gingersnap Crust
- Gingersnap cookies (about 20-24 cookies, or 1 ½ cups finely crushed) — I prefer Nabisco or a bakery-style brand with visible molasses and sugar crystals on top. The spicier the cookie, the better the contrast with the sweet filling.
- Unsalted butter (4 tablespoons, melted) — Binds the crumbs together. Salted butter works in a pinch, just skip any added salt in the crust.
- Granulated sugar (1 tablespoon) — A tiny bit of extra sweetness to balance the peppery gingersnaps. Honestly, you can skip this if your cookies are already on the sweet side.
For the Pumpkin Cheesecake Filling
- Full-fat cream cheese (16 ounces, or two 8-ounce blocks, softened) — This is non-negotiable. Low-fat cream cheese has too much water and will make your filling runny. Let it sit on the counter for at least 30 minutes before you start.
- Granulated sugar (½ cup) — Just enough to sweeten without overpowering the pumpkin and spice.
- Light brown sugar (¼ cup, packed) — Adds a deeper, almost caramel-like sweetness that plays beautifully with the pumpkin. Don’t skip it.
- Pumpkin purée (¾ cup) — Make sure it’s 100% pumpkin, not pumpkin pie filling. Libby’s is my go-to. It has a consistent texture and isn’t too watery.
- Sour cream (¼ cup, room temperature) — Adds tang and keeps the texture silky. Greek yogurt works too if that’s what you have.
- Large eggs (2, room temperature) — Cold eggs will seize the cream cheese mixture. Crack them into a bowl and let them sit for 10 minutes if you forgot to pull them out early.
- Vanilla extract (1 teaspoon) — Pure vanilla, not imitation. It makes a difference.
- Pumpkin pie spice (1 ½ teaspoons) — You can use store-bought or make your own with cinnamon, nutmeg, ginger, and a pinch of cloves.
- Cinnamon (½ teaspoon) — A little extra warmth because I’m a cinnamon maximalist.
- Salt (¼ teaspoon) — Balances the sweetness and brings out the spice.
For the Topping (Optional but Recommended)
- Whipped cream — Homemade is best, but store-bought works in a pinch.
- Crushed gingersnap crumbs — For garnish and texture.
- Caramel sauce — A drizzle takes these over the top. I use store-bought when I’m lazy.
Equipment Needed
- 12-cup standard muffin tin — This is what you’ll bake the cheesecakes in. No special mini cheesecake pan required.
- Paper or foil cupcake liners — Foil liners peel off easier, but paper works fine if you spray them with non-stick spray.
- Food processor or zip-top bag and rolling pin — For crushing the gingersnaps. A food processor gives you a fine, even crumb, but a bag and a rolling pin works great if you need to vent some frustration.
- Medium mixing bowls — One for the crust, one for the filling.
- Electric hand mixer or stand mixer — You can mix the filling by hand if you have strong arms, but a mixer makes it silky smooth with less effort.
- Rubber spatula — For scraping down the bowl and getting every last bit of filling.
- Small cookie scoop or measuring cup — For evenly distributing the crust and filling.
- Cooling rack — Essential for letting the cheesecakes cool gradually before refrigeration.
Preparation Method
- Preheat your oven to 325°F (163°C). Line a 12-cup muffin tin with paper or foil liners. If using paper liners, give them a quick spritz of non-stick spray — this makes peeling them off later much easier.
- Make the crust. Place 1 ½ cups of gingersnap cookie crumbs in a medium bowl. Add 1 tablespoon of granulated sugar and a pinch of salt. Pour in 4 tablespoons of melted unsalted butter and stir with a fork until every crumb is moistened. The mixture should look like wet sand and hold together when pressed between your fingers.
- Press the crust into the liners. Scoop about 1 ½ tablespoons of the crust mixture into each liner. Use the bottom of a small glass or a shot glass to press the crumbs down firmly and evenly. Don’t skimp on this step — a tight, compact crust is what keeps it from falling apart later. Set the muffin tin aside.
- Bake the crusts. Pop the tin into the oven for 8 minutes. You want the crusts to be set and just starting to smell toasty. Remove from the oven and let them cool while you make the filling. Leave the oven on.
- Make the filling. In a large mixing bowl, beat 16 ounces of softened cream cheese with an electric mixer on medium speed until smooth and fluffy — about 2 minutes. Scrape down the sides and bottom of the bowl with a rubber spatula.
- Add the sugars. Add ½ cup granulated sugar and ¼ cup packed light brown sugar. Beat on medium speed for another minute until well combined and no graininess remains.
- Add the pumpkin and sour cream. Add ¾ cup pumpkin purée and ¼ cup sour cream. Beat on low speed until just combined. Don’t overmix here — you don’t want to incorporate too much air into the batter.
- Add the eggs one at a time. Crack one egg into the bowl, beat on low until just incorporated. Repeat with the second egg. Overmixing at this stage can cause cracks during baking.
- Add the flavorings. Add 1 teaspoon vanilla extract, 1 ½ teaspoons pumpkin pie spice, ½ teaspoon cinnamon, and ¼ teaspoon salt. Beat on low until everything is evenly distributed. Give the bowl a final scrape to make sure there are no streaks of cream cheese hiding at the bottom.
- Fill the crusts. Spoon or scoop the filling evenly over the pre-baked crusts, filling each liner almost to the top — about 3 tablespoons each. A small cookie scoop makes this step fast and mess-free.
- Bake the cheesecakes. Place the muffin tin in the oven and bake for 18 to 22 minutes. The edges should look set and slightly puffed, but the centers should still jiggle slightly when you gently shake the pan. That jiggle is your friend — it means you didn’t overbake them.
- Cool completely in the pan. Let the cheesecakes cool in the muffin tin on a wire rack for 30 minutes. Then transfer the tin to the refrigerator and chill for at least 4 hours, preferably overnight. This step is crucial for the texture to set properly.
- Remove from the pan. Once fully chilled, gently peel away the liners. If you used foil liners, they should come off easily. Paper liners may stick a bit — just peel gently, and the cheesecakes will come out clean.
Cooking Tips & Techniques
I’ve made these mini pumpkin cheesecakes more times than I can count, and I’ve made just about every mistake in the book. Here’s what I’ve learned so you don’t have to learn the hard way.
Room temperature ingredients matter. I know it’s annoying to wait for cream cheese and eggs to come to room temperature, but it makes a real difference. Cold cream cheese creates lumps that no amount of beating will fully smooth out. Cold eggs can seize the mixture and leave you with a grainy texture. Set everything out on the counter 30 to 45 minutes before you start baking. Your future self will thank you.
Don’t overmix the filling. Once you add the eggs, mix on low speed and stop as soon as everything is combined. Overmixing incorporates too much air, which can cause the cheesecakes to puff up in the oven and then collapse, leaving cracks on the surface. A little jiggle is good. Cracks are not.
Press that crust down firmly. The gingersnap crust is the foundation of these cheesecakes. If you don’t press it down firmly enough, it will crumble when you try to eat it. Use the bottom of a flat glass or a small measuring cup to really pack those crumbs in. A tight crust is a happy crust.
Watch the bake time. Every oven runs a little differently. Start checking at 18 minutes. The edges should be set and just barely starting to pull away from the liners, but the centers should still have a gentle wobble. If you wait until the centers are completely firm, you’ve overbaked them. Overbaked cheesecakes are dry and dense, and nobody wants that.
Chill them fully. I know it’s tempting to dig in after an hour, but these cheesecakes need at least 4 hours in the fridge to set up properly. Overnight is even better. The texture goes from soft and almost mousse-like to firm, creamy, and sliceable. Patience pays off here.
Variations & Adaptations
One of the things I love about this recipe is how flexible it is. Here are a few ways to make it your own.
Gluten-free version : Use gluten-free gingersnap cookies for the crust. The rest of the ingredients are naturally gluten-free, so this is an easy swap. I’ve tested it with a few different brands, and they all worked beautifully.
Dairy-free version : Use a dairy-free cream cheese alternative and a vegan butter substitute. I’ve had good results with Kite Hill cream cheese and Miyoko’s vegan butter. The texture is slightly softer, but the flavor is still spot-on.
Extra spicy version : Add ¼ teaspoon of cayenne pepper or an extra ½ teaspoon of ginger to the filling. The heat plays beautifully with the sweet pumpkin and the peppery gingersnaps. It’s unexpected and wonderful.
Chocolate gingersnap crust : Swap half the gingersnaps for chocolate wafer cookies. The chocolate and pumpkin combo is surprisingly good — think pumpkin and chocolate in a cozy fall way. I did this on a whim one afternoon and it was a happy accident.
No-bake version : If you really don’t want to turn on the oven, you can make a no-bake version using the same crust but a filling made with whipped cream and cream cheese. The texture is lighter and more mousse-like. I’ll share that version another time, but it’s a great option for hot days when baking feels like a chore.
Serving & Storage Suggestions
These mini pumpkin cheesecakes are best served cold, straight from the fridge. The texture is firm and creamy, and the crust stays perfectly crunchy. If you let them sit at room temperature too long, the crust can soften, so I recommend pulling them out just a few minutes before serving.
For presentation, I like to top each cheesecake with a generous dollop of whipped cream, a sprinkle of crushed gingersnap crumbs, and a drizzle of caramel sauce. It looks impressive with almost no extra effort. If you’re serving them for a holiday gathering, arrange them on a platter with fresh rosemary sprigs or small cinnamon sticks for a festive touch.
These pair beautifully with a hot cup of coffee or a cozy brown sugar pumpkin chai latte. The spiced notes in the latte echo the flavors in the cheesecake, making for a perfectly cohesive fall treat. If you’re serving them after a big meal, a simple cup of black tea or an espresso is all you need.
Storage : Store the cheesecakes in an airtight container in the refrigerator for up to 5 days. I like to layer them between sheets of parchment paper so they don’t stick together. They also freeze beautifully. Wrap each cheesecake individually in plastic wrap, then place them in a freezer-safe bag or container. They’ll keep for up to 3 months. Thaw them overnight in the fridge before serving.
Nutritional Information & Benefits
Here’s the thing — these are still cheesecakes. They’re a treat, not a health food. But they do have a few redeeming qualities worth mentioning.
Pumpkin is packed with vitamin A, fiber, and antioxidants. It’s low in calories and adds natural sweetness, which means you don’t need as much sugar as you would in a plain cheesecake. The gingersnap crust adds a dose of warm spices like ginger and cloves, which have anti-inflammatory properties. And the cream cheese provides protein and calcium, so you’re getting a little bit of nutrition in every bite.
One mini cheesecake (without toppings) contains approximately:
- Calories: 220
- Fat: 14g
- Carbohydrates: 20g
- Protein: 4g
- Sugar: 14g
These numbers will vary depending on the exact brands you use and whether you add toppings. If you’re looking for a lighter option, you can use Neufchâtel cream cheese and reduce the sugar by a tablespoon or two. The texture will be slightly less creamy, but the flavor will still be wonderful.
If you’re looking for a higher-protein pumpkin treat, you might also enjoy my best easy protein pumpkin muffins. They’re a great breakfast option when you want something seasonal and satisfying.
Frequently Asked Questions
Can I use fresh pumpkin instead of canned?
You can, but I don’t recommend it for this recipe. Fresh pumpkin purée has a much higher water content than canned, which can make the filling watery and prevent it from setting properly. If you really want to use fresh, cook it down on the stovetop until it thickens significantly, then let it cool before using.
Why did my cheesecakes crack on top?
Cracks usually happen from overmixing the filling or overbaking. Mix on low speed once the eggs are in, and pull the cheesecakes out of the oven while the centers are still slightly jiggly. A quick chill in the fridge usually hides minor cracks anyway, so don’t stress too much.
Can I make these in a mini cheesecake pan with removable bottoms?
Absolutely. If you have a mini cheesecake pan, use it. You’ll get cleaner edges and easier removal. Just follow the same baking instructions. You may need to adjust the bake time by a minute or two, so keep an eye on them.
Can I use a different cookie for the crust?
You can, but the gingersnap is really what makes these special. The spicy, molasses-forward flavor is the perfect partner for the sweet pumpkin filling. If you must substitute, graham crackers or shortbread cookies will work, but the final result won’t have the same depth of flavor.
How far in advance can I make these?
You can make them up to 3 days ahead and store them in the fridge. They actually taste better after a day or two because the flavors have time to meld. You can also freeze them for up to 3 months — just wrap them well and thaw overnight in the fridge.
Conclusion
These mini pumpkin cheesecakes with gingersnap crust are everything I want in a fall dessert. They’re creamy without being heavy, spiced without being overwhelming, and just the right size for a satisfying sweet bite. The gingersnap crust adds a crunch and warmth that makes every mouthful feel intentional, like each layer was designed to work together. And honestly, they’re so simple to make that I find myself reaching for this recipe again and again, whether I’m hosting a crowd or just treating myself on a quiet evening.
I hope you give them a try and make them your own. Maybe you’ll add an extra pinch of cinnamon or a drizzle of caramel on top. Maybe you’ll serve them with a side of easy iced pumpkin sugar cookie bars for the ultimate fall dessert spread. Whatever you do, I’d love to hear about it. Drop a comment below and let me know how yours turned out — did you stick with the classic gingersnap crust, or did you try a fun variation? Your feedback helps other readers and honestly, I just love hearing about your kitchen adventures.
Happy baking, friends. Here’s to crunchy crusts, creamy centers, and the kind of dessert that makes you close your eyes after the first bite.
Pin This Recipe!
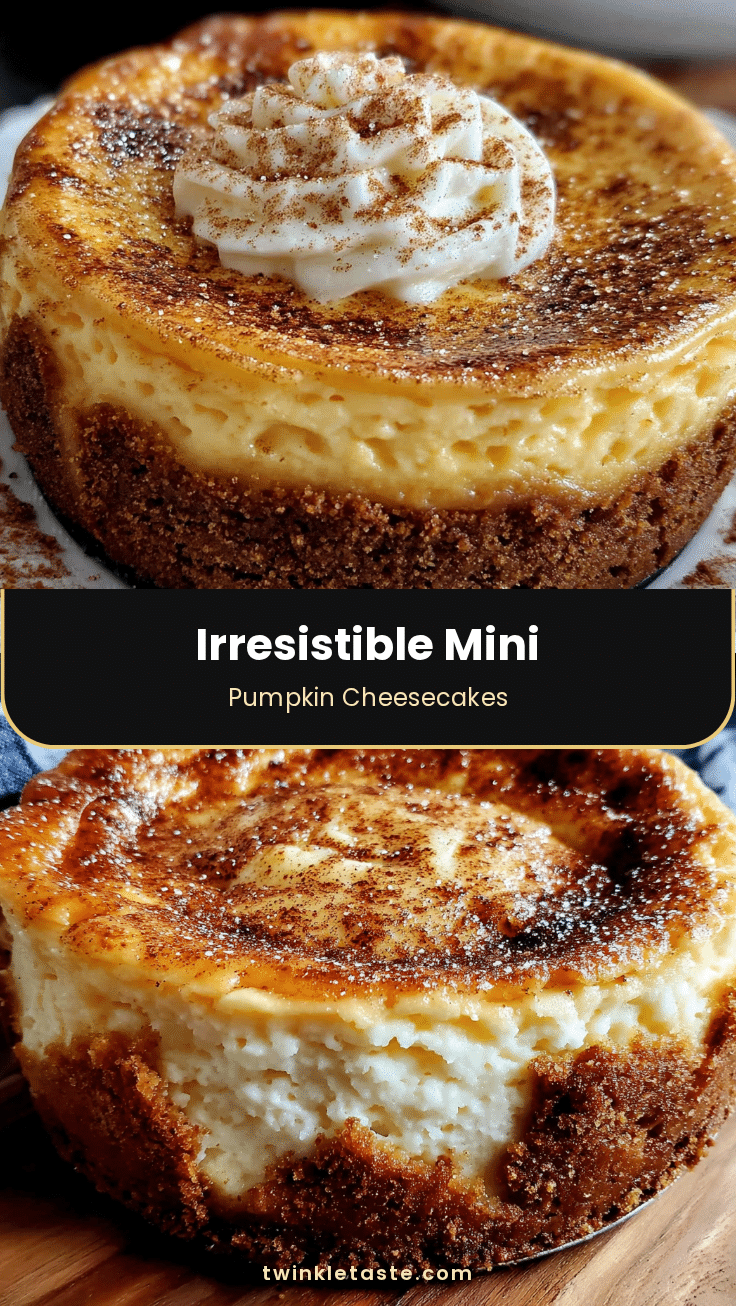
Perfect Mini Pumpkin Cheesecakes with Easy Gingersnap Crust
These mini pumpkin cheesecakes feature a crunchy gingersnap crust and a creamy, spiced pumpkin filling. They’re the perfect fall dessert, easy to make, and require no water bath.
- Prep Time: 20 minutes
- Cook Time: 20 minutes
- Total Time: 4 hours 40 minutes (includes chilling time)
- Yield: 12 servings 1x
- Category: Dessert
- Cuisine: American
Ingredients
- 1 ½ cups finely crushed gingersnap cookies (about 20–24 cookies)
- 4 tablespoons unsalted butter, melted
- 1 tablespoon granulated sugar
- 16 ounces full-fat cream cheese, softened
- ½ cup granulated sugar
- ¼ cup packed light brown sugar
- ¾ cup pumpkin purée (100% pumpkin, not pie filling)
- ¼ cup sour cream, room temperature
- 2 large eggs, room temperature
- 1 teaspoon vanilla extract
- 1 ½ teaspoons pumpkin pie spice
- ½ teaspoon cinnamon
- ¼ teaspoon salt
- Whipped cream, for topping (optional)
- Crushed gingersnap crumbs, for garnish (optional)
- Caramel sauce, for drizzling (optional)
Instructions
- Preheat your oven to 325°F (163°C). Line a 12-cup muffin tin with paper or foil liners. If using paper liners, spray them with non-stick spray.
- Make the crust: In a medium bowl, combine 1 ½ cups gingersnap crumbs, 1 tablespoon granulated sugar, and a pinch of salt. Pour in 4 tablespoons melted unsalted butter and stir with a fork until every crumb is moistened. The mixture should look like wet sand and hold together when pressed.
- Press the crust into the liners: Scoop about 1 ½ tablespoons of the crust mixture into each liner. Use the bottom of a small glass or shot glass to press the crumbs down firmly and evenly.
- Bake the crusts: Place the muffin tin in the oven and bake for 8 minutes, until set and fragrant. Remove from the oven and let cool while you make the filling. Leave the oven on.
- Make the filling: In a large mixing bowl, beat 16 ounces softened cream cheese with an electric mixer on medium speed until smooth and fluffy, about 2 minutes. Scrape down the sides and bottom of the bowl.
- Add the sugars: Add ½ cup granulated sugar and ¼ cup packed light brown sugar. Beat on medium speed for another minute until well combined.
- Add the pumpkin and sour cream: Add ¾ cup pumpkin purée and ¼ cup sour cream. Beat on low speed until just combined. Do not overmix.
- Add the eggs one at a time: Crack one egg into the bowl, beat on low until just incorporated. Repeat with the second egg. Do not overmix.
- Add the flavorings: Add 1 teaspoon vanilla extract, 1 ½ teaspoons pumpkin pie spice, ½ teaspoon cinnamon, and ¼ teaspoon salt. Beat on low until evenly distributed. Scrape down the bowl.
- Fill the crusts: Spoon or scoop the filling evenly over the pre-baked crusts, filling each liner almost to the top (about 3 tablespoons each).
- Bake the cheesecakes: Place the muffin tin in the oven and bake for 18 to 22 minutes. The edges should look set and slightly puffed, but the centers should still jiggle slightly when you gently shake the pan.
- Cool completely in the pan: Let the cheesecakes cool in the muffin tin on a wire rack for 30 minutes. Then transfer the tin to the refrigerator and chill for at least 4 hours, preferably overnight.
- Remove from the pan: Once fully chilled, gently peel away the liners. Serve cold, topped with whipped cream, crushed gingersnap crumbs, and caramel sauce if desired.
Notes
Room temperature ingredients are crucial for a smooth filling. Do not overmix once eggs are added to prevent cracks. Press the crust firmly to avoid crumbling. Chill for at least 4 hours, preferably overnight, for best texture. For a gluten-free version, use gluten-free gingersnaps. For a dairy-free version, use dairy-free cream cheese and vegan butter. Store in an airtight container in the refrigerator for up to 5 days, or freeze for up to 3 months.
Nutrition
- Serving Size: 1 mini cheesecake
- Calories: 220
- Sugar: 14
- Sodium: 180
- Fat: 14
- Saturated Fat: 8
- Carbohydrates: 20
- Fiber: 1
- Protein: 4
Keywords: mini pumpkin cheesecakes, gingersnap crust, fall dessert, pumpkin cheesecake, mini cheesecakes, Thanksgiving dessert


