It was late October, and the rain was tapping against the kitchen window in that steady, unbothered way it does when you have nowhere to be. I had a half-melted bar of white chocolate on the counter, a box of brownie mix I was pretending was fancy, and a vague memory of a cat-shaped cookie cutter I’d bought on a whim last spring. I wasn’t trying to be clever. I just wanted something to do with my hands while the kettle boiled. But then I saw the cookie cutter peeking out from the drawer—a little black cat silhouette—and something clicked. Not a big, dramatic idea. Just a small, quiet one. What if I made brownies, cut them into cat shapes, and gave them white chocolate ears? It felt silly at first. Like something you’d do for a kid’s party or a Pinterest board you’d never actually try. But I did it anyway. And when I pulled that first cat out of the pan, ears intact and chocolate still warm, I stood there in my quiet kitchen and smiled at a brownie. That’s when I knew this recipe was going to stick.
These easy black cat brownies with white chocolate ears are exactly that kind of recipe. They’re not complicated. They don’t require a ton of fancy equipment or a pastry degree. But they have a charm that’s hard to explain until you see them sitting on a plate, all lined up like a little army of Halloween mischief. The brownie base is fudgy, rich, and perfectly dark—almost black, thanks to a little cocoa powder and dark chocolate. The white chocolate ears add a sweet, creamy contrast that makes each bite feel balanced. And honestly? They’re just fun. The kind of fun that makes you want to share a photo before anyone takes a bite.
So if you’re looking for a Halloween treat that’s more adorable than scary, more homemade than store-bought, and more about the joy of making something cute than impressing anyone, this one’s for you. Let’s make some black cat brownies.
Why You’ll Love This Recipe
I’ve tested this recipe about four times now—twice with boxed mix, once from scratch, and once when I accidentally used dark cocoa powder and ended up with brownies so black they looked like charcoal. (They still tasted great, by the way.) So trust me when I say these black cat brownies have been through the wringer. Here’s why they’re worth your time:
- Quick & Easy : From start to finish, you’re looking at about 35 minutes. That includes baking, cooling, and sticking on the ears. Perfect for a last-minute Halloween party or a Tuesday night craving.
- Simple Ingredients : You probably already have most of what you need. Butter, sugar, eggs, cocoa powder, flour, and white chocolate. No weird extracts or specialty flours.
- Perfect for Halloween : These aren’t just cute—they’re conversation starters. Kids love them, adults sneak them, and they look amazing on a dessert table next to some spooky witch finger pretzel rods.
- Crowd-Pleaser : I brought a batch to a small gathering last week, and they were gone before the cupcakes. Seriously. People couldn’t stop grabbing them.
- Unbelievably Delicious : The brownies are fudgy without being underbaked, and the white chocolate ears add a little snap and sweetness. It’s comfort food with a costume on.
What makes this recipe different from the rest? It’s the way the white chocolate ears sit right on top of the brownie, like actual cat ears. No piping, no frosting, no complicated assembly. Just a simple, clever trick that looks way more impressive than it is. And that’s my favorite kind of recipe—the one that makes you look like a kitchen wizard when really, you just followed the instructions and had a little patience.
What Ingredients You Will Need
This recipe uses simple, everyday ingredients to create something that feels special. No need to hunt down anything obscure—just grab these basics and you’re good to go.
- Unsalted butter, melted (½ cup / 113g) – I always use unsalted so I can control the salt level. If you only have salted, just skip the added salt later.
- Granulated sugar (1 cup / 200g) – Regular white sugar gives the brownies that classic crackly top. You can substitute coconut sugar, but the texture will be slightly different.
- Large eggs (2, room temperature) – Room temperature eggs mix more evenly into the batter. If you forgot to set them out, place them in a bowl of warm water for 5 minutes.
- Vanilla extract (1 teaspoon) – Pure vanilla is best, but imitation works in a pinch.
- All-purpose flour (¾ cup / 90g) – Spoon and level it. Don’t scoop directly from the bag or you’ll end up with dry brownies.
- Unsweetened cocoa powder (⅓ cup / 30g) – I prefer natural cocoa powder here. Dutch-process will give a darker color, but either works.
- Salt (¼ teaspoon) – Just enough to balance the sweetness.
- White chocolate melting wafers or white chocolate chips (about ½ cup / 90g) – These are for the ears. Melting wafers are easier to work with, but chips work too. Just be careful not to overheat them.
- Optional: Black gel food coloring (a few drops) – If you want the brownies to look truly black, add a tiny bit of black food coloring to the batter. I used it in my final test batch and loved the result, but it’s not necessary.
For the ears, you’ll also need a small piping bag or a zip-top bag with the corner snipped off. And a cat-shaped cookie cutter, obviously. I found mine at a craft store for about three dollars. You can also find them online easily.
Equipment Needed
You don’t need a lot of fancy tools for this one, which is part of the appeal. Here’s what I used:
- 8×8-inch baking pan – This size works perfectly for getting enough brownies to cut shapes from. If you use a 9×9, the brownies will be thinner and harder to cut.
- Parchment paper – Line your pan with it, leaving some overhang. This makes lifting the brownies out so much easier.
- Mixing bowls – One large, one small.
- Whisk – For the wet ingredients. A spatula works too.
- Spatula – For folding in the dry ingredients.
- Cat-shaped cookie cutter – About 3 inches tall works best. Any smaller and the ears get fiddly.
- Sharp knife – For trimming edges if needed.
- Small piping bag or zip-top bag – For the white chocolate ears.
- Microwave or double boiler – For melting the white chocolate. I use the microwave in 15-second bursts.
- Baking sheet lined with parchment or wax paper – To set the finished brownies on.
If you don’t have a cat-shaped cutter, you can freehand the shape with a knife. It won’t be as uniform, but it’ll still be cute. I’ve done it before when I lost my cutter mid-recipe—let’s just say those brownies looked a little more “abstract art” than “cat,” but they tasted the same.
Preparation Method
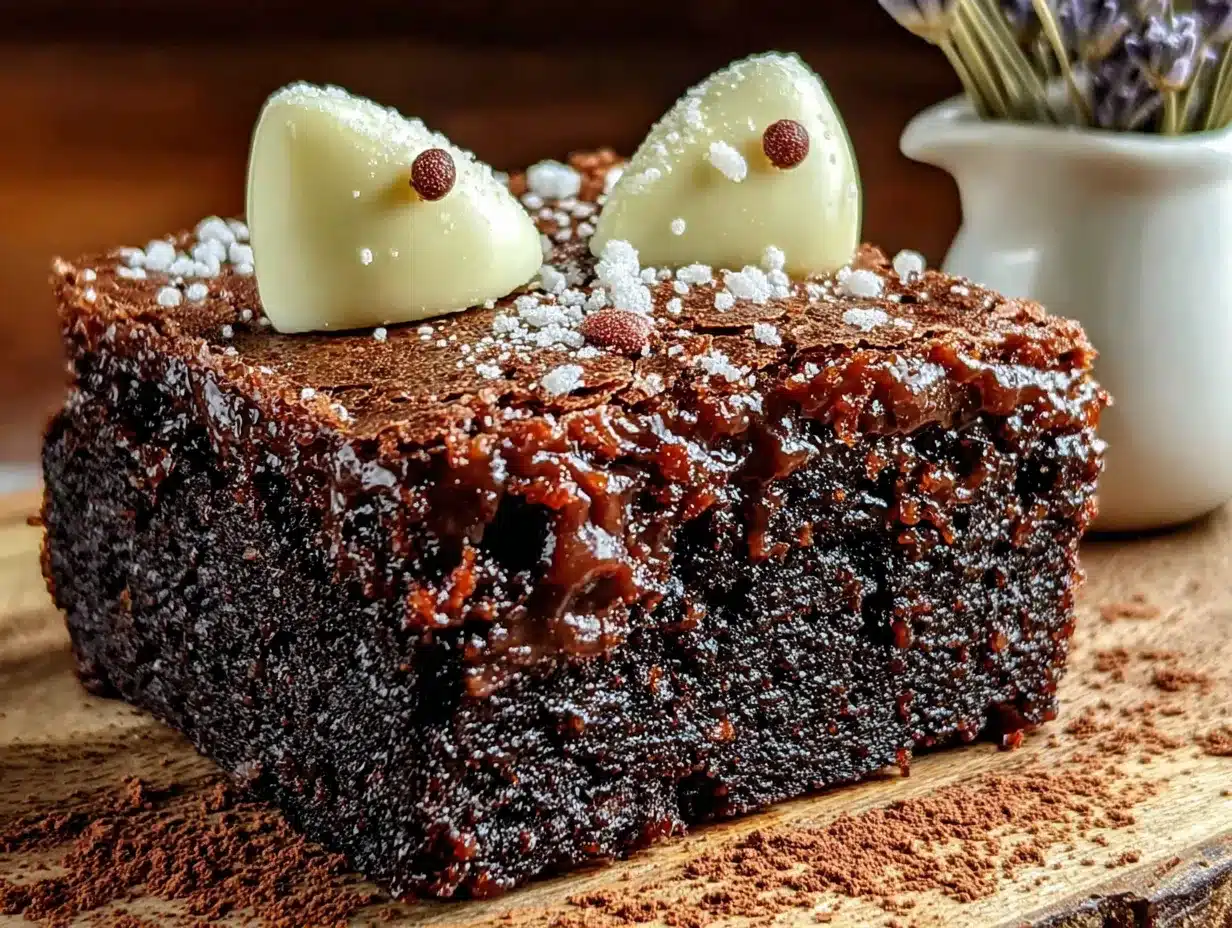
Alright, let’s get to it. This is the fun part. I’ll walk you through every step, including the little tricks I learned from my four test batches.
- Preheat your oven to 350°F (175°C). Line your 8×8 pan with parchment paper, leaving some overhang on two opposite sides. This will help you lift the brownies out later.
- Melt the butter. In a large microwave-safe bowl, melt ½ cup of unsalted butter. Let it cool for a minute or two—you don’t want it hot enough to cook the eggs when you add them.
- Mix in the sugar. Add 1 cup of granulated sugar to the melted butter and whisk until combined. It’ll look a little grainy, and that’s fine.
- Add the eggs and vanilla. Crack in 2 large eggs and add 1 teaspoon of vanilla extract. Whisk vigorously for about 30 seconds until the mixture is smooth and slightly thickened. This is where the crackly top starts to develop, so don’t skip the whisking.
- Combine the dry ingredients. In a separate small bowl, whisk together ¾ cup all-purpose flour, ⅓ cup cocoa powder, and ¼ teaspoon salt. If you’re using black food coloring, add a couple drops to the wet mixture now.
- Fold the dry ingredients into the wet. Use a spatula and fold gently until just combined. Overmixing will make the brownies tough. A few streaks of flour are okay—they’ll disappear as you fold.
- Pour the batter into the prepared pan. Spread it evenly with the spatula. It’s a thick batter, so take your time.
- Bake for 20-25 minutes. Start checking at 20 minutes. The edges should look set, and a toothpick inserted into the center should come out with a few moist crumbs—not wet batter. If it comes out clean, you’ve overbaked them slightly.
- Cool completely in the pan. This is crucial. If you try to cut the brownies while they’re warm, they’ll crumble and you’ll end up with brownie rubble (which is delicious, but not cat-shaped). Let them cool for at least 30 minutes at room temperature, then pop them in the fridge for another 15 minutes to firm up.
- Lift the brownies out using the parchment overhang. Place them on a cutting board. Use your cat-shaped cookie cutter to press down firmly and cut out the shapes. You might need to wiggle the cutter slightly to get a clean cut. I usually get about 6-8 cats from one batch, depending on the size of the cutter.
- Melt the white chocolate. Place ½ cup of white chocolate melting wafers or chips in a small microwave-safe bowl. Microwave in 15-second bursts, stirring between each, until smooth. Be careful—white chocolate burns easily. If it seizes up, add a tiny splash of coconut oil and stir.
- Pipe the ears. Transfer the melted white chocolate to a small piping bag or a zip-top bag with a tiny corner snipped off. On each cat brownie, pipe two small triangles on the top of the head for ears. Don’t worry about perfection—cats have different ear shapes anyway. Let the chocolate set at room temperature for about 10 minutes, or pop them in the fridge for 5 minutes.
- Optional: Add eyes. You can use tiny dots of white chocolate for eyes, or leave them off for a more minimalist look. I’ve done both, and honestly, the ones without eyes look a little more mysterious—like a black cat in the dark.
Cooking Tips & Techniques
I’ve made a lot of mistakes in the kitchen, and this recipe was no exception. Here are the lessons I learned so you don’t have to repeat them.
- Don’t overbake. I know I said this already, but it’s worth repeating. Brownies that are too dry won’t hold their shape well when you cut them. You want them fudgy and slightly underdone in the center. They’ll continue to set as they cool.
- Chill before cutting. This is non-negotiable. Warm brownies are soft and sticky. Cold brownies cut cleanly and hold the cat shape perfectly. I learned this the hard way when my first batch turned into a pile of brownie crumbs shaped vaguely like a cat.
- Use a sharp cookie cutter. A dull cutter will squish the edges instead of cutting through. If your cutter is a little dull, dip it in powdered sugar or cocoa powder before pressing down—it helps it slide through.
- Work in batches. Don’t try to cut all the cats at once. Cut a few, then re-press the scraps together and cut more. I usually get about 6 perfect cats and 2-3 that are a little wonky. The wonky ones are my favorite—they have character.
- Pipe the ears quickly. White chocolate sets fast, especially if your brownies are cold. Have your piping bag ready before you melt the chocolate, and work in a cool room if possible.
One more thing—if you’re making these for a party, you can prep the brownies a day ahead and add the ears the next morning. They’ll still look great and taste just as fresh.
Variations & Adaptations
This recipe is pretty forgiving, so feel free to play around. Here are a few variations I’ve tried or thought about:
- Gluten-free version: Swap the all-purpose flour with a 1:1 gluten-free baking flour. I used Bob’s Red Mill in one test batch, and the texture was slightly more cakey but still delicious.
- Vegan adaptation: Use a flax egg (1 tablespoon flaxseed meal + 3 tablespoons water per egg) and vegan butter. The brownies will be a little less fudgy, but they’ll still cut well. Use dairy-free white chocolate for the ears.
- Extra dark version: Use dark cocoa powder and add 2 tablespoons of melted dark chocolate to the batter. The brownies will be almost black, which makes the white ears pop even more.
- Flavor twist: Add ½ teaspoon of espresso powder to the dry ingredients. It doesn’t make the brownies taste like coffee—it just deepens the chocolate flavor.
- Different shapes: If you don’t have a cat cutter, use a bat, ghost, or pumpkin shape. The white chocolate ears only work for cats, but you can pipe little eyes or mouths on other shapes.
I tried a batch with peppermint extract once—added about ¼ teaspoon to the batter. It was good, but it tasted more like Christmas than Halloween. So if you’re making these in December, go for it. Otherwise, stick with vanilla.
Serving & Storage Suggestions
These black cat brownies are best served at room temperature, but they’re also pretty great straight from the fridge if you like a firmer texture. I like to arrange them on a black or orange platter for Halloween parties—they look spooky and cute at the same time.
For storage, place them in an airtight container at room temperature for up to 3 days. If you stack them, put a piece of parchment paper between layers to protect the ears. They’ll stay fresh and fudgy. In the fridge, they’ll last about a week, but the brownies will be denser. I actually prefer them cold—the white chocolate ears get snappy, and the brownie feels like a truffle.
You can also freeze them. Place the finished brownies on a baking sheet in a single layer and freeze for 1 hour. Then transfer them to a freezer-safe container with parchment between layers. They’ll keep for up to 3 months. Thaw at room temperature for about 30 minutes before serving. The ears might get a little dull from condensation, but they’ll still taste great.
These pair beautifully with a glass of cold milk, a hot coffee, or even a scoop of vanilla ice cream. If you’re serving them at a Halloween party, try them alongside some spooky black velvet cupcakes for a full spread. Or, if you’re keeping it simple, just put them on a plate and watch them disappear.
Nutritional Information & Benefits
Let’s be real—these are brownies. They’re a treat. But I’ll give you the numbers so you can plan accordingly. Per brownie (based on 8 servings):
- Calories: ~280
- Fat: 14g
- Carbohydrates: 36g
- Protein: 4g
- Sugar: 24g
- Fiber: 2g
The cocoa powder in these brownies is actually a decent source of antioxidants, and the dark chocolate (if you use it) has some flavonoids. The white chocolate doesn’t offer much nutritionally, but it does make people smile, and I think that counts for something.
If you’re looking for a slightly healthier version, you can reduce the sugar by a quarter cup. The brownies won’t be as sweet, and the texture will be a little less tender, but they’ll still be good. I’ve also made them with coconut sugar, and while the flavor is different (a little earthier), they’re still delicious.
These are not gluten-free, nut-free, or dairy-free as written, but the substitutions I mentioned earlier work well. Just be mindful of cross-contamination if you’re serving someone with allergies.
Conclusion
These black cat brownies with white chocolate ears are the kind of recipe that makes you feel like a kid again. They’re playful, simple, and surprisingly satisfying to make. There’s something about cutting out those little cat shapes and piping on the ears that feels like a small creative victory. And when you see them sitting on a plate, all lined up and ready to go, you can’t help but smile.
I hope you give them a try—and I hope you customize them to your heart’s content. Add a little extra cocoa. Use dark chocolate ears instead of white. Make them gluten-free. Whatever works for you. The best recipes are the ones that feel like your own.
If you make these, I’d love to hear about it. Drop a comment below, tag me in your photos, or tell me about the time your brownies didn’t turn out quite right and you ate them anyway. (We’ve all been there.) And if you’re looking for more Halloween fun, check out these frosted Halloween sugar cookies with royal icing spiders—they’re another favorite.
Happy baking, and may your brownies always be fudgy and your cats always have ears.
Frequently Asked Questions
Can I use a boxed brownie mix for this recipe?
Absolutely. I’ve tested it with a boxed mix, and it works great. Just bake the brownies according to the package directions for an 8×8 pan, let them cool completely, and then proceed with cutting and decorating. The texture might be slightly different—boxed mixes tend to be a little more cakey—but they’ll still look adorable.
How do I keep the white chocolate ears from breaking off?
The ears are pretty sturdy once the white chocolate sets. To make them even stronger, pipe the ears a little thicker—about ¼ inch wide at the base. Also, let the chocolate set completely at room temperature or in the fridge before moving the brownies. If you’re stacking them, use parchment paper between layers.
Can I make these brownies ahead of time?
Yes! You can bake the brownies up to 2 days ahead and store them in an airtight container at room temperature. Add the white chocolate ears the day you plan to serve them. The ears are best when they’re fresh, and the brownies stay fudgy for days.
My brownies are too crumbly to cut into shapes. What went wrong?
This usually happens when the brownies are overbaked or cut while still warm. Make sure you bake them just until a toothpick comes out with a few moist crumbs—not clean. Then let them cool completely and chill in the fridge for 15 minutes before cutting. If they’re still crumbly, try using a sharper cookie cutter.
Can I use dark chocolate instead of white for the ears?
Of course. Dark chocolate ears will look more like a shadow cat, which is kind of cool. Just keep in mind that dark chocolate sets harder than white chocolate, so the ears might be a little more brittle. Melt it the same way—in 15-second bursts—and pipe as usual.
Pin This Recipe!

Easy Black Cat Brownies with White Chocolate Ears Recipe
These easy black cat brownies with white chocolate ears are fudgy, rich, and perfectly dark—almost black, thanks to cocoa powder and dark chocolate. The white chocolate ears add a sweet, creamy contrast, making each bite feel balanced and fun for Halloween.
- Prep Time: 15 minutes
- Cook Time: 25 minutes
- Total Time: 40 minutes
- Yield: 8 servings 1x
- Category: Dessert
- Cuisine: American
Ingredients
- ½ cup (113g) unsalted butter, melted
- 1 cup (200g) granulated sugar
- 2 large eggs, room temperature
- 1 teaspoon vanilla extract
- ¾ cup (90g) all-purpose flour
- ⅓ cup (30g) unsweetened cocoa powder
- ¼ teaspoon salt
- ½ cup (90g) white chocolate melting wafers or white chocolate chips
- Optional: a few drops black gel food coloring
Instructions
- Preheat your oven to 350°F (175°C). Line an 8×8-inch baking pan with parchment paper, leaving overhang on two opposite sides.
- In a large microwave-safe bowl, melt ½ cup unsalted butter. Let cool for 1-2 minutes.
- Add 1 cup granulated sugar to the melted butter and whisk until combined.
- Add 2 large eggs and 1 teaspoon vanilla extract. Whisk vigorously for about 30 seconds until smooth and slightly thickened.
- In a separate small bowl, whisk together ¾ cup all-purpose flour, ⅓ cup cocoa powder, and ¼ teaspoon salt. If using black food coloring, add a few drops to the wet mixture now.
- Fold the dry ingredients into the wet mixture using a spatula until just combined. Do not overmix.
- Pour the batter into the prepared pan and spread evenly.
- Bake for 20-25 minutes, until edges are set and a toothpick inserted into the center comes out with a few moist crumbs.
- Cool completely in the pan (at least 30 minutes at room temperature, then 15 minutes in the fridge).
- Lift the brownies out using the parchment overhang and place on a cutting board. Use a cat-shaped cookie cutter to press down firmly and cut out shapes.
- Melt ½ cup white chocolate melting wafers or chips in a small microwave-safe bowl in 15-second bursts, stirring between each, until smooth.
- Transfer melted white chocolate to a small piping bag or zip-top bag with a tiny corner snipped off. Pipe two small triangles on the top of each cat brownie for ears.
- Let the chocolate set at room temperature for about 10 minutes, or refrigerate for 5 minutes. Optional: add tiny dots of white chocolate for eyes.
Notes
Chill brownies before cutting for clean shapes. Pipe ears quickly as white chocolate sets fast. For extra dark brownies, use dark cocoa powder and add melted dark chocolate. Can be made gluten-free with 1:1 gluten-free flour.
Nutrition
- Serving Size: 1 brownie
- Calories: 280
- Sugar: 24
- Sodium: 120
- Fat: 14
- Saturated Fat: 8
- Carbohydrates: 36
- Fiber: 2
- Protein: 4
Keywords: black cat brownies, Halloween brownies, white chocolate ears, fudgy brownies, easy Halloween treats


