My neighbor knocked on my door holding a plate of something that smelled like autumn in a bakery. She said, “I made these for my book club, but I ate four before they got in the car.” That was my first introduction to small batch pumpkin chocolate chip cookies, and honestly, I didn’t blame her one bit. I took one bite right there in the doorway and felt the corners of my mouth turn up before I even swallowed. The edges were slightly crisp, the centers were soft and pillowy, and the chocolate had melted into little puddles of sweetness against the warm pumpkin flavor. I asked for the recipe immediately, and she laughed and said she’d just thrown things together until the dough felt right. That’s the kind of energy I love in a kitchen, you know?
I spent the next week tweaking that original idea until it felt like mine. I wanted a version that made exactly twelve cookies, no more, no less, because sometimes you don’t need a giant batch sitting on your counter tempting you for days. I wanted something that came together in one bowl without a mixer, because I hate washing extra dishes when I’m craving something cozy. And I wanted the pumpkin flavor to shine, not get lost behind too much spice or sugar. After seven test batches, my neighbor came back for more, and she said these were even better than her original. I took that as a win.
These cookies have become my go-to for those days when the air gets crisp and you just want to bake something that makes your whole house smell like fall. They’re not complicated, and they don’t ask for fancy ingredients. They just deliver that perfect combination of soft pumpkin, warm spices, and melty chocolate in every single bite. If you’ve been searching for the best easy small batch pumpkin chocolate chip cookies that actually turn out right, I think you’re going to love these.
Why You’ll Love This Recipe
I’ve tested this recipe more times than I care to admit, and every single batch has taught me something new. The first time I made these, I used too much pumpkin puree and ended up with flat, gummy cookies that looked sad on the baking sheet. The second time, I overmixed the dough and got tough cookies that tasted more like hockey pucks than anything cozy. But by batch number four, I found the sweet spot, and I’ve been making them the same way ever since.
- Quick & Easy: These cookies come together in about 25 minutes from start to finish. No chilling required, no stand mixer needed, just a bowl and a spoon. Perfect for those spontaneous baking moods that hit on a rainy afternoon.
- Simple Ingredients: You probably have most of these in your pantry right now. Canned pumpkin puree, all-purpose flour, butter, sugar, chocolate chips, and a few warm spices. No weird specialty items that you’ll use once and forget about.
- Perfect for Fall: These cookies scream autumn without being overwhelming. They’re great for Thanksgiving dessert tables, cozy weekend baking, or just because you want your kitchen to smell amazing.
- Crowd-Pleaser: I brought these to a potluck last month and watched three different people ask who made the pumpkin cookies. Kids love them, adults love them, even my friend who claims she doesn’t like pumpkin desserts ate three.
- Unbelievably Delicious: The texture is what gets me every time. Soft centers, slightly crisp edges, and pockets of melted chocolate in every bite. The pumpkin keeps them incredibly moist without making them cakey, which is a hard balance to strike.
What makes this recipe different from all the other pumpkin chocolate chip cookie recipes out there? It’s the ratio. I spent a lot of time figuring out exactly how much pumpkin to add so the cookies stay soft without becoming too wet. I also use a combination of brown sugar and granulated sugar, which gives them that chewy texture with just enough caramel flavor from the brown sugar. And I add a touch of cinnamon and nutmeg, but not so much that you feel like you’re eating a pumpkin pie in cookie form. It’s balanced, it’s simple, and it just works.
What Ingredients You Will Need
This recipe uses simple, wholesome ingredients that work together to create cookies that are soft, flavorful, and perfectly pumpkin-spiced. Here’s everything you’ll need and why each ingredient matters.
- Unsalted butter (4 tablespoons, melted): I always use unsalted butter so I can control the salt level myself. Melting the butter instead of creaming it with sugar makes these cookies come together faster and gives them a chewier texture. If you only have salted butter on hand, just reduce the added salt by a pinch.
- Light brown sugar (½ cup, packed): Brown sugar adds moisture and a deep, caramel-like sweetness that pairs beautifully with pumpkin. Make sure you pack it firmly into your measuring cup for the right measurement. I prefer light brown sugar here because dark brown can overpower the pumpkin flavor.
- Granulated sugar (¼ cup): The granulated sugar helps create those slightly crisp edges while keeping the centers soft. It also balances out the molasses notes from the brown sugar.
- Pumpkin puree (⅓ cup): Use canned pumpkin puree, not pumpkin pie filling. Pumpkin pie filling has added sugar and spices that will throw off the whole recipe. I like Libby’s brand for consistent texture, but any pure pumpkin puree works great. Make sure you blot it slightly with a paper towel to remove excess moisture, or your cookies might spread too much.
- Large egg yolk (1): Just the yolk, not the whole egg. The yolk adds richness and helps bind the dough without adding too much liquid. Save the egg white for scrambled eggs tomorrow morning or add it to your morning omelet.
- Vanilla extract (1 teaspoon): Pure vanilla extract adds warmth and depth to the flavor. I use Nielsen-Massey when I’m feeling fancy, but store brand works perfectly fine too. Avoid imitation vanilla if you can, it has a chemical aftertaste that doesn’t do these cookies any favors.
- All-purpose flour (1 cup plus 2 tablespoons): Regular all-purpose flour gives these cookies the perfect structure. I spoon the flour into my measuring cup and level it off with a knife instead of scooping directly from the bag, which packs the flour too tightly and leads to dry cookies.
- Baking soda (½ teaspoon): Baking soda helps the cookies spread slightly and gives them a nice golden color. Make sure your baking soda isn’t expired, or your cookies won’t rise properly.
- Salt (¼ teaspoon): Salt balances the sweetness and enhances all the other flavors. Don’t skip it, even if you’re using salted butter. A little salt makes the chocolate taste more chocolatey, I swear.
- Ground cinnamon (1 teaspoon): Cinnamon is the backbone of the pumpkin spice flavor here. It’s warm and slightly sweet and pairs perfectly with the pumpkin and chocolate.
- Ground nutmeg (¼ teaspoon): Just a touch of nutmeg adds that classic fall flavor without being too overpowering. Freshly grated nutmeg is amazing if you have it, but pre-ground works great too.
- Ground ginger (¼ teaspoon): Ginger adds a little warmth and a subtle kick that keeps the cookies from feeling one-dimensional. It’s a small amount, but you’ll miss it if you leave it out.
- Semi-sweet chocolate chips (½ cup): I prefer semi-sweet chocolate chips because they’re not too sweet and they balance the pumpkin nicely. You can use dark chocolate chips if you want a richer flavor, or milk chocolate chips if you like things sweeter. I’ve also used chopped chocolate bars in a pinch, and they melt into beautiful puddles throughout the cookies.
That’s it. Twelve ingredients, most of which are probably already in your kitchen. No fancy extracts, no specialty flours, nothing complicated. Just simple, real ingredients that come together to make something genuinely delicious.
Equipment Needed
You don’t need a lot of fancy equipment for these cookies, which is one of the reasons I love this recipe so much. Here’s what you’ll need:
- Large mixing bowl: Any medium to large bowl works. I use a ceramic mixing bowl that my mom gave me years ago, and it’s perfect for this recipe.
- Whisk or wooden spoon: A whisk works great for combining the wet ingredients, but a wooden spoon is perfect for folding in the flour and chocolate chips. Use whatever feels comfortable in your hand.
- Measuring cups and spoons: Accurate measurements matter in baking, so use proper measuring cups for dry ingredients and liquid measuring cups for the pumpkin puree. I’ve learned the hard way that guessing leads to flat cookies.
- Baking sheet: A standard half-sheet pan works perfectly. I line mine with parchment paper for easy cleanup and to prevent sticking. If you don’t have parchment paper, a silicone baking mat works great too.
- Cookie scoop (about 1.5 tablespoons): A cookie scoop makes portioning the dough quick and consistent. If you don’t have one, use two spoons to scoop and drop the dough. I prefer a medium scoop for perfectly sized cookies.
- Cooling rack: Letting the cookies cool on a rack instead of the hot baking sheet prevents them from overcooking on the bottom. If you don’t have a cooling rack, just let them cool on the baking sheet for a few minutes, then transfer them carefully to a plate.
If you don’t have a cookie scoop, don’t worry. I made these cookies for years using just two spoons, and they turned out great every time. The scoop just makes things faster and gives you more uniform cookies, but it’s absolutely not necessary.
Preparation Method
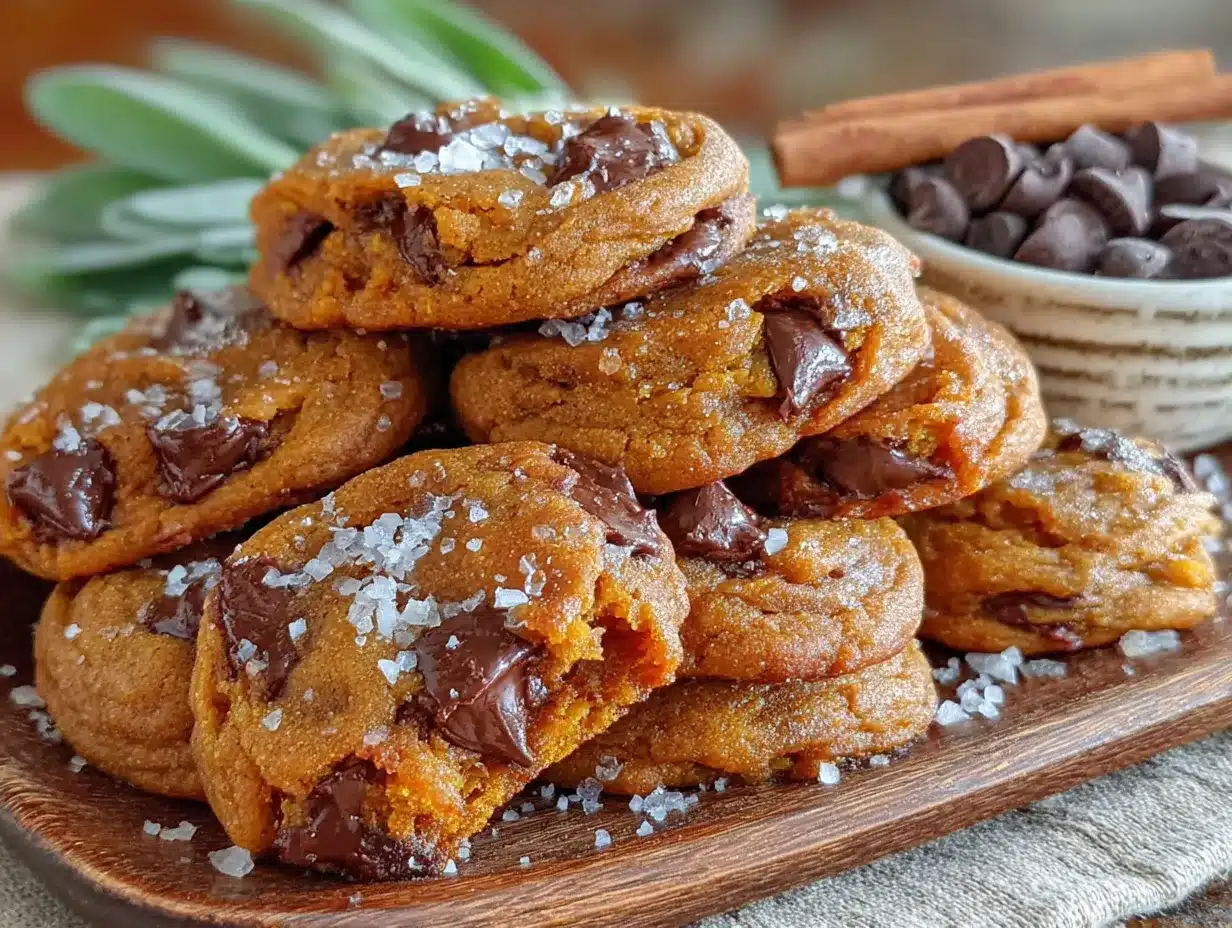
Let me walk you through exactly how to make these cookies. I’ve included all the little details that make the difference between good cookies and great cookies, so pay attention to the sensory cues I mention along the way.
- Preheat your oven to 350°F (175°C) and line a baking sheet with parchment paper. I always do this first so the oven is fully heated by the time I’m ready to bake. A properly preheated oven ensures even baking and prevents flat cookies.
- Melt the butter in a small bowl in the microwave for about 30 seconds, or in a small saucepan over low heat. Let it cool for a minute or two while you gather your other ingredients. You want it warm but not hot, or it will cook the egg yolk when you add it.
- In your large mixing bowl, combine the melted butter, brown sugar, and granulated sugar. Whisk them together until they’re well combined and the mixture looks like wet sand. It should smell sweet and buttery already. This takes about 30 seconds of whisking.
- Add the pumpkin puree, egg yolk, and vanilla extract to the sugar mixture. Whisk everything together until it’s smooth and completely combined. The mixture will look a little thick and glossy, and it should be a beautiful orange color. If it looks separated or greasy, keep whisking until it comes together.
- In a separate small bowl, whisk together the flour, baking soda, salt, cinnamon, nutmeg, and ginger. I use a fork for this because it’s quick and easy. Make sure the spices are evenly distributed throughout the flour, or you’ll end up with some cookies that are super spicy and others that are bland.
- Add the dry ingredients to the wet ingredients and fold them together with a spatula or wooden spoon. Stir just until you don’t see any more streaks of flour. Overmixing at this stage develops gluten and makes your cookies tough, so stop as soon as the dough comes together. It will look thick and slightly sticky, which is exactly what you want.
- Fold in the chocolate chips with a few gentle stirs. Make sure they’re evenly distributed throughout the dough. If you’re using chopped chocolate, you might have some smaller pieces mixed in, which is great because they’ll melt into the cookies.
- Scoop the dough using a 1.5-tablespoon cookie scoop or two spoons. Drop rounded tablespoons of dough onto the prepared baking sheet, spacing them about 2 inches apart. These cookies spread a little, so give them room to breathe. You should get exactly 12 cookies from this batch.
- Bake for 10 to 12 minutes, or until the edges are set and lightly golden. The centers will still look slightly soft and underdone, and that’s exactly what you want. My oven runs hot, so I start checking at 10 minutes. The cookies should be puffed up slightly and the tops should look set but not browned. If you press gently on the center, it should spring back slowly.
- Let the cookies cool on the baking sheet for 5 minutes. This is important because they’re very soft when they come out of the oven, and moving them too soon will cause them to fall apart. After 5 minutes, transfer them to a wire cooling rack to cool completely. The centers will continue to set as they cool, so don’t worry if they look a little soft at first.
One thing I learned the hard way: don’t press the cookies down before baking. Pumpkin cookies don’t spread as much as regular cookies, and pressing them down will make them flat and dense. Just scoop and drop, and let the oven do the work.
Cooking Tips & Techniques
After making these cookies more times than I can count, I’ve picked up a few tricks that make the process smoother and the results more consistent. Here are my best tips:
Blot your pumpkin puree. This is the number one mistake people make with pumpkin cookies. Pumpkin puree contains a lot of water, and too much moisture will make your cookies spread into flat, gummy discs. Before measuring, spread the pumpkin puree on a paper towel and gently press another paper towel on top to absorb excess moisture. You’ll be surprised how much water comes out, and your cookies will thank you.
Don’t skip the chilling step if your kitchen is warm. I don’t always chill this dough, but if it’s a hot day or your butter was very warm, the dough might be too soft to hold its shape. Pop the scooped dough balls in the fridge for 15 minutes before baking. This helps the cookies maintain their shape and gives you thicker, softer centers.
Use room temperature ingredients for the best texture. I know, I know, who has time to let eggs and butter come to room temperature? But it really does make a difference. Cold ingredients don’t emulsify as well, which can lead to greasy cookies. If you forgot to take your egg out ahead of time, place it in a bowl of warm water for 5 minutes to bring it up to temperature quickly.
Rotate your baking sheet halfway through. Ovens have hot spots, and rotating the sheet ensures even baking. I do this at the 6-minute mark, and it makes a noticeable difference in how evenly the cookies brown.
Underbake slightly for softer cookies. If you like your cookies soft and tender, take them out at the 10-minute mark even if they look a little underdone in the center. They’ll continue to cook on the hot baking sheet as they cool. If you prefer crispier cookies, bake them for the full 12 minutes or even an extra minute.
I once forgot to add the egg yolk to a batch and ended up with cookies that were dry and crumbly. It was a sad day, but I learned to double-check my ingredients before mixing. Now I always lay everything out on the counter before I start, which saves me from those kinds of mistakes.
Variations & Adaptations
One of the best things about this recipe is how easy it is to customize. Here are some variations I’ve tried and loved:
Gluten-Free Version: Swap the all-purpose flour for a 1-to-1 gluten-free baking flour blend. I’ve used Bob’s Red Mill 1-to-1 Baking Flour with great results. The cookies might spread a little more, so chill the dough for 20 minutes before baking. The texture is slightly different but still delicious.
Vegan Version: Use melted coconut oil or vegan butter instead of regular butter, and replace the egg yolk with a flax egg (1 tablespoon ground flaxseed mixed with 2.5 tablespoons water, let sit for 5 minutes). The cookies will be a little less rich, but they’re still soft and flavorful. I’ve made these for a vegan friend’s birthday and nobody could tell the difference.
White Chocolate Cranberry: Swap the semi-sweet chocolate chips for white chocolate chips and add ¼ cup dried cranberries. The tartness of the cranberries pairs beautifully with the sweet white chocolate and warm pumpkin spices. This is my favorite holiday variation, and I’ve brought it to multiple Thanksgiving gatherings.
Extra Spiced Version: If you’re a spice lover like me, add an extra ½ teaspoon of cinnamon and a pinch of cloves or allspice. You can also add a teaspoon of pumpkin pie spice instead of the individual spices if that’s what you have on hand. Just be careful not to overdo it, or the spices will overwhelm the pumpkin flavor.
Nutty Addition: Fold in ¼ cup of chopped pecans or walnuts along with the chocolate chips. The crunch adds a nice texture contrast to the soft cookies. Toast the nuts first for extra flavor, just spread them on a baking sheet and bake at 350°F for 5 minutes until fragrant.
I’ve also tried these cookies with dark chocolate chunks instead of chips, and the result was absolutely gorgeous. The chunks melt into big puddles of chocolate that look beautiful and taste even better. Use whatever chocolate you have on hand, honestly, this recipe is forgiving enough to handle it.
Serving & Storage Suggestions
These cookies are best served slightly warm, when the chocolate chips are still a little melty and the centers are soft and tender. I like to pop one in the microwave for about 10 seconds if it’s been sitting out for a while. They’re perfect with a glass of cold milk, a cup of hot coffee, or a warm mug of tea. If you’re feeling fancy, serve them alongside a scoop of vanilla ice cream for an easy fall dessert that looks impressive with zero effort.
For storage, keep the cookies in an airtight container at room temperature for up to 5 days. I layer them between sheets of parchment paper so they don’t stick together. They’ll stay soft and fresh for several days, though honestly, they never last that long in my house. If you want to keep them extra soft, add a slice of bread to the container. The bread absorbs excess moisture and releases it slowly, keeping the cookies soft. Replace the bread slice every couple of days.
These cookies freeze beautifully. Place the cooled cookies in a single layer on a baking sheet and freeze for about an hour, then transfer them to a freezer-safe bag or container. They’ll keep for up to 3 months. When you’re ready to enjoy them, let them thaw at room temperature for about 30 minutes, or pop them in the microwave for 15 seconds. You can also freeze the unbaked dough balls on a baking sheet, then transfer them to a freezer bag. Bake from frozen, adding 2 to 3 minutes to the baking time.
The flavors actually develop and deepen after a day or two in the container. The pumpkin and spices meld together, and the cookies become even more flavorful. I actually prefer them on day two, when they’ve had time to settle and the texture has become perfectly soft and chewy.
Nutritional Information & Benefits
Here’s the approximate nutritional breakdown for one cookie, based on a batch of 12:
| Nutrient | Amount per Cookie |
|---|---|
| Calories | 185 |
| Total Fat | 9g |
| Saturated Fat | 5g |
| Cholesterol | 35mg |
| Sodium | 95mg |
| Total Carbohydrates | 25g |
| Dietary Fiber | 1g |
| Sugars | 14g |
| Protein | 2g |
These cookies aren’t health food, but they do have some redeeming qualities. Pumpkin is packed with vitamin A, which is great for your eyes and immune system. It also contains fiber and antioxidants that support overall health. The cinnamon in these cookies has anti-inflammatory properties and can help regulate blood sugar levels. And dark chocolate is rich in antioxidants and can improve heart health when consumed in moderation.
For a slightly lighter option, you can reduce the sugar by a couple of tablespoons or use a sugar substitute like monk fruit sweetener. I’ve tried this, and the cookies are still good, just not as sweet. You can also use dark chocolate chips with higher cocoa content for more antioxidants and less sugar. But honestly, these cookies are meant to be a treat, and I think it’s okay to enjoy them as they are.
Conclusion
These small batch pumpkin chocolate chip cookies have become my favorite fall baking project for so many reasons. They’re quick enough for a weeknight craving, simple enough for beginner bakers, and delicious enough to impress anyone who tries them. The combination of soft pumpkin, warm spices, and melty chocolate is just unbeatable, especially when the weather turns cool and you want something cozy to enjoy with your afternoon coffee.
I love that this recipe makes exactly twelve cookies, no more, no less. It’s the perfect amount for sharing with a friend, bringing to a small gathering, or keeping all to yourself (no judgment here). And because it’s a small batch, you can experiment with different variations without committing to a huge batch of cookies that might not turn out the way you hoped.
If you make these cookies, I’d love to hear how they turn out. Leave a comment below and let me know if you tried any variations, or tag me in your photos on social media. I genuinely read every comment, and your feedback helps me create better recipes for you. Happy baking, and I hope these cookies bring as much warmth and comfort to your kitchen as they’ve brought to mine.
Frequently Asked Questions
Can I use fresh pumpkin instead of canned?
Yes, you can use fresh pumpkin puree, but you’ll need to make sure it’s very well drained. Fresh pumpkin usually has more water content than canned, which can make your cookies spread too much. Spread the puree on a paper towel and press gently to remove excess moisture before measuring.
Why did my cookies turn out flat?
Flat cookies usually happen for one of three reasons: too much moisture in the pumpkin (make sure to blot it), butter that was too warm, or not enough flour. Make sure you’re measuring your flour correctly by spooning it into the measuring cup and leveling it off. Also, chilling the dough for 15 minutes before baking can help prevent spreading.
Can I double this recipe?
Absolutely. This recipe doubles beautifully if you want to make a full batch of 24 cookies. Just use one whole egg instead of two egg yolks if you’re doubling, and increase the baking time by a minute or two. I’ve done this many times for holiday cookie exchanges and it works perfectly.
How do I know when the cookies are done baking?
The edges should be set and lightly golden, but the centers will still look soft and slightly underdone. If you press gently on the center, it should spring back slowly. Don’t wait for the centers to look completely set, or you’ll end up with dry cookies. They’ll continue to cook on the hot baking sheet as they cool.
Can I add cream cheese frosting to these cookies?
You can, but I don’t recommend it for this particular recipe. These cookies are soft and tender, and adding frosting makes them a little too sweet and messy. If you want a frosted pumpkin cookie, I’d suggest trying my easy iced pumpkin sugar cookie bars instead, which are designed to hold up to a thick layer of frosting. For these cookies, I think they’re best enjoyed as they are, maybe with a light dusting of powdered sugar if you want to dress them up.
Pin This Recipe!
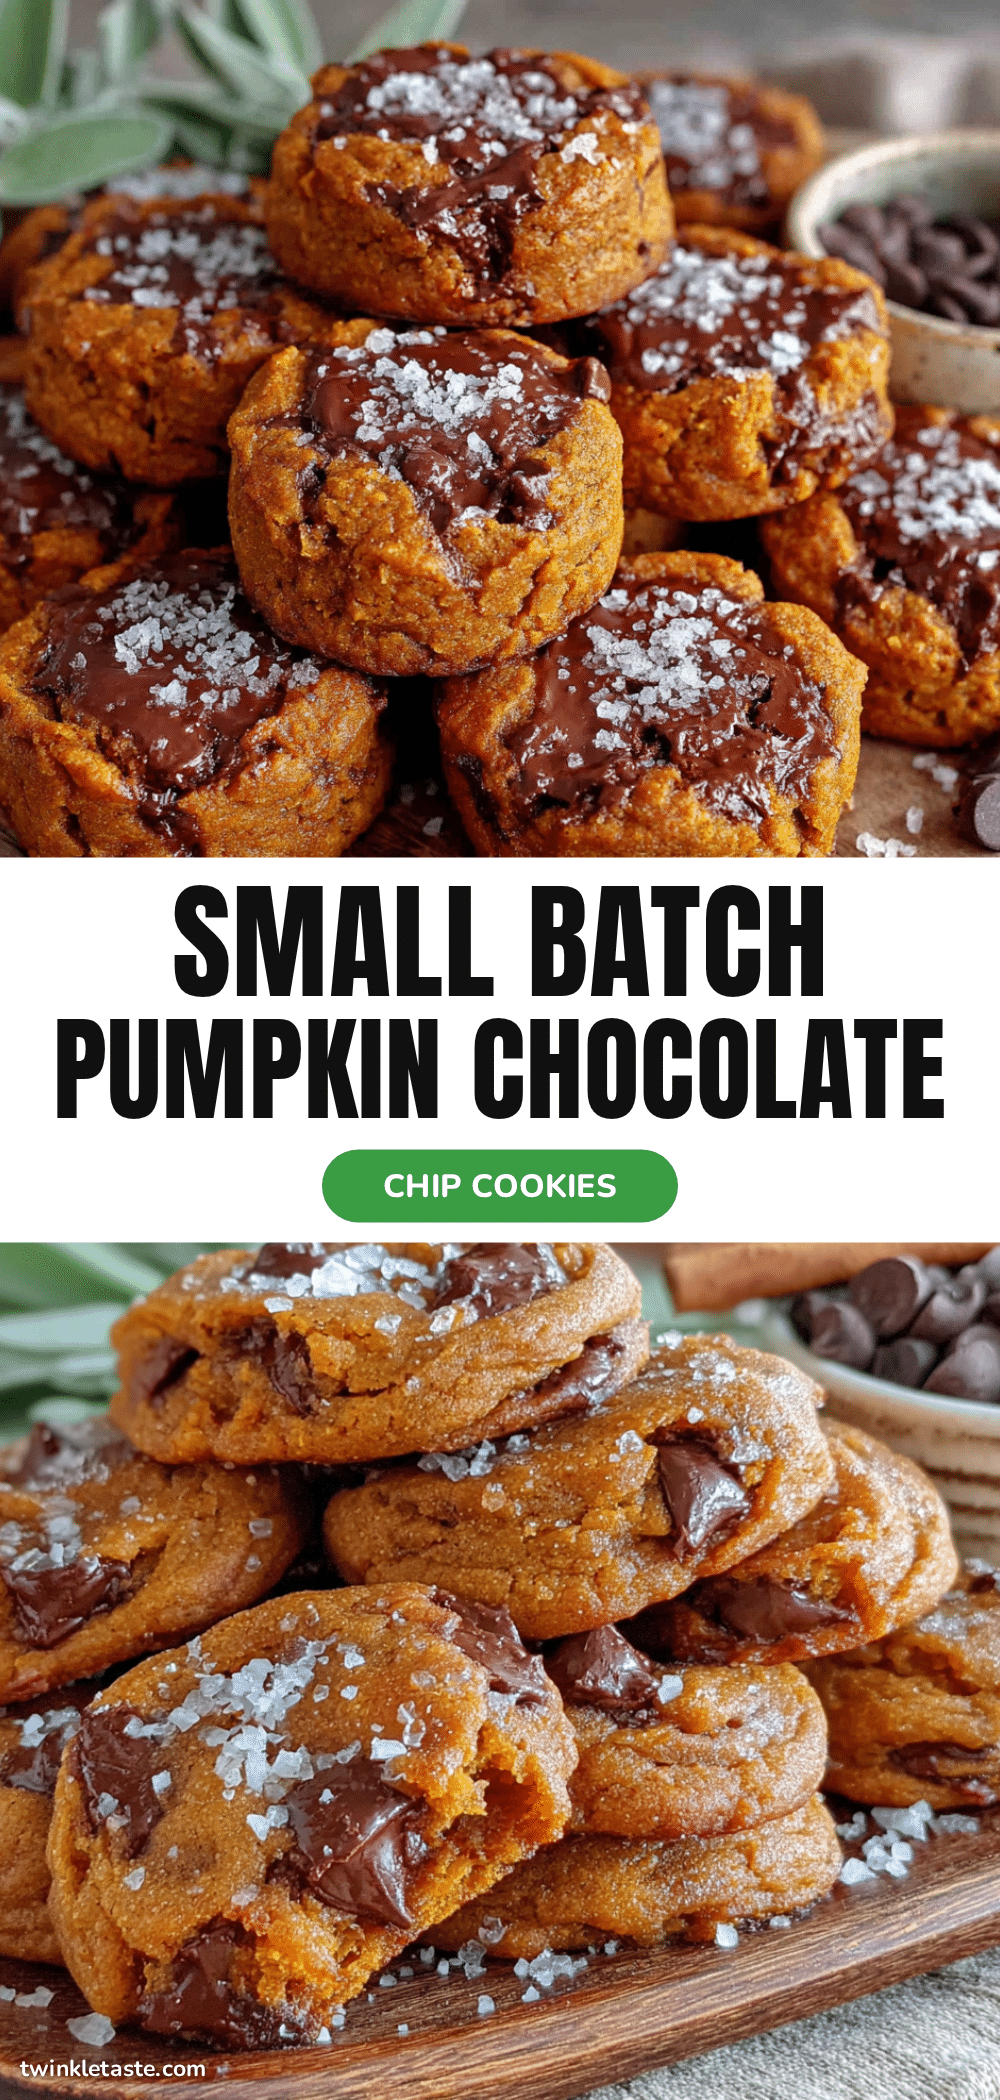
Best Easy Small Batch Pumpkin Chocolate Chip Cookies
These small batch pumpkin chocolate chip cookies are soft, chewy, and perfectly spiced, making exactly twelve cookies for a cozy fall treat. They come together in one bowl without a mixer and deliver a perfect balance of pumpkin, warm spices, and melty chocolate.
- Prep Time: 10 minutes
- Cook Time: 12 minutes
- Total Time: 22 minutes
- Yield: 12 cookies 1x
- Category: Dessert
- Cuisine: American
Ingredients
- 4 tablespoons unsalted butter, melted
- ½ cup light brown sugar, packed
- ¼ cup granulated sugar
- ⅓ cup pumpkin puree (blotted to remove excess moisture)
- 1 large egg yolk
- 1 teaspoon vanilla extract
- 1 cup plus 2 tablespoons all-purpose flour
- ½ teaspoon baking soda
- ¼ teaspoon salt
- 1 teaspoon ground cinnamon
- ¼ teaspoon ground nutmeg
- ¼ teaspoon ground ginger
- ½ cup semi-sweet chocolate chips
Instructions
- Preheat your oven to 350°F (175°C) and line a baking sheet with parchment paper.
- Melt the butter in a small bowl in the microwave for about 30 seconds, or in a small saucepan over low heat. Let it cool for a minute or two.
- In a large mixing bowl, combine the melted butter, brown sugar, and granulated sugar. Whisk until well combined and the mixture looks like wet sand.
- Add the pumpkin puree, egg yolk, and vanilla extract to the sugar mixture. Whisk until smooth and completely combined.
- In a separate small bowl, whisk together the flour, baking soda, salt, cinnamon, nutmeg, and ginger.
- Add the dry ingredients to the wet ingredients and fold together with a spatula or wooden spoon until just combined. Do not overmix.
- Fold in the chocolate chips with a few gentle stirs until evenly distributed.
- Scoop the dough using a 1.5-tablespoon cookie scoop or two spoons. Drop rounded tablespoons of dough onto the prepared baking sheet, spacing them about 2 inches apart. You should get exactly 12 cookies.
- Bake for 10 to 12 minutes, or until the edges are set and lightly golden. The centers will still look slightly soft and underdone.
- Let the cookies cool on the baking sheet for 5 minutes, then transfer to a wire cooling rack to cool completely.
Notes
Blot the pumpkin puree with a paper towel to remove excess moisture before measuring. If your kitchen is warm, chill the scooped dough balls in the fridge for 15 minutes before baking. Underbake slightly for softer cookies. Store in an airtight container at room temperature for up to 5 days. Freeze baked cookies for up to 3 months.
Nutrition
- Serving Size: 1 cookie
- Calories: 185
- Sugar: 14
- Sodium: 95
- Fat: 9
- Saturated Fat: 5
- Carbohydrates: 25
- Fiber: 1
- Protein: 2
Keywords: pumpkin chocolate chip cookies, small batch cookies, fall cookies, easy pumpkin cookies, soft pumpkin cookies


