The slight give of a soft pretzel bite against the snap of a dark chocolate square — that’s the whole reason this board exists. Everything else, the ghoulish little decorations, the piles of candy corn, the way the cheese cubes sit in a neat orange row, it all just supports that first moment when someone reaches in and gets the perfect sweet-and-salty combo in one bite.
I didn’t set out to make a Halloween charcuterie board, honestly. I was staring down a bag of mini pretzels and a half-eaten bag of fun-size Milky Ways a few days before October 31st, wondering why we separate these things. Why is the candy on one table and the snacks on another? That never made sense to me. At a party, people want both. They want to grab a handful of something crunchy and salty and then immediately follow it with something chewy and sweet. So I started piling everything onto one big wooden board, and the Easy Sweet and Salty Halloween Charcuterie Board was born.
The kids went absolutely silent for a full ten seconds when they saw it. That never happens. My oldest usually has an opinion about everything before she even sees it. But she just stood there, pointing at the little plastic spider I’d wedged between the Gouda and the gummy worms. It felt like I’d done something right without even trying hard. And that’s the thing about this board — it looks like you spent hours, but really, you just dumped and arranged. I think that’s my favorite kind of recipe, the one that looks impressive but asks almost nothing of you.
Why You’ll Love This Recipe
Let me tell you why this board keeps showing up at every Halloween thing I host. It’s not complicated, and that’s exactly the point.
- No Cooking Required : Seriously, zero heat. You just arrange. This is the kind of recipe you can throw together while your kid is finishing their costume or while you’re waiting for the pizza delivery.
- Perfect for Parties and Small Gatherings : Whether it’s a Halloween movie night with the family or a full-on costume party, this board feeds a crowd without needing plates or forks. People just grab and go.
- Customizable for Any Diet : Gluten-free? Swap in GF pretzels and crackers. Dairy-free? Use vegan cheese and dark chocolate. Nut-free? Skip the almonds and add more seeds. It bends to whatever you need.
- Kid-Friendly and Adult-Approved : The kids go for the candy and gummy worms. The adults hover around the aged cheddar and the dark chocolate. Everyone wins.
- Looks Like a Pinterest Dream : Honestly, this board photographs like a dream. The orange and black color palette practically styles itself. You’ll get compliments before anyone even takes a bite.
What makes this different from every other Halloween snack platter out there is the balance. Most boards lean too sweet or too savory. This one hits both notes equally, so you never feel like you’re missing something. I’ve tested it at three different gatherings now — a kid’s Halloween party, a grown-up game night, and a casual family dinner — and every single time, the board was empty within an hour. That’s the kind of feedback you can trust.
There’s also something about the way it makes people feel. When someone walks into the kitchen and sees a board covered in spooky treats, they smile. It’s an invitation to snack without pressure. You don’t have to commit to a full plate of anything. You just pick, nibble, and move on. That’s the kind of easy hosting I can get behind.
What Ingredients You Will Need
This recipe uses simple, store-bought ingredients to create a visually striking and deliciously balanced board. The key is variety — you want a mix of textures, flavors, and colors that scream Halloween without screaming for attention.
Salty & Savory Components
- Mini pretzels (about 2 cups) — The classic salty crunch. I like the traditional twists, but the little pretzel sticks work great too for dipping.
- Assorted crackers (about 1 cup) — Go for a mix of shapes and flavors. I use a combination of buttery rounds and seeded wheat crackers for texture contrast.
- Aged cheddar cheese (8 ounces, cut into cubes) — The sharpness cuts through the sweetness beautifully. Look for a block you can cut into even cubes, about 1-inch each.
- Gouda cheese (6 ounces, sliced or cubed) — Smoky and creamy, it pairs perfectly with dark chocolate. I recommend a young Gouda for milder flavor.
- Salami or pepperoni slices (about 4 ounces) — Adds a meaty, savory element. I fold them into little triangles or roll them into tiny logs for visual interest.
- Roasted and salted almonds (½ cup) — For extra crunch and protein. You can also use cashews or peanuts.
- Olives (½ cup, mixed colors) — The briny pop is a nice contrast to all the sugar. Use pitted ones for easy snacking.
Sweet Components
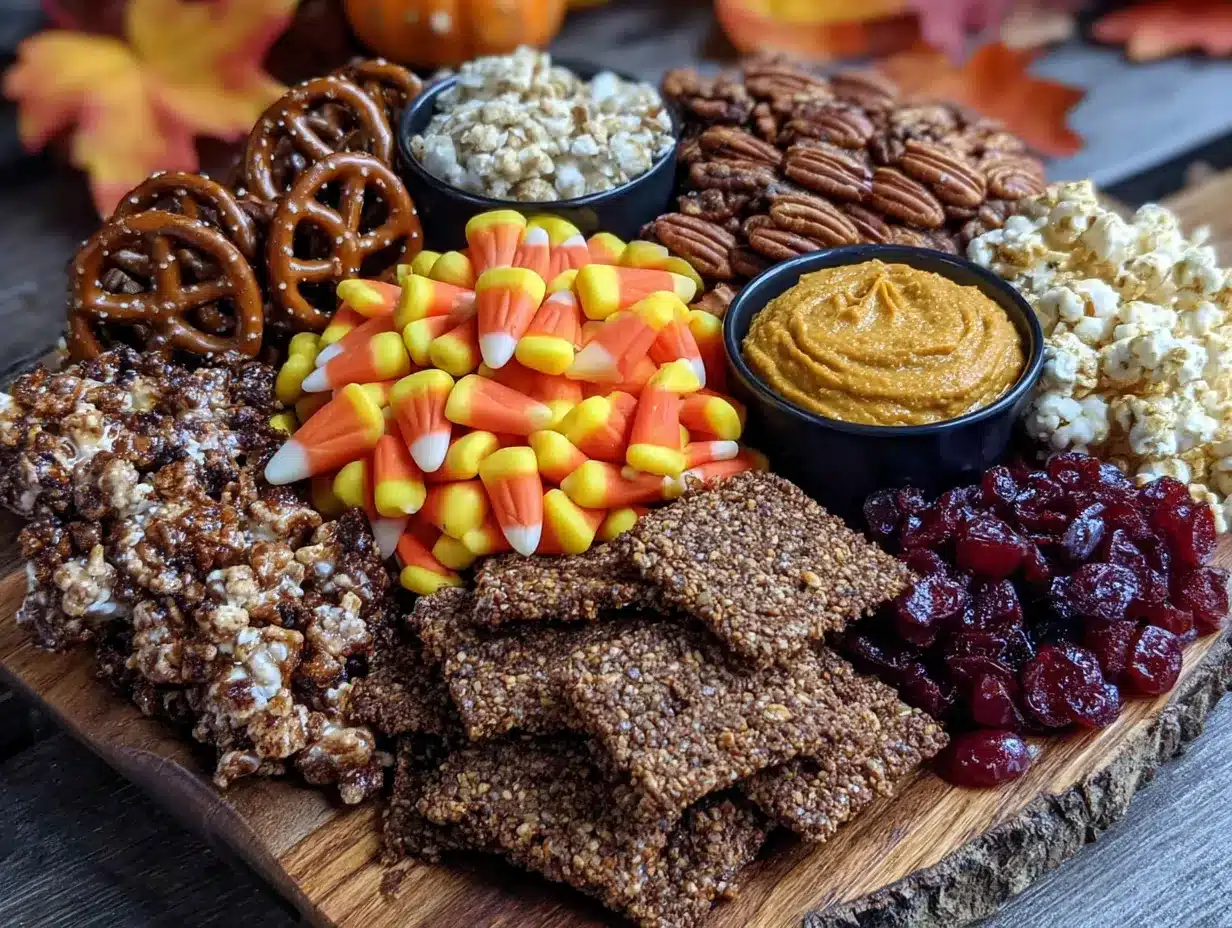
- Dark chocolate squares or chunks (about 1 cup) — Go for 70% cocoa or higher for that deep, bitter-sweet balance. I break a few bars into irregular pieces for a rustic look.
- Milk chocolate candies (about 1 cup) — Think mini peanut butter cups, caramel-filled chocolates, or chocolate-covered pretzels. The classic orange-and-black wrappers are perfect for the theme.
- Gummy worms or gummy spiders (about 1 cup) — Essential for the Halloween vibe. They add a chewy, fruity element that kids specifically hunt for.
- Candy corn or candy pumpkins (about ½ cup) — You either love it or hate it, but it’s a visual staple. I scatter them sparingly for pops of orange and yellow.
- Dried apricots or figs (about ½ cup) — A slightly healthier sweet option that also adds a chewy texture. The deep orange color fits the theme naturally.
- Caramel dip or chocolate sauce (small bowl for dipping) — For the pretzels and fruit. I use a store-bought caramel sauce and warm it slightly before serving.
Halloween-Themed Decor (Optional but Fun)
- Plastic spiders, bats, or skeleton hands — Just a few scattered around the board for a spooky touch. Make sure they’re food-safe or wrapped in plastic.
- Edible glitter or orange sprinkles — A light dusting over the chocolate adds a magical, witchy feel.
- Fresh rosemary sprigs — They look like tiny Halloween trees and add a nice green contrast against all the orange and black.
Equipment Needed
You don’t need much for this one, which is honestly my favorite part.
- Large wooden cutting board or serving platter (at least 18 inches long) — The bigger the better. You want room to spread everything out without it looking crowded. I use a reclaimed wood board I found at a flea market, but any large platter works.
- Small bowls or ramekins (2 to 3) — For the caramel dip, olives, or any loose items like candy corn. They keep things contained and add height to the board.
- Cheese knife or small spreader — For the cheese and any spreads. Optional but nice to have.
- Tongs or small spoons (optional) — For serving, especially if you’re worried about little hands touching everything.
- Parchment paper or small liners (optional) — To place under the cheese or sticky candies for easy cleanup.
If you don’t have a large board, don’t stress. You can use a baking sheet, a large cutting board, or even a clean pizza pan. I’ve made this on a rimmed baking sheet before when I was traveling, and it worked perfectly. Just line it with a bit of parchment for a cleaner look.
Preparation Method
This is the easiest part. No oven, no stove, no stress. Just arrange and serve.
- Choose your board and layout. Start with your largest platter or board. Place your small bowls or ramekins first — these will hold the dips, olives, or loose candies. I usually put them in the center or slightly off-center for visual balance.
- Add the cheese. Arrange the cheddar cubes and Gouda slices in small clusters. Don’t line them up perfectly — a little organic scatter looks more inviting. Leave some space around them for crackers.
- Place the salami or pepperoni. Fold or roll the slices and tuck them near the cheese. I like to make a small pile of rolled salami logs that people can grab easily.
- Scatter the crackers and pretzels. Fill in the gaps around the cheese and meat. Don’t pile them too high — you want them accessible, not towering. A single layer with a few overlapping pieces is perfect.
- Add the nuts and olives. Sprinkle the almonds and olives in the remaining empty spaces. They act as little fillers that also add texture and flavor.
- Place the chocolates and candies. Now for the sweet stuff. Arrange the dark chocolate squares, milk chocolate candies, and gummy worms in separate clusters. Don’t mix them too much — let each type have its own little zone so people can pick and choose.
- Add the dried fruit and candy corn. Scatter the dried apricots and candy corn in small, deliberate piles. A few pieces here and there, not a blanket.
- Fill the small bowls. Spoon the caramel dip into one ramekin and the olives into another. Place them back on the board.
- Add the Halloween decorations. Tuck a plastic spider near the cheese, place a skeleton hand next to the gummy worms, or scatter a few edible sprinkles over the chocolate. Less is more — you want it to look festive, not cluttered.
- Serve immediately or refrigerate. If you’re making it ahead, cover the board loosely with plastic wrap and refrigerate for up to 2 hours. Take it out 15 minutes before serving to let the cheese come to room temperature.
A quick note: if you’re using a wooden board, don’t let the wet ingredients (like olives or dip) sit directly on the wood for too long. Use the ramekins or a small piece of parchment under them. I learned that the hard way when my favorite board got a permanent olive juice stain.
Cooking Tips & Techniques
Even though there’s no actual cooking involved, a few tricks make this board look like you spent way more time than you did.
Balance the colors. The whole point of a Halloween board is the orange-and-black palette. Make sure you have enough orange elements (cheddar, candy corn, dried apricots) and black elements (dark chocolate, olives, black licorice if you’re brave). If your board looks too brown or too yellow, adjust by adding more of the missing color.
Create height. Flat boards can look boring. Use the small bowls to add vertical interest. You can also stack a few crackers under a cheese cube to lift it slightly. I sometimes place a small overturned ramekin under a cluster of gummy worms to make them pop.
Don’t overfill. It’s tempting to pile everything on, but a crowded board looks messy and makes it hard for people to grab things. Leave about 20% of the board empty. That empty space actually makes the food look more abundant.
Think about flow. Arrange the board so that salty and sweet items are interspersed. You don’t want all the candy on one side and all the cheese on the other. People should be able to reach a little of everything without stretching.
Make it interactive. Add a small sign or a little flag that says “BOO” or “EAT ME” near the dip. It’s a tiny detail that makes kids giggle and adults smile.
Prep ahead but assemble last minute. You can cut the cheese, portion the nuts, and arrange the candies in bowls a day ahead. But don’t assemble the board more than an hour before serving. The crackers get stale, and the cheese starts to sweat. I learned that one the hard way when I made a board for a party and the crackers were soft by the time guests arrived.
Variations & Adaptations
This board is endlessly adaptable. Here are a few ways to switch it up depending on your crowd or what you have on hand.
Gluten-Free Version
Swap the pretzels and crackers for gluten-free alternatives. There are tons of great GF pretzel sticks and seed-based crackers that work perfectly. Just check the labels on the candies — some contain wheat as a filler.
Vegan Version
Use vegan cheese (I like the cashew-based cheddar style), dairy-free dark chocolate, and plant-based salami or skip the meat entirely. The caramel dip can be swapped for a date-based caramel or a simple maple syrup drizzle.
Nut-Free Version
Skip the almonds and add more seeds (pumpkin seeds are perfect for Halloween) or extra crackers. Make sure the chocolate is nut-free — some dark chocolates are processed on shared equipment.
Kid-Friendly Focus
Load up on the gummy worms, candy corn, and chocolate-covered pretzels. Add a few fun-shaped crackers (bat-shaped or pumpkin-shaped if you can find them). Skip the olives — most kids don’t love them anyway.
Spicy Kick Version
Add a small bowl of spicy honey or sriracha for drizzling over the cheese and salami. Toss in some chili-lime peanuts for an unexpected heat. The sweet-spicy combo is surprisingly addictive.
I once made a version with smoked Gouda and spicy dark chocolate for a game night, and it was gone in twenty minutes. The smoky-sweet-spicy thing really works if you’re into that kind of flavor adventure.
Serving & Storage Suggestions
This board is best served at room temperature, so take it out of the fridge about 15 to 20 minutes before you plan to set it out. The cheese softens slightly, the chocolate doesn’t snap as hard, and everything just tastes more relaxed.
For presentation, I like to place the board in the center of the table with small plates and napkins on either side. If you’re worried about double-dipping, provide small tongs or toothpicks for the olives and cheese.
This board pairs beautifully with a warm drink. A mug of iced pumpkin chai latte or a cozy homemade pumpkin spice syrup latte would be perfect alongside the salty-sweet snacks. For a non-caffeinated option, a glass of cold apple cider is a classic fall pairing.
If you have leftovers (which honestly, rarely happens), store the components separately. The cheese goes in an airtight container in the fridge. The crackers and pretzels go in a ziplock bag at room temperature. The chocolate and candy can stay in a cool, dry place. Don’t store the assembled board in the fridge — the crackers will get soft and the gummy worms will harden.
The flavors actually get better after a day or two for some things. The cheese and salami kind of meld together in the fridge, and the dried fruit softens slightly. But the crackers and pretzels will definitely lose their crunch, so plan to eat those first.
Nutritional Information & Benefits
I’m not going to pretend this is a health food. It’s a Halloween snack board — it’s meant to be fun and indulgent. But there are a few redeeming qualities if you look closely.
Here’s an approximate breakdown per serving (assuming the board serves 8 to 10 people):
- Calories: 350-450 per serving
- Protein: 12-15 grams (from cheese, nuts, and salami)
- Carbohydrates: 30-40 grams
- Fat: 20-25 grams
- Fiber: 3-5 grams
- Sugar: 15-20 grams (mostly from candy and dried fruit)
The cheese provides calcium and protein. The almonds offer healthy fats and vitamin E. The dark chocolate is packed with antioxidants (the higher the cocoa percentage, the better). Even the gummy worms have a little bit of joy, which I think counts for something.
If you’re looking for a slightly lighter option, you can balance this board with some fresh fruit like apple slices or grapes. They add natural sweetness and a pop of color without the processed sugar. I sometimes add a small bowl of fresh house balsamic vinaigrette chopped salad on the side for a fresh contrast, but that’s optional.
Conclusion
This Easy Sweet and Salty Halloween Charcuterie Board is the kind of recipe that makes you look like a hosting genius without actually doing much work. It’s forgiving, flexible, and always a hit. Whether you’re throwing a costume party, having a quiet family movie night, or just want to surprise your kids with something fun after school, this board delivers.
Don’t be afraid to make it your own. Swap in your favorite candies, use whatever cheese you have in the fridge, and decorate it as spooky or as silly as you like. The best boards are the ones that reflect the people eating them.
I’d love to hear how yours turns out. Did you add something wild? Did the kids fight over the gummy worms? Drop a comment below or tag me in your photos — I always get a kick out of seeing your creations. Happy Halloween, and happy snacking!
Frequently Asked Questions
How far in advance can I make this board?
You can prep the ingredients a day ahead — cut the cheese, portion the nuts, and arrange the candies in bowls. But don’t assemble the board more than an hour before serving. The crackers get soft and the cheese starts to sweat if it sits too long.
Can I make this board nut-free?
Absolutely. Just skip the almonds and add extra seeds like pumpkin seeds or sunflower seeds. Make sure your chocolate is nut-free by checking the label — some dark chocolates are processed on shared equipment.
What if I don’t have a large board?
No problem. Use a large baking sheet, a clean pizza pan, or even a few smaller plates arranged together. The key is to have enough surface area to spread everything out without crowding.
How do I keep the crackers from getting stale?
Don’t add the crackers and pretzels until just before serving. If you’re prepping ahead, keep them in a sealed bag and scatter them on the board right before you set it out.
Can I add fresh fruit to this board?
Yes! Apple slices, grapes, and pomegranate seeds all work beautifully. They add freshness and a pop of color. Just add them right before serving so they don’t brown or get soggy.
Pin This Recipe!
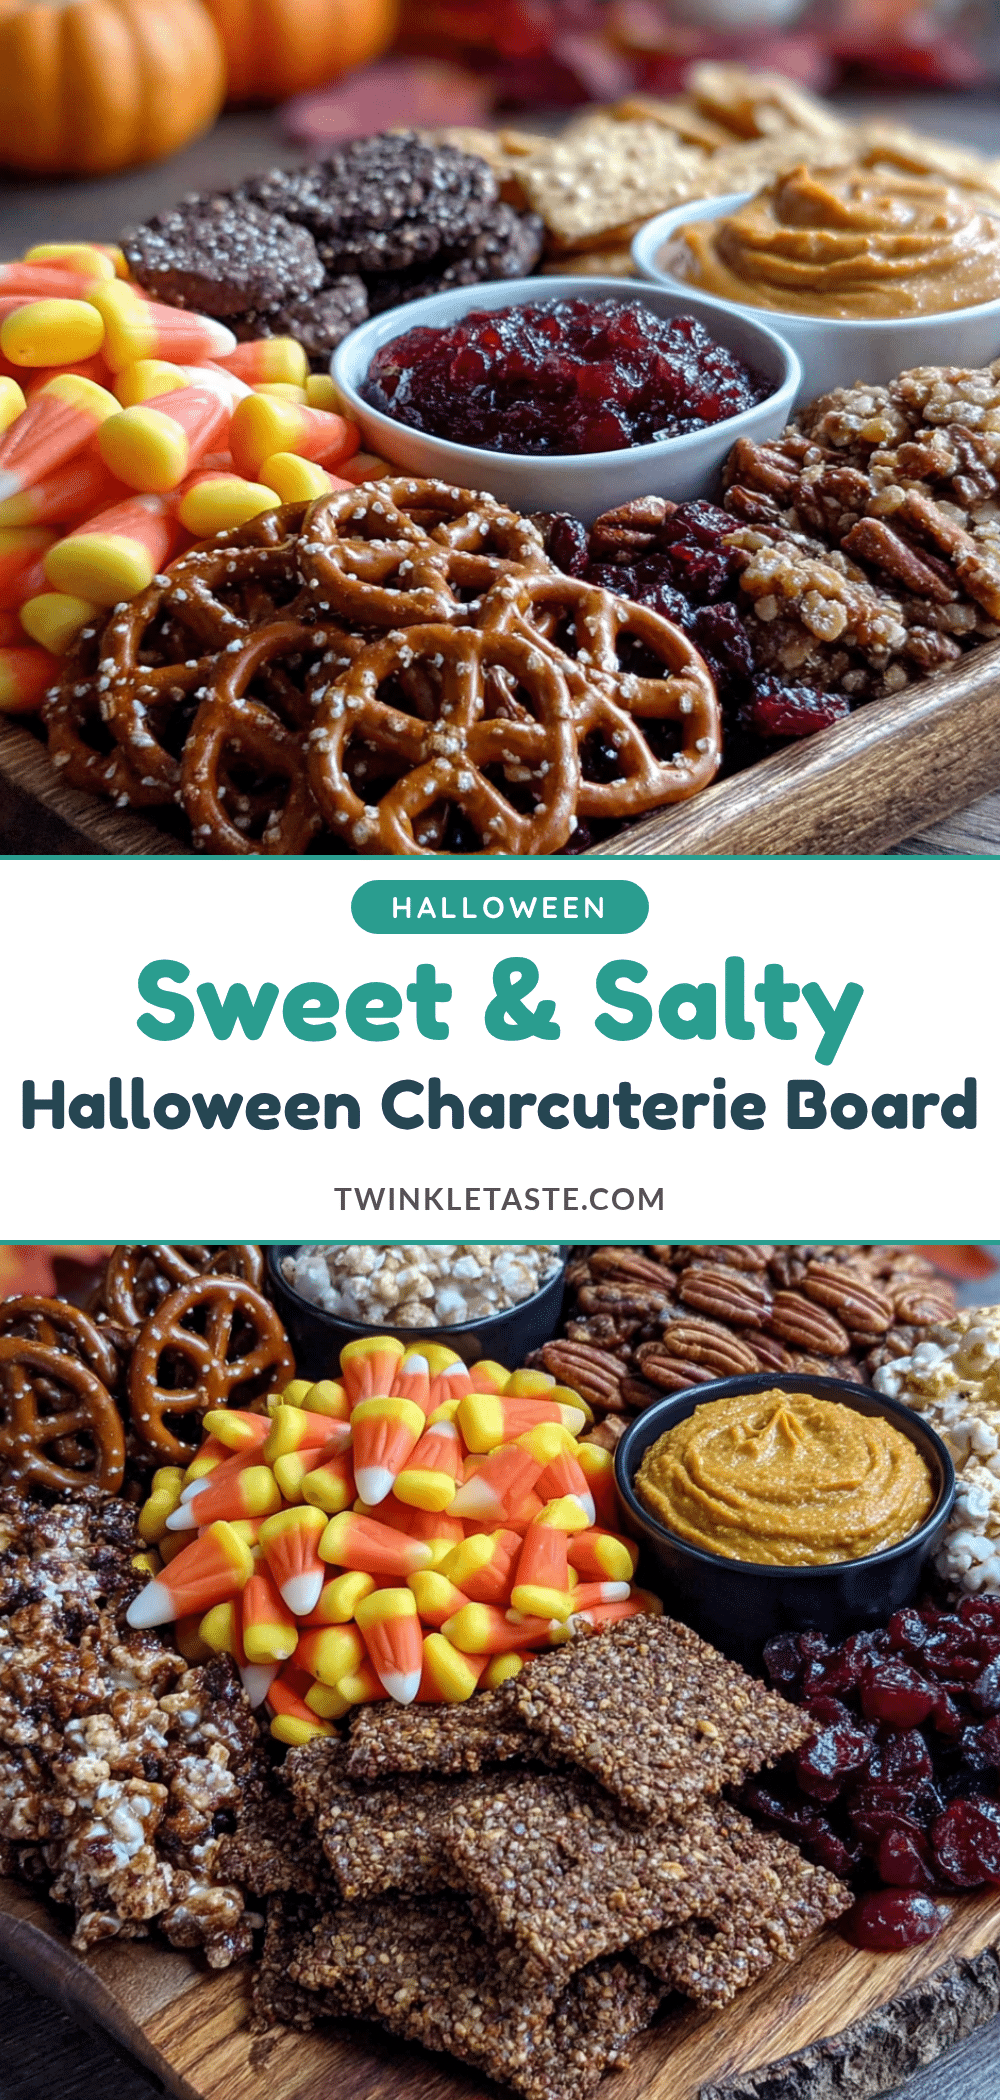
Easy Sweet and Salty Halloween Charcuterie Board
A no-cook Halloween snack board that balances sweet and salty flavors with cheese, crackers, candies, and spooky decorations. Perfect for parties and family gatherings.
- Prep Time: 15 minutes
- Cook Time: 0 minutes
- Total Time: 15 minutes
- Yield: 8-10 servings 1x
- Category: Appetizer
- Cuisine: American
Ingredients
- 2 cups mini pretzels
- 1 cup assorted crackers
- 8 ounces aged cheddar cheese, cut into 1-inch cubes
- 6 ounces Gouda cheese, sliced or cubed
- 4 ounces salami or pepperoni slices
- ½ cup roasted and salted almonds
- ½ cup mixed olives, pitted
- 1 cup dark chocolate squares or chunks (70% cocoa or higher)
- 1 cup milk chocolate candies (mini peanut butter cups, caramel-filled chocolates, or chocolate-covered pretzels)
- 1 cup gummy worms or gummy spiders
- ½ cup candy corn or candy pumpkins
- ½ cup dried apricots or figs
- Caramel dip or chocolate sauce (for serving)
- Plastic spiders, bats, or skeleton hands (optional, for decoration)
- Edible glitter or orange sprinkles (optional)
- Fresh rosemary sprigs (optional)
Instructions
- Choose your board and layout. Start with your largest platter or board. Place small bowls or ramekins first to hold dips, olives, or loose candies, positioning them in the center or slightly off-center for visual balance.
- Add the cheese. Arrange cheddar cubes and Gouda slices in small clusters, leaving space around them for crackers.
- Place the salami or pepperoni. Fold or roll the slices and tuck them near the cheese in a small pile.
- Scatter the crackers and pretzels. Fill in the gaps around the cheese and meat in a single layer with a few overlapping pieces.
- Add the nuts and olives. Sprinkle almonds and olives in remaining empty spaces as fillers.
- Place the chocolates and candies. Arrange dark chocolate squares, milk chocolate candies, and gummy worms in separate clusters, letting each type have its own zone.
- Add the dried fruit and candy corn. Scatter dried apricots and candy corn in small, deliberate piles.
- Fill the small bowls. Spoon caramel dip into one ramekin and olives into another, then place them back on the board.
- Add the Halloween decorations. Tuck plastic spiders, skeleton hands, or edible sprinkles sparingly for a festive look.
- Serve immediately or refrigerate. If making ahead, cover loosely with plastic wrap and refrigerate for up to 2 hours. Remove 15 minutes before serving to let cheese come to room temperature.
Notes
For best results, assemble the board no more than an hour before serving to keep crackers crisp. Use ramekins for wet ingredients to avoid staining wooden boards. Balance colors with orange (cheddar, candy corn, apricots) and black (dark chocolate, olives) elements. Leave about 20% of the board empty for visual appeal.
Nutrition
- Serving Size: 1 serving (based on
- Calories: 350450
- Sugar: 1520
- Sodium: 400600
- Fat: 2025
- Saturated Fat: 810
- Carbohydrates: 3040
- Fiber: 35
- Protein: 1215
Keywords: Halloween charcuterie board, sweet and salty snack board, no-cook appetizer, Halloween party food, easy charcuterie board


