My niece showed up at my door on a rainy October afternoon with a look that said “I need something fun to do, and fast.” The pantry had flour, sugar, and vanilla. The fridge had butter, eggs, and a bag of chocolate chips that was almost empty. I had zero plans for a baking project, but she had that hopeful, slightly impatient energy kids get when they want magic to happen immediately.
So I grabbed a muffin tin and started throwing things together, honestly not sure where this was going. She sat on the counter watching me, swinging her legs, asking if we could make something “spooky but cute.” Not scary, she specified. Cute. That’s when the idea hit me — these little vanilla ghost cupcakes with chocolate chip eyes. Simple enough that she could help with every step, but adorable enough that she’d feel like a real pastry chef.
The batter came together in about ten minutes flat. While the cupcakes baked, the whole kitchen filled with that warm, sweet vanilla smell that makes everything feel cozy. She kept peeking through the oven window, asking if they were done yet. And when we finally pulled them out and started piping the ghost shapes on top, her face lit up in that way that makes you remember why you love cooking for people in the first place.
These cupcakes aren’t fancy. They’re not complicated. But they’re the kind of thing that turns an ordinary afternoon into a memory. And honestly, that’s the best kind of recipe to have in your back pocket.
Why You’ll Love This Recipe
I’ve tested a lot of cupcake recipes over the years, and this one earns its spot in my regular rotation for so many reasons. Let me break it down for you.
- Quick & Easy : From start to finish, these come together in under 45 minutes. The batter mixes by hand in one bowl, no stand mixer required.
- Simple Ingredients : You probably already have everything you need. No weird extracts, no specialty flours, no hunting down obscure decorations.
- Perfect for Halloween : These are the star of any Halloween party, school bake sale, or spooky movie night. Kids go absolutely wild for them.
- Crowd-Pleaser : I’ve brought these to three different gatherings now, and they disappear every single time. Adults love them just as much as kids.
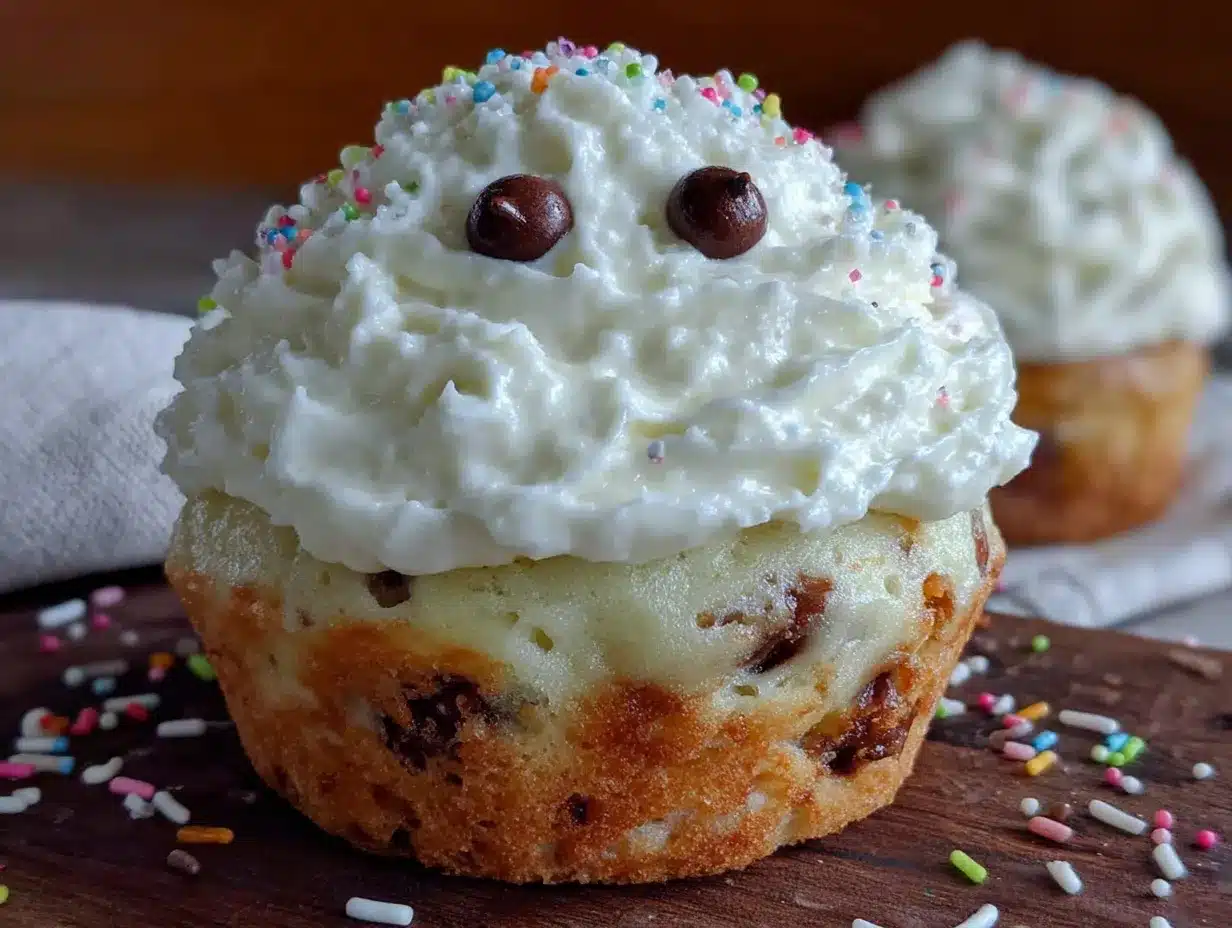
- Unbelievably Adorable : The ghost shapes are surprisingly easy to pipe, and those chocolate chip eyes give them so much personality. Each one looks a little different.
What makes these different from other Halloween cupcakes? It’s the texture, honestly. The cake stays incredibly moist for days, thanks to the buttermilk and oil combination. And the vanilla buttercream is light and fluffy, not that dense, overly sweet stuff you get from a can. Plus, the ghost design doesn’t require any special piping tips or food coloring. Just a zip-top bag with the corner snipped off.
This recipe is comfort food reimagined for the spooky season. It’s the kind of treat that makes you close your eyes after the first bite, then immediately reach for another one. Perfect for impressing your kid’s classmates without spending hours in the kitchen, or turning a simple weekend into something memorable.
Ingredients Needed
This recipe uses simple, wholesome ingredients to deliver that classic vanilla flavor and tender crumb. Most of these are pantry staples you probably already have on hand.
For the Cupcakes
- 1 ½ cups all-purpose flour (spooned and leveled)
- 1 cup granulated sugar
- 1 ½ teaspoons baking powder
- ½ teaspoon baking soda
- ¼ teaspoon salt
- ½ cup unsalted butter, melted and slightly cooled (I use Land O’Lakes for consistent results)
- 2 large eggs, room temperature
- ¾ cup buttermilk, room temperature (adds incredible tenderness)
- 2 teaspoons pure vanilla extract (use the real stuff here, it makes a difference)
For the Vanilla Buttercream Frosting
- 1 cup unsalted butter, softened (2 sticks)
- 3 ½ cups powdered sugar, sifted
- 2 tablespoons heavy cream or whole milk
- 2 teaspoons pure vanilla extract
- Pinch of salt
For the Ghost Decorations
- 1 cup powdered sugar (for the ghost bodies)
- 2-3 tablespoons milk or water
- ½ teaspoon vanilla extract
- ¼ cup mini chocolate chips (for the eyes)
Ingredient Tips: For the best texture, make sure your eggs and buttermilk are at room temperature. Cold ingredients don’t emulsify as well, which can make the cupcakes dense instead of fluffy. If you don’t have buttermilk, you can make a quick substitute by adding 1 tablespoon of lemon juice or white vinegar to ¾ cup of regular milk and letting it sit for 5 minutes.
I’ve tried this recipe with both salted and unsalted butter, and I strongly recommend unsalted for the frosting. It lets you control the salt level precisely. If you only have salted butter, just skip the extra pinch of salt in the frosting.
For the chocolate chips, I prefer the mini ones for the ghost eyes. They look more proportional on the little ghost heads. Regular chocolate chips work too, but they make the ghosts look a bit bug-eyed — which honestly, is also kind of cute in its own way.
Equipment Needed
You don’t need a fully stocked bakery to pull these off. Here’s what you’ll actually use:
- Standard 12-cup muffin tin
- Paper cupcake liners (white ones work best for the ghost theme)
- Large mixing bowl
- Whisk or electric hand mixer
- Wire cooling rack
- Piping bags or zip-top bags (quart size)
- Small round piping tip (or just snip the corner of the bag)
- Spatula for scraping bowls clean
- Measuring cups and spoons
If you don’t have a muffin tin, you can use a mini muffin tin and adjust the baking time to about 10-12 minutes. I’ve done that before for bite-sized ghost cupcakes, and they’re even more adorable. Just keep an eye on them since they bake faster.
For the piping, I honestly prefer using a simple zip-top bag over a fancy piping set. It’s less cleanup, and the ghosts come out looking more organic and playful. Plus, it’s way easier for kids to help with.
Preparation Method
- Preheat and Prep : Preheat your oven to 350°F (175°C). Line your muffin tin with paper liners. This recipe makes exactly 12 standard cupcakes, so fill every cup.
- Mix Dry Ingredients : In a large bowl, whisk together the flour, sugar, baking powder, baking soda, and salt. Make sure there are no lumps. I usually give it a good 20-30 seconds of whisking to aerate the flour.
- Combine Wet Ingredients : In a separate bowl or large liquid measuring cup, whisk together the melted butter, eggs, buttermilk, and vanilla extract until smooth. The mixture should look pale and slightly thickened.
- Combine Wet and Dry : Pour the wet ingredients into the dry ingredients. Stir gently with a spatula or whisk until just combined. Do not overmix! A few small lumps are totally fine. Overmixing develops gluten and makes the cupcakes tough. Fold until you can’t see any more dry flour, then stop.
- Fill the Liners : Divide the batter evenly among the 12 liners. Each should be about ⅔ to ¾ full. I use a cookie scoop for this — it’s cleaner and ensures even-sized cupcakes.
- Bake : Bake for 16-20 minutes, or until a toothpick inserted into the center comes out clean or with a few moist crumbs. The tops should be lightly golden and spring back when touched gently. Rotate the pan halfway through for even baking.
- Cool Completely : Let the cupcakes cool in the pan for 5 minutes, then transfer them to a wire rack to cool completely. Do not frost them while they’re still warm, or the frosting will melt into a sad puddle.
- Make the Buttercream : While the cupcakes cool, make the frosting. Beat the softened butter with an electric mixer until creamy and smooth, about 2 minutes. Gradually add the sifted powdered sugar, one cup at a time, beating on low speed. Add the heavy cream and vanilla extract, then increase speed to medium-high and beat for 3-4 minutes until light and fluffy. Add the pinch of salt and beat one more minute.
- Prepare the Ghost Glaze : In a small bowl, whisk together the powdered sugar, milk, and vanilla extract until smooth. It should be thick but still pourable — think honey consistency. If it’s too thick, add a tiny bit more milk. Too thin, add more powdered sugar.
- Frost the Cupcakes : Spread a thin layer of buttercream on each cooled cupcake. This gives the ghost glaze something to stick to and adds extra creaminess. Don’t go too thick here, or the ghosts will look lumpy.
- Pipe the Ghosts : Transfer the ghost glaze to a piping bag or zip-top bag. Snip a small hole in the corner — start tiny, you can always cut more. Pipe a tall, rounded dollop on each cupcake, then pull up slightly to create a little ghost tail. The glaze will naturally spread and settle into a ghost shape.
- Add the Eyes : While the glaze is still wet, gently press two mini chocolate chips into each ghost for eyes. Don’t push them all the way in — you want them visible. Place them close together for a cute expression.
- Set and Serve : Let the ghosts set at room temperature for about 15-20 minutes before serving. The glaze will firm up slightly but stay soft.
Cooking Tips & Techniques
I’ve made these ghost cupcakes about six times now, and I’ve learned a few things the hard way. Let me save you the trouble.
Don’t overmix the batter. I know I said this already, but it’s worth repeating. The first time I made these, I was chatting on the phone while mixing and overworked the batter. The cupcakes came out dense and almost rubbery. Mix until the flour disappears, then walk away.
Room temperature ingredients matter. Cold butter doesn’t cream properly. Cold eggs don’t emulsify. Cold buttermilk makes the batter seize up. Take everything out of the fridge 30 minutes before you start baking. Set a timer if you’re forgetful like me.
The ghost glaze consistency is everything. If it’s too thin, your ghosts will slide off the cupcakes and look like melted marshmallows. Too thick, and they’ll look like blobs instead of ghosts. Aim for that honey-like consistency. Test a small dollop on the back of a spoon — it should slowly drip off, not pour like water.
Work quickly with the chocolate chips. The glaze starts setting almost immediately, especially if your kitchen is cool. Press the eyes in within 30 seconds of piping each ghost. If you wait too long, the chips won’t stick, and you’ll have eyeless ghosts wandering around your cupcake tray.
Make extra glaze. I always mix up a little more than I think I need. You can always discard extra, but running out mid-piping is frustrating. Plus, if any ghosts don’t come out perfectly, you can scrape them off and start over.
One time, I forgot to add the vanilla to the glaze. The ghosts still looked cute, but they tasted like sweetened milk powder. Don’t skip the vanilla — it adds that warm, comforting flavor that makes these cupcakes irresistible.
Variations & Adaptations
These ghost cupcakes are super versatile. Here are some ways I’ve adapted them over the years:
Chocolate Ghost Cupcakes: Swap ¼ cup of the flour for unsweetened cocoa powder. The dark chocolate ghosts look even spookier against the white glaze, and the chocolate-vanilla combo is always a hit.
Gluten-Free Version: Use a 1:1 gluten-free all-purpose flour blend. I’ve tested this with Bob’s Red Mill, and the texture is almost identical. Just be careful not to overmix, since gluten-free batters can get gummy.
Dairy-Free Adaptation: Substitute the butter with vegan butter sticks (I like Earth Balance), use almond milk with a splash of vinegar instead of buttermilk, and swap the heavy cream for coconut cream. The flavor changes slightly, but the ghosts still look adorable.
Pumpkin Spice Ghosts: Add 1 teaspoon of pumpkin pie spice to the cupcake batter and replace the buttermilk with canned pumpkin puree. The orange-tinted cupcakes peeking out from under the white ghosts are so festive. If you love pumpkin season, you might also enjoy this brown sugar pumpkin coffee cake for another cozy fall treat.
Mini Ghost Bites: Use a mini muffin tin and bake for 10-12 minutes. These are perfect for classroom parties or snack-sized treats. You’ll get about 24 mini ghosts from one batch.
I tried a version with black cocoa powder once for truly dark, dramatic ghosts. They looked incredible but tasted intensely chocolatey — almost bitter. If you go that route, add an extra tablespoon of sugar to balance it out.
Serving & Storage Suggestions
These ghost cupcakes are best served at room temperature. The glaze stays soft and creamy, and the cake is perfectly tender. If you’ve refrigerated them, let them sit out for 20 minutes before serving.
For Halloween parties, arrange them on a black platter or cake stand. The white ghosts contrast beautifully against a dark background. I like to scatter a few candy pumpkins or pretzel sticks around the base for a graveyard vibe.
They pair wonderfully with a warm drink. A pumpkin chai latte or a cup of hot apple cider is perfect for a cozy Halloween night.
Storage: Store leftover cupcakes in an airtight container at room temperature for up to 2 days. The glaze will soften slightly but still hold its shape. If your kitchen is warm, refrigerate them to keep the ghosts firm.
Freezing: You can freeze the unfrosted cupcakes for up to 3 months. Wrap each one individually in plastic wrap, then place them in a freezer bag. Thaw at room temperature, then add the buttercream and ghost glaze fresh. Do not freeze decorated cupcakes — the glaze gets weepy and loses its shape.
Make-Ahead Tip: Bake the cupcakes and make the buttercream a day ahead. Store them separately in the fridge. The next day, bring the cupcakes to room temperature, re-whip the buttercream for 30 seconds to restore fluffiness, then assemble and decorate. The ghosts look best when they’re freshly piped.
Flavors actually develop nicely overnight. The vanilla becomes more pronounced, and the cake gets even more moist. If you can wait, these are genuinely better on day two.
Nutritional Information & Benefits
Let’s be real — these are cupcakes, not health food. But here’s the estimated breakdown per cupcake (based on 12 servings):
- Calories: 385
- Total Fat: 18g
- Saturated Fat: 11g
- Cholesterol: 75mg
- Sodium: 180mg
- Total Carbohydrates: 52g
- Sugar: 38g
- Protein: 4g
Health Highlights: The buttermilk adds a small amount of calcium and probiotics. The eggs provide protein and vitamin D. And honestly, the biggest benefit is the joy these bring to a room. Sometimes food is about nourishment for the soul, and these ghost cupcakes deliver on that front.
Dietary Considerations: This recipe contains dairy, eggs, and gluten. For nut-free baking, just double-check your chocolate chips — some brands process them on shared equipment with tree nuts.
If you’re watching your sugar intake, you can reduce the sugar in the cupcake batter to ¾ cup without affecting the texture too much. The frosting is harder to lighten up, but you could use a dusting of powdered sugar instead of the full glaze for a less sweet option.
I personally love that these cupcakes aren’t loaded with artificial colors or preservatives. The ghosts get their pure white color from the powdered sugar glaze, not food coloring. It feels better knowing exactly what went into every bite.
Conclusion
These adorable vanilla ghost cupcakes with chocolate chip eyes are everything I want in a Halloween treat — fun to make, gorgeous to look at, and genuinely delicious to eat. They don’t require any special skills or expensive equipment. Just a little patience, a steady hand for piping, and maybe a tiny helper or two to press in those chocolate chip eyes.
The best part? Each ghost comes out with its own personality. Some are tall and dramatic. Some are short and round. Some have wonky eyes that make them look permanently surprised. That’s the charm of handmade treats — they’re imperfect in the most lovable way.
I hope you make these for your next Halloween gathering, or honestly, just for a random Tuesday when you need something cute in your life. They work for both occasions. If you try them, I’d love to hear how they turned out. Drop a comment below and tell me about your ghost creations — especially if your kids helped. Those are always the best stories.
Happy Halloween, and happy baking! 🎃
Frequently Asked Questions
Can I use a boxed cake mix instead of making the batter from scratch?
Absolutely. A white or vanilla boxed cake mix works perfectly. Just prepare it according to the package directions and bake as instructed. The ghost decorations will still look adorable. The homemade version tastes better in my opinion, but I won’t judge you for taking the shortcut.
How do I keep the ghost glaze from running off the cupcakes?
The key is getting the right consistency. Your glaze should be thick enough to hold its shape but thin enough to pipe smoothly. If it’s too runny, add more powdered sugar a tablespoon at a time. Also, make sure your cupcakes are completely cool before you start decorating.
Can I make these ahead of time for a party?
Yes! Bake the cupcakes up to 2 days in advance and store them in an airtight container. Make the frosting and glaze the day before. Assemble and decorate the morning of your party. The ghosts look best within 24 hours of being piped.
What if I don’t have mini chocolate chips for the eyes?
Regular chocolate chips work fine — they just make the ghosts look a little more cartoonish. You can also use candy eyes from the baking aisle, black frosting dots, or even small pieces of dark chocolate. Get creative with what you have on hand.
Can I freeze the decorated ghost cupcakes?
I don’t recommend it. The glaze gets weepy when thawed and loses its smooth ghost shape. If you need to freeze, do it before decorating. Freeze the unfrosted cupcakes, then thaw, frost, and add the ghosts fresh for the best results.
Pin This Recipe!
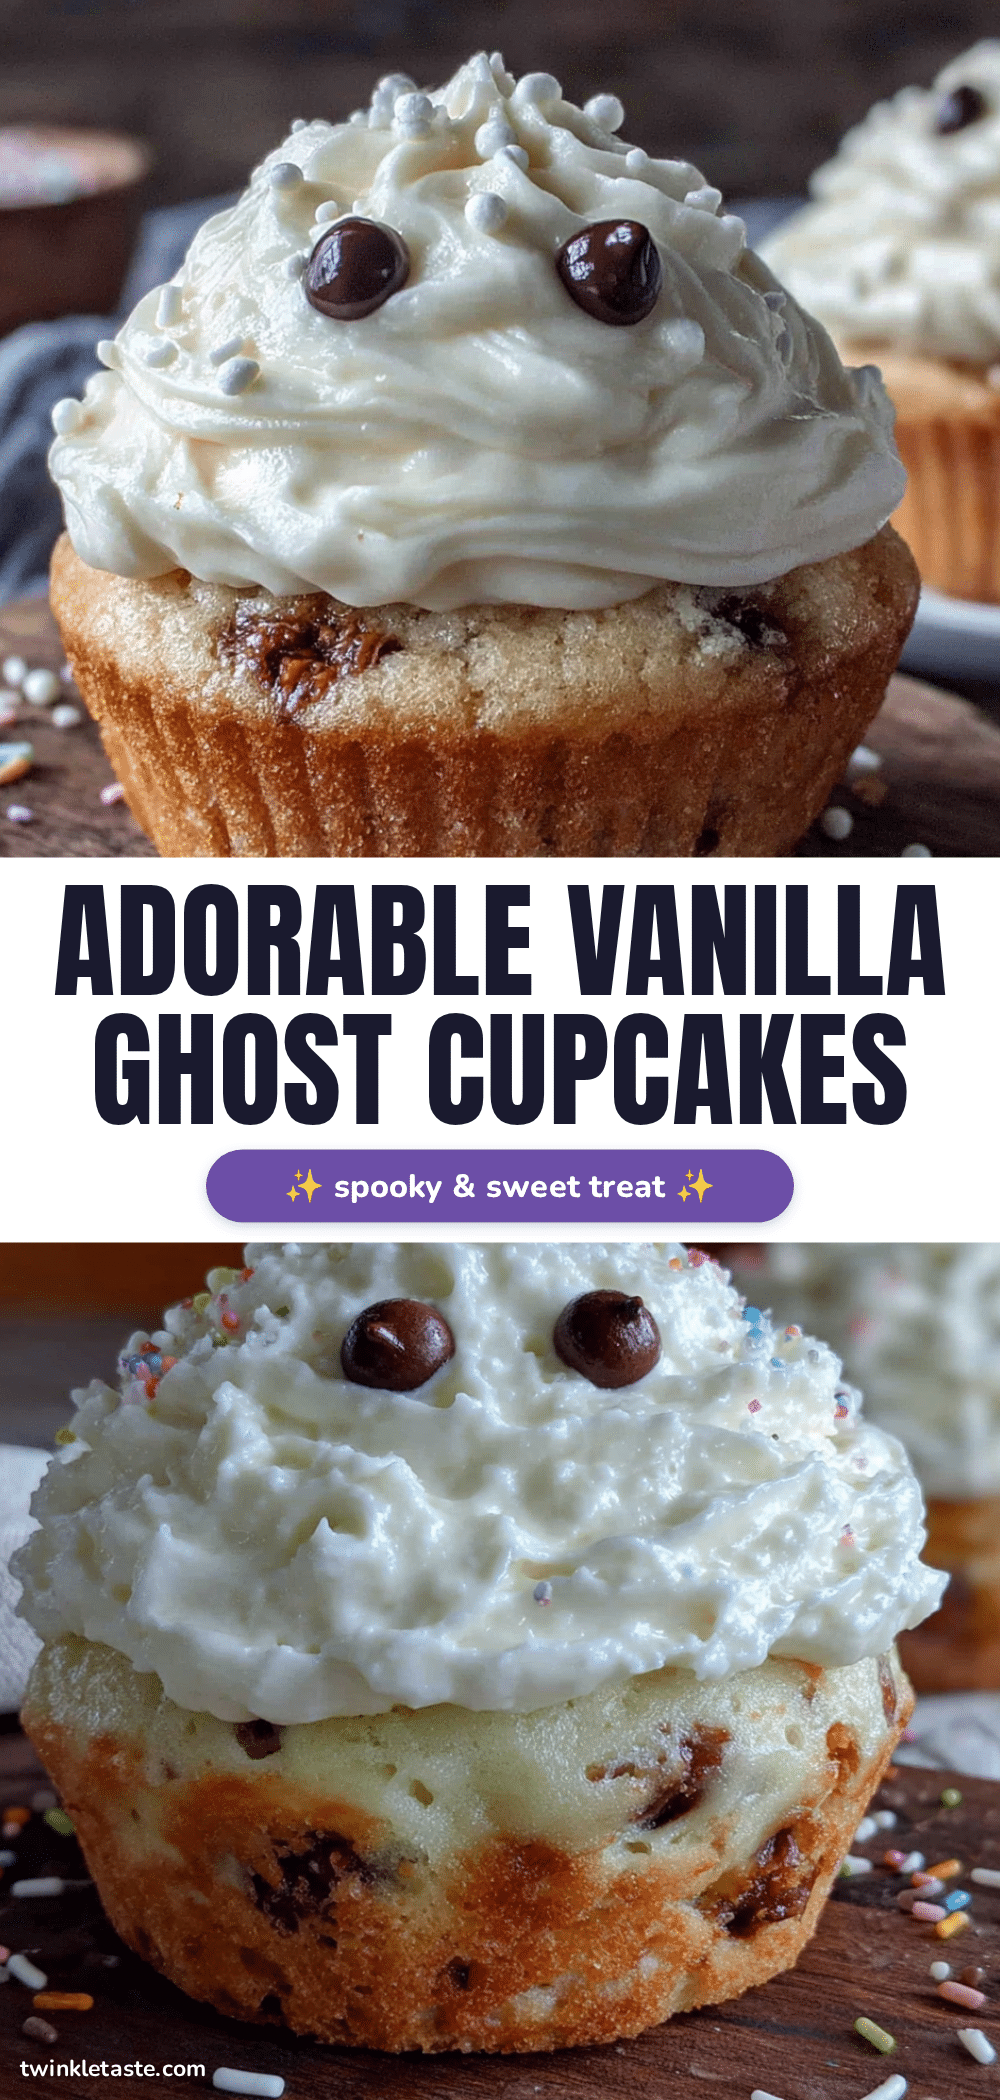
Adorable Vanilla Ghost Cupcakes with Chocolate Chip Eyes
These adorable vanilla ghost cupcakes with chocolate chip eyes are fun to make, gorgeous to look at, and genuinely delicious to eat. They don’t require any special skills or expensive equipment, just a little patience and a steady hand for piping.
- Prep Time: 15 minutes
- Cook Time: 20 minutes
- Total Time: 45 minutes
- Yield: 12 servings 1x
- Category: Dessert
- Cuisine: American
Ingredients
- 1 ½ cups all-purpose flour (spooned and leveled)
- 1 cup granulated sugar
- 1 ½ teaspoons baking powder
- ½ teaspoon baking soda
- ¼ teaspoon salt
- ½ cup unsalted butter, melted and slightly cooled
- 2 large eggs, room temperature
- ¾ cup buttermilk, room temperature
- 2 teaspoons pure vanilla extract
- 1 cup unsalted butter, softened (for frosting)
- 3 ½ cups powdered sugar, sifted (for frosting)
- 2 tablespoons heavy cream or whole milk (for frosting)
- 2 teaspoons pure vanilla extract (for frosting)
- Pinch of salt (for frosting)
- 1 cup powdered sugar (for ghost glaze)
- 2–3 tablespoons milk or water (for ghost glaze)
- ½ teaspoon vanilla extract (for ghost glaze)
- ¼ cup mini chocolate chips (for eyes)
Instructions
- Preheat your oven to 350°F (175°C). Line your muffin tin with paper liners.
- In a large bowl, whisk together the flour, sugar, baking powder, baking soda, and salt until well combined and aerated.
- In a separate bowl, whisk together the melted butter, eggs, buttermilk, and vanilla extract until smooth and slightly thickened.
- Pour the wet ingredients into the dry ingredients. Stir gently with a spatula or whisk until just combined. Do not overmix; a few small lumps are fine.
- Divide the batter evenly among the 12 liners, filling each about ⅔ to ¾ full.
- Bake for 16-20 minutes, or until a toothpick inserted into the center comes out clean or with a few moist crumbs. Rotate the pan halfway through for even baking.
- Let the cupcakes cool in the pan for 5 minutes, then transfer them to a wire rack to cool completely.
- While the cupcakes cool, make the buttercream: Beat the softened butter with an electric mixer until creamy, about 2 minutes. Gradually add the sifted powdered sugar, one cup at a time, beating on low speed. Add the heavy cream and vanilla extract, then increase speed to medium-high and beat for 3-4 minutes until light and fluffy. Add the pinch of salt and beat one more minute.
- Prepare the ghost glaze: In a small bowl, whisk together the powdered sugar, milk, and vanilla extract until smooth. It should be thick but still pourable, like honey consistency.
- Spread a thin layer of buttercream on each cooled cupcake.
- Transfer the ghost glaze to a piping bag or zip-top bag. Snip a small hole in the corner. Pipe a tall, rounded dollop on each cupcake, then pull up slightly to create a little ghost tail.
- While the glaze is still wet, gently press two mini chocolate chips into each ghost for eyes. Place them close together for a cute expression.
- Let the ghosts set at room temperature for about 15-20 minutes before serving.
Notes
For best texture, ensure eggs and buttermilk are at room temperature. Do not overmix the batter. The ghost glaze should have a honey-like consistency; test on a spoon. Press chocolate chips into glaze within 30 seconds of piping. Make extra glaze to avoid running out. Store unfrosted cupcakes in freezer for up to 3 months; decorate fresh.
Nutrition
- Serving Size: 1 cupcake
- Calories: 385
- Sugar: 38
- Sodium: 180
- Fat: 18
- Saturated Fat: 11
- Carbohydrates: 52
- Protein: 4
Keywords: Halloween cupcakes, ghost cupcakes, vanilla cupcakes, chocolate chip eyes, easy Halloween dessert, kid-friendly baking, spooky treats


