Third batch in two days, and I finally stopped overthinking the legs. The first round snapped clean off—too brittle, wrong pretzel angle, I was basically making amputee spiders. The second batch looked like they’d crawled through a flour spill. But this third tray? Eight legs per spider, all angled just right, dark chocolate bodies cracking slightly as they cooled on the counter. My kitchen smelled like a cocoa factory and, honestly, I didn’t care that I’d eaten four test spiders standing over the stove. These Spooky Chocolate Spider Cookies with Crunchy Pretzel Legs were finally the creepy, crunchy, chocolatey Halloween dream I’d been chasing. And now I know exactly how to get you there on your first try.
The thing about spider cookies is they have to look like something you’d find scurrying across a haunted table, not like a sad cookie with toothpicks stuck in it. That’s why the pretzel legs matter so much. They add that satisfying snap when you bite in, a salty contrast to the deep cocoa, and they actually make the cookie look like it’s about to crawl away. I’ve made these for Halloween parties, spooky movie nights, and even just because October hit and my brain demanded something with eight legs. They’re the kind of cookie that makes kids (and adults) do a double-take before grinning and grabbing three.
So whether you’re hosting a costume party, packing a classroom treat, or just want to make your kitchen look like a witch’s bakery, this recipe is the one. No fancy tools, no weird ingredients, just a solid chocolate cookie base and a little pretzel engineering. Let’s make some spiders.
Why You’ll Love This Recipe
I’ve tested these cookies more times than I’d like to admit, and here’s why they keep ending up on my Halloween table year after year:
- Quick & Easy: From mixing bowl to creepy crawlers in about 30 minutes. No chilling required, which means instant spider gratification.
- Simple Ingredients: You probably have most of this in your pantry right now. Cocoa powder, butter, sugar, eggs, flour, and pretzels. No weird specialty stuff.
- Perfect for Halloween: These are the star of any spooky spread. They look impressive but take almost no effort to decorate.
- Crowd-Pleaser: Kids love the crunch, adults love the salty-sweet combo, and everyone loves the creepy factor. I’ve watched people argue over the last spider on the plate.
- Unbelievably Delicious: This isn’t just a gimmick cookie. The chocolate base is rich, fudgy, and perfectly balanced by the salty pretzel legs. You’ll eat them even when it’s not Halloween.
What makes these different from every other spider cookie recipe out there? It’s the pretzel placement. I figured out the exact angle and depth to push the legs so they stay put during baking and don’t snap off when you bite. Plus, the cookie dough itself is designed to spread just enough to look like a spider body without turning into a flat puddle. This isn’t just another version—it’s the one I’d bet my Halloween candy on.
These cookies are the kind that make you close your eyes after the first bite. The crunch of the pretzel, the soft fudgy center, the little hit of salt that makes you reach for another. Perfect for impressing party guests without spending hours in the kitchen, or turning a regular Tuesday into something delightfully spooky.
What Ingredients You Will Need
This recipe uses simple, everyday ingredients to create cookies that look like they crawled out of a haunted bakery. Nothing fancy, just smart choices for maximum flavor and structure.
- Unsalted butter, softened — ½ cup (1 stick / 113g). Softened to room temperature so it creams properly with the sugar. I use Kerrygold for the richer flavor, but any good unsalted butter works.
- Granulated sugar — ½ cup (100g). Adds sweetness and helps create that slight crackle on top of the cookies.
- Light brown sugar, packed — ¼ cup (50g). Adds moisture and a hint of molasses depth that plays beautifully with the cocoa.
- Large egg — 1, at room temperature. Binds everything together. If you forgot to take it out of the fridge, place it in warm water for 5 minutes.
- Vanilla extract — 1 teaspoon. Use pure vanilla extract if you have it; the flavor difference is real.
- All-purpose flour — 1 cup (120g). Spoon and level it—don’t scoop directly from the bag or you’ll end up with dry cookies.
- Unsweetened cocoa powder — ⅓ cup (30g). I prefer Dutch-process cocoa for a darker, more intense chocolate color and flavor. Ghirardelli or Hershey’s Special Dark both work great.
- Baking soda — ½ teaspoon. Helps the cookies spread just enough without turning into pancakes.
- Salt — ¼ teaspoon. Balances the sweetness and makes the chocolate taste more chocolatey.
- Miniature pretzel twists — About 48-60 pretzels (you’ll need 8 legs per spider). Look for the smaller twists, not the big thick ones. Snyder’s Mini Pretzel Twists are my go-to because they’re the perfect size and snap cleanly.
- Candy eyes — 12-15 pairs (2 per spider). The little white and black edible eyes you find in the baking aisle. Wilton makes good ones, or any brand near the cake decorating supplies.
Substitution guidance: If you need a dairy-free option, use vegan butter sticks (I like Miyoko’s) and make sure your candy eyes are dairy-free (most are, but check the label). For a gluten-free version, substitute the all-purpose flour with a 1:1 gluten-free baking flour blend and use gluten-free pretzels. The texture will be slightly different but still delicious.
Equipment Needed
You don’t need a professional bakery setup for these spiders, just a few basics you probably already own:
- Mixing bowls — One medium, one small. Glass or stainless steel works best.
- Electric hand mixer or stand mixer — A hand mixer is perfectly fine. You can also cream the butter and sugar by hand with a wooden spoon if you want a little arm workout.
- Baking sheets — Two standard half-sheet pans. If you only have one, let it cool completely between batches.
- Parchment paper or silicone baking mat — Parchment is non-negotiable here. It prevents sticking and makes cleanup effortless.
- Cookie scoop or tablespoon — A 1.5-tablespoon scoop gives you perfectly uniform spiders. If you don’t have one, use a regular spoon and try to keep portions even.
- Cooling rack — Wire rack for letting cookies cool completely before adding eyes. If you don’t have one, a clean countertop works but takes longer.
- Small offset spatula or butter knife — For gently transferring the baked cookies and for applying the tiny bit of frosting to stick the eyes on.
I’ve made these with just a bowl and a spoon before, and they turned out fine. The cookie scoop just makes life easier and ensures all your spiders are the same size—which matters when you’re trying to get the pretzel legs to look uniform.
Preparation Method
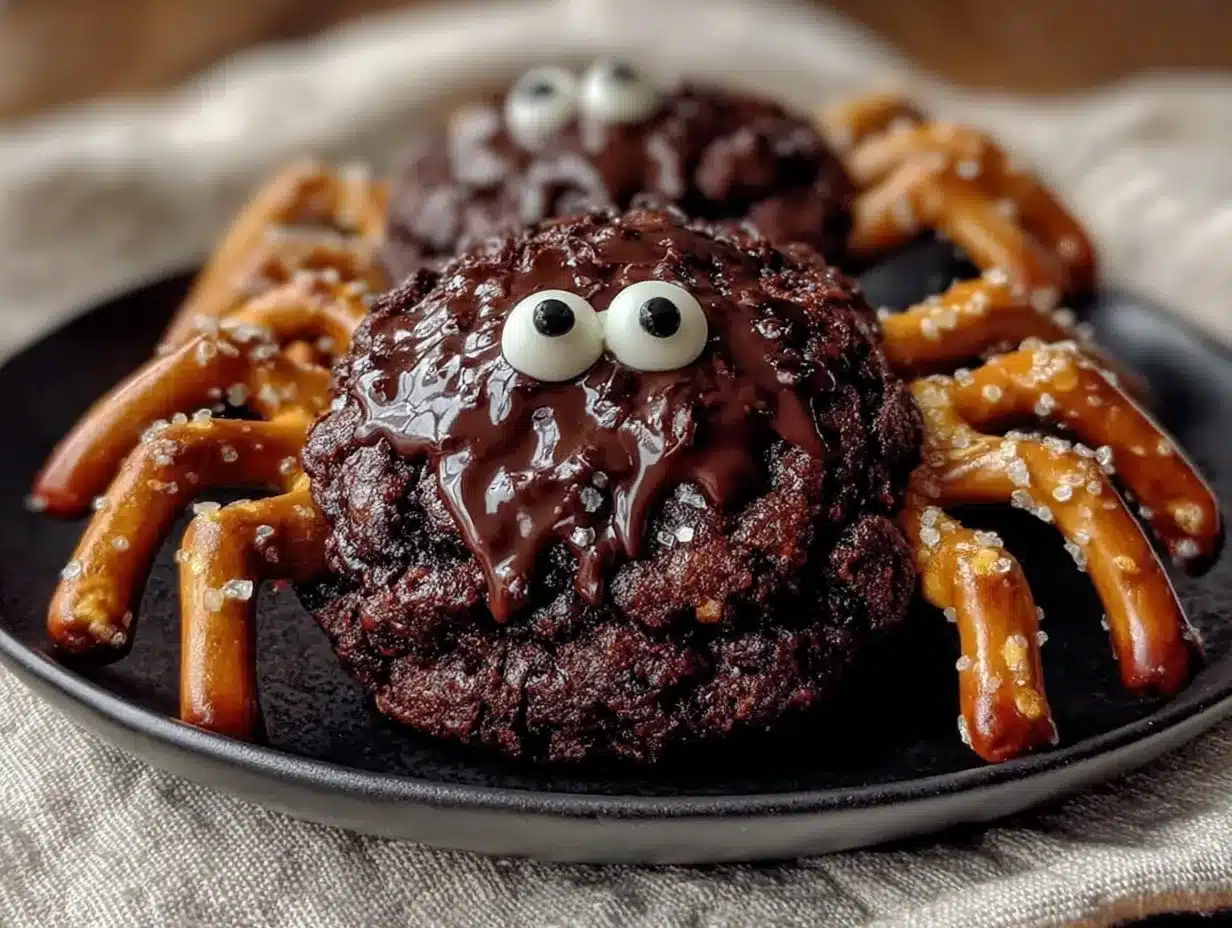
Let’s turn that bowl of ingredients into a batch of spooky spiders. I’ll walk you through every step so you don’t end up with legless nightmares.
- Preheat your oven to 350°F (175°C). Line two baking sheets with parchment paper. This gives the cookies a clean surface to spread on and makes removing them a breeze.
- Cream the butter and sugars. In a medium mixing bowl, beat the softened butter, granulated sugar, and brown sugar together until light and fluffy—about 2-3 minutes with an electric mixer on medium speed. You’ll see the mixture turn pale and increase in volume. Scrape down the sides of the bowl once halfway through.
- Add the egg and vanilla. Crack the egg into the butter-sugar mixture, add the vanilla, and beat on medium speed until fully combined, about 30 seconds. The mixture might look slightly curdled at this point—that’s totally normal, don’t panic.
- Whisk the dry ingredients separately. In a small bowl, whisk together the flour, cocoa powder, baking soda, and salt. This ensures the baking soda and salt are evenly distributed so you don’t get a pocket of salt in one cookie.
- Combine wet and dry. Gradually add the dry ingredients to the wet mixture, mixing on low speed or stirring with a spatula until just combined. Stop as soon as you no longer see streaks of flour. Overmixing will make the cookies tough, and nobody wants a tough spider.
- Scoop the dough. Use your cookie scoop or a tablespoon to portion out rounded tablespoons of dough. Roll each portion into a smooth ball between your palms. Place them on the prepared baking sheets about 2 inches apart—these cookies spread a little, and you don’t want your spiders touching.
- Add the pretzel legs. Here’s the trick: Take a mini pretzel twist and snap it in half at the center loop. You’ll get two curved pieces, each with the classic pretzel bumps on one side. Insert 8 half-pretzels into each dough ball, angled slightly downward and outward, with the bumpy side facing up. Push them in about ¼ inch so they’re secure. Think of it like a spider doing a push-up—legs should curve away from the body. For a more natural look, alternate the angle of each leg slightly. This is the step where my first batch failed because I pushed them in too deep and they disappeared into the dough during baking. Don’t bury them—just a gentle push so they’re held in place.
- Bake. Place the baking sheets in the preheated oven, one at a time if they don’t fit side by side. Bake for 10-12 minutes. The cookies will look puffed and slightly cracked on top. They’ll continue to set as they cool, so don’t overbake. At 10 minutes, the centers should still look slightly soft. The kitchen will smell like a chocolate factory—that’s how you know you’re on track.
- Cool on the baking sheet. Let the cookies rest on the hot baking sheet for 5 minutes. This allows them to firm up enough to move without breaking. The pretzel legs will be hot, so don’t try to adjust them now.
- Transfer to a cooling rack. Using your offset spatula or a butter knife, carefully transfer each spider cookie to a wire cooling rack. Let them cool completely—about 20 minutes—before adding the eyes. If you add eyes while the cookies are still warm, the frosting will melt and the eyes will slide off.
- Attach the candy eyes. Once the cookies are completely cool, dab a tiny amount of frosting or melted chocolate onto the back of each candy eye and press gently onto the front of the spider “head.” Place two eyes close together for that classic cute-but-creepy look. I use a toothpick to apply the frosting—it gives me more control than trying to squeeze from a tube.
Pro tip: If you want extra creepy spiders, you can add a tiny dot of red frosting under the eyes to look like a glowing mouth. My kids insisted on this for “angry spiders” and honestly, it makes them even better for Halloween.
Cooking Tips & Techniques
After making roughly forty-seven batches of these cookies (I’m only slightly exaggerating), here’s what I’ve learned the hard way so you don’t have to:
The pretzel leg angle is everything. My first batch looked like spiders that had been stepped on—legs pointing every which way, some snapped off during baking. The sweet spot is inserting the pretzel half at about a 45-degree angle, with the curved end pointing away from the cookie center. Push it in just enough that it stays, but leave most of the pretzel exposed. Think of how a spider’s legs naturally curve outward and down. Mimic that.
Don’t overbake. I know it’s tempting to leave them in for that extra minute to make sure they’re done, but these cookies are best when they’re slightly underbaked. The centers should be soft and fudgy. Overbaked spiders turn into dry, crumbly spiders, and the pretzel legs will snap off when you try to eat them. Pull them out when the edges look set but the centers still look a little soft.
Work in batches. If you only have one baking sheet, let it cool completely between batches. Putting dough on a hot sheet will cause the butter to melt immediately, and your spiders will spread into flat blobs with legs sticking out at weird angles. Trust me on this one—I ruined an entire batch because I got impatient.
Keep the pretzels organized. Before you start inserting legs, snap all your pretzels in half and arrange them in little piles of 8. This saves you from frantically snapping pretzels while the dough sits and warms up. Warm dough is harder to work with and spreads more during baking.
Multitask like a pro. While one batch is baking, scoop and shape the next batch. By the time the first tray comes out, you’ll have the second tray ready to go. This cuts your total kitchen time in half.
Variations & Adaptations
One of the best things about this recipe is how easy it is to twist (pun intended) for different occasions or dietary needs. Here are some variations I’ve tried and loved:
Peanut Butter Spider Cookies: Replace ¼ cup of the butter with ¼ cup of creamy peanut butter. Reduce the granulated sugar to ⅓ cup. The peanut butter adds a savory richness that pairs insanely well with the chocolate and salty pretzels. I made these for a Halloween potluck and they disappeared in 10 minutes.
White Chocolate Web Spiders: After the cookies cool, drizzle melted white chocolate over the tops in a zigzag pattern to look like spiderwebs. Then add the pretzel legs and eyes. The white against the dark chocolate cookie is stunning and makes them look even more professional.
Gluten-Free Version: Swap the all-purpose flour with a 1:1 gluten-free baking blend (I like King Arthur Measure for Measure). Use gluten-free pretzel twists—there are several good brands available now. The texture will be slightly more tender, but the flavor is still fantastic.
Vegan Adaptation: Use vegan butter sticks and a flax egg (1 tablespoon ground flaxseed mixed with 3 tablespoons water, let sit for 5 minutes). Most candy eyes are accidentally vegan, but double-check the package. The cookies will be a bit more delicate, so handle them gently when adding legs.
Spicy Chocolate Spiders: Add ¼ teaspoon of cayenne pepper and ½ teaspoon of cinnamon to the dry ingredients. The subtle heat builds as you eat, and the cinnamon adds a warm, cozy note that’s perfect for fall. I tried this on a whim and it’s now my secret weapon for adult Halloween parties.
Serving & Storage Suggestions
These spiders are best served at room temperature, which lets the chocolate cookie soften slightly and the pretzels stay perfectly crunchy. Arrange them on a black or orange platter for maximum Halloween vibes. I like to scatter a few extra pretzels around the plate to look like “spider legs” that have fallen off—it’s a little morbid but always gets a laugh.
For a full spooky spread, pair these with a batch of crispy spiderweb brown butter rice krispie treats for a double dose of Halloween fun. They also go beautifully with a warm mug of black sesame latte with caramel drip for a grown-up treat that’s still perfectly on-theme.
Storage: Store the cookies in an airtight container at room temperature for up to 5 days. Layer them between sheets of parchment paper to prevent the pretzel legs from poking into neighboring cookies. Do not refrigerate—the fridge will make the pretzels go stale and soft.
Freezing: You can freeze the unbaked cookie dough balls (without the pretzel legs) for up to 3 months. When you’re ready to bake, place the frozen dough balls on a parchment-lined baking sheet, insert the pretzel legs while the dough is still frozen (it’s actually easier this way—the cold dough holds the pretzels better), and add 1-2 minutes to the baking time. Baked cookies also freeze well for up to 2 months. Thaw at room temperature and add the eyes after thawing.
Reheating: If you want that just-baked experience, pop a cookie in a 300°F oven for 3-4 minutes. The chocolate gets all melty and the pretzels crisp back up. Microwaving works too but will soften the pretzels, so only do 10-second intervals.
The flavors actually get better after a day or two. The chocolate deepens, the salt from the pretzels melds into the cookie, and the texture becomes perfectly balanced between fudgy and crunchy. If you can resist eating them all on day one, you’re in for a treat.
Nutritional Information & Benefits
Let’s be real—these are a treat, not a health food. But here’s the estimated breakdown per spider cookie (based on 15 cookies):
- Calories: Approximately 180-200
- Fat: 9g
- Carbohydrates: 24g
- Protein: 3g
- Sugar: 14g
- Sodium: 180mg
Dietary considerations: This recipe contains gluten, dairy, and eggs. For allergen-friendly versions, check the variations section above. The pretzels add a surprising amount of sodium, which actually helps balance the sweetness and makes these cookies feel more satisfying than your average sugar bomb.
Health highlights: On the bright side, cocoa powder is rich in antioxidants called flavonoids, which have been linked to heart health and improved mood. The pretzels provide a small amount of iron and B vitamins. And honestly? The joy these cookies bring to a Halloween party is a mental health win in my book. Sometimes you just need a spider-shaped cookie to make the world feel a little more magical.
If you’re watching your sugar intake, you can reduce the granulated sugar to ⅓ cup, but the cookies will be less tender and won’t spread as much. I’ve tried it, and they’re still good, just slightly more cake-like.
Conclusion
These Spooky Chocolate Spider Cookies with Crunchy Pretzel Legs are everything I want in a Halloween treat—creepy looking, ridiculously delicious, and actually easy to make. No complicated decorating skills required, no specialty tools, just a solid chocolate cookie and a handful of pretzels that transform into something unforgettable.
I love that you can make these your own. Add peanut butter for richness, spice them up with cayenne for a grown-up version, or keep them classic for the kids. They’re forgiving, they’re fun, and they always, always get a reaction. That moment when someone picks one up and goes, “Wait, the legs are pretzels?!” never gets old.
If you make these, please come back and let me know how they turned out. Did your spiders look terrifying or adorable? Did you add extra legs? Did you eat three before they even made it to the party? (No judgment—I’ve been there.) Leave a comment below or tag me in your photos—I genuinely love seeing your creepy creations.
Now go make some spiders. Halloween is waiting, and your cookie sheet is ready.
Frequently Asked Questions
Can I make these cookies ahead of time for a party?
Absolutely. You can bake them up to 3 days in advance and store them in an airtight container at room temperature. Add the candy eyes right before serving so they stay bright and don’t get smudged. You can also freeze the baked cookies for up to 2 months—just thaw at room temperature and add fresh eyes.
Why did my pretzel legs fall off during baking?
This usually happens when the pretzels aren’t pushed in far enough, or the dough is too warm. Make sure you’re inserting each pretzel half about ¼ inch into the dough. If your kitchen is hot, chill the scooped dough balls for 10 minutes before adding the legs. Also, don’t overbake—cookies that are too dry will shrink away from the pretzels.
Can I use regular-sized pretzels instead of mini twists?
You can, but they’ll look a bit oversized for the cookies. If you only have regular pretzels, snap them into smaller pieces—aim for pieces about 1.5 inches long. The thicker pretzels will also be harder to bite through, so mini twists really are the best option for that perfect crunch.
What can I use instead of candy eyes?
If you can’t find candy eyes, you can make your own by piping small dots of white frosting and adding a tiny black sprinkle in the center. Or skip the eyes entirely—the cookies still look like spiders with just the pretzel legs. For a different look, use mini chocolate chips pressed into the dough before baking for embedded “eyes.”
How do I keep the cookies from spreading too much?
Make sure your butter is softened but not melted. If your kitchen is warm, chill the dough balls for 15 minutes before baking. Also, check that your baking soda is fresh—old baking soda loses its leavening power and can cause excessive spreading. Finally, don’t flatten the dough balls; leave them rounded so they spread into natural spider shapes.
Pin This Recipe!
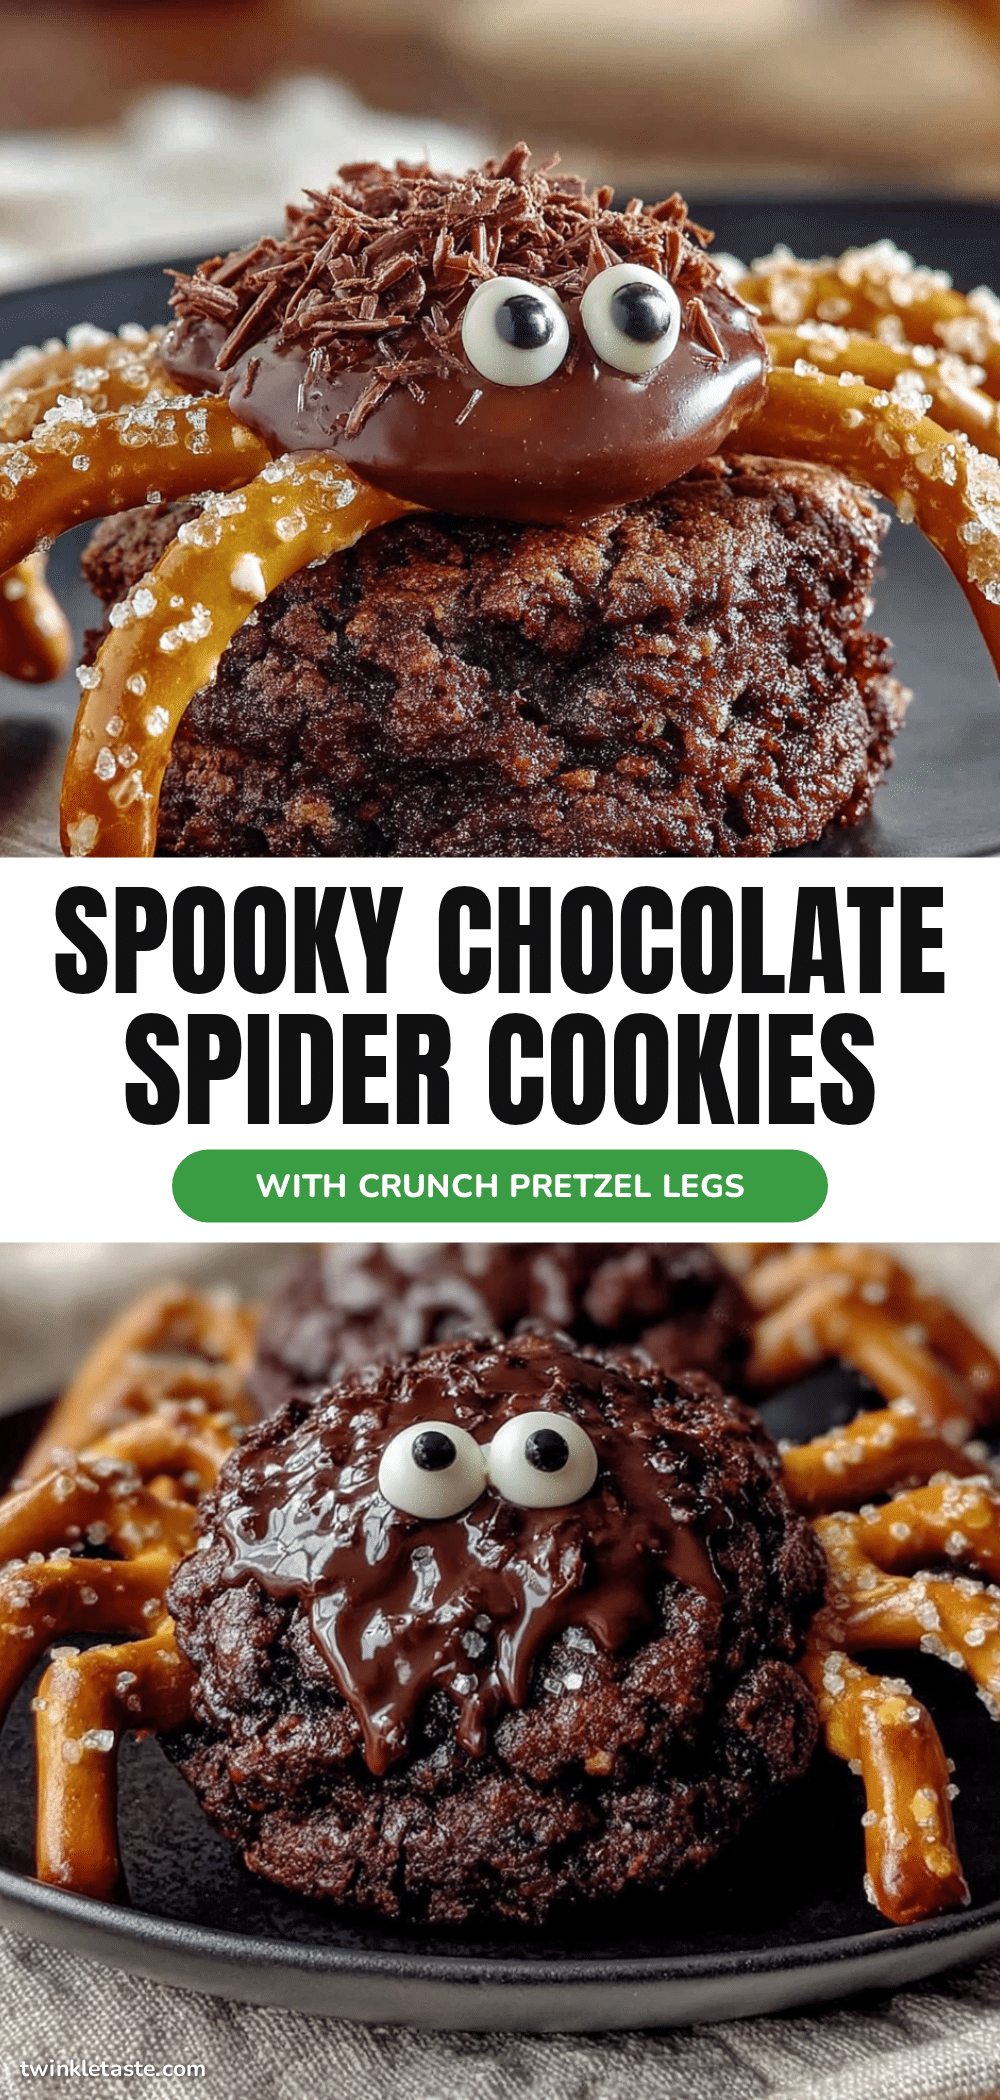
Best Easy Spider Cookies Recipe with Crunchy Pretzel Legs

These spooky chocolate spider cookies with crunchy pretzel legs are the perfect Halloween treat. Easy to make with simple ingredients, they feature a rich, fudgy chocolate base and salty pretzel legs that add a satisfying crunch.
- Prep Time: 15 minutes
- Cook Time: 12 minutes
- Total Time: 27 minutes
- Yield: 15 servings 1x
- Category: Dessert
- Cuisine: American
Ingredients
- ½ cup (1 stick / 113g) unsalted butter, softened
- ½ cup (100g) granulated sugar
- ¼ cup (50g) light brown sugar, packed
- 1 large egg, at room temperature
- 1 teaspoon vanilla extract
- 1 cup (120g) all-purpose flour
- ⅓ cup (30g) unsweetened cocoa powder (Dutch-process preferred)
- ½ teaspoon baking soda
- ¼ teaspoon salt
- 48–60 miniature pretzel twists (8 per spider)
- 12–15 pairs candy eyes (2 per spider)
Instructions
- Preheat your oven to 350°F (175°C). Line two baking sheets with parchment paper.
- In a medium mixing bowl, beat the softened butter, granulated sugar, and brown sugar together until light and fluffy, about 2-3 minutes with an electric mixer on medium speed. Scrape down the sides once halfway through.
- Add the egg and vanilla, and beat on medium speed until fully combined, about 30 seconds.
- In a small bowl, whisk together the flour, cocoa powder, baking soda, and salt.
- Gradually add the dry ingredients to the wet mixture, mixing on low speed or stirring with a spatula until just combined. Do not overmix.
- Using a cookie scoop or tablespoon, portion out rounded tablespoons of dough. Roll each into a smooth ball and place on the prepared baking sheets about 2 inches apart.
- Snap each mini pretzel twist in half at the center loop to get two curved pieces. Insert 8 half-pretzels into each dough ball, angled slightly downward and outward, with the bumpy side facing up. Push them in about ¼ inch so they are secure.
- Bake for 10-12 minutes. The cookies should look puffed and slightly cracked on top, with centers still slightly soft.
- Let the cookies rest on the hot baking sheet for 5 minutes.
- Transfer to a wire cooling rack and let cool completely, about 20 minutes.
- Once completely cool, dab a tiny amount of frosting or melted chocolate onto the back of each candy eye and press gently onto the front of the spider ‘head’.
Notes
For best results, insert pretzel legs at a 45-degree angle, leaving most of the pretzel exposed. Do not overbake; cookies are best when slightly underbaked for a fudgy center. Store in an airtight container at room temperature for up to 5 days. Unbaked dough balls can be frozen for up to 3 months.
Nutrition
- Serving Size: 1 spider cookie
- Calories: 190
- Sugar: 14
- Sodium: 180
- Fat: 9
- Saturated Fat: 5
- Carbohydrates: 24
- Fiber: 1
- Protein: 3
Keywords: spider cookies, Halloween cookies, chocolate cookies, pretzel legs, easy Halloween treat, spooky cookies


