I did not trust chocolate chips in pumpkin bread. Honestly, it felt like a betrayal of everything I loved about a plain, simple pumpkin loaf. I was that person—the one who would side-eye any recipe that tried to gild the lily. Pumpkin bread is supposed to be about the warm spice, the tender crumb, and that earthy sweetness. Why would you muddy that with chocolate? It seemed like a decision made by someone who didn’t respect the squash.
Then my neighbor, a woman who gardens with the kind of obsessive precision I reserve for organizing my spice rack, dropped off a loaf wrapped in foil. She said it was her “fall emergency bread.” I took it politely, thinking I’d give it to my kids for an after-school snack. But later that night, standing in the kitchen in the dark, I cut a thin slice. The cinnamon sugar top cracked under the knife, and I saw a glint of a chocolate chip. I almost put it back.
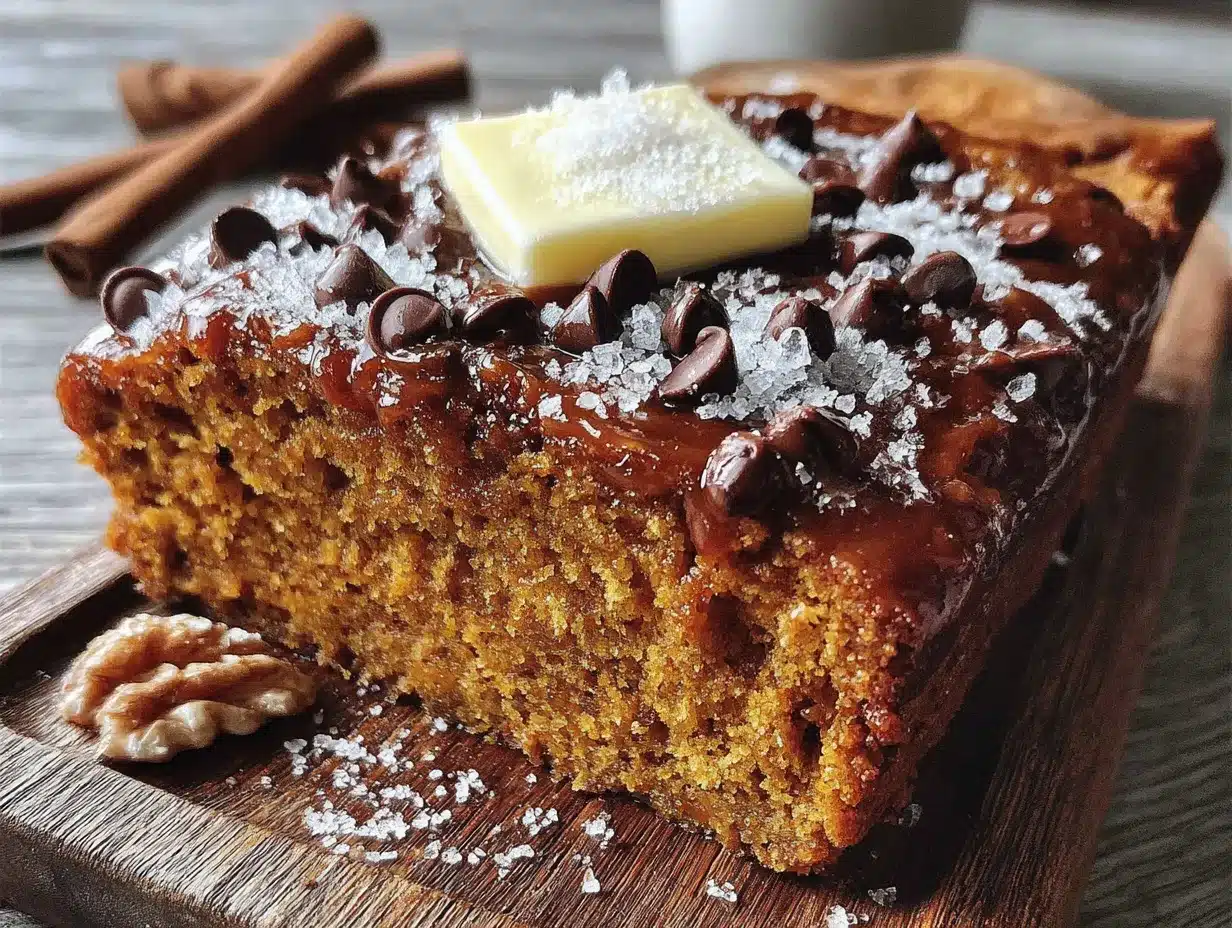
I took a bite anyway. And that was it. The chocolate wasn’t fighting the pumpkin; it was making it better. It was like finding out your quiet friend has a secret, brilliant hobby. The bitterness of the dark chocolate cut through the sweet, spiced loaf in a way that made me understand what I’d been missing. The cinnamon sugar crust shattered with a satisfying crunch against the soft, moist interior. Honestly, I ate three more slices standing at the counter. This recipe, this Best Chocolate Chip Pumpkin Bread with Cinnamon Sugar Top, isn’t just good. It’s the kind of bread that makes you rethink everything you thought you knew about fall baking. It’s the one you’ll want to make on repeat, not because it’s fancy, but because it’s quietly, deeply perfect.
Why You’ll Love This Recipe
This isn’t your average pumpkin bread. I’ve tested this recipe more times than I care to admit, tweaking the flour ratio and the spice blend until it was just right. The result is a loaf that’s incredibly moist but never gummy, with a tender crumb that practically melts.
- Incredibly Moist & Tender: The combination of pumpkin puree and oil creates a bread that stays soft for days. You won’t get that dry, crumbly texture that plagues so many pumpkin recipes.
- Perfectly Balanced Flavor: The warm pumpkin spice doesn’t overpower the rich, nutty flavor of the pumpkin itself. The semi-sweet chocolate chips add pockets of gooey, bittersweet goodness that complement, not compete.
- That Irresistible Cinnamon Sugar Top: This is the star of the show. It creates a crunchy, crackly crust that contrasts beautifully with the soft bread underneath. It’s the best part, and you’ll be fighting for the end pieces.
- Simple, Pantry-Friendly Ingredients: You probably have most of these items in your kitchen right now. No weird, hard-to-find ingredients, just good, honest baking staples.
- Perfect for Any Occasion: This bread is equally at home on a Thanksgiving dessert table as it is in a lunchbox or with a cup of coffee on a crisp morning. It’s a crowd-pleaser that always gets asked for.
- Better the Next Day: I know it sounds crazy, but this bread is even better the day after it’s baked. The flavors meld together, and the texture becomes even more perfect. It’s the ultimate make-ahead treat.
This recipe is different because it respects the pumpkin. It doesn’t drown it in sugar or hide it under a ton of spice. It lets the pure, honest flavor of the squash shine, while the chocolate and cinnamon sugar add a little drama. It’s the bread you’ll bake when you want to impress without the stress.
What Ingredients You Will Need
This recipe uses simple, wholesome ingredients to deliver a bold, satisfying flavor. Most of these are pantry staples, making this an easy last-minute baking project.
- All-Purpose Flour (1 ¾ cups / 218g): The foundation of our bread. I use unbleached all-purpose flour for the best structure. Spoon and level your flour for the most accurate measurement—don’t scoop directly from the bag or you’ll end up with a dry loaf.
- Baking Soda (1 teaspoon): This is our main leavening agent. Make sure it’s fresh for the best rise. You can test it by dropping a little into vinegar—if it fizzes vigorously, it’s good to go.
- Pumpkin Pie Spice (1 ½ teaspoons): You can use store-bought or make your own with a mix of cinnamon, nutmeg, ginger, and cloves. I prefer a blend that’s heavy on the cinnamon and light on the clove.
- Ground Cinnamon (1 teaspoon): This adds a warm, sweet spice that pairs perfectly with the pumpkin. I recommend a good-quality cinnamon like Saigon or Ceylon for a more complex flavor.
- Salt (½ teaspoon): Don’t skip this! Salt doesn’t just make things salty—it enhances all the other flavors and balances the sweetness.
- Granulated Sugar (1 cup / 200g): Provides sweetness and helps create a tender crumb. It also contributes to that beautiful brown crust.
- Brown Sugar (½ cup / 100g, packed): I use light brown sugar for its moisture and subtle molasses flavor, which adds depth to the pumpkin. Pack it firmly into your measuring cup.
- Vegetable Oil (½ cup / 120ml): This is the secret to an incredibly moist bread that stays soft for days. Use a neutral oil like canola or grapeseed. Do not substitute melted butter—it will change the texture.
- Large Eggs (2, at room temperature): Eggs provide structure and richness. Room-temperature eggs emulsify better into the batter, creating a smoother, more even crumb. Let them sit on the counter for 30 minutes before you start.
- Vanilla Extract (2 teaspoons): Pure vanilla extract adds a warm, aromatic flavor that rounds out the spices. Imitation vanilla will work, but pure is always better.
- Pumpkin Puree (1 can / 15 oz / 425g): Make sure you buy 100% pure pumpkin puree, not pumpkin pie filling. The filling is pre-sweetened and spiced, which will throw off the recipe. Libby’s is my go-to brand for consistent results.
- Semi-Sweet Chocolate Chips (1 cup / 175g): I prefer semi-sweet because they aren’t too sweet and their bitterness balances the sweet pumpkin bread perfectly. You can use dark chocolate chips for an even more intense flavor, or milk chocolate if you have a sweeter tooth.
- For the Cinnamon Sugar Topping:
- Granulated Sugar (2 tablespoons)
- Ground Cinnamon (1 teaspoon)
Equipment Needed
You don’t need a fancy bakery setup for this one. Here’s what you’ll need:
- 9×5-inch Loaf Pan: This is the standard size for a classic loaf. A glass or metal pan works well. If you use a dark, non-stick pan, you may need to reduce the baking time by 5-10 minutes as it can brown the crust faster.
- Large Mixing Bowls: You’ll need one for the dry ingredients and one for the wet ingredients. A set of nesting bowls is a great investment.
- Whisk: For combining the dry ingredients and for mixing the wet ingredients.
- Rubber Spatula: This is essential for folding in the chocolate chips and scraping down the sides of the bowl. Don’t use a wooden spoon for this—a spatula is much gentler.
- Parchment Paper: I highly recommend lining your loaf pan with a parchment sling. It makes lifting the finished bread out of the pan so much easier, and cleanup is a breeze. Just leave an overhang on the long sides.
- Cooling Rack: A wire rack allows air to circulate around the bread as it cools, preventing the bottom from getting soggy.
- Measuring Cups and Spoons: For accurate measurements. A kitchen scale is even better for precision, especially for the flour.
Preparation Method
Let’s get baking! Follow these steps carefully, and you’ll have a perfect loaf every time.
- Preheat and Prep: Preheat your oven to 350°F (175°C). Grease a 9×5-inch loaf pan and line it with a parchment paper sling, leaving an overhang on the two long sides. This will make it super easy to lift the bread out later.
- Mix the Dry Ingredients: In a large bowl, whisk together the all-purpose flour, baking soda, pumpkin pie spice, ground cinnamon, and salt. Whisking aerates the flour and ensures the leavening agents and spices are evenly distributed. Set this bowl aside.
- Combine the Wet Ingredients: In a separate, larger bowl, whisk together the granulated sugar, packed brown sugar, and vegetable oil until well combined and smooth. The mixture will look a bit grainy from the sugar, and that’s perfectly fine.
- Add the Eggs and Vanilla: Whisk in the room-temperature eggs, one at a time, until each is fully incorporated. Then, whisk in the vanilla extract. The mixture should be smooth and glossy.
- Add the Pumpkin Puree: Add the entire can of pumpkin puree to the wet ingredients. Whisk until completely smooth. The batter will be thick and a beautiful deep orange color. Don’t overmix here—just get it smooth.
- Combine Wet and Dry: Pour the wet ingredients into the bowl with the dry ingredients. Use a rubber spatula to gently fold the mixture together. Stir just until you see no more streaks of flour. A few small lumps are okay. Overmixing at this stage will develop the gluten too much, resulting in a tough, dense bread.
- Fold in the Chocolate Chips: Add the semi-sweet chocolate chips to the batter. Gently fold them in with your spatula, being careful not to overmix. You want them evenly distributed throughout the batter.
- Prepare the Topping: In a small bowl, stir together the 2 tablespoons of granulated sugar and 1 teaspoon of ground cinnamon. Set this aside.
- Fill the Pan: Pour the batter into your prepared loaf pan. Use your spatula to spread it into an even layer. It will be a thick batter, so take your time to get it into the corners.
- Add the Topping: Sprinkle the cinnamon sugar mixture evenly over the top of the batter. Don’t be shy—cover the entire surface. This is what will create that amazing crackly crust.
- Bake: Place the pan in the preheated oven and bake for 55-65 minutes. The bread is done when a wooden skewer or toothpick inserted into the center comes out clean or with a few moist crumbs. If the top is browning too quickly before the center is done, tent the pan loosely with aluminum foil for the last 15-20 minutes of baking.
- Cool in the Pan: Let the bread cool in the pan on a wire rack for about 15 minutes. This allows it to set and makes it easier to remove.
- Remove and Cool Completely: Using the parchment paper sling, lift the bread out of the pan and transfer it to the wire rack to cool completely. This is crucial. If you slice it while it’s still warm, it will be too tender and may fall apart. Patience, my friend! Let it cool for at least an hour before slicing.
Cooking Tips & Techniques
I’ve made this bread dozens of times, and I’ve learned a few things the hard way. Here are my best tips for success.
Don’t Overmix the Batter. This is the number one mistake people make with quick breads. Once you add the dry ingredients to the wet, mix only until the flour disappears. Overmixing develops the gluten, which will make your bread tough and dense instead of tender and light. It’s okay if there are a few small lumps.
Test for Doneness Correctly. Ovens can be liars. They run hot or cold, and the center of the bread can look done when it’s not. The best test is the toothpick test. Insert a wooden skewer or toothpick into the very center of the loaf. If it comes out clean or with just a few moist crumbs clinging to it, it’s done. If it comes out with wet batter on it, it needs more time.
Room Temperature Ingredients Matter. I know it’s tempting to use cold eggs straight from the fridge, but taking the time to let them come to room temperature really does make a difference. Room-temperature ingredients emulsify better, creating a smoother, more consistent batter and a better rise. Just set your eggs on the counter for 30 minutes before you start.
Use a Parchment Sling. Trust me on this one. A parchment sling is a game-changer. Just cut a piece of parchment paper that’s about 8 inches wide and long enough to hang over the long sides of your pan. Grease the pan, then place the paper inside. It makes lifting the finished bread out a breeze, and it keeps your pan clean.
Let It Cool Completely. I know the smell of freshly baked pumpkin bread is intoxicating, and you’re going to want to slice into it immediately. But if you do, you’ll be left with a crumbly mess. The bread needs time to set and firm up. Let it cool in the pan for 15 minutes, then on a wire rack for at least an hour. The wait is worth it.
Variations & Adaptations
This recipe is a great base, and it’s easy to adapt to your own tastes or dietary needs.
- Gluten-Free Option: You can substitute the all-purpose flour with a good 1:1 gluten-free baking flour blend. I’ve had great success with Bob’s Red Mill 1-to-1 Baking Flour. The texture will be slightly different, but it will still be delicious.
- Nutty Crunch: Add ½ cup of chopped walnuts or pecans along with the chocolate chips. Toasting the nuts beforehand in a dry skillet for a few minutes will really deepen their flavor. This is a wonderful variation if you want a little extra texture.
- Different Chocolate: Feel free to experiment with different types of chocolate chips. Dark chocolate chips will give you a more intense, less sweet flavor. White chocolate chips will make it taste like a pumpkin spice latte in bread form. Milk chocolate chips are great for a sweeter, more kid-friendly loaf.
- Spice It Up: If you like a more intense spice flavor, add an extra ½ teaspoon of pumpkin pie spice or a pinch of ground cloves and nutmeg. You could also add a teaspoon of fresh, grated ginger for a warm, zesty kick.
- Streusel Topping: For an even more decadent treat, skip the simple cinnamon sugar top and make a streusel. Combine ¼ cup flour, ¼ cup brown sugar, ¼ cup cold butter (cubed), and 1 teaspoon cinnamon. Use a pastry cutter or your fingers to work the butter into the dry ingredients until it resembles coarse crumbs. Sprinkle this over the batter before baking.
I once tried a version where I swapped the semi-sweet chips for a chopped-up dark chocolate bar and added a handful of dried cranberries. The tartness of the cranberries against the bitter chocolate and sweet pumpkin was incredible. It’s a great option for a holiday gathering.
Serving & Storage Suggestions
This bread is wonderful in so many ways. Here’s how to serve and store it.
Serving: This bread is best served at room temperature. A slice with a pat of salted butter is a classic choice, but it’s also fantastic on its own. For a real treat, warm a slice in the microwave for about 15 seconds and serve it with a scoop of vanilla ice cream or a drizzle of caramel sauce. It’s also perfect for breakfast with a cup of coffee or a best iced pumpkin chai latte.
Storage: Store the completely cooled bread in an airtight container at room temperature. It will stay moist and delicious for up to 4 days. If you live in a very humid climate, you can store it in the refrigerator, but it may dry out slightly faster.
Freezing: This bread freezes beautifully! Once the loaf is completely cool, wrap it tightly in a layer of plastic wrap, then in a layer of aluminum foil. You can also freeze individual slices, which is perfect for grab-and-go breakfasts. It will keep in the freezer for up to 3 months. To thaw, just leave it on the counter for a few hours or overnight.
Reheating: To revive a slice, pop it in the microwave for 10-15 seconds. For a crispier top, you can reheat it in a 300°F (150°C) oven for about 5-10 minutes. The flavors actually deepen and meld together after a day or two, making this one of those rare breads that’s even better the next day.
Nutritional Information & Benefits
Please note that these are estimates and will vary based on specific ingredients used.
| Nutrient | Per Slice (1/12 of loaf) |
|---|---|
| Calories | ~320 |
| Fat | ~15g |
| Carbohydrates | ~45g |
| Protein | ~4g |
| Fiber | ~2g |
| Sugar | ~28g |
Pin This Recipe!
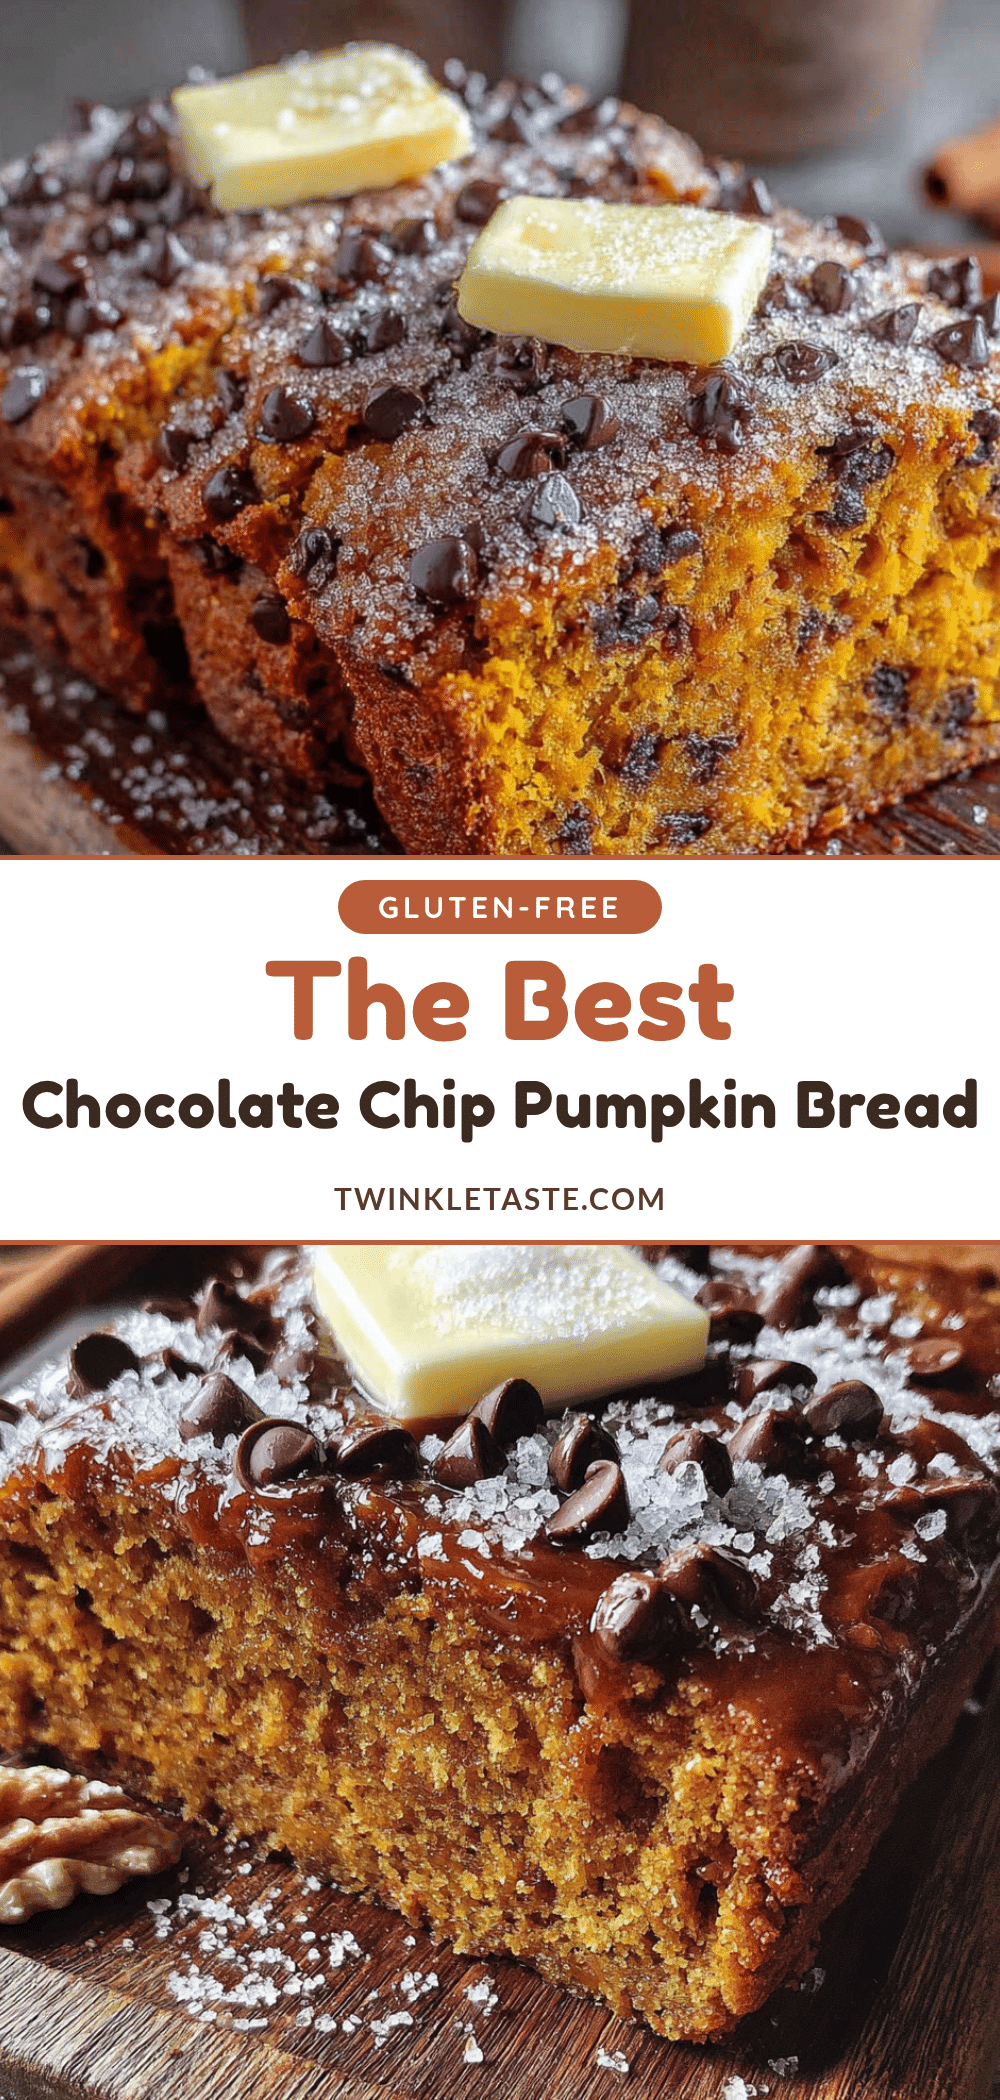
Best Chocolate Chip Pumpkin Bread with Easy Cinnamon Sugar Top
This incredibly moist and tender pumpkin bread is studded with semi-sweet chocolate chips and topped with a crunchy cinnamon sugar crust. It’s the perfect fall treat that’s even better the next day.
- Prep Time: 15 minutes
- Cook Time: 55-65 minutes
- Total Time: 1 hour 15 minutes (plus cooling time)
- Yield: 12 servings 1x
- Category: Dessert
- Cuisine: American
Ingredients
- 1 ¾ cups (218g) all-purpose flour
- 1 teaspoon baking soda
- 1 ½ teaspoons pumpkin pie spice
- 1 teaspoon ground cinnamon
- ½ teaspoon salt
- 1 cup (200g) granulated sugar
- ½ cup (100g) packed light brown sugar
- ½ cup (120ml) vegetable oil
- 2 large eggs, at room temperature
- 2 teaspoons vanilla extract
- 1 can (15 oz / 425g) 100% pure pumpkin puree
- 1 cup (175g) semi-sweet chocolate chips
- For the Cinnamon Sugar Topping:
- 2 tablespoons granulated sugar
- 1 teaspoon ground cinnamon
Instructions
- Preheat your oven to 350°F (175°C). Grease a 9×5-inch loaf pan and line it with a parchment paper sling, leaving an overhang on the two long sides.
- In a large bowl, whisk together the all-purpose flour, baking soda, pumpkin pie spice, ground cinnamon, and salt. Set aside.
- In a separate, larger bowl, whisk together the granulated sugar, packed brown sugar, and vegetable oil until well combined and smooth.
- Whisk in the room-temperature eggs, one at a time, until each is fully incorporated. Then, whisk in the vanilla extract.
- Add the entire can of pumpkin puree to the wet ingredients and whisk until completely smooth.
- Pour the wet ingredients into the bowl with the dry ingredients. Use a rubber spatula to gently fold the mixture together just until no streaks of flour remain. Do not overmix.
- Add the semi-sweet chocolate chips and gently fold them in with the spatula until evenly distributed.
- In a small bowl, stir together the 2 tablespoons of granulated sugar and 1 teaspoon of ground cinnamon for the topping.
- Pour the batter into the prepared loaf pan and spread it into an even layer. Sprinkle the cinnamon sugar mixture evenly over the top.
- Bake for 55-65 minutes, or until a wooden skewer or toothpick inserted into the center comes out clean or with a few moist crumbs. If the top is browning too quickly, tent the pan loosely with aluminum foil for the last 15-20 minutes.
- Let the bread cool in the pan on a wire rack for 15 minutes.
- Using the parchment paper sling, lift the bread out of the pan and transfer it to the wire rack to cool completely (at least 1 hour) before slicing.
Notes
For best results, use room temperature ingredients. Do not overmix the batter. Let the bread cool completely before slicing to prevent it from falling apart. The bread can be stored in an airtight container at room temperature for up to 4 days, or frozen for up to 3 months.
Nutrition
- Serving Size: 1 slice (1/12 of loa
- Calories: 320
- Sugar: 28
- Fat: 15
- Carbohydrates: 45
- Fiber: 2
- Protein: 4
Keywords: pumpkin bread, chocolate chip pumpkin bread, cinnamon sugar pumpkin bread, fall baking, pumpkin recipe, easy pumpkin bread


