Pulling a slightly burnt graham cracker crust out of the oven at 10 PM on a Tuesday, and honestly, I almost just scraped the whole thing into the trash. The pumpkin filling was already sitting on the counter, staring at me, and the baby had finally gone down after what felt like hours of negotiation. I didn’t have the energy to start over, and I definitely didn’t have another sleeve of graham crackers. So I scraped off the darkest edges, pressed the crust back together with the back of a spoon, and poured the filling in anyway, hoping for the best.
That slightly-charred, totally-imperfect pan of creamy pumpkin cheesecake bars ended up being the thing everyone reached for first at the potluck the next day. Not the fancy bakery cake, not the store-bought cookies. These bars. The ones I almost threw away. There’s something about a recipe born from a near-disaster that just tastes better, you know? It’s humbling, and it’s honest.
These creamy pumpkin cheesecake bars have become my go-to for fall gatherings ever since. They’re not fussy, they don’t require a water bath, and they deliver that perfect swirl of tangy cheesecake and spiced pumpkin on a buttery, crunchy base. It’s the kind of dessert that makes you close your eyes for a second after the first bite. And honestly, that’s the kind of recipe worth keeping around.
Why You’ll Love This Recipe
I’ve tested this recipe at least six times to get that perfect balance—not too dense, not too jiggly, with a crust that stays crisp even after a day in the fridge. This isn’t just another pumpkin bar; it’s the one I bring to Thanksgiving, Friendsgiving, and random Tuesday nights when I need a little comfort.
- Quick & Easy: No water bath, no complicated steps. You can have these in the oven in about 20 minutes.
- Simple Ingredients: You probably have most of these in your pantry right now. No weird extracts or hard-to-find spices.
- Perfect for Fall Gatherings: Great for Thanksgiving dessert tables, Halloween parties, or cozy weekend baking.
- Crowd-Pleaser: Even people who say they “don’t like pumpkin” go back for seconds. It’s the cheesecake that wins them over.
- Unbelievably Delicious: That creamy, tangy filling against the spiced pumpkin swirl? It’s next-level comfort food, I promise.
What makes this version different is the technique. I use a slightly higher ratio of cream cheese to pumpkin, which keeps the cheesecake layer rich and stable without being heavy. And I pre-bake the crust just long enough to get it golden, so it doesn’t get soggy from the filling. It’s a small tweak, but it makes all the difference. This recipe is the kind that makes you look like a hero with very little effort—and honestly, that’s my favorite kind of recipe to share.
What Ingredients You Will Need
This recipe uses simple, wholesome ingredients to deliver that signature creamy texture and warm fall flavor. Most of these are pantry staples, and I’ve included a few notes to help you pick the best options.
- Graham Cracker Crumbs (1 ½ cups / about 12 full sheets): You can use store-bought crumbs or crush your own. I prefer crushing my own with a rolling pin for a more rustic texture. Keebler is my go-to brand for consistent flavor.
- Unsalted Butter (6 tablespoons, melted): Melted butter binds the crust. Use unsalted so you can control the salt level. If you only have salted, just skip the pinch of salt in the crust.
- Granulated Sugar (¼ cup for crust + ¾ cup for cheesecake filling): Regular white sugar works best here. It dissolves easily and doesn’t compete with the pumpkin spice.
- Salt (¼ teaspoon for crust): A tiny pinch balances the sweetness and brings out the buttery flavor.
- Cream Cheese (16 ounces / two 8-ounce blocks, softened): Full-fat cream cheese is non-negotiable for the creamiest texture. Let it sit at room temperature for at least 30 minutes before mixing. Philadelphia is my trusted brand.
- Granulated Sugar (¾ cup for filling): Sweetens the cheesecake without overpowering the tang.
- Pumpkin Purée (1 cup): Make sure you grab 100% pure pumpkin purée, not pumpkin pie filling. Libby’s is reliable and has a consistent texture.
- Large Eggs (2, room temperature): Room-temperature eggs blend more smoothly into the batter, preventing lumps. Let them sit out with the cream cheese.
- Vanilla Extract (1 teaspoon): Pure vanilla extract adds warmth and depth. Imitation works in a pinch, but pure is better.
- Pumpkin Pie Spice (1 ½ teaspoons): You can use store-bought or make your own with cinnamon, nutmeg, ginger, and cloves. I like using a homemade blend for a fresher flavor.
- Cinnamon (½ teaspoon): Adds an extra layer of warmth to the pumpkin layer.
- Heavy Cream (¼ cup): This makes the cheesecake filling extra luscious. You can substitute with half-and-half, but it won’t be as rich.
Equipment Needed
You don’t need a fancy kitchen to make these bars. Here’s what you’ll need and a few tips on alternatives.
- 9×9-inch Baking Pan: This is the perfect size for thick, square bars. An 8×8 pan works too, but your bars will be slightly taller and may need a few extra minutes of baking time.
- Electric Hand Mixer or Stand Mixer: A hand mixer is perfect here—it’s easier to control and you won’t overmix. If you don’t have one, a sturdy whisk and some elbow grease will work, but expect a little more effort.
- Mixing Bowls: You’ll need at least two medium bowls—one for the crust and one for the filling.
- Parchment Paper: Lining the pan with parchment paper (with overhang on two sides) makes lifting the bars out a breeze. Don’t skip this step.
- Measuring Cups and Spoons: Accurate measurements matter in baking. Use dry measuring cups for the crumbs and sugar, and a liquid measuring cup for the cream.
- Spatula: A rubber spatula is great for scraping down the bowl and smoothing the filling.
- Knife or Offset Spatula: For swirling the pumpkin into the cheesecake layer. A butter knife works in a pinch.
If you don’t have a 9×9 pan, you can use a 9-inch round cake pan—just adjust the baking time slightly and expect a different shape. I’ve also made these in a disposable foil pan for potlucks, and they turn out just fine.
Preparation Method
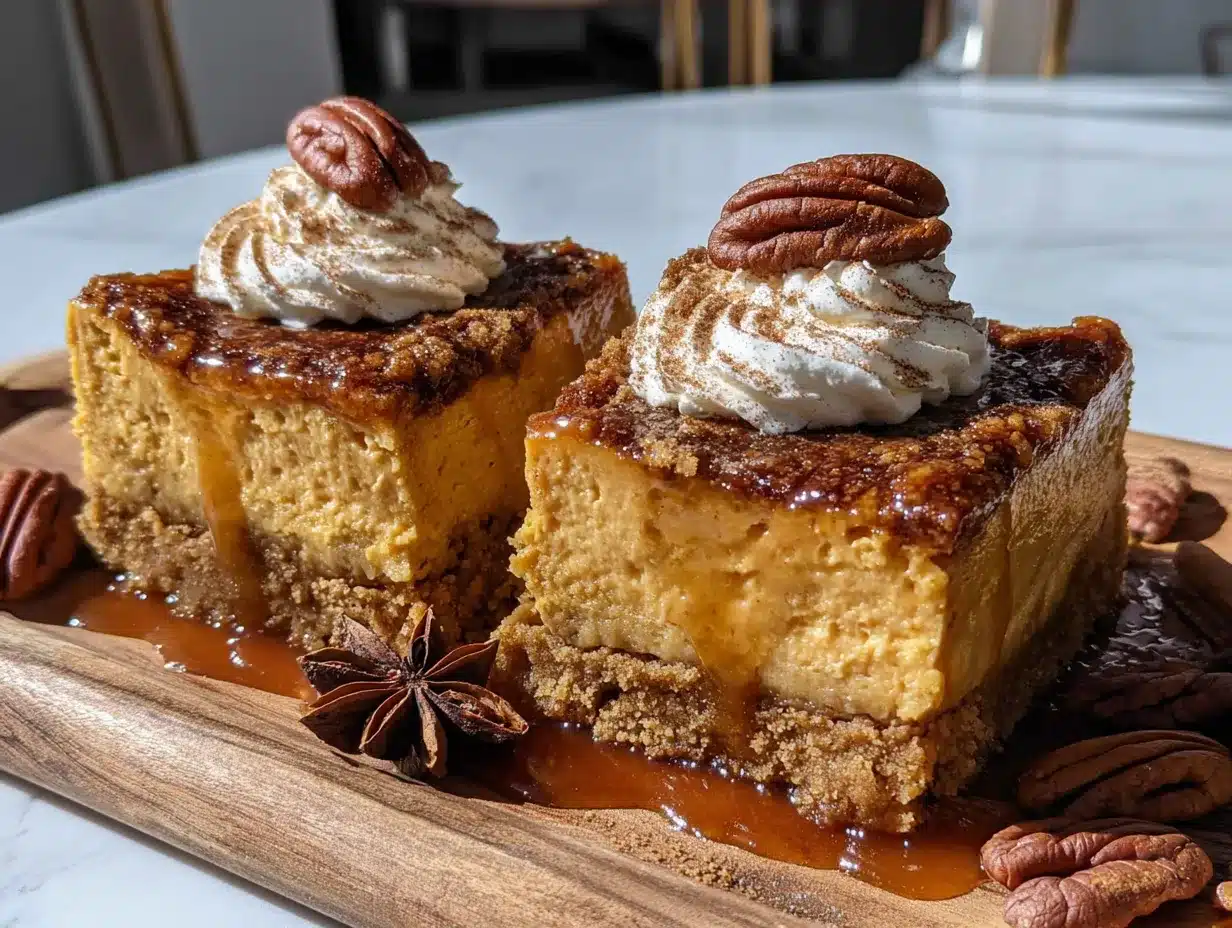
Let’s get baking! Take your time with each step—rushing is the only way to mess this up.
- Preheat and Prep: Preheat your oven to 350°F (175°C). Line your 9×9-inch baking pan with parchment paper, leaving a 2-inch overhang on two opposite sides. This will be your “handle” to lift the bars out later.
- Make the Crust: In a medium bowl, combine 1 ½ cups graham cracker crumbs, ¼ cup granulated sugar, and ¼ teaspoon salt. Pour in 6 tablespoons of melted butter and stir with a fork until the mixture looks like wet sand and holds together when pressed. Don’t overmix—you want it just combined.
- Press and Pre-Bake: Dump the crust mixture into your prepared pan. Use the bottom of a measuring cup or a flat glass to press it down firmly and evenly. Press hard—this keeps the crust from crumbling later. Bake for 10 minutes, until it’s lightly golden and smells toasty. Set aside to cool slightly while you make the filling. (See? That burnt crust story ended up fine.)
- Beat the Cream Cheese: In a large bowl, beat 16 ounces of softened cream cheese with ¾ cup granulated sugar using an electric mixer on medium speed. Beat for about 2 minutes, until smooth and creamy. Scrape down the sides and bottom of the bowl with a spatula.
- Add the Eggs: Add the 2 room-temperature eggs, one at a time, beating on low after each addition until just combined. Overmixing at this stage can incorporate too much air and cause cracks, so keep it gentle.
- Add the Cream and Vanilla: Pour in ¼ cup heavy cream and 1 teaspoon vanilla extract. Mix on low until smooth. The batter should be thick, silky, and free of lumps.
- Make the Pumpkin Layer: In a separate small bowl, whisk together 1 cup pumpkin purée, 1 ½ teaspoons pumpkin pie spice, and ½ teaspoon cinnamon. Take about 1 cup of the plain cheesecake batter and stir it into the pumpkin mixture until combined. You’ll have two batters now—a plain cheesecake batter and a spiced pumpkin batter.
- Layer and Swirl: Pour the plain cheesecake batter into the pre-baked crust and spread it evenly. Drop spoonfuls of the pumpkin batter on top. Use a knife or offset spatula to gently swirl the two together—think figure-eight motions, not aggressive mixing. You want distinct ribbons of pumpkin and cheesecake, not a uniform color.
- Bake: Place the pan in the oven and bake for 35-40 minutes, or until the edges are set and the center still has a slight jiggle when you gently shake the pan. A toothpick inserted near the center should come out mostly clean with a few moist crumbs. Don’t overbake—the residual heat will finish setting the center.
- Cool Completely: Let the bars cool in the pan on a wire rack for 1 hour. Then transfer the pan to the refrigerator and chill for at least 4 hours, preferably overnight. This step is crucial for clean slices and the best texture. Patience, my friend.
- Slice and Serve: Once fully chilled, use the parchment overhang to lift the entire block out of the pan. Place it on a cutting board and use a sharp knife to cut into 9 or 16 squares. Wipe the knife clean between cuts for neat edges.
Cooking Tips & Techniques
I’ve learned a few things the hard way so you don’t have to. Here are my best tips for perfect bars every time.
- Room Temperature is Non-Negotiable: Cold cream cheese creates lumps that no amount of beating can fully fix. Leave it on the counter for at least 30 minutes. Same goes for the eggs. Trust me on this one—I’ve had lumpy cheesecake before, and it’s not the end of the world, but it’s not as pretty.
- Don’t Overmix the Batter: Once you add the eggs, mix on low speed and stop as soon as they’re incorporated. Overmixing incorporates air, which can cause the cheesecake to puff up and then crack as it cools. A few small cracks are fine, but we’re aiming for that smooth, creamy top.
- Press the Crust Firmly: A loose crust is a crumbly crust. Use the bottom of a glass or a measuring cup to really compact the graham cracker mixture. It should feel solid, not sandy.
- The Jiggle Test: Don’t rely solely on a toothpick. The center should jiggle slightly when you shake the pan. If it’s completely firm, it’s overbaked. The residual heat will finish cooking the center as it cools.
- Chill Overnight for Best Results: I know it’s hard to wait, but overnight chilling gives the flavors time to meld and the texture to set perfectly. Bars cut after 4 hours are good; bars cut after 8 hours are incredible.
Variations & Adaptations
This recipe is wonderfully flexible. Here are a few ways to make it your own.
- Gluten-Free Option: Use gluten-free graham crackers or crushed gluten-free cookies (like shortbread) for the crust. The rest of the recipe is naturally gluten-free.
- Dairy-Free Adaptation: Substitute the cream cheese with a high-quality dairy-free cream cheese (like Kite Hill or Miyoko’s) and use coconut cream instead of heavy cream. The texture will be slightly softer, but still delicious.
- Spice It Up: Add ¼ teaspoon of ground ginger or a pinch of cloves to the pumpkin mixture for a deeper, warmer spice profile. I’ve also added a teaspoon of bourbon to the filling for a grown-up twist—it’s fantastic.
- Different Crusts: Swap the graham crackers for crushed ginger snaps, vanilla wafers, or even shortbread cookies. Each one brings a different flavor. Ginger snaps with pumpkin? A match made in heaven.
- Chocolate Swirl: Melt ¼ cup of semi-sweet chocolate chips and drizzle it over the plain cheesecake batter before adding the pumpkin. Swirl it all together for a chocolate-pumpkin combo that’s hard to resist.
I once made a version with a pecan shortbread crust for a holiday party, and it was gone in fifteen minutes. Don’t be afraid to experiment—that’s half the fun.
Serving & Storage Suggestions
These bars are versatile enough for any occasion. Here’s how to serve and store them like a pro.
- Serving Temperature: Serve cold straight from the fridge for the cleanest slices. If you prefer a softer texture, let them sit at room temperature for 10-15 minutes before serving.
- Presentation: Top each bar with a dollop of whipped cream, a dusting of cinnamon, or a drizzle of caramel sauce. For a festive touch, add a few sugared cranberries or a sprinkle of candied pecans.
- Complementary Dishes: These bars pair beautifully with a hot cup of coffee or a pumpkin spice latte. They also work well alongside a slice of brown sugar pumpkin coffee cake for a full fall dessert spread.
- Refrigerator Storage: Store in an airtight container in the refrigerator for up to 5 days. Layer them with parchment paper between bars to prevent sticking.
- Freezer Storage: These freeze beautifully! Wrap individual bars tightly in plastic wrap, then place them in a freezer-safe bag or container. Freeze for up to 3 months. Thaw in the refrigerator overnight before serving.
- Reheating: No need to reheat—enjoy them cold. If you want a warm dessert, pop a bar in the microwave for 10-15 seconds, just enough to take the chill off without melting the cheesecake.
The flavors actually deepen after a day or two in the fridge, so don’t be surprised if they taste even better on day three. If they last that long.
Nutritional Information & Benefits
Here’s a rough estimate for one bar (based on 9 servings). Keep in mind this is a treat, not a health food, but there are a few surprising perks.
- Calories: Approximately 380 per bar
- Fat: 24g
- Carbohydrates: 38g
- Protein: 7g
- Fiber: 2g
- Sugar: 28g
Pumpkin is rich in vitamin A and fiber, which supports eye health and digestion. Cream cheese provides calcium and protein, though it’s also higher in saturated fat, so moderation is key. If you’re looking for a lighter option, you can use reduced-fat cream cheese, but the texture won’t be as luxuriously creamy. These bars are also vegetarian and can be made gluten-free with a simple swap. For a healthier breakfast treat, you might enjoy a slice of creamy strawberry cheesecake overnight oats instead.
Conclusion
These creamy pumpkin cheesecake bars are everything I want in a fall dessert—easy, impressive, and deeply satisfying. They’re forgiving enough for a beginner baker (see: my burnt crust story) but elegant enough for a holiday table. The combination of tangy cheesecake, spiced pumpkin, and buttery graham cracker crust is honestly unbeatable.
I hope you give these a try and make them your own. Maybe you’ll add a little extra cinnamon, or swap in ginger snaps, or forget to set a timer like I did. That’s okay. Baking is about the process as much as the result. And these bars? They’re worth every imperfect moment.
If you make them, I’d love to hear how they turned out. Drop a comment below, tag me in your photos, or share your own twist on the recipe. And if you’re looking for more cozy fall inspiration, don’t miss my copycat Starbucks pumpkin cream cheese muffins—they’re another reader favorite. Happy baking, friends!
Frequently Asked Questions
Can I use canned pumpkin pie filling instead of pumpkin purée?
No, I wouldn’t recommend it. Pumpkin pie filling is already sweetened and spiced, which will throw off the balance of the recipe. Stick with 100% pure pumpkin purée for the best results.
Why did my cheesecake crack?
A few small cracks are normal and won’t affect the taste. Cracks usually happen from overmixing the batter (too much air) or overbaking. Make sure your cream cheese and eggs are at room temperature, and don’t bake until the center is completely firm—it should still have a slight jiggle.
Can I make these bars ahead of time?
Absolutely! In fact, they’re better made a day ahead. Prepare and bake the bars, then chill them in the refrigerator overnight. They’ll be perfectly set and easier to slice. They also freeze well for up to 3 months.
How do I get clean, neat slices?
Chill the bars for at least 4 hours (overnight is best). Use a sharp knife and wipe it clean with a damp paper towel between each cut. This prevents the cheesecake from smearing and gives you those beautiful, bakery-style edges.
Can I use a different crust?
Yes! Crushed ginger snaps, vanilla wafers, or shortbread cookies all make excellent crusts. Just keep the butter-to-crumb ratio the same—6 tablespoons of melted butter for every 1 ½ cups of crumbs.
Pin This Recipe!
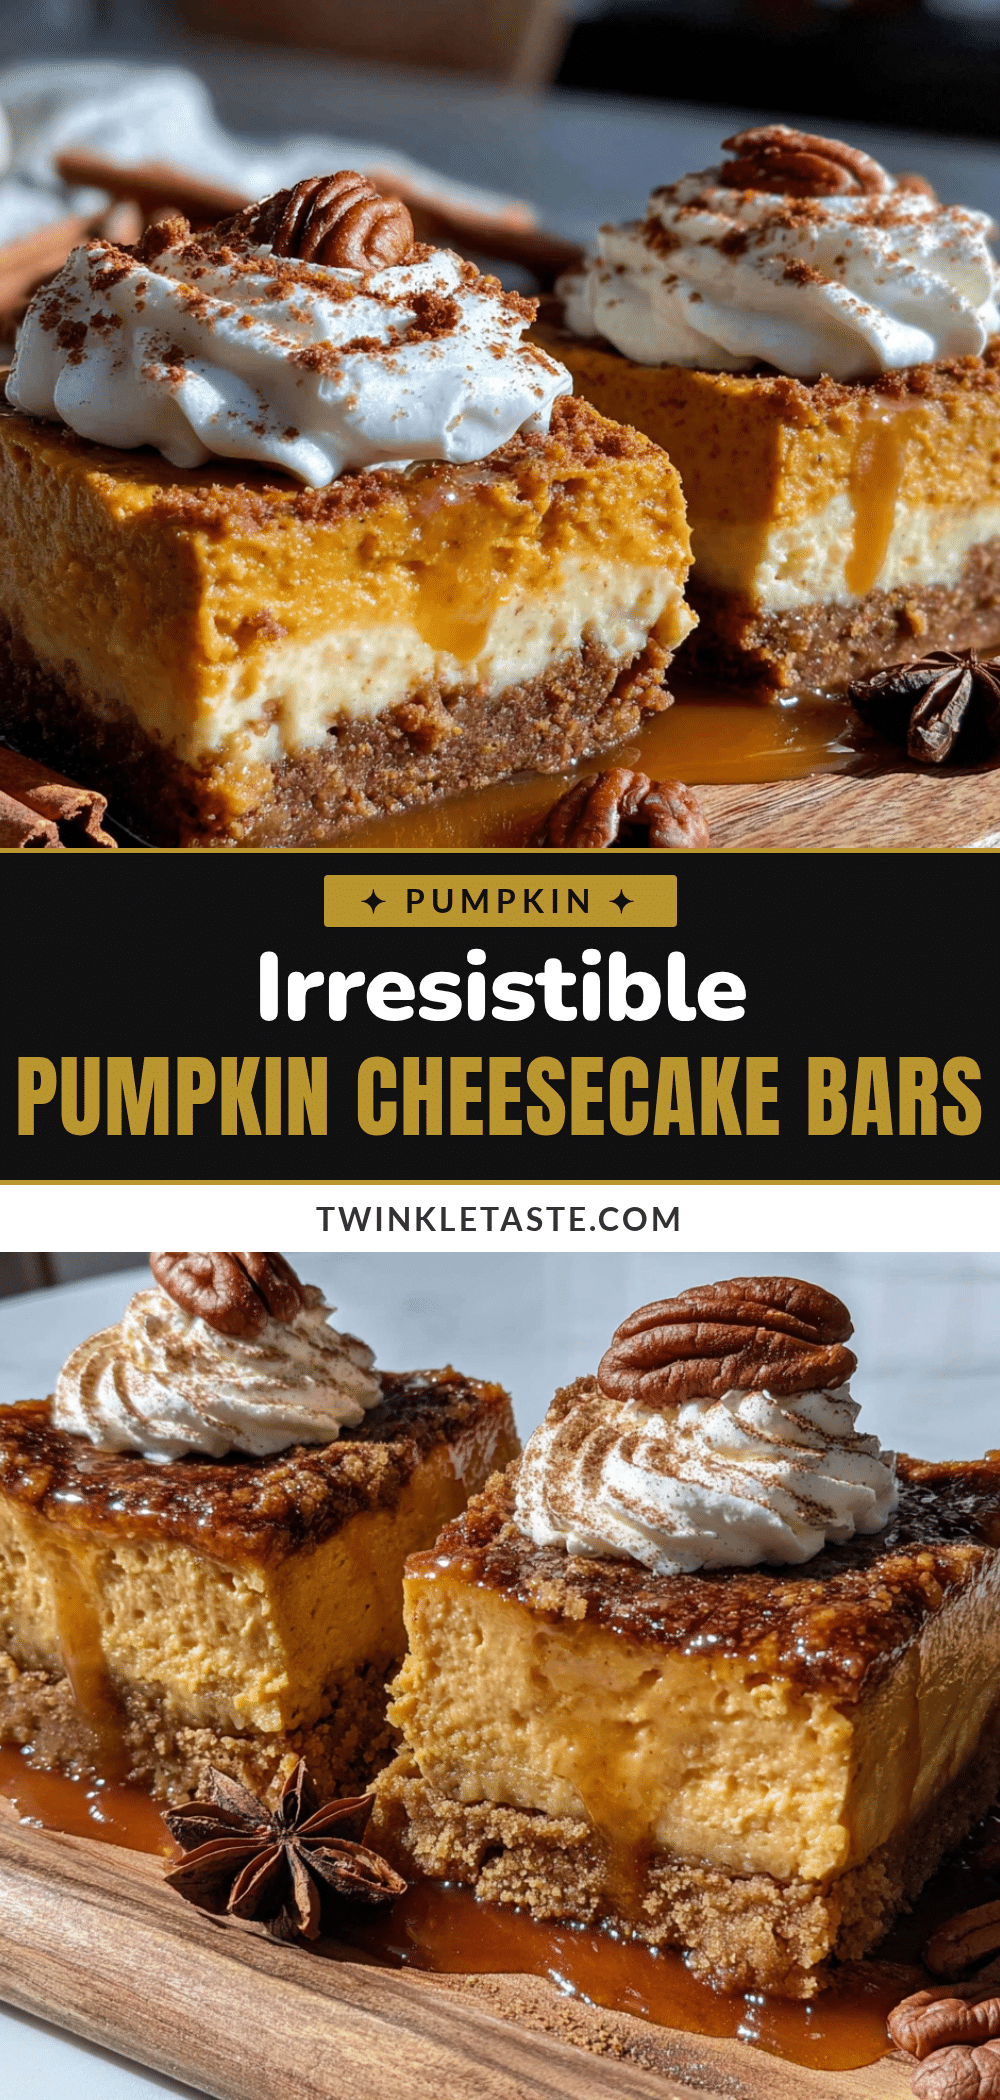
Easy Creamy Pumpkin Cheesecake Bars Recipe
These creamy pumpkin cheesecake bars feature a buttery graham cracker crust, a tangy cheesecake layer, and a spiced pumpkin swirl. They’re easy to make, require no water bath, and are perfect for fall gatherings.
- Prep Time: 20 minutes
- Cook Time: 35-40 minutes
- Total Time: 4 hours 55 minutes (includes chilling)
- Yield: 9-16 servings 1x
- Category: Dessert
- Cuisine: American
Ingredients
- 1 ½ cups graham cracker crumbs (about 12 full sheets)
- 6 tablespoons unsalted butter, melted
- ¼ cup granulated sugar (for crust)
- ¼ teaspoon salt
- 16 ounces cream cheese (two 8-ounce blocks), softened
- ¾ cup granulated sugar (for filling)
- 1 cup pumpkin purée (100% pure, not pumpkin pie filling)
- 2 large eggs, room temperature
- 1 teaspoon vanilla extract
- 1 ½ teaspoons pumpkin pie spice
- ½ teaspoon cinnamon
- ¼ cup heavy cream
Instructions
- Preheat oven to 350°F (175°C). Line a 9×9-inch baking pan with parchment paper, leaving a 2-inch overhang on two opposite sides.
- In a medium bowl, combine graham cracker crumbs, ¼ cup sugar, and salt. Pour in melted butter and stir with a fork until mixture resembles wet sand and holds together when pressed.
- Press the crust mixture firmly and evenly into the prepared pan using the bottom of a measuring cup or flat glass. Bake for 10 minutes until lightly golden. Set aside to cool slightly.
- In a large bowl, beat softened cream cheese and ¾ cup sugar with an electric mixer on medium speed for about 2 minutes until smooth and creamy. Scrape down sides and bottom of bowl.
- Add eggs one at a time, beating on low after each addition until just combined. Do not overmix.
- Add heavy cream and vanilla extract, mixing on low until smooth.
- In a separate small bowl, whisk together pumpkin purée, pumpkin pie spice, and cinnamon. Take about 1 cup of the plain cheesecake batter and stir it into the pumpkin mixture until combined.
- Pour the plain cheesecake batter into the pre-baked crust and spread evenly. Drop spoonfuls of the pumpkin batter on top. Use a knife or offset spatula to gently swirl the two batters together in figure-eight motions.
- Bake for 35-40 minutes, until edges are set and center still has a slight jiggle when shaken. A toothpick inserted near the center should come out mostly clean with a few moist crumbs.
- Cool in the pan on a wire rack for 1 hour. Then transfer to the refrigerator and chill for at least 4 hours, preferably overnight.
- Once fully chilled, use the parchment overhang to lift the entire block out of the pan. Place on a cutting board and cut into 9 or 16 squares with a sharp knife, wiping the knife clean between cuts.
Notes
Room temperature cream cheese and eggs are essential for a smooth batter. Do not overmix after adding eggs to prevent cracks. Chill overnight for best texture and clean slices. For gluten-free, use gluten-free graham crackers. For dairy-free, use dairy-free cream cheese and coconut cream.
Nutrition
- Serving Size: 1 bar (based on 9 se
- Calories: 380
- Sugar: 28
- Sodium: 320
- Fat: 24
- Saturated Fat: 14
- Carbohydrates: 38
- Fiber: 2
- Protein: 7
Keywords: pumpkin cheesecake bars, fall dessert, pumpkin dessert, cheesecake bars, easy pumpkin recipe


