Honestly, I did not believe a sheet pan nacho bar could actually work for a tailgate. I mean, nachos are supposed to be this chaotic, beautiful mess that you eat out of a flimsy tray, right? The idea of laying everything out on a single pan, hauling it to a parking lot, and having it still be crispy and not a soggy disaster sounded like a fantasy. My husband, who takes his tailgating very seriously, kept insisting we try it. I kept saying no—it felt like a shortcut that would end in disappointment.
Then came the game where we forgot the paper plates. I was stuck staring at a pile of chips and a cooler full of toppings, and I just grabbed the biggest sheet pan I had. I piled on the chips, threw on the cheese, and broiled it right there on a portable grill. People gathered around that pan like it was the actual game. They were scooping, layering, and going back for thirds. No one missed the plates. No one complained about cold toppings. That sheet pan became the center of the party.
That moment changed everything for me. This Ultimate Sheet Pan Nacho Bar for Tailgate Parties isn’t just a recipe—it’s a whole system. It keeps things hot, it keeps things organized, and it lets everyone build their own perfect bite without fighting over a communal bowl. It’s the kind of thing that makes you wonder why you ever did it any other way. And honestly? I think that messy, glorious sheet pan is the real MVP of game day.
Why You’ll Love This Recipe
Look, I’ve tested this thing more times than I care to admit. I’ve burned cheese, I’ve used the wrong chips, and I’ve learned exactly what works. This isn’t just another nacho recipe—it’s the one I bring to every single tailgate, and it never fails. Here’s why it’s going to become your go-to, too:
- No Cold Toppings, Ever: The whole point of a nacho bar is that everything stays hot. By baking the base layer of chips and cheese directly on the sheet pan, you get that melty, gooey goodness that cold nachos just can’t deliver. You can even keep the pan on a warming tray or grill to maintain the heat throughout the game.
- Build-Your-Own Fun: This is a bar, not a plated dish. Everyone gets to customize their nachos with their favorite proteins, salsas, and extras. It’s interactive, it’s fun, and it keeps people hovering around your setup—which is exactly where you want them during a tailgate.
- Feeds a Crowd Without the Mess: One sheet pan, one giant mess of deliciousness. No multiple bowls, no individual plates, no endless cleanup. Just a single pan that serves as the centerpiece of your tailgate spread. It’s genius for a reason.
- Super Flexible: You can use whatever you have on hand. Leftover carnitas from taco night? Perfect. Grilled chicken from the week? Absolutely. This recipe is a vehicle for your fridge scraps, and it always tastes amazing.
- It’s a Conversation Starter: Seriously, people will stop and ask what you’re making. The sizzle of the cheese, the smell of the seasoned meat, the sight of that loaded sheet pan—it’s a spectacle. It makes you look like the tailgate hero without actually doing that much work.
This recipe is different because it’s built for real life—for parking lots, for crowded kitchens, for when you want to impress without the stress. It’s the kind of food that makes people close their eyes after the first bite and go, “Okay, this is the best thing I’ve eaten all day.” And trust me, that feeling never gets old.
What Ingredients You Will Need
This recipe is all about simplicity and flexibility. You don’t need a laundry list of exotic ingredients—just good, solid staples that you can find at any grocery store. Here’s what you’ll need to build your ultimate sheet pan nacho bar:
For the Base
- 1 large bag (about 13-16 oz) of sturdy tortilla chips: Do not use thin, delicate chips here. You want the thick, restaurant-style chips that can hold up to all the toppings without turning into mush. I personally love Tostitos Cantina or On the Border for their durability and satisfying crunch.
- 2 cups shredded Mexican blend cheese: This is your workhorse cheese. It melts beautifully and has a good flavor. Pre-shredded is fine in a pinch, but if you have the time, shredding a block of Monterey Jack and cheddar yourself will give you a creamier melt (it doesn’t have the anti-caking agents).
- 1 cup shredded cheddar cheese: For that extra sharp, bold flavor that really cuts through the richness. I use sharp cheddar because it stands up to the other toppings.
For the Protein (Choose One or Two)
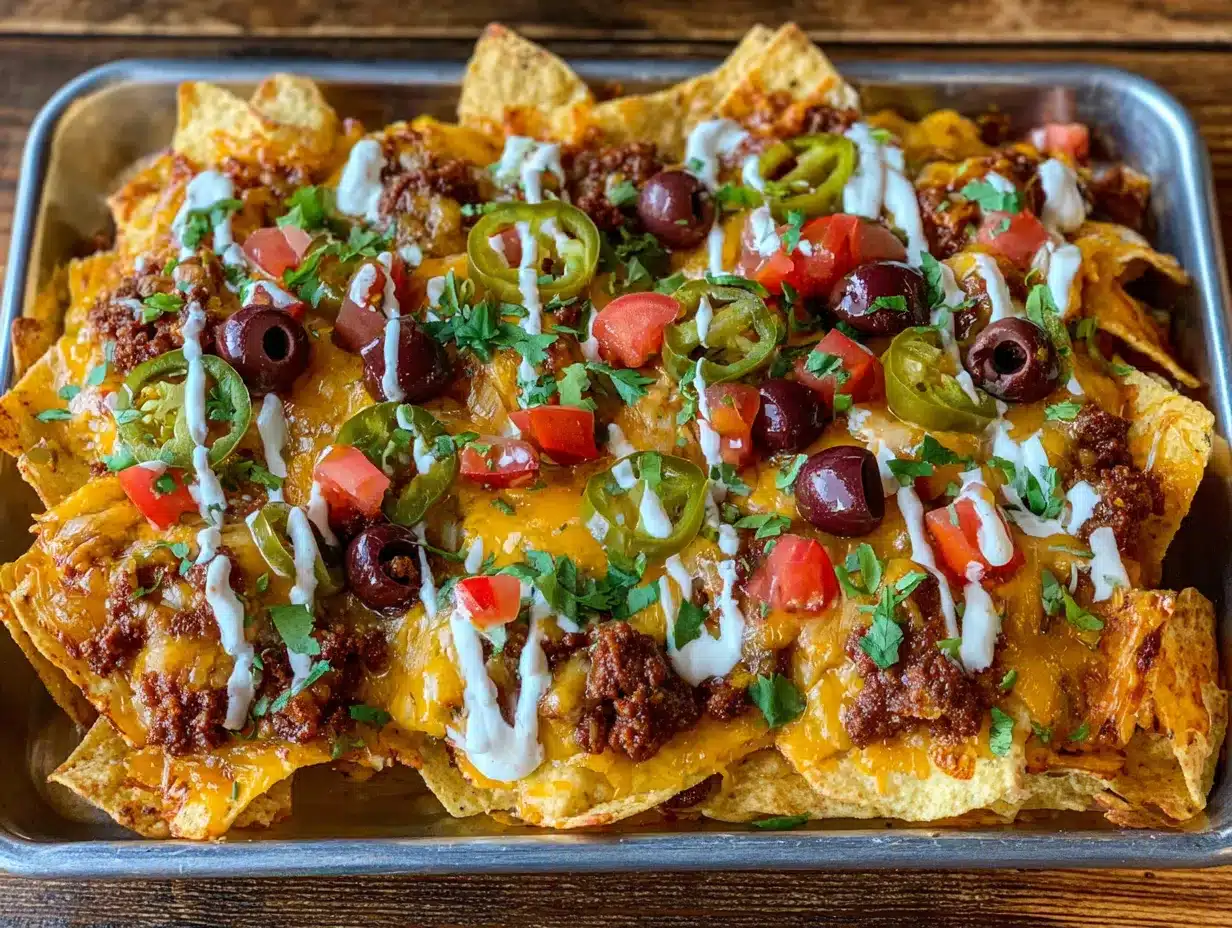
- 1 lb ground beef: Seasoned with chili powder, cumin, garlic powder, and a pinch of cayenne. Brown it, drain the fat, and let it simmer in a little tomato sauce for extra depth.
- 1 lb shredded chicken: Poached or rotisserie chicken works great. Toss it in your favorite salsa verde or a mix of hot sauce and butter for a buffalo-style kick.
- 1 lb carnitas or pulled pork: Leftover pork shoulder or store-bought carnitas are a game-changer. The crispy edges are incredible on nachos.
- 1 can (15 oz) black beans, drained and rinsed: For a vegetarian option, these are a must. They add protein and a creamy texture that balances the crunch.
For the Toppings Bar
- 1 cup salsa (pico de gallo or your favorite jarred salsa): Fresh pico is always my go-to—the acidity cuts through the cheese and meat perfectly.
- 1 cup sour cream: Full-fat is best for richness, but Greek yogurt works in a pinch for a lighter option.
- 1 cup guacamole: Store-bought is fine for convenience, but homemade is always better. Just mash 2 ripe avocados with lime juice, salt, and a little diced onion.
- 1/2 cup pickled jalapeños: These are non-negotiable for me. The acidity and heat are essential for balancing the richness.
- 1/2 cup sliced black olives: A classic topping that adds a briny, salty pop.
- 1/2 cup diced red onion: For a sharp, fresh crunch.
- 1/4 cup chopped fresh cilantro: For garnish and freshness.
- 1 lime, cut into wedges: A squeeze of lime over the finished nachos brightens everything up.
Ingredient Selection Tips
When choosing your chips, look for a bag that doesn’t have a lot of broken pieces at the bottom. You want whole, sturdy chips that can act as a solid base. For the cheese, if you’re using pre-shredded, make sure it’s a blend that melts well—some brands are better than others. I’ve found that Sargento and Kraft have reliable melting properties. For the meat, if you’re short on time, a rotisserie chicken from the store is your best friend. Just shred it and toss it in your seasoning—it takes five minutes.
Equipment Needed
You don’t need a professional kitchen to pull this off. Here’s what you’ll need:
- One large, rimmed sheet pan (13×18 inches or similar): This is non-negotiable. A rimmed pan is crucial because it catches all the juices and melted cheese, preventing a mess in your oven or on your tailgate grill. I use a heavy-duty aluminum pan for tailgates because it’s disposable, but a standard baking sheet works perfectly at home.
- Aluminum foil or parchment paper: For easy cleanup. Line your sheet pan before you start, and you’ll thank yourself later.
- A large skillet: For browning your ground beef or any other protein.
- A spatula: For spreading the chips and toppings evenly.
- Small bowls or ramekins: For holding your toppings bar ingredients (salsa, sour cream, guacamole, etc.). This keeps everything organized and prevents cross-contamination.
- A portable grill or oven: At home, your oven is perfect. For a tailgate, a portable gas grill or a camp stove with a baking stone works wonders. I’ve even used a friend’s charcoal grill with success—just keep the heat indirect.
Budget-Friendly Alternatives
If you don’t have a rimmed sheet pan, a large disposable aluminum roasting pan works great. Just make sure it’s sturdy enough to hold the weight. For the grill, if you don’t have a portable one, you can absolutely make the entire nacho bar in your oven at home and transport it in a preheated cooler (wrap the pan in towels). It will stay hot for a good hour.
Preparation Method
Alright, let’s get to the fun part. Here’s how to build the ultimate sheet pan nacho bar, step by step:
- Preheat your oven or grill to 400°F (200°C). If you’re using a grill, set it up for indirect heat. This ensures the cheese melts evenly without burning the chips.
- Prepare your protein. In a large skillet over medium-high heat, cook 1 lb of ground beef, breaking it up with a spatula. Season with 1 tablespoon chili powder, 1 teaspoon cumin, 1 teaspoon garlic powder, 1/2 teaspoon salt, and a pinch of cayenne. Cook until browned, about 6-8 minutes. Drain any excess fat, then stir in 1/4 cup of tomato sauce or salsa. Let it simmer for 2-3 minutes. If you’re using shredded chicken or carnitas, warm them in the skillet with a little broth or salsa.
- Line your sheet pan. Take your large rimmed sheet pan and cover it with aluminum foil or parchment paper. This step is crucial for easy cleanup—trust me, you don’t want to be scrubbing baked-on cheese.
- Build the first layer. Spread the entire bag of tortilla chips evenly across the sheet pan. Make sure they’re in a single layer, slightly overlapping. This is your foundation, so don’t skimp.
- Add the first layer of cheese. Sprinkle 1 cup of the Mexican blend cheese and 1/2 cup of the cheddar cheese evenly over the chips. This bottom layer of cheese is what holds everything together and creates that irresistible, gooey base.
- Add the protein. Distribute your cooked ground beef (or other protein) evenly over the cheese-covered chips. Try to spread it out so every chip gets a little bit of meat.
- Add the second layer of cheese. Sprinkle the remaining 1 cup of Mexican blend cheese and 1/2 cup of cheddar over the meat. This is where the magic happens—the top cheese layer will melt into a beautiful, bubbly blanket.
- Bake or grill. Place the sheet pan in the preheated oven or on the grill. Bake for 8-12 minutes, or until the cheese is fully melted and bubbly. Watch it carefully—you want the cheese melted, not the chips burned. If the chips start to brown too quickly, reduce the heat to 375°F (190°C).
- Remove and let cool slightly. Take the pan out of the oven and let it rest for 2-3 minutes. This allows the cheese to set just a bit, making it easier to scoop without everything sliding off.
- Set up your toppings bar. While the nachos are cooling, arrange your small bowls with salsa, sour cream, guacamole, pickled jalapeños, black olives, diced red onion, and fresh cilantro. Place them around the sheet pan so everyone can customize their own plate.
- Serve immediately. Bring the hot sheet pan to the table (or tailgate cooler) and let everyone dig in. Encourage people to scoop from the edges first—they tend to be crispier. The center will be the most loaded and gooey.
Troubleshooting Tips
If your chips are getting too brown: Your oven or grill is too hot. Lower the temperature by 25 degrees and keep a close eye on it. You can also tent the pan loosely with foil for the first 5 minutes.
If the cheese isn’t melting: Make sure you’re using a good melting cheese. Pre-shredded cheese sometimes has anti-caking agents that prevent it from melting smoothly. Shredding your own block cheese is the best fix.
If the chips are soggy: This usually happens if you overload the chips with wet toppings before baking. Keep the wet toppings (salsa, sour cream, guacamole) on the side for the bar, and only bake the chips with cheese and dry-ish protein.
Cooking Tips & Techniques
I have made this recipe so many times that I’ve learned a few tricks the hard way. Here are my best tips for perfect sheet pan nachos every time:
Don’t overcrowd the pan. It’s tempting to pile on as many chips as possible, but a single, even layer is key. Overlapping chips too much means some will be crunchy and others will be soggy. Spread them out, and if you need more, use two smaller pans instead of one giant one.
Layer your cheese strategically. I learned this one after a few sad, dry nachos. Putting cheese on the bottom and the top ensures that every chip gets coated. The bottom cheese melts and creates a glue that holds the chips together, while the top cheese gets bubbly and golden. It’s a game-changer.
Use a two-zone heat method on the grill. If you’re tailgating, set up your grill with direct heat on one side and indirect on the other. Start the nachos on the indirect side to melt the cheese slowly, then move them to the direct side for the last minute to get a little char on the cheese. This gives you the best of both worlds—melted and slightly crispy.
Keep your toppings cold and separate. I made the mistake of adding everything before baking once. The lettuce wilted, the salsa turned into soup, and the sour cream separated. Keep the cold toppings on the side and let people add them after baking. It’s the only way to maintain texture and temperature.
Warm your serving bowls. If you’re serving the nachos at a tailgate, warm the bowls you’re using for the toppings bar by placing them near the grill or in a warm oven for a few minutes. This keeps the salsa from getting cold shock when it hits the hot chips.
My biggest failure: I once used a thin, cheap baking sheet that warped in the oven. The cheese and chips slid to one side, creating a lopsided mess. Invest in a good, heavy-duty rimmed sheet pan—it makes all the difference.
Variations & Adaptations
This recipe is a canvas, not a finished painting. Here are some of my favorite ways to change it up:
Vegetarian “Fiesta” Version
Skip the meat and load up on black beans, corn, and roasted bell peppers. Add a layer of refried beans under the chips for extra creaminess. I’ve made this for a group of friends who are vegetarian, and it was gone before the meat version. The key is to season the beans well—cumin, chili powder, and a little smoked paprika go a long way.
Buffalo Chicken Nachos
Toss your shredded rotisserie chicken in a mixture of melted butter and Frank’s RedHot sauce. Use blue cheese crumbles instead of cheddar on top, and drizzle with ranch dressing before serving. This is my husband’s absolute favorite variation. The tangy, spicy kick is perfect for game day.
Breakfast Nachos
Yes, this is a thing. Swap the ground beef for crumbled breakfast sausage or chorizo. Use the same cheese blend, but after baking, top with a fried egg (one per person) and a drizzle of hot sauce. It’s the ultimate tailgate breakfast if you’re camping overnight or just need a hearty start to the day.
Low-Carb / Keto Version
Use pork rinds or cheese crisps (like Whisps) instead of tortilla chips. Load up on the meat and cheese, and skip the beans and corn. It’s not exactly the same, but it scratches that nacho itch without the carbs. I’ve done this for myself when I was on a keto kick, and it was surprisingly satisfying.
Serving & Storage Suggestions
These nachos are best served immediately, right off the sheet pan. The contrast between the hot, melty cheese and the cold, fresh toppings is what makes them so addictive. Here’s how to handle serving and leftovers:
Serving Temperature: Serve the nachos straight from the oven or grill. The cheese should be bubbly and the chips should be warm and slightly crispy. If you’re at a tailgate, you can keep the pan on a warming tray or over a low grill to maintain the heat throughout the game. Just be careful not to leave it on direct heat, or the chips will burn.
Presentation: Place the sheet pan in the center of your serving area, surrounded by the small bowls of toppings. Let everyone grab a plate (or a napkin) and build their own pile. I like to put a big spoon or spatula near the pan for easy scooping. A squeeze of fresh lime over the top right before serving brightens everything up beautifully.
Storage: Nachos are really a “eat them now” kind of food, but if you have leftovers, here’s what to do. Let the pan cool completely, then scrape the leftover nachos into an airtight container. Store them in the refrigerator for up to 2 days. The chips will be soft, but the flavor will still be there.
Reheating: The best way to reheat leftover nachos is in the oven or on a grill. Spread them on a sheet pan and bake at 350°F (175°C) for 5-7 minutes, or until heated through. Do not use the microwave—it will turn the chips into a sad, chewy mess. If you’re in a pinch, you can reheat them in a dry skillet over medium heat, stirring frequently.
Flavor Development: Honestly, the flavors actually meld together overnight in the fridge. The next day, the chips are soft, but the cheese and meat have become this cohesive, casserole-like mixture. It’s not the same as fresh nachos, but it’s a different kind of delicious. I’ve been known to eat cold leftover nachos straight from the container—no judgment here.
Nutritional Information & Benefits
Let’s be real—this is not a health food. But it is real food, made with real ingredients, and that counts for something. Here’s a rough breakdown per serving (about 1/6 of the sheet pan):
| Nutrient | Amount Per Serving |
|---|---|
| Calories | ~450-550 |
| Protein | 25-30g |
| Fat | 28-35g |
| Carbohydrates | 35-45g |
| Fiber | 4-6g |
| Sodium | 800-1000mg |
Health Benefits: The protein from the beef and cheese will keep you full and satisfied, which is great for a long day of tailgating. The black beans, if you use them, add fiber and plant-based protein. The tomatoes in the salsa provide lycopene, an antioxidant, and the lime juice adds a dose of Vitamin C. It’s not a salad, but it’s not empty calories either.
Dietary Considerations: This recipe is naturally gluten-free if you use certified gluten-free tortilla chips. For a dairy-free version, use a plant-based cheese shreds and a dairy-free sour cream. For a lower-sodium option, use low-sodium chips and go easy on the added salt in the meat seasoning. The pickled jalapeños and olives are high in sodium, so you can skip them or use them sparingly.
Potential Allergens: Dairy (cheese, sour cream), gluten (in some tortilla chips), and nightshades (tomatoes, peppers) are all present. If you’re cooking for a crowd, it’s always a good idea to label the toppings so everyone knows what’s in each bowl.
I love this recipe because it’s honest food. It’s not pretending to be something it’s not. It’s a celebration dish, meant to be shared with people you care about. And that, to me, is worth every calorie.
Conclusion
So there you have it—the Ultimate Sheet Pan Nacho Bar for Tailgate Parties that turned me from a skeptic into a full-blown believer. This recipe is everything you want in a game day dish: it’s easy, it’s customizable, it’s messy in the best way, and it feeds a crowd without making you feel like a short-order cook. Whether you’re in a parking lot, a living room, or a backyard, this sheet pan nacho bar will be the star of the show.
I want you to take this recipe and make it your own. Swap in your favorite protein, pile on the toppings you love, and don’t be afraid to get a little creative. Maybe you’ll discover a new combination that becomes your signature dish. That’s the beauty of a build-your-own bar—it’s never the same twice.
I honestly love this recipe because it reminds me of that first tailgate where everything went wrong but turned out so right. It’s proof that sometimes the best meals come from happy accidents. So grab a sheet pan, call your friends, and make some nachos. And when you do, I’d love to hear about it. Drop a comment below and tell me your favorite topping combination, or tag me in your photos. Let’s make every game day a little more delicious, one sheet pan at a time.
Now go make some nachos. You’ve got this!
Frequently Asked Questions
Can I make this nacho bar ahead of time?
You can prep all the components ahead of time—cook the meat, shred the cheese, chop the toppings—but do not assemble the nachos until you’re ready to bake. The chips will get soggy if they sit with the wet ingredients for too long. I usually prep everything the night before and assemble right before baking at the tailgate.
What if I don’t have a sheet pan?
No problem! You can use a large disposable aluminum roasting pan, a cast iron skillet (for a smaller batch), or even a pizza pan. Just make sure whatever you use has a rim to catch the melting cheese and juices. If you’re using a pizza pan, you might want to line it with foil for easier cleanup.
How do I keep the nachos warm during a long tailgate?
After baking, you can place the sheet pan on a portable warming tray, a low-heat grill, or even wrap the pan in a clean towel and place it in a preheated cooler. The key is to keep the heat gentle—you don’t want to burn the chips. I’ve also seen people use a slow cooker on the “warm” setting to keep the meat and cheese hot, then assemble the nachos in batches.
Can I use a different type of cheese?
Absolutely! A blend of Monterey Jack, cheddar, and pepper jack is my go-to, but you can use whatever melts well. Avoid hard cheeses like Parmesan or aged gouda, as they don’t melt smoothly. Some people love using queso fresco or cotija for a different texture, but I’d recommend adding those as a cold topping after baking rather than melting them.
How do I prevent the chips from getting soggy?
The number one rule is to keep wet toppings off the chips until after baking. Only bake the chips with cheese and dry-ish protein (like ground beef or shredded chicken). Add salsa, sour cream, guacamole, and any other wet toppings right before serving. Also, make sure your chips are sturdy—thin chips will turn to mush no matter what you do.
Pin This Recipe!
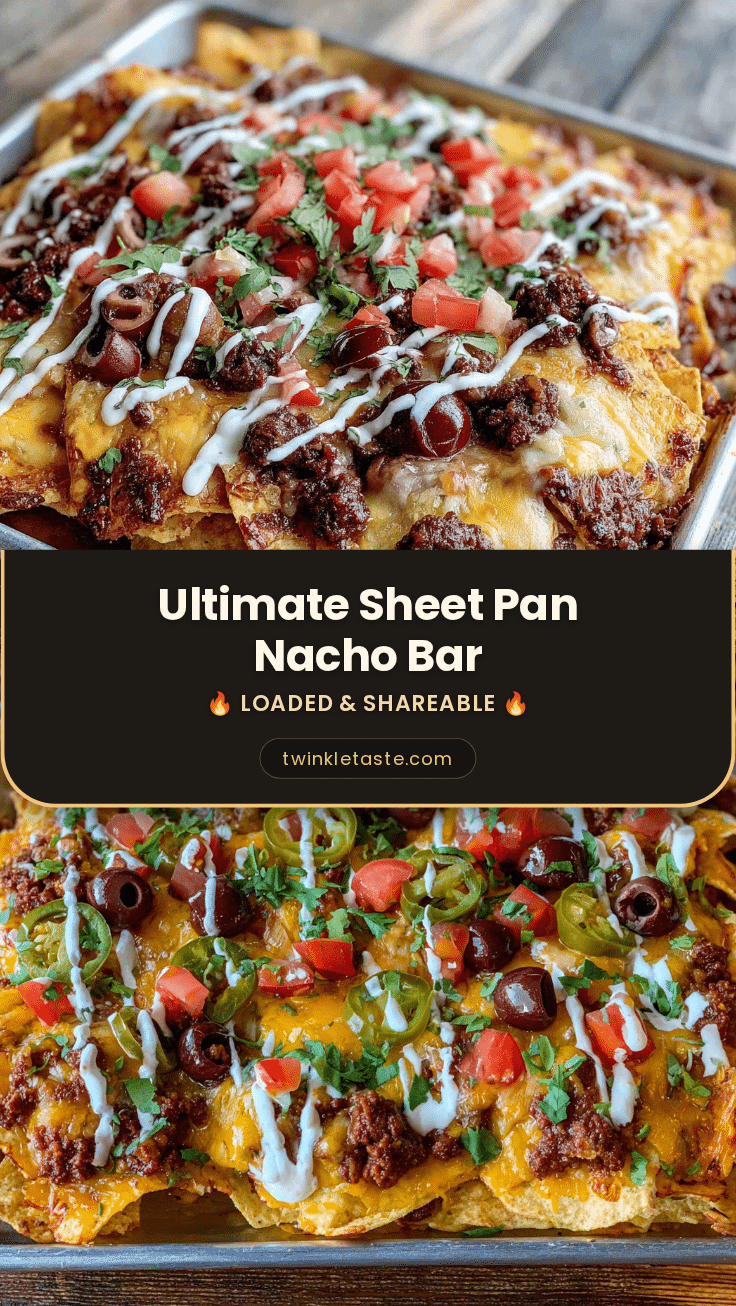
Ultimate Sheet Pan Nacho Bar for Tailgate Parties
This sheet pan nacho bar keeps everything hot and organized, letting everyone build their own perfect bite. It’s the ultimate game day dish that feeds a crowd without the mess.
- Prep Time: 15 minutes
- Cook Time: 12 minutes
- Total Time: 27 minutes
- Yield: 6 servings 1x
- Category: Main Course
- Cuisine: Mexican
Ingredients
- 1 large bag (13–16 oz) sturdy tortilla chips
- 2 cups shredded Mexican blend cheese
- 1 cup shredded cheddar cheese
- 1 lb ground beef
- 1 tablespoon chili powder
- 1 teaspoon cumin
- 1 teaspoon garlic powder
- 1/2 teaspoon salt
- Pinch of cayenne pepper
- 1/4 cup tomato sauce or salsa
- 1 cup salsa (pico de gallo or jarred)
- 1 cup sour cream
- 1 cup guacamole
- 1/2 cup pickled jalapeños
- 1/2 cup sliced black olives
- 1/2 cup diced red onion
- 1/4 cup chopped fresh cilantro
- 1 lime, cut into wedges
Instructions
- Preheat oven or grill to 400°F (200°C). If using a grill, set up for indirect heat.
- In a large skillet over medium-high heat, cook 1 lb ground beef, breaking it up with a spatula. Season with 1 tablespoon chili powder, 1 teaspoon cumin, 1 teaspoon garlic powder, 1/2 teaspoon salt, and a pinch of cayenne. Cook until browned, about 6-8 minutes. Drain excess fat, then stir in 1/4 cup tomato sauce or salsa. Simmer for 2-3 minutes.
- Line a large rimmed sheet pan (13×18 inches) with aluminum foil or parchment paper.
- Spread the entire bag of tortilla chips evenly across the sheet pan in a single layer, slightly overlapping.
- Sprinkle 1 cup of Mexican blend cheese and 1/2 cup of cheddar cheese evenly over the chips.
- Distribute the cooked ground beef evenly over the cheese-covered chips.
- Sprinkle the remaining 1 cup of Mexican blend cheese and 1/2 cup of cheddar over the meat.
- Place the sheet pan in the preheated oven or on the grill. Bake for 8-12 minutes, or until the cheese is fully melted and bubbly. Watch carefully to avoid burning the chips.
- Remove from oven and let rest for 2-3 minutes.
- Arrange small bowls with salsa, sour cream, guacamole, pickled jalapeños, black olives, diced red onion, and fresh cilantro around the sheet pan.
- Serve immediately. Encourage people to scoop from the edges first for crispier chips.
Notes
For best results, use sturdy tortilla chips and shred your own cheese for a creamier melt. Keep wet toppings (salsa, sour cream, guacamole) on the side and add after baking to prevent soggy chips. If chips brown too quickly, reduce oven temperature to 375°F.
Nutrition
- Serving Size: 1/6 of sheet pan
- Calories: 500
- Sugar: 4
- Sodium: 900
- Fat: 31
- Saturated Fat: 12
- Carbohydrates: 40
- Fiber: 5
- Protein: 27
Keywords: sheet pan nachos, tailgate nachos, nacho bar, game day nachos, easy nachos


