I want banana bread right now. Not the kind you plan for, the kind where you spot three sad, spotty bananas on the counter and your brain just goes do it. The thing is, I also want walnuts—that little crunch that breaks up the softness—and I absolutely do not want to wash a mixer, a separate bowl for dry ingredients, or anything that requires more than one hand to carry to the sink. So this is the recipe I make. One bowl, a fork, a spatula, and about ten minutes of actual effort. The rest is just oven time and the smell that makes your whole kitchen feel like a Sunday morning.
I have made a lot of banana bread over the years. Some were too dense, some were too sweet, some vanished before they even cooled. This one hits that sweet spot—tender but sturdy, sweet but not cloying, with walnuts toasted right into the batter so every slice has that nutty edge. And the one-bowl thing? Honestly, it changes the game. You can be eating warm banana bread with butter melting into it before the guilt of a messy kitchen even sets in.
It is the kind of recipe you memorize after one try. The kind you make for a friend who is having a rough week, or for yourself on a Tuesday afternoon just because. Let me show you how easy it really is.
Why You’ll Love This Recipe
This is not just another banana bread recipe. It is the one you will come back to again and again, and here is why:
- One Bowl, No Mixer: Everything comes together in a single mixing bowl with just a fork or whisk. No stand mixer, no hand mixer, no extra dishes. This is the kind of baking you can do while half-awake or in the middle of a chaotic afternoon.
- Simple Pantry Ingredients: You probably have everything already—bananas, flour, sugar, eggs, butter, walnuts. No special trips to the store for buttermilk or sour cream.
- Perfectly Moist Every Time: The ratio of bananas to fat to flour is carefully balanced so the bread stays moist for days without being gummy. It is the kind of texture that makes you close your eyes after the first bite.
- Walnuts Add the Perfect Crunch: Toasting the walnuts before folding them in makes a huge difference. They stay crunchy inside the soft bread and add that nutty, savory contrast that keeps every bite interesting.
- Foolproof for Beginners: If you have never baked banana bread before, this is the recipe to start with. It is forgiving, straightforward, and nearly impossible to mess up.
- Great for Gifting or Freezing: This bread freezes beautifully. Make two loaves—one to eat now, one to tuck away for later. It also makes a thoughtful homemade gift wrapped in parchment and tied with twine.
This is comfort food at its simplest. It is the recipe you will text to your sister, the one your kids will ask for by name, the one that makes you feel like a better baker than you actually are. And it starts with a single bowl.
What Ingredients You Will Need
This recipe uses simple, wholesome ingredients to deliver a moist, tender loaf with pockets of crunchy walnut in every slice. Most of these are pantry staples, so you can probably get started right now.
For the Banana Bread Batter
- 3 large ripe bananas, mashed (about 1 ½ cups or 340g) — The riper the better. You want them heavily spotted or even mostly brown for maximum sweetness and moisture. If your bananas are not ripe enough, you can roast them in a 300°F oven for 15 minutes to soften and sweeten them.
- ⅓ cup (75g) unsalted butter, melted — Melted butter gives the bread a rich flavor and tender crumb. You can substitute coconut oil or vegetable oil if needed, but butter really makes this sing.
- ¾ cup (150g) granulated sugar — Standard white sugar works perfectly here. It dissolves easily into the wet ingredients and helps create that golden crust. You can reduce to ½ cup if you prefer a less sweet bread.
- 1 large egg, room temperature — A room-temperature egg blends more smoothly into the batter and helps create a more even texture. If you forgot to take it out of the fridge, place it in a bowl of warm water for 5 minutes.
- 1 teaspoon vanilla extract — Pure vanilla extract adds warmth and depth. Imitation vanilla works in a pinch, but the real thing makes a noticeable difference.
- 1 ½ cups (190g) all-purpose flour — Spoon and level your flour for accuracy. Scooping directly from the bag can pack in too much flour and make the bread dry. For a whole wheat option, substitute up to half the flour with whole wheat pastry flour.
- 1 teaspoon baking soda — This is the only leavening agent you need. Make sure it is fresh—test it by dropping a little into vinegar; it should fizz vigorously.
- ½ teaspoon salt — Salt balances the sweetness and enhances the banana flavor. I use fine sea salt here.
- ½ teaspoon ground cinnamon (optional) — Cinnamon and banana are a classic pair. It adds warmth without overpowering the banana flavor. You can also add a pinch of nutmeg or cardamom if you are feeling adventurous.
For the Walnut Addition
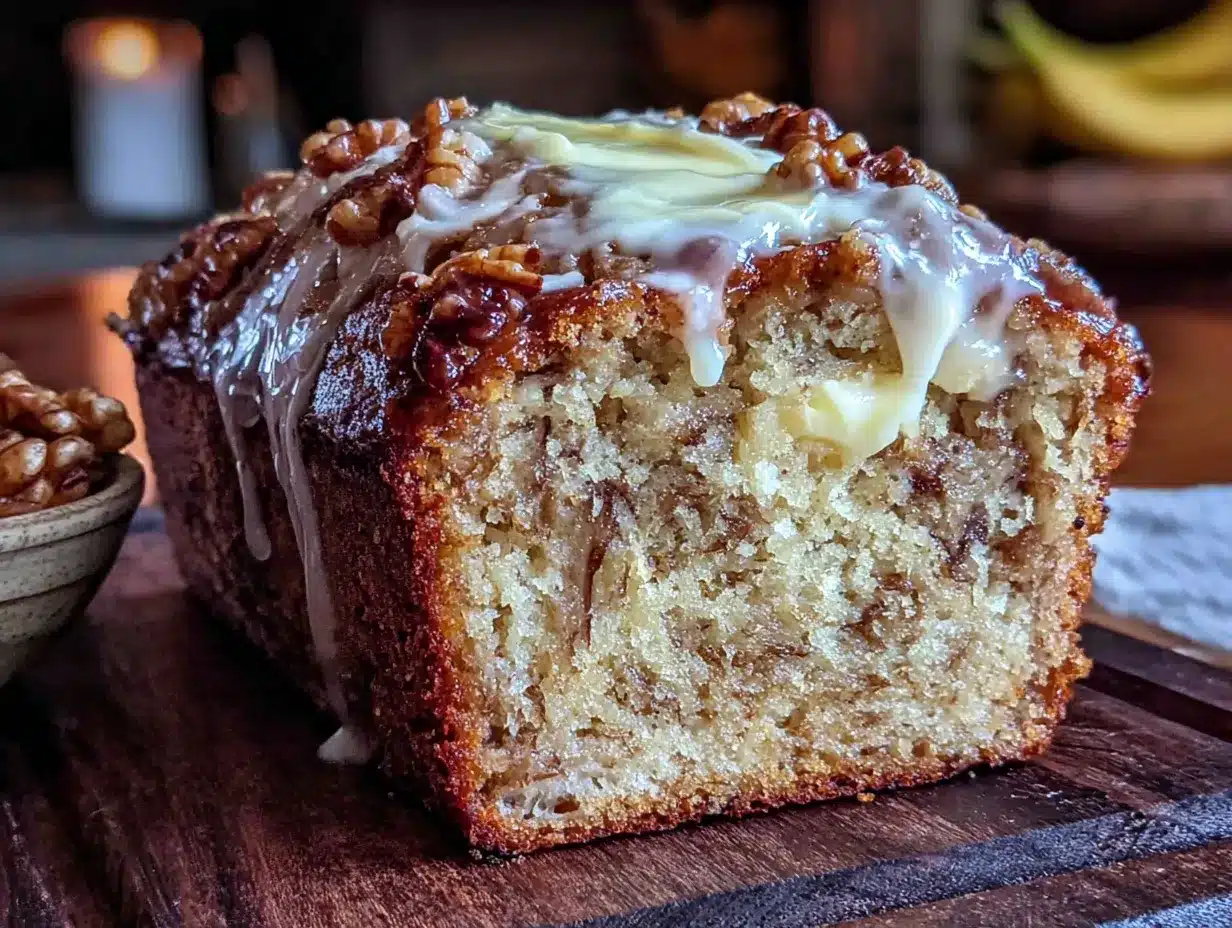
- 1 cup (120g) walnut halves or pieces — Toast them first for the best flavor. Spread them on a baking sheet and bake at 350°F for 6-8 minutes, until fragrant and slightly darkened. Let them cool completely before chopping and folding into the batter. This step is non-negotiable if you want the best texture. I recommend buying raw walnuts and toasting them yourself—the flavor is far superior to pre-toasted ones.
- Optional: Extra walnuts for topping — Save a handful of toasted walnut halves to arrange on top of the batter before baking. It makes the loaf look beautiful and adds extra crunch to the first bite.
Substitution Notes: For a dairy-free version, use melted coconut oil or a neutral vegetable oil instead of butter. For an egg-free version, substitute the egg with a flax egg (1 tablespoon ground flaxseed mixed with 3 tablespoons water, let sit for 5 minutes). For a gluten-free version, use a 1:1 gluten-free baking flour blend that contains xanthan gum. And if you do not have walnuts, pecans are a wonderful substitute—just toast them the same way.
Equipment Needed
One of the best things about this recipe is how little equipment it requires. Here is what you will need:
- One large mixing bowl — Any medium-to-large bowl will do. I use a standard ceramic mixing bowl, but glass or stainless steel work just as well.
- A fork or whisk — A fork is actually my preferred tool here. It mashes the bananas beautifully and mixes the batter without overworking it. A whisk works too, but a fork gives you more control.
- A 9×5-inch loaf pan — This is the standard size for banana bread. If you use an 8×4-inch pan, your bread will be taller and may need an extra 5-10 minutes of baking time. If you use a larger pan, it will be shorter and bake faster.
- Parchment paper — Not strictly necessary, but it makes lifting the finished bread out of the pan a breeze. I always line my pan with a sling of parchment paper that hangs over the two long sides.
- Cooling rack — A wire rack allows air to circulate around the bread as it cools, preventing the bottom from getting soggy. If you do not have one, you can use the inverted loaf pan lid or just let it cool in the pan for 10 minutes, then turn it out onto a cutting board.
- Measuring cups and spoons — For accuracy. I prefer using a kitchen scale for the flour and bananas, but measuring cups work fine if you spoon and level properly.
- Baking sheet (for toasting walnuts) — A small baking sheet or even a pie plate works for toasting the walnuts.
I have made this recipe with a cheap loaf pan from the dollar store and it turned out perfectly. Do not overthink the equipment. A bowl, a fork, and an oven are all you truly need.
Preparation Method
Follow these steps carefully, and you will have a beautiful loaf of banana walnut bread in about an hour. The key is not to overmix the batter—mix just until the flour disappears, then stop.
- Preheat your oven to 350°F (175°C). Position a rack in the center of the oven. Line a 9×5-inch loaf pan with parchment paper, leaving an overhang on the two long sides. Lightly grease the exposed ends of the pan with butter or nonstick spray.
- Toast the walnuts. Spread the walnut halves or pieces on a small baking sheet. Bake for 6-8 minutes, until they smell nutty and are slightly darkened. Watch them closely—they can burn quickly. Remove from the oven and let them cool completely. Once cool, roughly chop them into small pieces. Set aside about 2 tablespoons for topping the loaf if desired.
- Mash the bananas. In your large mixing bowl, add the three ripe bananas. Mash them with a fork until they are mostly smooth with a few small lumps remaining. You want some texture here, not baby food. You should have about 1 ½ cups of mashed banana.
- Add the wet ingredients. To the mashed bananas, add the melted butter, granulated sugar, egg, and vanilla extract. Stir with your fork or a whisk until everything is well combined. The mixture should look smooth and slightly glossy. Do not worry if it looks a little separated at this point—that is normal.
- Add the dry ingredients. Sprinkle the flour, baking soda, salt, and cinnamon (if using) over the wet mixture. Stir gently with your fork or a spatula, using a folding motion. Mix only until you no longer see streaks of flour. A few small lumps are perfectly fine. Overmixing at this stage will develop gluten and make your bread tough and dense.
- Fold in the walnuts. Add the cooled, chopped walnuts to the batter. Fold them in gently with a spatula, just until evenly distributed. Do not overmix. The batter will be thick and slightly lumpy—that is exactly what you want.
- Transfer to the pan. Scrape the batter into your prepared loaf pan. Spread it evenly with the spatula. If you saved some walnut pieces for the top, sprinkle them over the batter now, pressing them in very lightly so they stick.
- Bake. Place the pan in the preheated oven. Bake for 55-65 minutes, or until a toothpick inserted into the center comes out clean or with just a few moist crumbs attached. If the top is browning too quickly after 40 minutes, tent the loaf loosely with aluminum foil. My oven usually takes exactly 58 minutes, but ovens vary—start checking at 50 minutes.
- Cool in the pan. Remove the pan from the oven and place it on a cooling rack. Let the bread cool in the pan for 10-15 minutes. This allows it to set and makes it easier to remove without breaking.
- Remove and cool completely. Use the parchment overhang to lift the bread out of the pan and onto the cooling rack. Peel away the parchment paper. Let the bread cool completely before slicing—about 1 hour. I know it is hard to wait, but slicing too early will result in crumbly, gummy slices. The bread continues to set as it cools.
Visual cue: The finished loaf should be deep golden brown on top, with a slight crack down the center. It should feel firm to the touch and spring back slightly when pressed. The smell alone will tell you it is done—your whole kitchen will smell like toasted walnuts and caramelized banana.
Cooking Tips & Techniques
After making this recipe more times than I can count, here are the things I have learned the hard way so you do not have to:
- Use really ripe bananas. This is the single most important tip. If your bananas are not spotty and soft, your bread will be less sweet and less moist. I keep a bag of overripe bananas in my freezer at all times—just thaw them in the microwave for 30 seconds, then drain off the excess liquid before mashing.
- Do not overmix the batter. This cannot be said enough. Mix until the flour just disappears. Overmixing develops gluten, which makes the bread tough and rubbery instead of tender. A few lumps are your friend.
- Toast the walnuts. I know it is an extra step, but it makes a world of difference. Raw walnuts can taste slightly bitter and have a soft, almost mealy texture. Toasting brings out their natural oils and makes them crunchy and sweet. You will taste the difference in every bite.
- Measure your flour correctly. The most common mistake in baking is using too much flour. Spoon the flour into your measuring cup, then level it off with a straight edge. Do not scoop directly from the bag—that packs the flour and can add up to 25% more than you need.
- Let it cool completely. I know it is tempting to cut into warm banana bread, but trust me on this one. The bread is still setting up as it cools. Slicing too early will give you a crumbly, gummy mess. Let it cool for at least an hour on the wire rack. The wait is worth it.
- Check for doneness with a toothpick. Insert a wooden toothpick into the center of the loaf. If it comes out clean or with a few moist crumbs, it is done. If it comes out wet with batter, bake for another 5 minutes and check again.
One time I forgot the baking soda. The bread came out flat and dense, like a banana-flavored hockey puck. It was a sad day. So double-check your ingredients before you start mixing. It is a simple mistake that is easy to avoid.
Variations & Adaptations
This recipe is wonderfully flexible. Here are some of my favorite ways to change it up:
- Chocolate Chip Banana Walnut Bread: Fold in ½ cup of semi-sweet or dark chocolate chips along with the walnuts. The chocolate melts into little pockets of richness that pair beautifully with the banana and toasted nuts. This is my most-requested version.
- Spiced Banana Bread: Add ½ teaspoon of ground nutmeg, ¼ teaspoon of ground ginger, and a pinch of ground cloves along with the cinnamon. This gives the bread a warm, holiday-inspired flavor that is perfect for fall and winter baking.
- Vegan Banana Walnut Bread: Substitute the melted butter with melted coconut oil or a neutral vegetable oil. Use a flax egg (1 tablespoon ground flaxseed mixed with 3 tablespoons water, let sit for 5 minutes) instead of the regular egg. The texture will be slightly different—a bit more tender and less rich—but it is still delicious.
- Gluten-Free Version: Use a 1:1 gluten-free baking flour blend that contains xanthan gum. I have had good results with both King Arthur Measure for Measure and Bob’s Red Mill 1:1 Baking Flour. The texture is slightly more delicate, so let it cool completely before slicing.
- Lower Sugar Option: Reduce the granulated sugar to ½ cup. The bananas provide plenty of sweetness, so you really do not miss the extra sugar. You can also substitute up to half the sugar with coconut sugar for a deeper, more caramel-like flavor.
- Add Dried Fruit: Fold in ½ cup of chopped dried dates, raisins, or dried cranberries along with the walnuts. The chewy fruit adds another layer of texture and sweetness. If you do this, reduce the sugar to ⅔ cup to balance the sweetness.
I have tried every single one of these variations, and they all work. My personal favorite is the chocolate chip version—it feels like a special treat, but it is still simple enough for a weekday afternoon.
Serving & Storage Suggestions
This banana walnut bread is wonderful on its own, but a few thoughtful touches can make it even better.
Serving: Serve the bread at room temperature or slightly warm. To warm a slice, pop it in the toaster for about 30 seconds or microwave it for 10-15 seconds. A thin pat of salted butter melting into a warm slice is pure heaven. For a more indulgent treat, spread a little cream cheese or mascarpone on top. It pairs beautifully with a cup of coffee, a glass of cold milk, or a warm mug of chai tea.
What to serve alongside: This bread is wonderful as part of a brunch spread. Pair it with a creamy tropical mango protein smoothie for a balanced breakfast, or serve it alongside a fresh balsamic vinaigrette chopped salad with feta and watermelon for a sweet-and-savory lunch combo. It also makes a lovely afternoon snack with a cup of tea.
Storage: Store the bread in an airtight container at room temperature for up to 4 days. To keep it extra moist, place a piece of paper towel in the bottom of the container and another on top of the bread. Replace the paper towels if they become soggy. Do not refrigerate the bread—it will dry out faster in the fridge.
Freezing: This bread freezes beautifully. Wrap the cooled loaf tightly in plastic wrap, then in a layer of aluminum foil, and place it in a freezer-safe bag. It will keep for up to 3 months. To thaw, leave it on the counter overnight, still wrapped. You can also freeze individual slices—wrap each slice in plastic wrap, then place them in a freezer bag. Grab a slice whenever you need a quick treat.
Reheating from frozen: Unwrap a frozen slice and microwave it for 20-30 seconds, or toast it directly from frozen for 2-3 minutes. It will taste almost as good as fresh.
Flavor development: Interestingly, this bread actually tastes better on the second day. The flavors have time to meld and mellow, and the texture becomes even more moist. So if you can resist eating it all on day one, you are in for a real treat on day two.
Nutritional Information & Benefits
Here is the estimated nutritional information for one slice of this banana walnut bread (based on 10 slices per loaf):
| Nutrient | Amount per Slice |
|---|---|
| Calories | 285 |
| Total Fat | 13g |
| Saturated Fat | 5g |
| Cholesterol | 35mg |
| Sodium | 220mg |
| Total Carbohydrates | 38g |
| Dietary Fiber | 2g |
| Sugars | 19g |
| Protein | 5g |
Health Benefits: Bananas are rich in potassium, vitamin B6, and vitamin C. They also contain resistant starch, which can support gut health. Walnuts are an excellent source of omega-3 fatty acids, which are important for heart and brain health. They also provide protein, fiber, and antioxidants. This bread is a more nutritious option than many store-bought baked goods, and it contains no preservatives or artificial ingredients.
Dietary Considerations: This recipe is vegetarian. It can be made dairy-free by using coconut oil instead of butter, and vegan by using a flax egg and coconut oil. It contains gluten, eggs, and tree nuts (walnuts). For a nut-free version, simply omit the walnuts or substitute with sunflower seeds or pumpkin seeds. The bread is relatively low in added sugar compared to many dessert breads, especially if you use very ripe bananas.
Allergen Note: This recipe contains wheat (gluten), eggs, dairy (butter), and tree nuts (walnuts). Please check all ingredient labels if you are cooking for someone with allergies.
Conclusion
This one bowl banana walnut bread is the kind of recipe that becomes a staple. It is simple enough for a beginner baker, forgiving enough for a busy weeknight, and delicious enough to impress anyone who tries it. The combination of sweet, tender banana bread and crunchy, toasted walnuts is a classic for a reason.
I love that this recipe asks so little of me. One bowl. A fork. Ten minutes of my time. And in return, it gives me a warm, fragrant loaf that makes my kitchen feel like home. It is the recipe I make when I need something reliable, something comforting, something that reminds me that good food does not have to be complicated.
I encourage you to make this bread your own. Add chocolate chips if that is your thing. Swap the walnuts for pecans. Reduce the sugar if you prefer a less sweet loaf. The beauty of this recipe is that it works with you, not against you. It is a starting point, not a rulebook.
If you try this recipe, I would love to hear how it turns out. Leave a comment below and let me know if you made any changes, or just tell me about the bananas that inspired you to bake. And if you are looking for another cozy, comforting recipe, you might enjoy this cozy slow cooker Tuscan white bean chicken soup with kale and lemon—it is the perfect savory counterpart to this sweet treat.
Happy baking, friend. Your kitchen is about to smell amazing.
Frequently Asked Questions
Can I use frozen bananas for this recipe?
Yes, absolutely. Frozen bananas are actually perfect for banana bread because they become very soft and sweet as they thaw. To use them, thaw the bananas in the microwave for about 30 seconds, then drain off any excess liquid before mashing. The liquid can make your bread too wet if you do not remove it.
Why did my banana bread turn out dry?
Dry banana bread is usually caused by one of three things: too much flour, not enough banana, or overbaking. Make sure you spoon and level your flour, use very ripe bananas (they provide moisture), and check for doneness early. Start checking at 50 minutes with a toothpick.
Can I make this recipe without walnuts?
Of course. Simply omit the walnuts entirely, or substitute them with an equal amount of pecans, chocolate chips, dried fruit, or seeds like pumpkin or sunflower seeds. The bread will still be delicious without any add-ins—just a classic, simple banana bread.
How do I know when the banana bread is done baking?
The best test is the toothpick test. Insert a wooden toothpick into the center of the loaf. If it comes out clean or with just a few moist crumbs attached, the bread is done. If it comes out wet with batter, bake for another 5 minutes and check again. The top should also be deep golden brown and the edges should be pulling away slightly from the pan.
Can I double this recipe?
Yes, this recipe doubles beautifully. Simply double all the ingredients and bake in two separate 9×5-inch loaf pans. You can also bake it in a single 9×13-inch pan for a thinner, bar-style bread—reduce the baking time to about 30-35 minutes and check with a toothpick. If you are making a big batch for a crowd or for gifting, this is a great option.
Pin This Recipe!
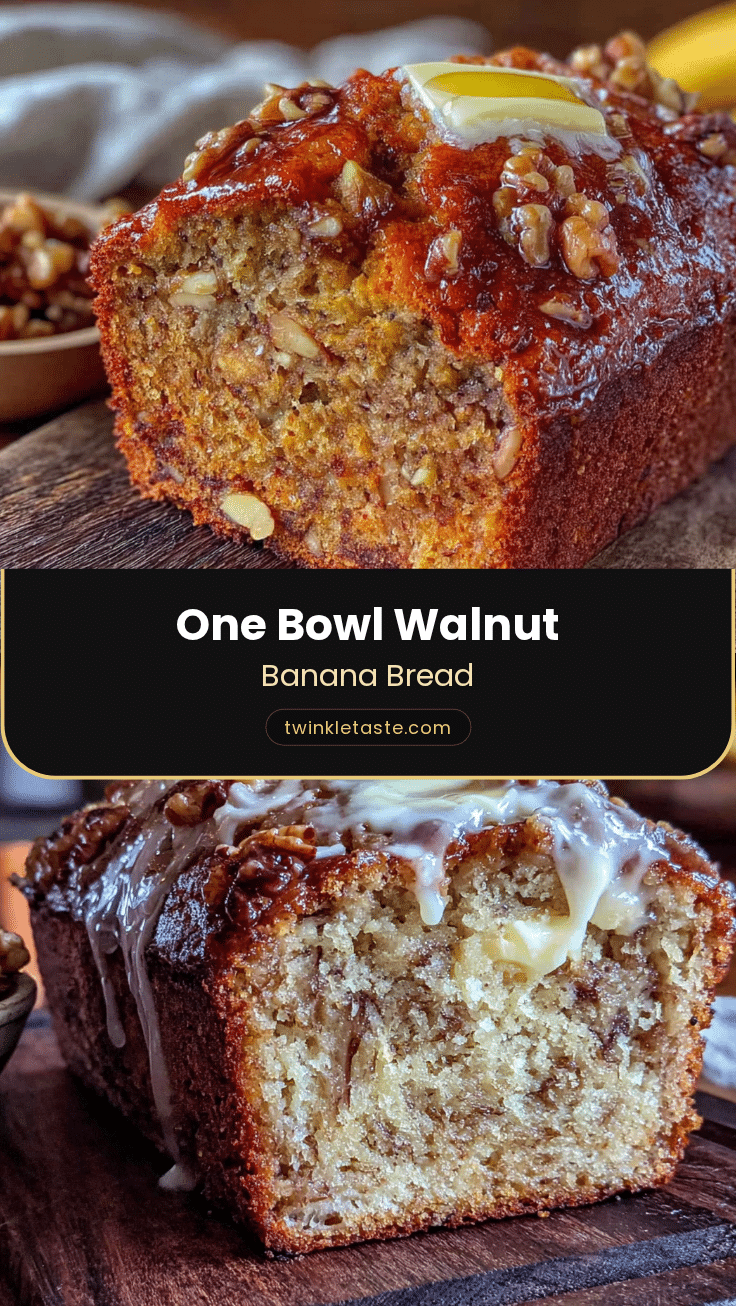
Best One Bowl Banana Walnut Bread: Easy Recipe
This one-bowl banana walnut bread is tender, moist, and packed with crunchy toasted walnuts. It requires no mixer, just a fork and a bowl, and comes together in about 10 minutes of active time.
- Prep Time: 10 minutes
- Cook Time: 55-65 minutes
- Total Time: 1 hour 10 minutes to 1 hour 15 minutes
- Yield: 10 servings 1x
- Category: Dessert
- Cuisine: American
Ingredients
- 3 large ripe bananas, mashed (about 1 ½ cups or 340g)
- ⅓ cup (75g) unsalted butter, melted
- ¾ cup (150g) granulated sugar
- 1 large egg, room temperature
- 1 teaspoon vanilla extract
- 1 ½ cups (190g) all-purpose flour
- 1 teaspoon baking soda
- ½ teaspoon salt
- ½ teaspoon ground cinnamon (optional)
- 1 cup (120g) walnut halves or pieces, toasted and chopped
- Optional: extra walnuts for topping
Instructions
- Preheat your oven to 350°F (175°C). Position a rack in the center of the oven. Line a 9×5-inch loaf pan with parchment paper, leaving an overhang on the two long sides. Lightly grease the exposed ends of the pan with butter or nonstick spray.
- Toast the walnuts: Spread the walnut halves or pieces on a small baking sheet. Bake for 6-8 minutes, until they smell nutty and are slightly darkened. Watch them closely—they can burn quickly. Remove from the oven and let them cool completely. Once cool, roughly chop them into small pieces. Set aside about 2 tablespoons for topping the loaf if desired.
- Mash the bananas: In your large mixing bowl, add the three ripe bananas. Mash them with a fork until they are mostly smooth with a few small lumps remaining. You should have about 1 ½ cups of mashed banana.
- Add the wet ingredients: To the mashed bananas, add the melted butter, granulated sugar, egg, and vanilla extract. Stir with your fork or a whisk until everything is well combined. The mixture should look smooth and slightly glossy.
- Add the dry ingredients: Sprinkle the flour, baking soda, salt, and cinnamon (if using) over the wet mixture. Stir gently with your fork or a spatula, using a folding motion. Mix only until you no longer see streaks of flour. A few small lumps are perfectly fine.
- Fold in the walnuts: Add the cooled, chopped walnuts to the batter. Fold them in gently with a spatula, just until evenly distributed. Do not overmix. The batter will be thick and slightly lumpy.
- Transfer to the pan: Scrape the batter into your prepared loaf pan. Spread it evenly with the spatula. If you saved some walnut pieces for the top, sprinkle them over the batter now, pressing them in very lightly so they stick.
- Bake: Place the pan in the preheated oven. Bake for 55-65 minutes, or until a toothpick inserted into the center comes out clean or with just a few moist crumbs attached. If the top is browning too quickly after 40 minutes, tent the loaf loosely with aluminum foil.
- Cool in the pan: Remove the pan from the oven and place it on a cooling rack. Let the bread cool in the pan for 10-15 minutes.
- Remove and cool completely: Use the parchment overhang to lift the bread out of the pan and onto the cooling rack. Peel away the parchment paper. Let the bread cool completely before slicing—about 1 hour.
Notes
Use really ripe bananas for best sweetness and moisture. Do not overmix the batter. Toast the walnuts for best flavor. Let the bread cool completely before slicing to avoid crumbling. The bread tastes even better on the second day.
Nutrition
- Serving Size: 1 slice
- Calories: 285
- Sugar: 19
- Sodium: 220
- Fat: 13
- Saturated Fat: 5
- Carbohydrates: 38
- Fiber: 2
- Protein: 5
Keywords: banana bread, walnut bread, one bowl banana bread, easy banana bread, moist banana bread, banana walnut bread


