My nephew turned seven last October, and his only request was a Halloween birthday party. Not a costume party that happened to fall near his birthday — a full-on spooky celebration with cobwebs, glow sticks, and cupcakes that looked like they might crawl off the plate. I spent three weeks testing different frosting techniques and candy placement, trying to find a version of spooky spider cupcakes that actually looked good and didn’t taste like a sugar science experiment. The ones from the bakery were always too dry, and the homemade versions I tried either collapsed or looked more sad than scary.
The morning of the party, I finally landed on something that worked. Rich chocolate cupcakes (because kids don’t want vanilla on Halloween), a dark cocoa buttercream that pipes clean and holds its shape, and pretzel legs that stay crunchy even after a few hours on the counter. I sent a photo to my sister, and she replied with seventeen exclamation points. That was the moment I knew these spooky spider cupcakes were going to be the thing everyone remembered about that party — not the decorations or the goodie bags, but the cupcakes that looked like they were about to skitter across the table.
They were gone in twelve minutes. Twelve minutes. That’s how long it took for twenty-four cupcakes to disappear at a party with pizza, chips, and a bounce house. A few parents asked for the recipe, and I realized I had accidentally created something worth sharing. These aren’t just cute — they’re genuinely good chocolate cupcakes with a sturdy crumb and frosting that doesn’t slide off when you add the legs. The spiders look creepy enough to fit the theme but approachable enough that even the pickiest seven-year-old will grab one without hesitation.
Why You’ll Love This Recipe
These spooky spider cupcakes solve the biggest problem with themed party desserts: they look impressive but come together without specialty tools or advanced piping skills. I’ve made them for three different Halloween parties now, and every time, someone asks if I bought them from a bakery. Here’s why they work:
- No fancy equipment needed — You don’t need a piping bag with a specialty tip. A zip-top bag with the corner snipped off works perfectly for the spider bodies.
- Kid-friendly assembly — The spider legs (pretzel sticks) and eyes (candy eyes) go on after the frosting, so little hands can help without making a mess.
- Make-ahead friendly — Bake the cupcakes up to two days ahead and frost the morning of the party. The pretzel legs stay crunchy for about 6-8 hours at room temperature.
- Customizable spookiness — Want them cuter? Use larger candy eyes. Want them scarier? Pipe the frosting in jagged swoops instead of smooth swirls.
- Actually delicious — This isn’t one of those recipes where the decoration outshines the cake. The chocolate base is moist, tender, and rich enough to satisfy adults who claim they “don’t do themed desserts.”
What makes these different from every other spider cupcake recipe online is the frosting stability. I tested five different buttercream ratios before finding one that holds the pretzel legs upright without sagging or sliding. The legs stay firmly in place even after an hour on a dessert table in a warm house. That matters more than you’d think when you’re trying to transport cupcakes to a party without them looking like a spider massacre.
What Ingredients You Will Need
This recipe uses basic baking staples with a few specific additions that make the difference between a good cupcake and a great one. The ingredient list looks long, but most of these are things you probably already have in your pantry.
For the Chocolate Cupcakes
- 1 ¾ cups all-purpose flour (spooned and leveled — don’t scoop directly from the bag or you’ll pack in too much)
- ¾ cup unsweetened cocoa powder (I prefer Dutch-process for deeper color, but natural works fine too)
- 1 ½ teaspoons baking powder
- 1 ½ teaspoons baking soda
- 1 teaspoon salt
- 2 large eggs, room temperature (cold eggs seize the batter)
- 1 cup whole milk, room temperature (adds richness — don’t use skim)
- ½ cup vegetable oil (keeps the cupcakes moist longer than butter)
- 2 teaspoons vanilla extract
- 1 cup hot coffee (this deepens the chocolate flavor without making it taste like coffee — trust me on this one)
- 1 ½ cups granulated sugar
For the Dark Cocoa Buttercream
- 1 cup unsalted butter, softened to room temperature
- 3 ½ cups powdered sugar
- ½ cup unsweetened cocoa powder
- ¼ cup heavy cream (adds stability — use whole milk in a pinch but the frosting won’t be as sturdy)
- 1 ½ teaspoons vanilla extract
- ¼ teaspoon salt
For the Spider Decorations
- 48 thin pretzel sticks (the standard 2-inch sticks, not the thick rods — break them in half if needed)
- 48 small candy eyes (available at craft stores or online — the 6mm size works best)
- Black gel food coloring (optional, for darker frosting)
I tested this recipe with both natural and Dutch-process cocoa, and the Dutch-process gives a noticeably darker, more Halloween-appropriate color. If you only have natural cocoa, add a drop of black gel food coloring to the frosting to deepen the shade. The coffee in the batter is non-negotiable — it doesn’t add coffee flavor, it just makes the chocolate taste more chocolaty. I learned that trick from a pastry chef friend who makes the best chocolate cake I’ve ever eaten.
Equipment Needed
You don’t need much for these spooky spider cupcakes, which is part of why I love making them for parties. Here’s what you’ll need:
- Standard 12-cup muffin tin (or two, if you’re making the full batch)
- Paper cupcake liners (black or orange ones make the spiders pop — I found some with spiderweb patterns at a party supply store)
- Two large mixing bowls
- Whisk and rubber spatula
- Electric hand mixer or stand mixer (for the buttercream — you can do it by hand but your arm will hate you)
- Piping bag or large zip-top bag
- Cooling rack
- Small offset spatula (helpful for smoothing but not essential)
If you don’t have a piping bag, a gallon-size zip-top bag works perfectly. Just fill it with frosting, snip about ½ inch off one corner, and pipe directly onto the cupcakes. I’ve done it this way for years and honestly prefer it to actual piping bags — less cleanup and no bag to wash.
Preparation Method
Let’s get into the actual process. I’ve broken this down into clear steps with timing estimates so you know exactly what to expect. The whole thing takes about 2 hours from start to finish, including cooling time.
Step 1: Make the Cupcake Batter (10 minutes)
Preheat your oven to 350°F (175°C). Line your muffin tin with paper liners — this recipe makes about 24 standard cupcakes, so you’ll need two tins or work in batches. In a large bowl, whisk together the flour, cocoa powder, baking powder, baking soda, and salt. Make sure there are no lumps in the cocoa powder; I usually sift it in just to be safe. In a separate bowl, whisk the eggs, milk, oil, and vanilla until smooth. The mixture should look pale and slightly thickened. Gradually add the sugar and whisk until combined — it will look grainy at this point, and that’s normal. Pour the wet ingredients into the dry ingredients and stir until just combined. A few streaks of flour are okay — overmixing makes tough cupcakes. Slowly pour in the hot coffee while stirring gently. The batter will be very thin, almost like a milkshake. Don’t panic. That’s exactly how it should look.
Step 2: Bake the Cupcakes (18-22 minutes)
Fill each liner about ⅔ full — an ice cream scoop works great for even portions. Bake for 18-22 minutes, rotating the pans halfway through. The cupcakes are done when a toothpick inserted in the center comes out with a few moist crumbs (not wet batter). Let them cool in the pan for 5 minutes, then transfer to a wire rack to cool completely. Do not frost warm cupcakes or the buttercream will melt into a sad puddle. I learned this the hard way during my first test batch and ended up with chocolate soup.
Step 3: Make the Buttercream (15 minutes)
While the cupcakes cool, make the frosting. Beat the softened butter with an electric mixer on medium speed for about 3 minutes until it’s pale and fluffy. Scrape down the sides of the bowl. Sift the powdered sugar and cocoa powder together (this prevents lumps), then add them to the butter one cup at a time, mixing on low speed after each addition. Add the heavy cream, vanilla, and salt, then increase the speed to medium-high and beat for 2 minutes until the frosting is light, airy, and holds its shape. If you want a darker color, add a tiny drop of black gel food coloring and mix until uniform. The frosting should be thick enough to pipe without running — if it seems too soft, refrigerate it for 10 minutes.
Step 4: Assemble the Spiders (20 minutes)
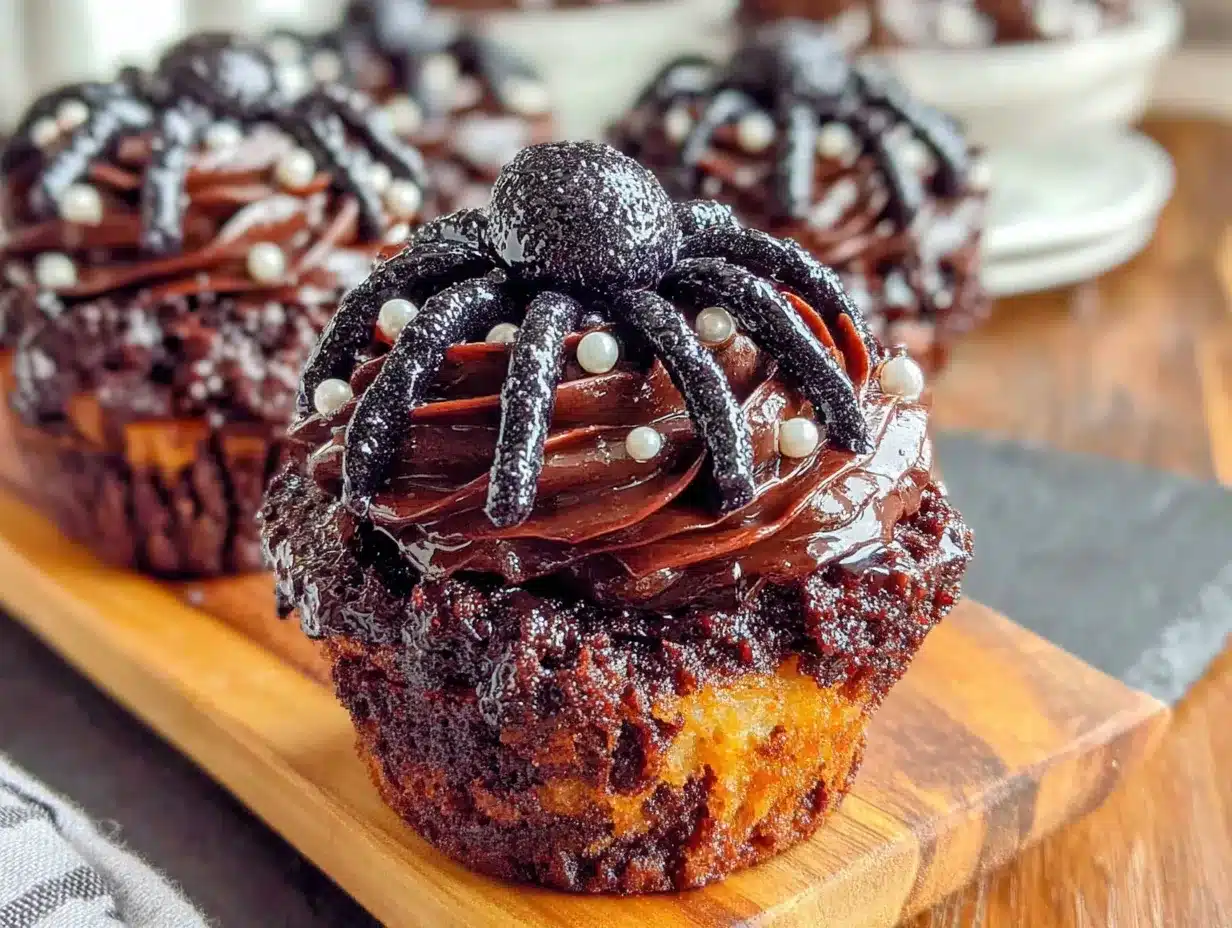
This is where the magic happens. Fit a piping bag (or zip-top bag) with a round tip or just snip the corner. Pipe a generous swirl of frosting onto each cooled cupcake — start from the outside and work inward, building up height in the center. You want the frosting to be about 1 ½ inches tall so the spider body looks proportional. Immediately after frosting each cupcake, insert four pretzel sticks on each side of the frosting mound to create the spider legs. Press them in gently so they’re secure but not buried. Place two candy eyes on the front of the frosting mound, pressing lightly so they stick. Repeat with the remaining cupcakes. The pretzel legs should fan out slightly to look like a spider in motion — straight legs look more like a dead spider, and nobody wants that at a birthday party.
Step 5: Set and Serve (15 minutes)
Let the finished cupcakes sit at room temperature for about 15 minutes so the frosting sets around the pretzel legs. This helps everything stay in place during transport. If you’re serving them later, store them in a single layer in an airtight container at room temperature. Do not refrigerate — the cold makes the cupcakes dense and the pretzels lose their crunch.
Cooking Tips & Techniques
After making these spooky spider cupcakes five times in one month, I picked up a few tricks that make the process smoother and the results more reliable.
Room temperature ingredients matter more than you think. Cold eggs and milk seize the butter in the batter, creating dense, flat cupcakes. Leave them on the counter for 30 minutes before starting. If you’re in a rush, place the eggs in a bowl of warm water for 5 minutes and microwave the milk for 15 seconds.
Don’t skip the coffee. I know it sounds weird, but the hot coffee activates the baking soda and deepens the chocolate flavor without any coffee taste. I’ve made these with hot water in a pinch, and the coffee version is noticeably better. If you’re serving kids who are sensitive to caffeine, use decaf — it works the same way.
Pipe the frosting immediately after making it. Buttercream stiffens as it sits, and piping cold frosting is a workout. If you make the frosting ahead of time, let it sit at room temperature for 20 minutes and re-whip it for 30 seconds before using.
Pretzel stick placement is everything. Insert them at a slight downward angle so the legs look like they’re crawling, not standing at attention. Space them evenly — two on each side, slightly staggered so they don’t all line up perfectly. Imperfect spacing looks more natural and more spider-like.
One mistake I made repeatedly was adding too many candy eyes. Two eyes per spider is plenty — more than that starts to look like a mutant creature, which might be fun for a different theme but not for spider cupcakes. Stick with two, placed close together near the front of the frosting mound.
Variations & Adaptations
These spooky spider cupcakes are surprisingly flexible. Here are a few ways to change them up depending on your crowd or occasion.
Gluten-free version: Substitute the all-purpose flour with a 1:1 gluten-free baking blend. I’ve tested this with Bob’s Red Mill and King Arthur brands, and both work well. Add an extra tablespoon of milk to compensate for the drier gluten-free flour.
Dairy-free adaptation: Use plant-based milk (oat milk works best for texture) and vegan butter sticks. The frosting will be slightly softer, so refrigerate the finished cupcakes for 10 minutes before serving to help the legs stay in place.
Peanut butter spider cupcakes: Add ⅓ cup creamy peanut butter to the buttercream and reduce the heavy cream to 2 tablespoons. The peanut butter adds structure to the frosting, making it even more stable for the pretzel legs.
Mini spider cupcakes: Use a mini muffin tin and bake for 10-12 minutes instead of 18-22. Use short pretzel sticks (or break regular ones in half) and smaller candy eyes. These are perfect for classroom parties where you need to feed 30 kids without overloading them with sugar.
White chocolate spiders: Swap the dark cocoa buttercream for a white chocolate version. Melt 4 ounces of white chocolate, let it cool slightly, and beat it into the frosting. The white frosting looks striking against dark cupcake liners, and you can tint it orange or purple for a non-traditional Halloween look.
I tried a version with red velvet cupcakes and cream cheese frosting, and honestly, the chocolate version wins every time. The red velvet looked more like a wound than a spider, which was a little too on-theme for my taste.
Serving & Storage Suggestions
These spooky spider cupcakes are best served at room temperature within 8 hours of assembly. The pretzel legs stay crunchy for about 6-8 hours, after which they start to soften from the moisture in the frosting. If you need to make them further ahead, bake the cupcakes up to 2 days in advance and store them unfrosted in an airtight container. Frost and decorate the morning of your event.
For presentation, arrange the cupcakes on a black platter or a cake stand draped with fake cobwebs. The contrast between the dark frosting and the white candy eyes really pops against a black background. If you’re serving them at a party, place them on a table away from direct sunlight or heat sources — warm buttercream gets soft quickly, and nobody wants droopy spider legs.
Leftover cupcakes (if you have any — I never do) can be stored in an airtight container at room temperature for up to 2 days. The pretzels will be soft by day two, but the cupcakes themselves stay moist. I actually prefer the day-old cupcakes for snacking because the flavors meld together overnight. Just don’t expect the spiders to look as perky as they did on day one.
These pair beautifully with a warm drink. I love serving them alongside a mug of black sesame latte with caramel drip for a grown-up Halloween treat. For the kids, a glass of cold milk or a warm mug of apple cider balances the richness of the chocolate perfectly.
Nutritional Information & Benefits
Let’s be honest — these are party cupcakes, not health food. But here’s the estimated nutritional breakdown per cupcake (based on 24 servings):
- Calories: 285
- Total Fat: 14g
- Saturated Fat: 7g
- Carbohydrates: 38g
- Sugar: 26g
- Protein: 3g
- Fiber: 2g
The cocoa powder provides a small amount of antioxidants and flavonoids, and the eggs add protein and healthy fats. The coffee in the batter boosts the chocolate flavor without adding significant caffeine — most of it bakes off during the cooking process. If you’re serving these at a school party, be aware that they contain dairy, eggs, and wheat. The pretzel sticks are made from wheat flour as well, so this recipe isn’t suitable for gluten-free or vegan diets without the substitutions listed above.
I always tell parents that one cupcake per kid is plenty — these are rich enough that most kids won’t even finish a second one. And honestly, the look on their faces when they see the spider legs is worth every calorie.
Conclusion
These spooky spider cupcakes have become my go-to Halloween birthday party recipe for good reason. They look like they took hours of professional decorating, but they come together with basic ingredients and simple techniques. The chocolate base is genuinely delicious — not just “good for a themed cupcake” but good enough that people ask for the recipe even when it’s not Halloween. The pretzel legs add a salty crunch that balances the sweet frosting, and the candy eyes give each spider its own little personality.
I love that this recipe lets you be creative without requiring artistic skills. You can make the spiders cute or creepy depending on how you pipe the frosting and position the legs. My nephew’s friends named each spider before eating them last year, which was both adorable and slightly disturbing. That’s the kind of memory you can’t buy at a bakery.
If you make these for your next Halloween party or birthday celebration, I’d love to hear how they turn out. Drop a comment below with your spider stories — the good, the bad, and the ones that got eaten before you could take a photo. And if you come up with a variation I haven’t tried, share that too. Happy baking, and may your spiders always have their legs pointing in the right direction.
Frequently Asked Questions
Can I make these spooky spider cupcakes a day ahead?
You can bake the cupcakes up to two days ahead and store them unfrosted in an airtight container. For best results, frost and decorate them the morning of your event. The pretzel legs start softening after about 8 hours, so waiting too long will give you droopy spiders.
How do I transport these without ruining the spider legs?
Place the cupcakes in a single layer in a large, shallow container with a lid. Don’t stack them. If you’re driving, put the container on the floor of the car where it won’t slide around. The pretzel legs are surprisingly sturdy once the frosting sets — I’ve driven 30 minutes with these and only lost one leg.
Can I use a boxed cake mix instead of making the cupcakes from scratch?
You can, but the homemade version is noticeably better. Boxed mixes tend to be drier and less chocolatey. If you’re short on time, use a dark chocolate boxed mix and add a teaspoon of instant coffee powder to the batter. It won’t be as good as the scratch version, but it’ll still be pretty great.
What if I can’t find candy eyes at the store?
You can make your own with royal icing or use mini chocolate chips placed upside down. White chocolate chips with a tiny dot of black frosting also work. The candy eyes are definitely the easiest option, but they’re not essential — I’ve made these with black and white frosting dots piped directly onto the spider body, and they looked great.
Can I freeze these cupcakes for later?
Freeze the unfrosted cupcakes in a freezer-safe container for up to 3 months. Thaw them at room temperature for about an hour before frosting and decorating. Do not freeze the assembled spiders — the pretzels will get soggy and the candy eyes will fall off during thawing.
Pin This Recipe!
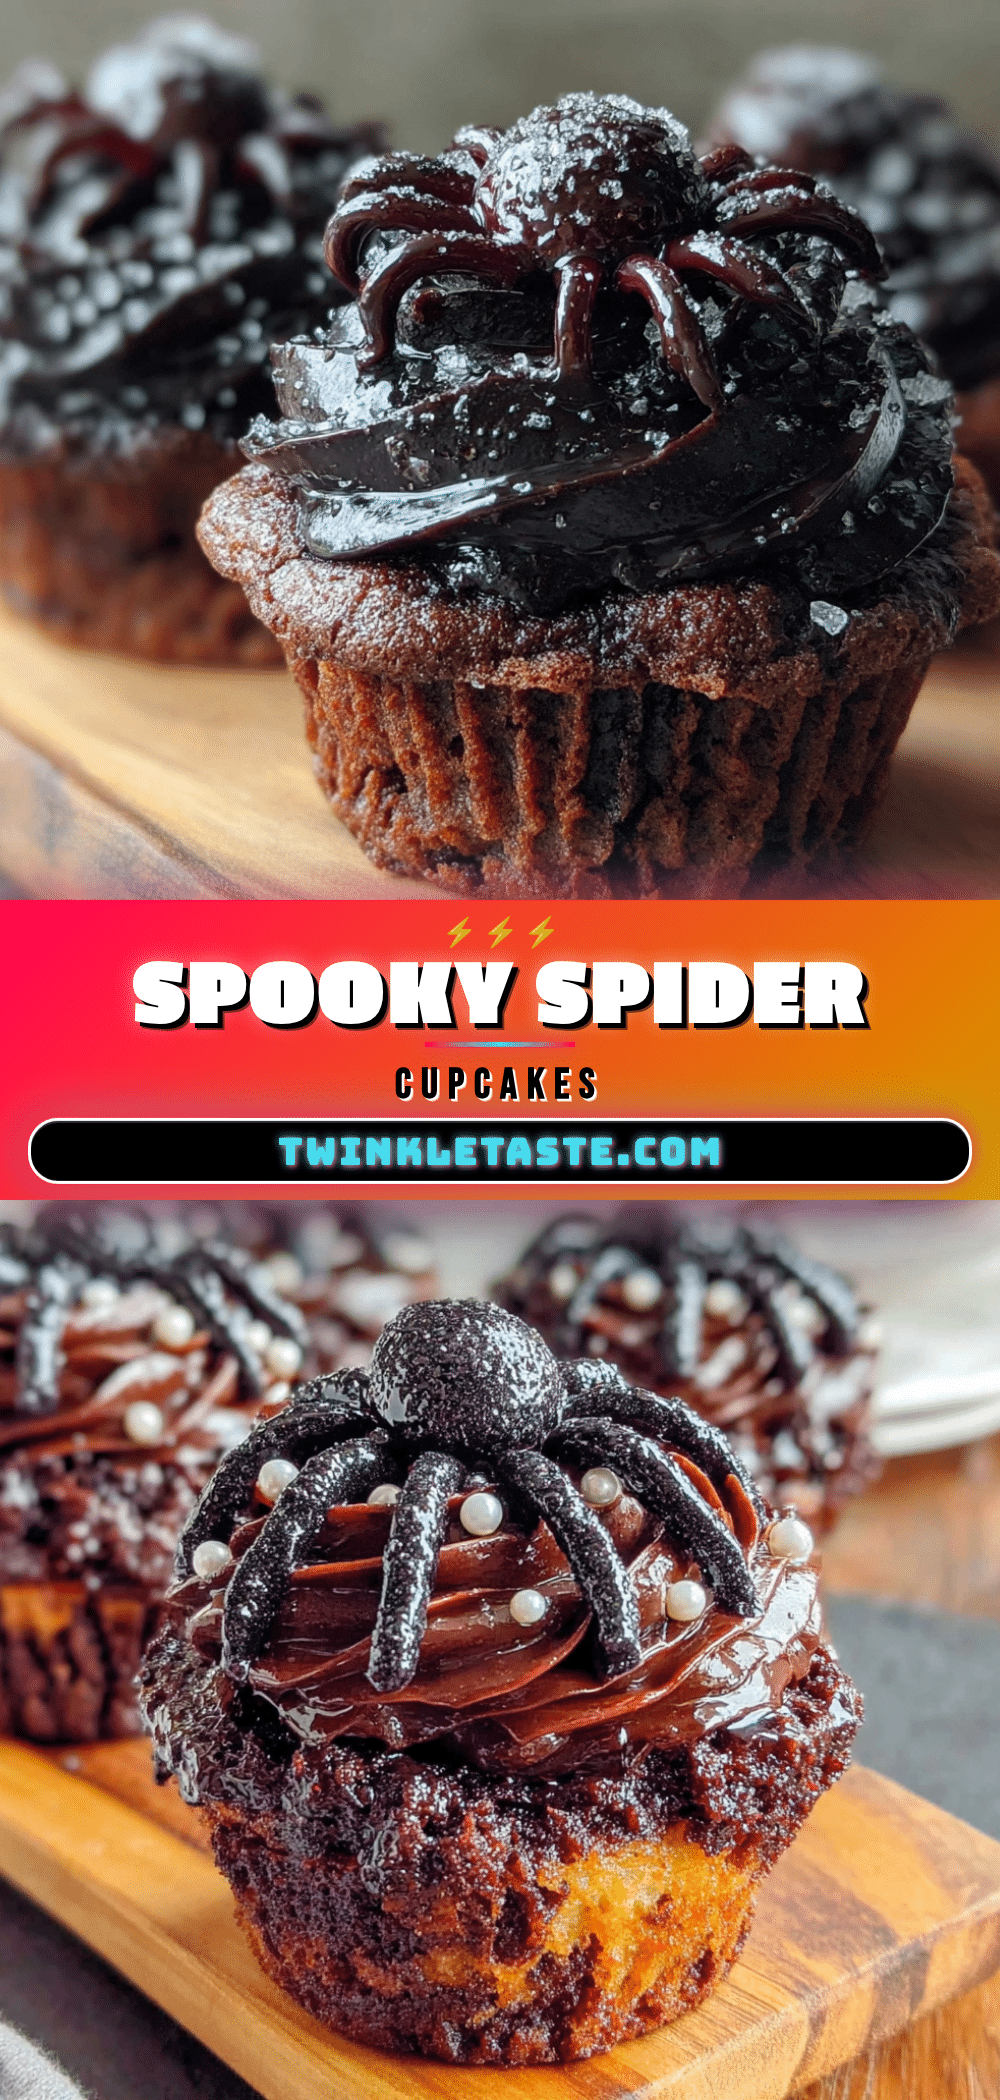
Best Easy Spooky Spider Cupcakes for a Halloween Birthday Party
Rich chocolate cupcakes with dark cocoa buttercream, pretzel stick legs, and candy eyes that look spooky but are easy to make. Perfect for Halloween parties and birthday celebrations.
- Prep Time: 30 minutes
- Cook Time: 20 minutes
- Total Time: 2 hours (including cooling)
- Yield: 24 servings 1x
- Category: Dessert
- Cuisine: American
Ingredients
- 1 ¾ cups all-purpose flour (spooned and leveled)
- ¾ cup unsweetened cocoa powder (Dutch-process preferred)
- 1 ½ teaspoons baking powder
- 1 ½ teaspoons baking soda
- 1 teaspoon salt
- 2 large eggs, room temperature
- 1 cup whole milk, room temperature
- ½ cup vegetable oil
- 2 teaspoons vanilla extract
- 1 cup hot coffee
- 1 ½ cups granulated sugar
- 1 cup unsalted butter, softened
- 3 ½ cups powdered sugar
- ½ cup unsweetened cocoa powder (for buttercream)
- ¼ cup heavy cream
- 1 ½ teaspoons vanilla extract (for buttercream)
- ¼ teaspoon salt (for buttercream)
- 48 thin pretzel sticks (standard 2-inch sticks)
- 48 small candy eyes (6mm size)
- Black gel food coloring (optional)
Instructions
- Preheat oven to 350°F (175°C). Line muffin tins with paper liners (makes about 24 cupcakes).
- In a large bowl, whisk together flour, ¾ cup cocoa powder, baking powder, baking soda, and salt.
- In a separate bowl, whisk eggs, milk, oil, and 2 teaspoons vanilla until smooth. Gradually add sugar and whisk until combined.
- Pour wet ingredients into dry ingredients and stir until just combined. Slowly pour in hot coffee while stirring gently. Batter will be thin.
- Fill each liner about ⅔ full. Bake for 18-22 minutes, rotating pans halfway through. Cupcakes are done when a toothpick inserted in center comes out with moist crumbs.
- Cool in pan for 5 minutes, then transfer to a wire rack to cool completely.
- For buttercream: Beat softened butter with electric mixer on medium speed for 3 minutes until pale and fluffy.
- Sift powdered sugar and ½ cup cocoa powder together. Add to butter one cup at a time, mixing on low after each addition.
- Add heavy cream, 1 ½ teaspoons vanilla, and ¼ teaspoon salt. Beat on medium-high for 2 minutes until light and airy. Add black gel food coloring if desired.
- Fit a piping bag or zip-top bag with a round tip or snip the corner. Pipe a generous swirl of frosting onto each cooled cupcake, building height in the center.
- Immediately insert 4 pretzel sticks on each side of the frosting mound to create spider legs. Press gently.
- Place 2 candy eyes on the front of the frosting mound, pressing lightly.
- Let cupcakes sit at room temperature for 15 minutes to set. Store in a single layer in an airtight container at room temperature.
Notes
Room temperature ingredients are crucial. Don’t skip the coffee—it deepens chocolate flavor without adding coffee taste. Pipe frosting immediately after making. Insert pretzel sticks at a slight downward angle for a crawling look. Use only 2 candy eyes per spider. Cupcakes can be baked up to 2 days ahead and stored unfrosted. Frost and decorate the morning of your event. Do not refrigerate assembled cupcakes.
Nutrition
- Serving Size: 1 cupcake
- Calories: 285
- Sugar: 26
- Fat: 14
- Saturated Fat: 7
- Carbohydrates: 38
- Fiber: 2
- Protein: 3
Keywords: spider cupcakes, Halloween cupcakes, chocolate cupcakes, birthday party cupcakes, spooky desserts, easy Halloween treats


