I figured a homemade immune shot would taste like punishment — the kind of thing you choke down while holding your nose. It took about one sip of this quick fire cider immune-boosting shot for that assumption to fall apart completely.
The first time I made fire cider was during a particularly brutal January. Everyone in my house was dropping like flies — runny noses, scratchy throats, the whole miserable routine. I was tired, honestly, and a little desperate. I had a jar of apple cider vinegar in the pantry, some garlic that was starting to sprout, and a sad, wrinkly jalapeño rolling around in the crisper drawer. That was it. No fancy tinctures, no expensive supplements. Just a few basic ingredients and a hunch that maybe, just maybe, this old folk remedy wasn’t just folklore.
I chopped everything up, poured the vinegar over it, and let it sit on my counter for a week. Every time I walked past, I’d give the jar a little shake and think, “This is either going to be brilliant or a huge mistake.” When I finally strained it, the smell hit me first — sharp, pungent, and undeniably alive. The taste? Surprisingly bright. It was spicy and sour, with a warm, earthy kick that cleared my sinuses before I even finished swallowing. It wasn’t a punishment. It was a wake-up call for my taste buds.
This quick version is my weeknight-friendly shortcut. Same punch, same immune-boosting potential, but ready in five minutes instead of a month. It’s the kind of recipe you keep in your back pocket for when you feel that tickle in your throat and need something real, fast.
Why You’ll Love This Quick Fire Cider Immune-Boosting Shot
Let’s be honest — most wellness shots taste like regret. They’re overly sweet, weirdly bitter, or just plain unpleasant. This one is different. It’s bold and zingy, with a balanced heat that wakes you up without making you wince.
- Ready in 5 Minutes: No fermenting, no waiting, no complicated steps. You can have this made and in your fridge before your coffee finishes brewing.
- Simple, Real Ingredients: No obscure adaptogens or hard-to-find powders. Everything here is probably already in your kitchen or easy to grab at the store.
- Perfect for Cold & Flu Season: When everyone around you is sniffling, having a bottle of this in the fridge feels like a secret weapon. It’s my go-to when I feel run down or after a day spent in crowded spaces.
- Completely Customizable: Prefer it less spicy? More garlicky? A touch sweeter? You’re in control. This recipe is a template, not a rulebook.
- Surprisingly Delicious: I know, I know — it sounds intense. But the combination of apple cider vinegar, fresh ginger, and a touch of honey creates a flavor profile that’s actually crave-able. It’s tangy, spicy, and just a little bit sweet.
What makes this recipe different from the rest is the technique — blending the ingredients instead of steeping them. This extracts all the flavor and goodness instantly, giving you that deep, complex taste of traditional fire cider without the two-week wait. It’s not just another version; it’s the version for people who want results right now.
What Ingredients You Will Need
This recipe uses simple, powerful ingredients to create a concentrated wellness boost. Each one plays a specific role, both in flavor and function. Most of these are pantry staples, but I’ve included notes on what to look for to get the best results.
- Apple Cider Vinegar (raw, unfiltered): This is the backbone of your fire cider. Look for brands like Bragg’s or Spectrum that contain the “mother” — that cloudy, stringy stuff floating at the bottom. It’s packed with beneficial bacteria and enzymes. (The mother is what gives it that extra immune-supporting edge.)
- Fresh Ginger Root (peeled, roughly chopped): Ginger is a powerhouse. It’s warming, anti-inflammatory, and fantastic for settling an upset stomach. I prefer using fresh ginger over dried for its bright, spicy zing. A 2-inch piece is plenty, but feel free to add more if you love that heat.
- Fresh Turmeric Root (peeled, roughly chopped): This is where the golden color comes from. Turmeric is famous for its anti-inflammatory properties, thanks to a compound called curcumin. Fresh turmeric is less earthy and more vibrant than the dried powder. If you can’t find fresh, use 1 teaspoon of dried turmeric powder instead.
- Garlic Cloves (peeled): Garlic is the immune system’s best friend. It’s antimicrobial and adds a savory, pungent depth to the shot. I use 3-4 cloves, but you can adjust based on your tolerance (and your social calendar).
- Jalapeño or Cayenne Pepper (seeds removed if desired): The heat source. Capsaicin, the compound that makes peppers hot, helps clear congestion and get your blood moving. A small jalapeño gives a nice, manageable kick. For more heat, add a pinch of cayenne pepper instead.
- Raw Honey: This balances the vinegar’s acidity and the pepper’s heat. Raw honey also has its own antibacterial properties and soothes a scratchy throat. Use local honey if you can — it may help with seasonal allergies. (Maple syrup works as a vegan alternative.)
- Lemon Juice (freshly squeezed): Fresh lemon juice adds brightness and a hefty dose of vitamin C. It cuts through the intensity of the other ingredients and makes the shot much more drinkable. Never use bottled lemon juice here — the fresh stuff makes a real difference.
- Black Peppercorns (freshly ground): This might seem like a small detail, but it’s crucial. Black pepper significantly increases the absorption of curcumin from the turmeric. Without it, you’re missing out on a lot of the benefits. A few cracks of fresh pepper is all you need.
Equipment Needed
You don’t need a professional kitchen to make this. A blender and a jar are really all it takes. Here’s what I use:
- High-Speed Blender: This is the most important tool. A high-speed blender like a Vitamix or Ninja will pulverize the ginger and turmeric into a smooth liquid, extracting maximum flavor. A regular blender will also work, but you may need to blend a bit longer and strain the mixture more thoroughly.
- Fine-Mesh Strainer or Nut Milk Bag: After blending, you’ll need to strain out the fibrous pulp. A fine-mesh strainer works well, but a nut milk bag makes the process even easier and gets you a smoother final product.
- Glass Jar or Bottle with Tight-Fitting Lid: A 16-ounce mason jar is perfect for storing your finished fire cider shot. A glass bottle with a pour spout makes it even easier to grab a shot in the morning.
- Cutting Board & Knife: For prepping your ginger, turmeric, garlic, and jalapeño. A small, sharp knife makes quick work of peeling the roots.
- Measuring Spoons & Cups: To get the proportions right, especially for the honey and lemon juice.
If you don’t have a high-speed blender, you can finely grate the ginger, turmeric, and garlic, then shake everything vigorously in a jar. It won’t be as concentrated, but it will still work. I’ve done this when my blender was in the dishwasher, and it got the job done.
Preparation Method
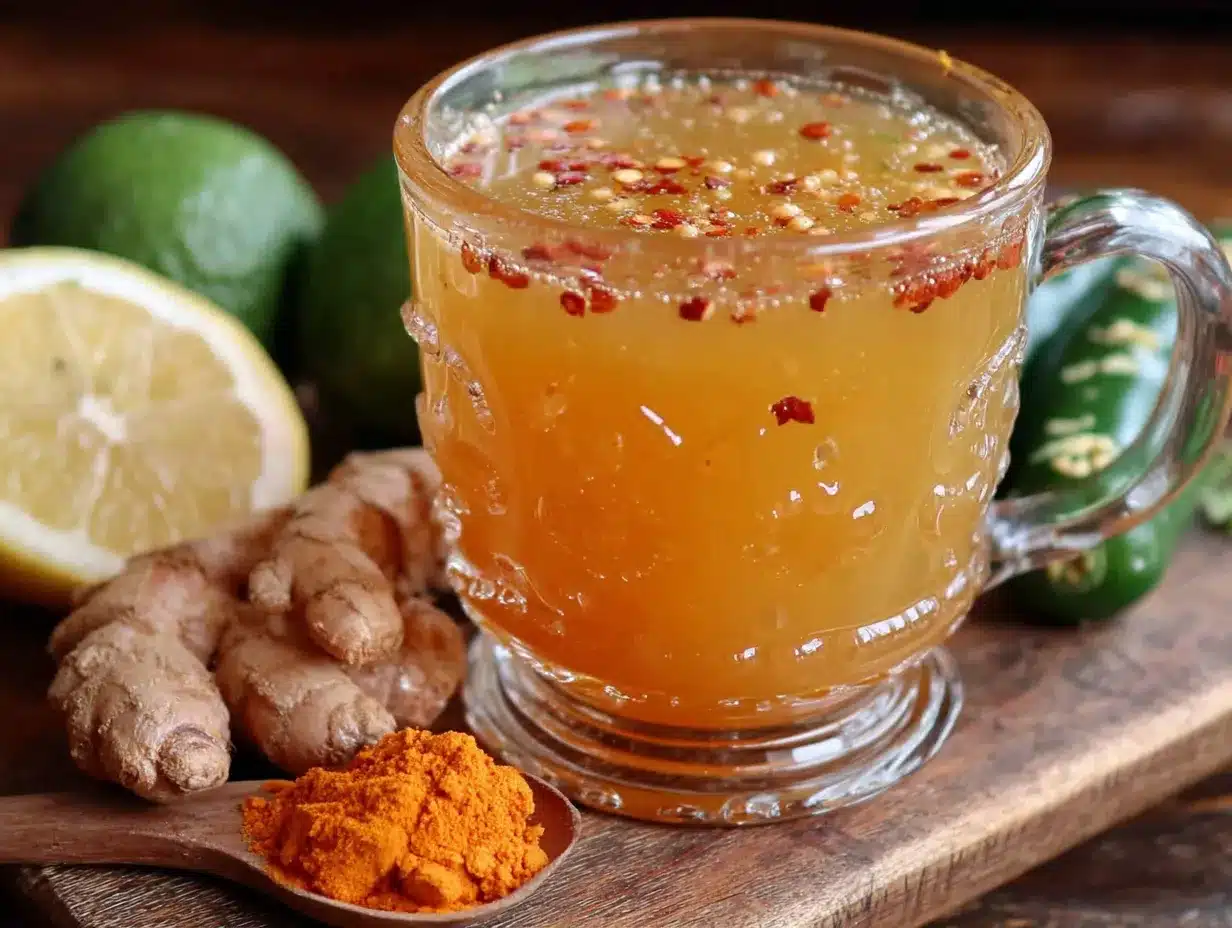
This is where the magic happens. The whole process takes about 5 minutes from start to finish.
- Prep your ingredients: Peel a 2-inch piece of fresh ginger and a 2-inch piece of fresh turmeric. A spoon works great for scraping off the skin. Roughly chop both into small chunks so your blender doesn’t struggle. Peel 3-4 garlic cloves. Remove the stem from a small jalapeño (remove the seeds and membranes if you want less heat). Juice half a lemon.
- Combine in blender: Add the chopped ginger, turmeric, garlic, and jalapeño to your blender. Pour in 1 cup of raw, unfiltered apple cider vinegar, 2 tablespoons of fresh lemon juice, 1 tablespoon of raw honey, and a pinch of freshly ground black pepper. (About 10-12 cracks of a pepper mill.)
- Blend until smooth: Start on low speed and gradually increase to high. Blend for 30-45 seconds, or until the mixture looks liquid and the solid pieces are completely broken down. The smell at this point is incredible — pungent, bright, and invigorating. It should look like a thick, golden-brown liquid.
- Strain the mixture: Place your fine-mesh strainer or nut milk bag over a glass measuring cup or bowl. Pour the blended mixture through the strainer. Use a spatula to press down on the pulp and extract as much liquid as possible. This is where you get your smooth, concentrated shot. Discard the fibrous pulp (or compost it!).
- Taste and adjust: Give your fire cider a taste. It should be tangy, spicy, and slightly sweet. If you want it sweeter, stir in a little more honey. If you want more heat, add a pinch of cayenne pepper and stir. This is your chance to customize it to your liking.
- Bottle and store: Pour the strained liquid into your clean glass jar or bottle. Seal it tightly with the lid. Label it with the date so you know when you made it.
- Shake before using: Because this is a raw, unfiltered product, some sediment may settle at the bottom. This is totally normal. Just give the bottle a good shake before you pour your shot.
Cooking Tips & Techniques
Over the years, I’ve made a few mistakes with this recipe so you don’t have to. Here’s what I’ve learned:
- Don’t skip the straining step. The first time I made this, I was in a hurry and just drank the blended mixture straight. Let me tell you — chewing your fire cider is not a pleasant experience. The fibrous pulp from the ginger and turmeric is tough to swallow. Straining is worth the extra 30 seconds.
- Use a microplane for a smoother texture. If you don’t have a high-speed blender, finely grate the ginger, turmeric, and garlic with a microplane instead of chopping them. This breaks down the fibers more effectively and results in a smoother final shot after shaking.
- Start with less heat. You can always add more, but you can’t take it out. I usually start with half a jalapeño and add a pinch of cayenne after tasting if I want more kick. Your heat tolerance might be different from mine, and that’s okay.
- Let it sit overnight for deeper flavor. While this recipe is ready immediately, the flavors meld and deepen if you let it sit in the fridge for 24 hours. The garlic and ginger become more rounded, and the honey fully incorporates. It’s even better the next day.
- Don’t use metal lids for long-term storage. The acidity of the apple cider vinegar can react with metal over time, causing a metallic taste. Use a plastic lid, or place a piece of parchment paper between the jar and the metal lid before screwing it on.
Variations & Adaptations
This recipe is endlessly adaptable. Don’t be afraid to play around with it based on what you have or what you’re craving.
- Milder Version: Omit the jalapeño and cayenne pepper entirely. The ginger still provides a gentle warmth, but this version is much more approachable for kids or those with sensitive stomachs. Add an extra tablespoon of honey for sweetness.
- Extra Garlic Punch: Double the garlic cloves. This is my go-to version when I feel a cold coming on. It’s potent, but garlic is one of the most powerful natural immune boosters out there. Just be prepared for the lingering aroma.
- Herbal Infusion: Add a sprig of fresh rosemary or a few sprigs of thyme to the blender. Both herbs have antimicrobial properties and add an earthy, aromatic layer to the flavor. This version pairs beautifully with a bowl of cozy slow cooker Tuscan white bean chicken soup on a chilly day.
- Citrus Twist: Replace half of the apple cider vinegar with fresh orange juice. This makes the shot much fruitier and more palatable for beginners. It also adds a significant boost of vitamin C. I made this version during a particularly bad flu season, and my kids actually asked for more.
- Warming Winter Shot: Add a 1-inch piece of cinnamon stick (broken into pieces) and 2 whole cloves to the blender. These spices add a cozy, mulled-cider vibe that’s perfect for the colder months. This variation is especially comforting when paired with a batch of wholesome homemade elderberry syrup for a double-dose of immune support.
Serving & Storage Suggestions
This fire cider is a concentrated shot, so a little goes a long way. Here’s how to make the most of it.
Serving: Take 1 to 2 tablespoons as a daily wellness shot, preferably in the morning on an empty stomach. You can also dilute it in a small glass of warm water if the straight shot feels too intense. I like to shoot it straight, chase it with a sip of water, and then eat a piece of toast to settle my stomach. It’s a quick, invigorating way to start the day.
Storage: Keep your fire cider in a tightly sealed glass jar in the refrigerator. It will stay fresh and potent for up to 3 months. The flavor will continue to develop over the first week, becoming more complex and mellow. Do not leave it at room temperature for extended periods, as the raw ingredients can ferment further and potentially spoil.
Reheating: You don’t need to reheat this, but if you want a warm, soothing drink, add 1 tablespoon of fire cider to a mug of hot water with a teaspoon of honey. It’s like a spicy, tangy tea that’s perfect for a sore throat or a stuffy nose.
Pairing Suggestions: This fire cider is a fantastic complement to other immune-supporting foods. Try it alongside a bowl of easy quinoa veggie power bowls for a lunch that fights off fatigue, or sip it before a dinner of crispy baked chicken thighs with lemon herb crust for a well-rounded, nourishing meal.
Nutritional Information & Benefits
This isn’t a meal replacement, but it’s a potent nutritional boost in a tiny package. Here’s what you’re getting in a 1-tablespoon serving:
| Nutrient | Amount (approx.) |
|---|---|
| Calories | 15-20 |
| Total Fat | 0g |
| Sodium | 5mg |
| Total Carbohydrates | 4g |
| Sugars | 3g (from honey) |
| Vitamin C | 2% DV |
| Iron | 1% DV |
Pin This Recipe!

Quick Fire Cider Immune-Boosting Shot: Easy 5-Minute Recipe

This quick fire cider immune-boosting shot is a bold, zingy wellness shot ready in just 5 minutes. Made with simple, real ingredients like apple cider vinegar, ginger, turmeric, garlic, and honey, it’s a delicious way to support your immune system without the long fermenting time.
- Prep Time: 5 minutes
- Cook Time: 0 minutes
- Total Time: 5 minutes
- Yield: 16 servings (1 tablespoon per serving) 1x
- Category: Wellness Shot
- Cuisine: American
Ingredients
- 1 cup raw, unfiltered apple cider vinegar (e.g., Bragg’s)
- 2-inch piece fresh ginger root, peeled and roughly chopped
- 2-inch piece fresh turmeric root, peeled and roughly chopped (or 1 teaspoon dried turmeric powder)
- 3–4 garlic cloves, peeled
- 1 small jalapeño, seeds removed if desired (or pinch of cayenne pepper)
- 1 tablespoon raw honey (or maple syrup for vegan)
- 2 tablespoons freshly squeezed lemon juice
- Pinch of freshly ground black pepper (about 10-12 cracks)
Instructions
- Prep your ingredients: Peel a 2-inch piece of fresh ginger and a 2-inch piece of fresh turmeric. Roughly chop both into small chunks. Peel 3-4 garlic cloves. Remove the stem from a small jalapeño (remove seeds and membranes for less heat). Juice half a lemon.
- Combine in blender: Add the chopped ginger, turmeric, garlic, and jalapeño to your blender. Pour in 1 cup of raw, unfiltered apple cider vinegar, 2 tablespoons of fresh lemon juice, 1 tablespoon of raw honey, and a pinch of freshly ground black pepper.
- Blend until smooth: Start on low speed and gradually increase to high. Blend for 30-45 seconds, or until the mixture looks liquid and the solid pieces are completely broken down.
- Strain the mixture: Place a fine-mesh strainer or nut milk bag over a glass measuring cup or bowl. Pour the blended mixture through the strainer. Use a spatula to press down on the pulp and extract as much liquid as possible. Discard the pulp.
- Taste and adjust: Give your fire cider a taste. If you want it sweeter, stir in a little more honey. If you want more heat, add a pinch of cayenne pepper and stir.
- Bottle and store: Pour the strained liquid into a clean glass jar or bottle. Seal it tightly with the lid. Label it with the date.
- Shake before using: Because this is a raw, unfiltered product, some sediment may settle at the bottom. Give the bottle a good shake before pouring your shot.
Notes
Don’t skip the straining step to avoid chewing fibrous pulp. For a smoother texture without a high-speed blender, finely grate the ginger, turmeric, and garlic with a microplane. Start with less heat and adjust to taste. Letting the shot sit in the fridge for 24 hours deepens the flavor. Avoid using metal lids for long-term storage due to acidity; use a plastic lid or place parchment paper between the jar and metal lid. This recipe is a template—customize with herbs, citrus, or spices as desired.
Nutrition
- Serving Size: 1 tablespoon
- Calories: 1520
- Sugar: 3
- Sodium: 5
- Carbohydrates: 4
Keywords: fire cider, immune booster, wellness shot, apple cider vinegar, ginger, turmeric, garlic, honey, cold remedy, flu season, quick recipe, 5-minute recipe


