My neighbor handed me a sweating casserole dish last July, said “it’s just a no-bake thing,” and walked away before I could ask a single question. I stood there holding this cold, pinkish dessert with graham cracker edges peeking out, completely skeptical. Let’s face it—I’ve had my share of soggy icebox cakes that taste more like wet cardboard than dessert. But that first bite? The strawberries were still bright, the cream had set into something almost like mousse, and the whole thing tasted like summer in a dish without ever turning on the oven. I texted her for the recipe before I finished my plate.
That was three years ago, and this Creamy No-Bake Strawberry Icebox Cake has become my secret weapon for every warm-weather gathering. It’s the kind of dessert that makes people close their eyes after the first forkful—honestly, I’ve watched it happen at least a dozen times. The layers soften just enough overnight so the vanilla wafers turn cake-like, but the strawberry cream filling stays light and fluffy. You don’t need any baking skills, fancy equipment, or even a mixer if you’re feeling stubborn about it. Just some bowls, a spatula, and a little patience while it chills.
What gets me every time is how something so simple can feel so special. There’s no complicated technique here, no list of obscure ingredients you’ll use once and forget about. It’s just good, honest dessert that happens to be incredibly easy. And honestly? That’s my favorite kind of recipe to share.
Why You’ll Love This Recipe
This Creamy No-Bake Strawberry Icebox Cake isn’t just another dessert—it’s the one you’ll reach for when you need something impressive without the stress. Here’s why it works so well:
- 10 Minutes of Prep : Seriously. You can have this assembled and chilling in the fridge faster than you can decide what to order for takeout. Perfect for those days when you need dessert but don’t want to work for it.
- No Oven Required : When it’s 90 degrees outside and your kitchen feels like a sauna, this recipe saves the day. No turning on the oven, no standing over a hot stove—just cool, creamy goodness.
- Simple Pantry Ingredients : Heavy cream, cream cheese, vanilla wafers, fresh strawberries, and a few basics. That’s it. No weird specialty items or expensive extracts.
- Make-Ahead Dream : This cake actually gets better after sitting overnight. You can prep it the day before your party and forget about it until serving time.
- Crowd-Pleaser Guaranteed : I’ve brought this to potlucks, birthday parties, and casual barbecues. It disappears every single time, and people always ask for the recipe.
- Naturally Beautiful : Those strawberry slices peeking through the layers create the prettiest cross-section when you cut into it. No decorating skills required.
What sets this version apart from other icebox cakes is the texture. Most recipes use whipped topping or instant pudding, which can feel artificial. This one uses real cream cheese and heavy cream, giving you that rich, tangy-sweet filling that actually holds its shape. The strawberries aren’t just thrown in—they’re macerated first, which draws out their natural juices and creates a syrupy layer that soaks into the wafers perfectly. It’s the difference between a good dessert and one people remember.
What Ingredients You Will Need
This recipe keeps things refreshingly simple. Every ingredient plays a specific role in creating that perfect balance of creamy, fruity, and crunchy textures. Here’s what you’ll need:
For the Strawberry Layer
- 2 cups fresh strawberries, hulled and sliced (about 1 pound) — Look for berries that are deep red and fragrant. If strawberries aren’t in season, frozen sliced strawberries work too—just thaw and drain them well first.
- 2 tablespoons granulated sugar — This draws out the natural juices from the berries and creates that lovely syrupy layer. You can adjust based on how sweet your strawberries are.
- 1 tablespoon fresh lemon juice — Adds brightness and helps the berries release their juices faster. Don’t skip it—it balances the sweetness beautifully.
For the Cream Filling
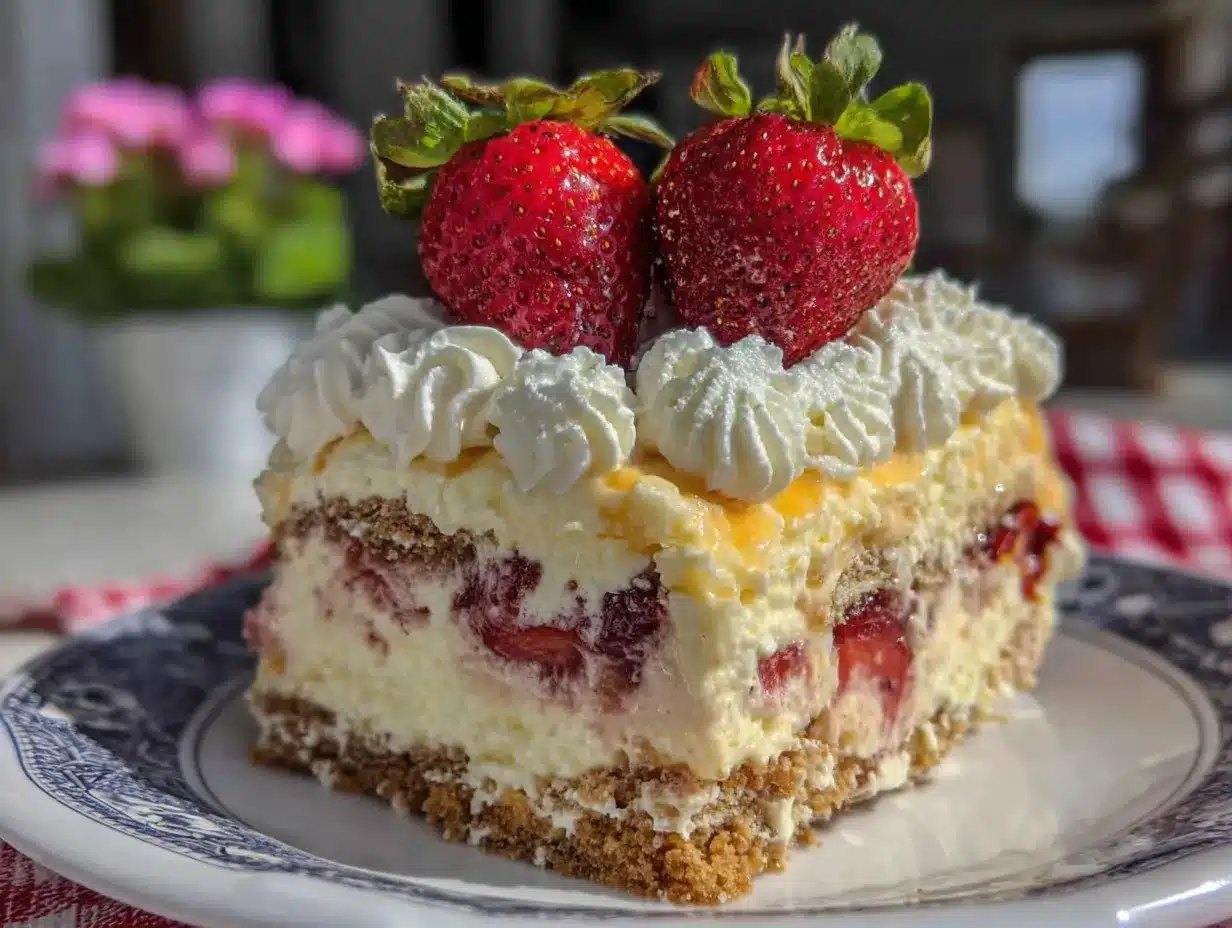
- 8 ounces cream cheese, softened to room temperature — Full-fat gives the best texture, but reduced-fat works in a pinch. Let it sit out for at least 30 minutes before starting.
- 1/2 cup powdered sugar — Dissolves more easily than granulated sugar, keeping the filling smooth and lump-free.
- 1 teaspoon vanilla extract — Pure vanilla makes a difference here. I recommend Nielsen-Massey or simply organic store brand for the best flavor.
- 1 1/2 cups heavy cream, cold — This is what gives the filling its light, mousse-like texture. Make sure it’s straight from the fridge.
For the Layers
- 1 box (about 12 ounces) vanilla wafers — Nilla Wafers are my go-to for their classic flavor and sturdy texture. You’ll need about 60-70 wafers total. Don’t use the mini ones—they’re too small to create clean layers.
- Extra strawberry slices and mint leaves for garnish (optional but pretty)
The beauty of this recipe is how forgiving it is. If you can’t find fresh strawberries, frozen ones work after a quick thaw and drain. No cream cheese? Mascarpone makes an even richer filling, though it’s pricier. And if you’re out of vanilla wafers, graham crackers or shortbread cookies both work—just expect a slightly different texture. For a gluten-free version, use gluten-free vanilla wafers or certified gluten-free graham crackers.
Equipment Needed
The equipment list for this recipe is refreshingly short. Here’s what you’ll need:
- 8×8-inch baking dish or similar 2-quart dish — Glass is ideal so you can see the layers, but ceramic or metal works fine. A 9-inch square pan also works if that’s what you have.
- Large mixing bowl — For whipping the cream. A glass or stainless steel bowl works best because it stays cold longer.
- Medium bowl — For macerating the strawberries.
- Hand mixer or stand mixer — You can whip the cream by hand with a whisk, but it’ll take about 5-7 minutes of vigorous arm work. A mixer makes it effortless.
- Spatula — For spreading the cream mixture evenly between layers.
- Sharp knife and cutting board — For slicing strawberries.
- Plastic wrap or lid — For covering the dish while it chills.
If you don’t have a hand mixer, a stand mixer with the whisk attachment works great. No mixer at all? A sturdy whisk and some elbow grease will get the job done—just make sure your cream is very cold and your bowl is chilled. I’ve made this in a rental cabin with nothing but a whisk and a fork, and it turned out beautifully. Sometimes the simplest setups produce the best results.
Preparation Method
Let’s walk through this step by step. Trust me, you’ll be amazed at how quickly this comes together.
Step 1: Macerate the Strawberries
In a medium bowl, combine the sliced strawberries, 2 tablespoons granulated sugar, and 1 tablespoon lemon juice. Stir gently to coat all the berries. Let them sit for 10-15 minutes while you prepare the cream filling. You’ll notice the strawberries releasing their beautiful red juices—that’s exactly what we want. Give them a gentle stir halfway through.
Step 2: Make the Cream Filling
In a large mixing bowl, beat the softened cream cheese with an electric mixer on medium speed until smooth and fluffy, about 2 minutes. Add the powdered sugar and vanilla extract, then beat until completely combined and no lumps remain. Scrape down the sides of the bowl with a spatula.
In a separate clean bowl (or the same bowl if you’re rinsing it—just make sure it’s dry), pour in the cold heavy cream. Using clean beaters, whip the cream on medium-high speed until stiff peaks form. This takes about 3-4 minutes with a hand mixer. You’ll know it’s ready when you lift the beaters and the cream holds its shape without drooping.
Gently fold the whipped cream into the cream cheese mixture using a spatula. Fold until just combined—you want streaks to disappear but don’t overmix or the filling will deflate. The result should be light, airy, and cloud-like.
Step 3: Drain the Strawberries
Using a slotted spoon, transfer the macerated strawberries to a small bowl, leaving the juices behind. Don’t throw away those juices—we’ll use them to brush the wafers later. Set both bowls aside.
Step 4: Assemble the Layers
Spread a thin layer of the cream filling (about 1/4 cup) on the bottom of your 8×8-inch dish. This helps the first layer of wafers stay put. Arrange a single layer of vanilla wafers on top, covering the bottom completely. You may need to break a few wafers to fill gaps—that’s totally fine.
Using a pastry brush or the back of a spoon, lightly brush the wafers with some of the reserved strawberry juice. Don’t soak them—just a light brush so they absorb a bit of that fruity flavor.
Spread about 1/3 of the remaining cream filling over the wafers. Top with about 1/3 of the drained strawberries, spreading them evenly. Repeat this process two more times: wafers, brush with juice, cream filling, strawberries. You should end with a final layer of cream filling on top. Reserve a few strawberry slices for garnish if you like.
Step 5: Chill and Set
Cover the dish tightly with plastic wrap and refrigerate for at least 6 hours, but overnight is best. The wafers need time to soften and absorb all that creamy, fruity goodness. I know it’s tempting to dig in sooner, but trust me—the texture is completely different after a full night in the fridge. The wafers transform into something almost cake-like, soft but with just a hint of structure left.
Step 6: Serve
When ready to serve, remove from the fridge and let it sit at room temperature for about 10 minutes—this makes slicing easier. Garnish with fresh strawberry slices and mint leaves if desired. Cut into squares and watch them disappear.
If the cake feels too soft to slice cleanly, pop it in the freezer for 20 minutes before cutting. That little chill firms everything up perfectly for neat squares.
Cooking Tips & Techniques
After making this cake more times than I can count, I’ve learned a few things the hard way. Here are my best tips for perfect results every time:
Room temperature cream cheese is non-negotiable. Cold cream cheese creates lumps that no amount of beating will fix. Let it sit on the counter for at least 30 minutes before you start. If you forgot to take it out, cut it into small cubes and microwave in 10-second bursts until soft but not melted.
Chill your bowl and beaters for the whipped cream. A cold bowl helps the cream whip up faster and hold its shape longer. Pop the bowl and beaters in the freezer for 10 minutes before you start—it makes a noticeable difference.
Don’t overwhip the cream. Stiff peaks are perfect, but if you keep going, you’ll end up with butter. Stop as soon as the cream holds its shape without drooping. If you accidentally go too far, don’t panic—just fold it gently into the cream cheese mixture and hope for the best. I’ve salvaged many overwhipped batches this way.
Layer evenly for the best texture. Take your time arranging the wafers and spreading the cream. Uneven layers mean some bites will be too wafer-heavy while others are all cream. A little patience here pays off in every perfect forkful.
Let it rest overnight. I know I’ve said this already, but it’s worth repeating. Six hours is the minimum, but 12-24 hours produces that ideal soft, sliceable texture. The wafers need time to absorb moisture from the cream and strawberry juices without turning into complete mush.
Use a sharp knife for clean slices. Run your knife under hot water, wipe it dry, then cut. Repeat between cuts for the cleanest edges. A serrated knife also works beautifully for this cake.
One mistake I made early on was using frozen strawberries without draining them properly. The extra water made the cake soupy and the wafers turned to paste. Always thaw frozen berries completely and pat them dry with paper towels before using. Fresh strawberries really are best here, but if you must use frozen, drain them well.
Variations & Adaptations
This recipe is incredibly flexible. Here are some of my favorite ways to change it up:
Mixed Berry Icebox Cake : Swap half the strawberries for fresh blueberries, raspberries, or blackberries. The combination of berries creates beautiful color contrast and a more complex flavor. I made this for a Fourth of July party and it was a hit.
Chocolate Strawberry Dream : Use chocolate wafers instead of vanilla, and add 2 tablespoons of cocoa powder to the cream filling. The chocolate-strawberry combination is classic for a reason. A drizzle of melted dark chocolate on top takes it over the top.
Lemon Strawberry Variation : Add the zest of one lemon to the cream filling and use lemon juice instead of vanilla extract. The bright citrus notes pair beautifully with the strawberries. You can also add a thin layer of lemon curd between the wafers for extra tang.
Vegan Version : Use vegan cream cheese (I like Miyoko’s or Kite Hill), coconut cream instead of heavy cream, and vegan vanilla wafers. The texture will be slightly different but still delicious. Chill the coconut cream can overnight and scoop out only the solid white part for best results.
Individual Servings : Instead of one large dish, layer everything in small mason jars or parfait glasses. These make adorable single-serving desserts for parties and are perfect for portion control. Layer them right before serving for the best texture, or make them a day ahead for softer wafers.
Peach Version : If you love this strawberry version, you’ll definitely enjoy my Creamy Fresh Peach Icebox Cake—it uses the same technique but swaps in juicy summer peaches for a completely different flavor profile.
Serving & Storage Suggestions
This cake is best served cold, straight from the fridge. The texture is perfectly set, the flavors are melded together, and every bite is cool and refreshing. For the cleanest slices, use a sharp knife and wipe it clean between cuts.
Presentation ideas:
- Top each square with a fresh strawberry slice and a tiny mint leaf for a pop of color.
- Dust with powdered sugar just before serving for a bakery-style finish.
- Serve with a dollop of extra whipped cream on the side.
- Pair with a cup of coffee or iced tea for an afternoon treat.
What to serve alongside: This cake is rich enough to stand alone, but it pairs beautifully with fresh fruit salad, a light sorbet, or even a scoop of vanilla bean ice cream. For a complete summer spread, try it after a light meal like Mango Avocado Black Bean Buddha Bowl or Burst Cherry Tomato Pasta.
Storage: Cover the dish tightly with plastic wrap or transfer leftovers to an airtight container. The cake will keep in the refrigerator for up to 4 days. The texture will continue to soften over time, so it’s best within the first 2-3 days. After that, the wafers become very soft and the strawberries may release more liquid.
Freezing: You can freeze this cake for up to 2 months. Wrap the entire dish (or individual portions) tightly in plastic wrap, then aluminum foil. Thaw overnight in the refrigerator before serving. The texture will be slightly different—a bit icier—but still delicious. I’ve done this when I wanted to prep dessert weeks ahead for a party.
Reheating: Don’t. This is a cold dessert meant to be enjoyed chilled. If you want softer wafers, just let it sit at room temperature for 15 minutes before serving.
One thing I love about this cake is how the flavors develop over time. The first day, the wafers still have some crunch and the strawberries are bright and fresh. By day two, everything has melded together into this cohesive, almost pudding-like texture. Both versions are wonderful—it just depends on your preference.
Nutritional Information & Benefits
Here’s an approximate nutritional breakdown for one serving (based on 9 servings per recipe):
| Nutrient | Amount per Serving |
|---|---|
| Calories | 385 |
| Total Fat | 24g |
| Saturated Fat | 14g |
| Cholesterol | 80mg |
| Sodium | 210mg |
| Total Carbohydrates | 40g |
| Dietary Fiber | 2g |
| Sugars | 28g |
| Protein | 4g |
While this is definitely a treat, there are some nutritional bright spots. Strawberries are packed with vitamin C, antioxidants, and fiber. The cream cheese and heavy cream provide calcium and protein. And since you’re using real ingredients instead of processed mixes, you’re avoiding artificial flavors and preservatives.
For a lighter version, you can use reduced-fat cream cheese and swap half the heavy cream for Greek yogurt. The texture will be slightly less rich but still delicious. If you’re watching your sugar intake, reduce the powdered sugar to 1/3 cup and use a sugar substitute like monk fruit sweetener.
This recipe contains dairy and gluten (from the wafers). For dairy-free, use the vegan version mentioned above. For gluten-free, use certified gluten-free vanilla wafers or graham crackers.
I personally love that this dessert feels indulgent without being overly heavy. A small square satisfies that sweet craving without leaving you feeling sluggish. It’s the kind of treat you can enjoy on a warm summer evening without regretting it later.
Conclusion
This Creamy No-Bake Strawberry Icebox Cake has earned a permanent spot in my summer dessert rotation, and I think it’ll earn one in yours too. It’s the kind of recipe that proves you don’t need fancy techniques or complicated steps to create something truly memorable. Just good ingredients, a little patience, and the willingness to let the fridge do the work.
What I love most about this cake is how it brings people together. There’s something about pulling a cold, beautiful dessert out of the fridge on a hot day that makes everyone smile. The layers of creamy filling, juicy strawberries, and softened wafers create this perfect harmony of textures and flavors that feels both nostalgic and fresh. It reminds me of summer potlucks and backyard barbecues and those lazy afternoons when all you want is something cold and sweet.
I’d love to hear how yours turns out! Did you try one of the variations? Add your own twist? Let me know in the comments below—I read every single one and love seeing your creations. And if you share a photo on Pinterest or Instagram, tag me so I can cheer you on. Happy no-bake baking, friends!
Frequently Asked Questions
Can I use frozen strawberries for this recipe?
Yes, but you need to thaw them completely and drain them very well. Frozen strawberries release more water than fresh ones, so pat them dry with paper towels after draining. If you skip this step, the cake can become watery and the wafers might turn mushy. Fresh strawberries really do give the best texture and flavor, but frozen work in a pinch.
How long does this cake need to set in the fridge?
At least 6 hours, but overnight is ideal. The wafers need time to soften and absorb the cream and strawberry juices. After 6 hours, the cake will be sliceable but the wafers will still have some texture. After 12-24 hours, everything melds together into that perfect, almost cake-like consistency. I always make mine the day before I plan to serve it.
Can I use Cool Whip instead of heavy cream?
You can, but I don’t recommend it. Cool Whip contains stabilizers and artificial flavors that change the texture and taste. Real whipped cream gives the filling that light, airy, mousse-like quality that makes this cake special. If you’re short on time, you can use stabilized whipped cream (add a tablespoon of powdered sugar and a pinch of cream of tartar) to help it hold its shape longer.
Why did my cake turn out watery?
This usually happens for one of three reasons: the strawberries weren’t drained well enough, the cream was overwhipped (which can cause it to separate), or the cake wasn’t chilled long enough. Next time, make sure to drain the macerated strawberries thoroughly and pat them dry if needed. Also, check that your cream cheese is fully softened before mixing—cold cream cheese can create lumps that trap liquid.
Can I make this cake in a different size dish?
Absolutely! This recipe fits perfectly in an 8×8-inch dish, but you can use a 9×9-inch for slightly thinner layers or a 9×13-inch if you double the recipe. For a round cake, use a 9-inch springform pan for easy removal. Just adjust the number of wafer layers accordingly—you want about 3-4 layers total for the best texture. Individual servings in jars or glasses also work beautifully and make great gifts.
Pin This Recipe!
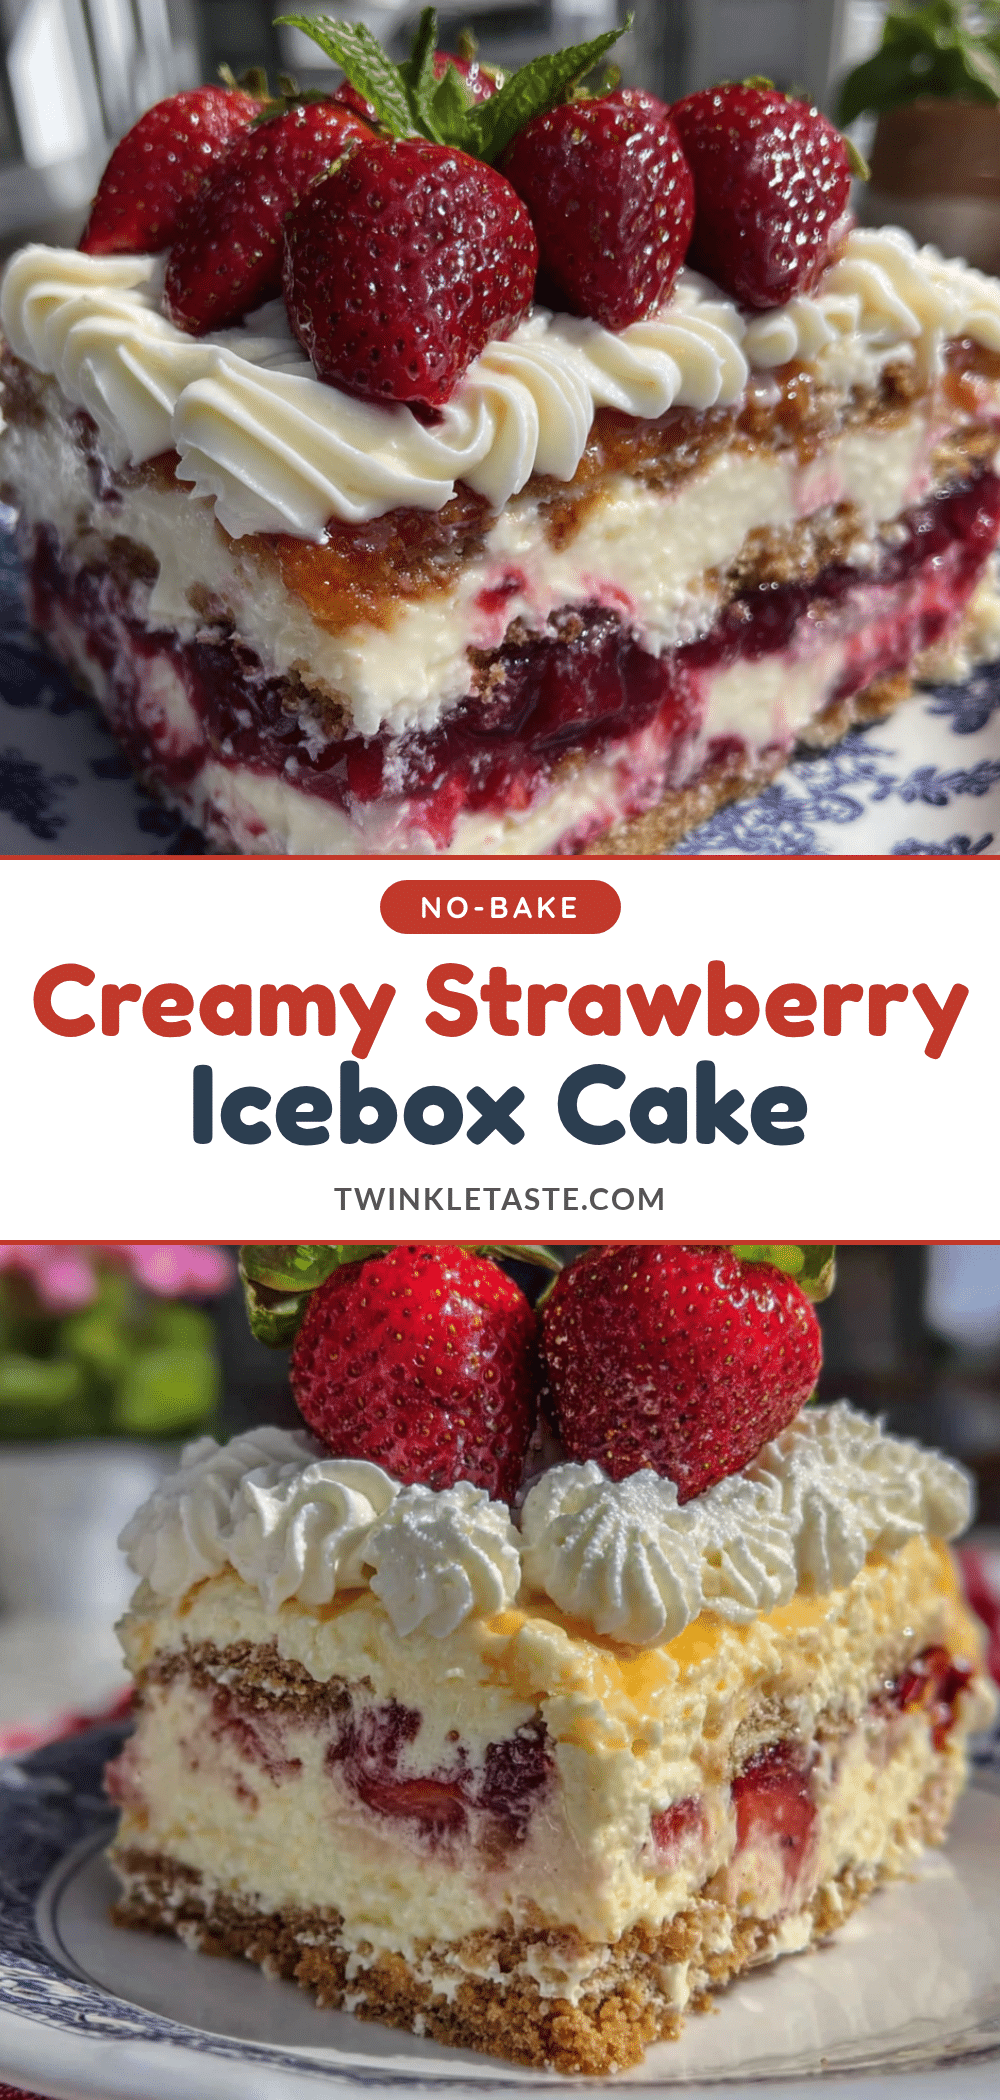
Creamy No-Bake Strawberry Icebox Cake
A refreshing no-bake dessert featuring layers of vanilla wafers, macerated strawberries, and a light cream cheese filling. Ready in just 10 minutes of prep, this make-ahead cake is perfect for warm-weather gatherings.
- Prep Time: 10 minutes
- Cook Time: 0 minutes
- Total Time: 6 hours 10 minutes (includes chilling time)
- Yield: 9 servings 1x
- Category: Dessert
- Cuisine: American
Ingredients
- 2 cups fresh strawberries, hulled and sliced (about 1 pound)
- 2 tablespoons granulated sugar
- 1 tablespoon fresh lemon juice
- 8 ounces cream cheese, softened to room temperature
- 1/2 cup powdered sugar
- 1 teaspoon vanilla extract
- 1 1/2 cups heavy cream, cold
- 1 box (about 12 ounces) vanilla wafers (about 60–70 wafers)
- Extra strawberry slices and mint leaves for garnish (optional)
Instructions
- In a medium bowl, combine sliced strawberries, 2 tablespoons granulated sugar, and 1 tablespoon lemon juice. Stir gently and let sit for 10-15 minutes to macerate.
- In a large mixing bowl, beat softened cream cheese with an electric mixer on medium speed until smooth and fluffy, about 2 minutes. Add powdered sugar and vanilla extract, beat until combined and no lumps remain.
- In a separate clean bowl, whip cold heavy cream on medium-high speed until stiff peaks form, about 3-4 minutes.
- Gently fold the whipped cream into the cream cheese mixture using a spatula until just combined.
- Using a slotted spoon, transfer macerated strawberries to a small bowl, reserving the juices.
- Spread a thin layer (about 1/4 cup) of cream filling on the bottom of an 8×8-inch baking dish.
- Arrange a single layer of vanilla wafers on top, covering the bottom completely. Break wafers to fill gaps if needed.
- Lightly brush the wafers with some of the reserved strawberry juice.
- Spread about 1/3 of the remaining cream filling over the wafers. Top with about 1/3 of the drained strawberries.
- Repeat layers two more times: wafers, brush with juice, cream filling, strawberries. End with a final layer of cream filling on top.
- Cover tightly with plastic wrap and refrigerate for at least 6 hours, preferably overnight.
- When ready to serve, let sit at room temperature for 10 minutes. Garnish with fresh strawberry slices and mint leaves if desired. Cut into squares and serve.
Notes
For best results, let the cake chill overnight. The wafers need time to soften and absorb the cream and strawberry juices. If the cake feels too soft to slice cleanly, pop it in the freezer for 20 minutes before cutting. For a gluten-free version, use gluten-free vanilla wafers or certified gluten-free graham crackers.
Nutrition
- Serving Size: 1 square (1/9 of rec
- Calories: 385
- Sugar: 28
- Sodium: 210
- Fat: 24
- Saturated Fat: 14
- Carbohydrates: 40
- Fiber: 2
- Protein: 4
Keywords: no-bake dessert, strawberry icebox cake, summer dessert, easy dessert, make-ahead dessert, cream cheese dessert


