I did not trust Chex Mix at a tailgate. Honestly, I thought it was the snack you brought when you didn’t actually want to try—the filler bowl sitting next to the real food. For years, I walked right past it at parties, grabbing another handful of wings or a slice of pizza instead. But then my buddy Kevin showed up to a preseason game with a massive Ziploc bag of this stuff, and he wouldn’t shut up about it. “Just try it,” he kept saying, practically shoving the bag in my face. I finally grabbed a handful just to get him off my back, you know?
And then I grabbed another handful. And another. By halftime, I was standing over the bag like it was my last meal, and Kevin was giving me the biggest “I told you so” look I’ve ever seen. The thing is, this isn’t your standard Chex Mix. It’s got this spicy ranch kick that hits different—like, the kind of heat that makes you reach for another sip of beer without even thinking about it. The seasoning clings to every single piece, so you’re not left with a sad, bland handful at the bottom of the bowl. It’s salty, it’s crunchy, it’s got a little bit of a bite, and it just works for game day.
I’ve been making it for every tailgate since that day, and honestly, it’s become my go-to. People ask for the recipe before they even ask what time kickoff is. It’s that good. So yeah, I was wrong about Chex Mix. And I’m not afraid to admit it.
Why You’ll Love This Recipe
This isn’t just another snack mix. I’ve tested this recipe at more tailgates than I can count, tweaking the spice level and the ranch ratio until it was absolutely perfect. Here’s why it works:
- Quick & Easy : You can throw this together in about 10 minutes of active time. The oven does the rest. It’s the kind of recipe you can make while you’re packing the cooler and yelling at someone to grab the chairs.
- Simple Ingredients : You probably already have most of this stuff in your pantry. No weird specialty items or trips to three different stores. Just good, honest ingredients that come together like a charm.
- Perfect for Tailgating : This is the ultimate game day snack. It’s portable, it doesn’t need to be kept hot or cold, and it feeds a crowd without any fuss. Just set it out and watch it disappear.
- Crowd-Pleaser : I’ve seen people who swear they don’t like Chex Mix go back for thirds. The spicy ranch combo is just that addictive. It gets rave reviews every single time.
- Unbelievably Delicious : The texture is everything—crunchy, coated, and perfectly seasoned. The heat builds slowly, and the ranch keeps it all creamy and cool. It’s next-level snack food.
This recipe is different because of the method. I don’t just toss everything in a bowl and hope for the best. I layer the seasoning, bake it low and slow, and stir it at just the right intervals to make sure every single piece gets that perfect coating. It’s the kind of snack that makes you close your eyes after the first bite. It’s comfort food for game day, and it’s honestly the best version I’ve ever had.
What Ingredients You Will Need
This recipe uses simple, pantry-friendly ingredients to deliver that big, bold flavor without any hassle. Most of these are staples you probably already have on hand, which makes this perfect for last-minute tailgate prep.
- Rice Chex Cereal – 9 cups. This is the base of the mix. I prefer Rice Chex for its light, crunchy texture, but you can use Corn Chex or a combination of both. It soaks up the seasoning beautifully without getting soggy.
- Corn Chex Cereal – 9 cups. Adds a slightly different crunch and a touch of corn flavor. The mix of the two is my favorite, but you can adjust the ratio to your liking.
- Cheez-It Crackers – 2 cups. These add a cheesy, salty punch that regular Chex just can’t match. I like the original flavor, but the white cheddar ones work great too.
- Pretzel Sticks – 2 cups. They add that satisfying, salty crunch. I prefer sticks over twists because they’re easier to eat by the handful, but twists work fine in a pinch.
- Mixed Nuts – 1 cup. I use a mix of salted peanuts, cashews, and almonds. The nuts add protein and a nice, hearty texture. You can use whatever you have on hand.
- Unsalted Butter – 1/2 cup (1 stick), melted. This is the carrier for all the seasoning. It helps everything stick and adds a rich, buttery flavor. I use unsalted so I can control the salt level.
- Ranch Seasoning Mix – 1 packet (about 1 ounce). This is the backbone of the flavor. I recommend the Hidden Valley brand for the most consistent results, but any good-quality ranch mix will work. (Pro tip: buy the bulk container of ranch powder—it’s cheaper and you’ll use it for everything.)
- Hot Sauce – 2 tablespoons. This is where the “spicy” part comes in. I use Frank’s RedHot for its balanced heat and vinegar kick, but you can use your favorite. Tabasco works, but it’s a different kind of heat.
- Worcestershire Sauce – 1 tablespoon. Adds that deep, umami savoriness that makes the mix so addictive. Don’t skip it—it’s a game-changer.
- Garlic Powder – 1 teaspoon. For an extra layer of savory goodness. Fresh garlic won’t work here; it’ll burn in the oven.
- Onion Powder – 1 teaspoon. Complements the ranch and garlic beautifully. It adds a subtle sweetness that balances the heat.
- Smoked Paprika – 1/2 teaspoon. This is my secret weapon. It adds a subtle smokiness that makes the mix taste like it’s been cooking over a campfire. Regular paprika works too, but smoked is better.
- Cayenne Pepper – 1/4 teaspoon (optional). For extra heat. I add this when I’m making it for a crowd that likes things spicy. Start with a little and taste as you go.
Equipment Needed
You don’t need any fancy gadgets for this recipe. Here’s what you’ll need:
- Large Mixing Bowl: The biggest one you have. You’re going to be mixing a lot of cereal, so give yourself room to work without spilling everything everywhere.
- Two Large Rimmed Baking Sheets: You’ll need two sheets to spread the mix out in a single layer. If you try to cram it all onto one sheet, it won’t get crispy. I prefer the heavy-duty aluminum ones—they distribute heat more evenly.
- Parchment Paper or Silicone Baking Mats: Not strictly necessary, but they make cleanup a breeze. The butter and seasoning can get a little sticky on the pan.
- Whisk or Small Bowl: For mixing the seasoning and butter together before pouring it over the cereal. A fork works fine in a pinch.
- Spatula or Wooden Spoon: For stirring the mix while it bakes. You want something sturdy that won’t break the cereal pieces.
- Measuring Cups and Spoons: Accurate measurements matter here. Too much butter and the mix gets greasy; too little and the seasoning won’t stick.
- Cooling Racks: Optional, but they help the mix cool faster and stay crunchy. If you don’t have them, just let the mix cool on the baking sheets.
I’ve made this with both a cheap baking sheet and a nice, heavy-duty one, and honestly, the heavy-duty sheet makes a difference. It heats more evenly and doesn’t warp in the oven. But if all you have is the thin one, it’ll still work—just keep an eye on it and stir a little more often.
Preparation Method
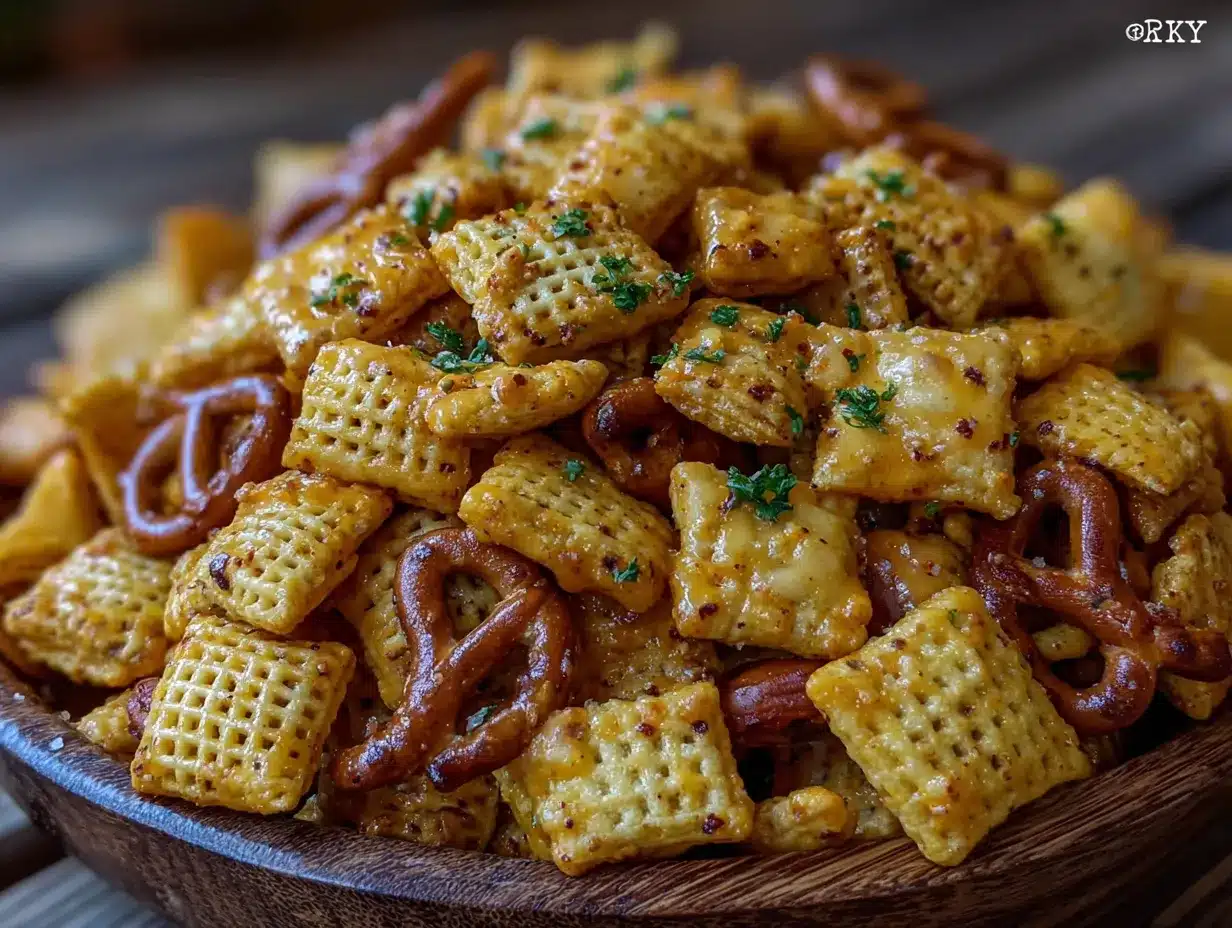
Alright, let’s get to it. This is the part where the magic happens. Follow these steps, and you’ll have the best spicy ranch Chex mix of your life.
- Preheat your oven to 250°F (120°C). This low temperature is key. We’re not trying to toast the cereal; we’re trying to dry out the seasoning and butter so it clings to every piece. A higher heat will burn the seasoning and leave you with a bitter mess. Trust me on this one—I learned the hard way.
- Get your biggest mixing bowl. I’m talking about the one you use for popcorn on movie night. Pour in the Rice Chex, Corn Chex, Cheez-Its, pretzel sticks, and mixed nuts. Give it a gentle toss with your hands to distribute everything evenly. Don’t be too rough—you don’t want to crush the cereal.
- In a separate small bowl or a liquid measuring cup, whisk together the melted butter, ranch seasoning mix, hot sauce, Worcestershire sauce, garlic powder, onion powder, smoked paprika, and cayenne pepper (if using). Whisk it until everything is fully combined. The mixture should be a uniform, slightly thick, pale orange color. Give it a sniff—it should smell like a dream.
- Slowly pour the butter mixture over the cereal mixture. And I mean slowly. You want to drizzle it evenly over the top, not dump it all in one spot. As you pour, use your spatula or a wooden spoon to gently toss and coat the cereal. Keep tossing until every single piece looks like it’s been kissed by the seasoning. This takes a minute or two, but it’s worth it. Don’t rush.
- Divide the mixture evenly between the two prepared baking sheets. Spread it out in a single, even layer. If it’s piled up too thick in spots, it won’t dry out properly. You want each piece to have its own little space to get crispy.
- Bake for 1 hour, stirring every 15 minutes. Set a timer—don’t rely on your memory. Every 15 minutes, pull the sheets out of the oven and give the mix a good stir with your spatula. This redistributes the heat and seasoning, ensuring everything cooks evenly. The mix will look a little wet at first, but by the end of the hour, it should be dry, fragrant, and perfectly crunchy.
- Let the mix cool completely on the baking sheets. This is the hardest part, I know. You’re going to want to dive in immediately. But if you try to eat it while it’s still warm, it will be soft. As it cools, it will crisp up to that perfect, addictive crunch. Give it at least 30 minutes. I usually let it sit for an hour while I set up the rest of the tailgate stuff.
- Once cool, transfer to a large bowl or divide into individual serving bags. If you’re taking it to a tailgate, Ziploc bags are your best friend. They’re portable, easy to share, and you can toss them in the cooler without worrying about spills.
Cooking Tips & Techniques
I’ve made this recipe more times than I can count, and I’ve definitely had my share of failures. Here’s what I’ve learned so you don’t have to make the same mistakes.
The biggest mistake people make is using too high a heat. I tried 350°F once because I was in a hurry, and the result was a burnt, bitter mess. The seasoning burned before the cereal had a chance to dry out. Low and slow is the way to go. 250°F is non-negotiable.
Stirring is not optional. I know it’s annoying to set a timer and keep going back to the oven, but it’s the only way to get that even coating. The first time I made this, I only stirred it once, and the bottom layer was soggy while the top layer was overdone. Every 15 minutes, without fail.
Don’t skip the cooling step. I know you’re hungry. I know the smell is driving you crazy. But warm Chex mix is soft Chex mix. Let it cool completely, and it will transform into the crunchiest, most addictive snack you’ve ever had. I once made the mistake of bagging it while it was still warm, and by the time we got to the tailgate, it was a sad, clumpy mess.
If you’re making this for a big crowd, double the recipe. It disappears fast. I usually make a double batch and store it in a giant container. It keeps for weeks, so you can make it ahead of time and not worry about it.
For an even more intense flavor, let the seasoned mix sit in the bowl for 10-15 minutes before you spread it on the baking sheets. This gives the cereal time to absorb some of the butter and seasoning, resulting in a deeper, more cohesive flavor.
Variations & Adaptations
This recipe is super flexible. Here are a few ways to make it your own:
- Extra Spicy: Double the hot sauce and add an extra 1/4 teaspoon of cayenne pepper. You can also toss in some crushed red pepper flakes for a different kind of heat. My buddy Kevin likes it so spicy it makes his eyes water, and this version does the trick.
- Mild Version: Skip the hot sauce and cayenne pepper entirely. The ranch seasoning still gives it plenty of flavor, and it’s perfect for kids or anyone who doesn’t love spicy food. My nephew devours this version by the bowlful.
- Gluten-Free Option: Use gluten-free Chex cereal and gluten-free pretzels. Make sure your ranch seasoning mix is certified gluten-free, as some brands contain wheat. This version is just as delicious, and no one will know the difference.
- Bacon Lover’s Version: Crumble 1/2 cup of cooked, crispy bacon and toss it in with the mix after it has cooled. The salty, smoky bacon takes this to a whole new level. I tried this for a Super Bowl party, and it was gone in 20 minutes.
- Smoky Chipotle Version: Replace the hot sauce with 1 tablespoon of adobo sauce from a can of chipotle peppers. This adds a deep, smoky heat that’s totally different from the original. It’s my personal favorite for fall tailgates when the weather starts to get cool.
Serving & Storage Suggestions
This Chex mix is best served at room temperature, straight out of the bowl. It’s perfect for setting out on a table and letting people grab handfuls throughout the game. I like to serve it in a big wooden bowl or a disposable aluminum tray for easy cleanup.
It pairs beautifully with cold beer—an ice-cold lager or a crisp IPA cuts through the richness of the seasoning. If you’re not drinking, a cold glass of iced tea or lemonade works great too. For a full tailgate spread, serve it alongside some lazy crockpot beef stew or a bowl of creamy slow cooker chicken tortilla soup for a hearty, satisfying meal.
Storage: Store the cooled Chex mix in an airtight container at room temperature. It will stay fresh and crunchy for up to 2 weeks. I usually keep it in a large glass jar or a resealable plastic bag. If it starts to lose its crunch after a few days, you can spread it out on a baking sheet and re-crisp it in a 250°F oven for 10-15 minutes. Just let it cool again before storing.
Freezing: You can freeze this Chex mix for up to 3 months. Place it in a freezer-safe bag or container, squeeze out as much air as possible, and seal it. When you’re ready to eat it, let it thaw at room temperature for about 30 minutes. It might be a little softer than fresh, but it’s still delicious.
The flavors actually get better after a day or two. The seasoning has time to meld and deepen, so don’t be afraid to make it a few days ahead of time. It’s the perfect make-ahead snack for a stress-free tailgate.
Nutritional Information & Benefits
Let’s be honest—this is a snack, not a health food. But it’s not as bad as you might think. Here’s the approximate nutritional breakdown for a 1-cup serving:
- Calories: 280
- Fat: 14g
- Saturated Fat: 6g
- Carbohydrates: 34g
- Fiber: 2g
- Sugar: 3g
- Protein: 5g
- Sodium: 480mg
The nuts in this mix provide healthy fats and a bit of protein, which helps keep you full and satisfied. The Chex cereal is fortified with vitamins and minerals like iron and B vitamins. And the butter, while not exactly a health food, does help your body absorb the fat-soluble vitamins from the other ingredients.
If you’re watching your sodium intake, you can use unsalted nuts and low-sodium pretzels to reduce the salt content. The ranch seasoning and hot sauce still provide plenty of flavor, so you won’t miss the extra salt. This recipe is not gluten-free as written, but it’s easy to adapt with the substitutions I mentioned above. Potential allergens include dairy (butter), gluten (cereal, pretzels), and nuts.
I’m not going to pretend this is a health food. It’s a tailgate snack, and it’s meant to be enjoyed. But knowing what’s in it helps me feel a little better about going back for that fourth handful.
Conclusion
This easy spicy ranch Chex mix has completely changed my tailgate game. It’s the snack that everyone asks for, the one that disappears before the wings, the one that makes people text me the next day for the recipe. It’s simple, it’s addictive, and it’s exactly what you want to be eating while you’re watching the game with your friends.
I love this recipe because it’s forgiving. You can tweak the spice level, swap in your favorite crackers, or add bacon if you’re feeling fancy. It’s a canvas for your own creativity, and it always turns out delicious. I’ve made it for football games, camping trips, and even just a lazy Sunday afternoon, and it never disappoints.
So go ahead and give it a try. Make a batch for your next tailgate, or just make it because you deserve a good snack. And when you do, come back and let me know how it turned out. Did you add extra heat? Did you swap in a different cracker? I want to hear about it. Drop a comment below or tag me in your photos—I love seeing your creations. Now go get that game day started!
Frequently Asked Questions
Can I make this Chex mix in a slow cooker?
Yes, you can! If you don’t want to use the oven, you can make this in a slow cooker on low heat. Just combine everything in the slow cooker, cover it with the lid slightly ajar to let steam escape, and cook on low for 2-3 hours, stirring every 30 minutes. It won’t get quite as crispy as the oven version, but it’s still delicious and perfect for keeping warm at a party.
How do I keep the Chex mix from getting soggy?
The key to avoiding soggy Chex mix is to make sure you bake it long enough at a low temperature and let it cool completely before storing it. If you store it while it’s still warm, the steam will get trapped and make everything soft. Also, make sure your storage container is completely airtight. If you live in a humid climate, you might need to bake it for an extra 10-15 minutes to get it extra dry.
Can I use a different type of hot sauce?
Absolutely! This recipe is very forgiving when it comes to hot sauce. I prefer Frank’s RedHot for its balanced heat and vinegar flavor, but you can use whatever you have on hand. Tabasco will give it a sharper, more vinegary kick. Sriracha will add a touch of sweetness and garlic. Just keep in mind that different hot sauces have different levels of heat, so you might need to adjust the amount to suit your taste.
How long does this Chex mix stay fresh?
Stored in an airtight container at room temperature, this Chex mix will stay fresh and crunchy for up to 2 weeks. If it starts to lose its crunch after a few days, you can spread it out on a baking sheet and re-crisp it in a 250°F oven for 10-15 minutes. Just let it cool completely before storing it again. It also freezes well for up to 3 months.
Can I add other mix-ins like chocolate or dried fruit?
You can, but I’d recommend adding them after the mix has cooled. Chocolate will melt in the oven, and dried fruit can get hard and chewy. Once the mix is completely cool, you can stir in things like M&Ms, chocolate chips, dried cranberries, or raisins. This is a great way to customize the mix for a sweet and salty snack that everyone will love.
Pin This Recipe!

Easy Spicy Ranch Chex Mix: Best Tailgating Snack
This spicy ranch Chex Mix is the ultimate tailgating snack—crunchy, addictive, and packed with bold flavor. It’s easy to make with simple ingredients and perfect for game day.
- Prep Time: 10 minutes
- Cook Time: 1 hour
- Total Time: 1 hour 10 minutes
- Yield: 16 servings 1x
- Category: Snack
- Cuisine: American
Ingredients
- 9 cups Rice Chex Cereal
- 9 cups Corn Chex Cereal
- 2 cups Cheez-It Crackers
- 2 cups Pretzel Sticks
- 1 cup Mixed Nuts (salted peanuts, cashews, almonds)
- 1/2 cup Unsalted Butter (1 stick), melted
- 1 packet Ranch Seasoning Mix (about 1 ounce)
- 2 tablespoons Hot Sauce (e.g., Frank’s RedHot)
- 1 tablespoon Worcestershire Sauce
- 1 teaspoon Garlic Powder
- 1 teaspoon Onion Powder
- 1/2 teaspoon Smoked Paprika
- 1/4 teaspoon Cayenne Pepper (optional)
Instructions
- Preheat your oven to 250°F (120°C).
- In a large mixing bowl, combine Rice Chex, Corn Chex, Cheez-Its, pretzel sticks, and mixed nuts. Toss gently to distribute.
- In a separate small bowl, whisk together melted butter, ranch seasoning mix, hot sauce, Worcestershire sauce, garlic powder, onion powder, smoked paprika, and cayenne pepper (if using) until fully combined.
- Slowly pour the butter mixture over the cereal mixture, tossing gently with a spatula or wooden spoon until every piece is evenly coated.
- Divide the mixture evenly between two large rimmed baking sheets, spreading it in a single layer.
- Bake for 1 hour, stirring every 15 minutes, until the mix is dry and crunchy.
- Let the mix cool completely on the baking sheets (at least 30 minutes) before serving or storing.
- Once cool, transfer to a large bowl or divide into individual serving bags.
Notes
For best results, bake at a low temperature (250°F) and stir every 15 minutes. Let the mix cool completely before storing to maintain crunchiness. The flavors deepen after a day or two. For extra heat, double the hot sauce and add more cayenne. For a milder version, omit the hot sauce and cayenne. Store in an airtight container at room temperature for up to 2 weeks, or freeze for up to 3 months.
Nutrition
- Serving Size: 1 cup
- Calories: 280
- Sugar: 3
- Sodium: 480
- Fat: 14
- Saturated Fat: 6
- Carbohydrates: 34
- Fiber: 2
- Protein: 5
Keywords: spicy ranch chex mix, tailgating snack, game day snack, chex mix recipe, easy snack mix


