“Do you think these eyeballs are real?” my nephew asked with a mix of excitement and slight hesitation as he poked one of the Perfect No-Bake Oreo Eyeball Truffles sitting on the Halloween party table. Honestly, I wasn’t sure if I should be proud or worried about the eerie realism of these treats. The whole thing started as a last-minute scramble: I had promised some spooky sweets for a neighborhood get-together, but after a long day juggling work and errands, the idea of firing up the oven was just out of the question.
So, I grabbed a pack of Oreos, some cream cheese, and a handful of candy eyeballs I’d picked up on a whim. With zero baking skills and even less time, I threw together this quick, no-bake recipe. The result? These creepy-cute eyeball truffles that turned out to be a smash hit—no one guessed they were that simple to make. Since then, I can’t seem to stop making these around Halloween; they’re perfect for sneaking in that fun, spooky vibe without any fuss.
What’s funny is how such an easy recipe became a quiet little tradition in my house, especially when paired with some of my other favorite quick treats like the quick brownies in a mug—both perfect for those busy evenings when time is tight but you want a little festive magic. These Oreo eyeball truffles stay creamy, rich, and just the right amount of spooky, making them a staple I trust to impress the kids and adults alike.
Why You’ll Love This Recipe
Making the Perfect No-Bake Oreo Eyeball Truffles for Halloween Treats is honestly a no-brainer for anyone who needs a quick, fun, and crowd-pleasing dessert. Here’s why this recipe has earned a spot in my seasonal favorites:
- Quick & Easy: You can whip these truffles up in under 20 minutes, no oven needed—ideal for last-minute Halloween prep or unexpected guests.
- Simple Ingredients: No fancy or hard-to-find stuff here. Odds are, you already have Oreos and cream cheese in your pantry or fridge.
- Perfect for Halloween Parties: The eyeball design is spooky but playful, making it a hit for kids’ parties, office potlucks, or casual get-togethers.
- Crowd-Pleaser: Everyone raves about them—especially when paired with drinks or alongside other treats like the easy cheesy pasta bake for a well-rounded spread.
- Unbelievably Delicious: The creamy filling and crunchy Oreo bits create a texture that’s just addictive—the perfect balance between sweet and slightly tangy from the cream cheese.
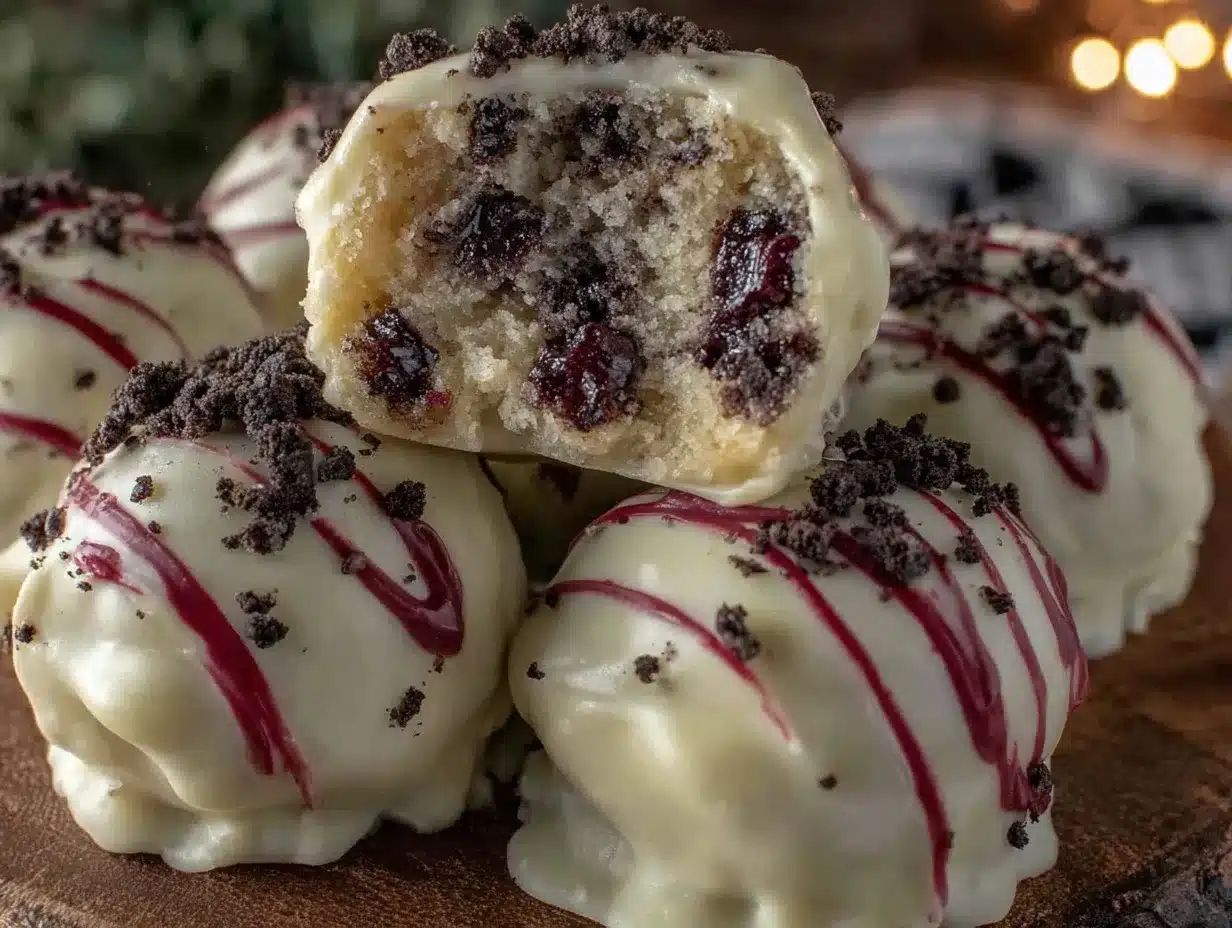
This isn’t your average Oreo truffle recipe. The secret lies in the way the cream cheese is blended with the crushed cookies to get that ultra-smooth yet slightly chunky texture. And those candy eyeballs? They add just enough creep factor without going overboard. Plus, no baking means less stress and mess, so you can spend more time enjoying the party and less time cleaning up afterward.
Honestly, after making these a few times, I realized it’s the kind of treat that makes you pause and smile—like a little Halloween wink from the kitchen. It’s fun, easy, and just the right amount of spooky to make the holiday feel special without the fuss.
What Ingredients You Will Need
This recipe uses simple, wholesome ingredients to deliver bold flavor and satisfying texture without the fuss. Everything is pretty straightforward, and you’ll mostly find these in your pantry or local grocery store.
- Oreo Cookies: About 24 regular Oreos (roughly 360 grams). I prefer the classic ones for that perfect balance of cream and chocolate crunch.
- Cream Cheese: 8 ounces (225 grams), softened. It adds creaminess and helps bind the crumbs together. I usually use full-fat for richness, but reduced-fat works too.
- Powdered Sugar: ½ cup (60 grams). Just enough to sweeten and firm up the truffles.
- Vanilla Extract: 1 teaspoon. This little splash boosts flavor and makes the filling taste more homemade.
- Candy Eyeballs: About 24 pieces for decorating. You can find these in most baking aisles around Halloween, but if unavailable, mini chocolate chips or colored icing dots can work.
- Optional Decoration: Red gel icing or edible marker for the “red veins” effect on eyeballs.
Feel free to swap regular Oreos for gluten-free alternatives if needed, or try a chocolate sandwich cookie of your choice. For dairy-free versions, cream cheese substitutes like vegan cream cheese and plant-based cookies can be used, though the texture might differ slightly.
Equipment Needed
- Mixing Bowl: A medium-sized bowl to combine the crushed cookies and cream cheese.
- Food Processor or Plastic Bag & Rolling Pin: For crushing the Oreos finely. A food processor gives the best texture, but a zip-top bag and rolling pin work just fine if you’re in a pinch.
- Spatula or Spoon: To mix everything thoroughly.
- Baking Sheet or Plate: To arrange the truffles before chilling.
- Parchment Paper: For easy cleanup and preventing sticking.
- Refrigerator: To chill the truffles until firm.
Personally, I’ve found that using a small cookie scoop makes portioning these truffles quick and consistent. If you don’t have one, a tablespoon works just fine. Also, keep your cream cheese out for at least 30 minutes before you start — it makes mixing so much easier.
Preparation Method
- Crush the Oreos: Place 24 Oreo cookies in a food processor and pulse until finely crushed but not powdered (about 30 seconds). If you don’t have a processor, put the cookies in a zip-top bag and crush with a rolling pin until you have fine crumbs with some small chunks for texture.
- Mix With Cream Cheese: In your mixing bowl, combine the crushed Oreos with 8 ounces (225 grams) of softened cream cheese. Add ½ cup (60 grams) powdered sugar and 1 teaspoon vanilla extract. Stir everything together with a spatula until the mixture is uniform and holds together when pressed (about 2-3 minutes).
- Form Truffles: Using a small cookie scoop or tablespoon, scoop out portions of the mixture and roll them between your palms to form smooth balls about 1 inch (2.5 cm) in diameter. Place the balls on a parchment-lined baking sheet or plate.
- Chill: Refrigerate the truffles for at least 1 hour to let them firm up. This step is key to getting the right texture, so don’t skip it!
- Decorate the Eyeballs: Once chilled, place one candy eyeball on top of each truffle. For an extra spooky effect, use red gel icing or an edible marker to draw thin red “veins” extending from the eyeball onto the truffle surface. This adds a creepy yet fun detail that makes these truffles stand out.
- Final Chill: Pop the decorated truffles back into the fridge for another 15 minutes so the decorations set nicely before serving.
If the mixture feels too sticky when rolling, pop it back in the fridge for 10-15 minutes or dust your hands lightly with powdered sugar. When done right, these truffles should be firm but creamy and hold their shape perfectly.
Cooking Tips & Techniques
Working with no-bake treats is all about the right texture and timing, and these Oreo eyeball truffles are no exception. Here are some tips I’ve learned after making them multiple times:
- Softened Cream Cheese is a Must: If your cream cheese is too cold, it won’t mix well with the crumbs and you’ll end up with lumps. Let it sit out for at least 30 minutes or soften in short bursts in the microwave (10 seconds at a time).
- Don’t Over-Pulse Oreos: Crushing too finely can make the truffles dry and crumbly. Aim for fine but with a bit of texture left to keep the truffles interesting.
- Chilling Time is Essential: The truffles need at least 1 hour in the fridge to firm up; otherwise, they’re too soft to roll or decorate properly.
- Rolling Tips: Lightly dust your hands with powdered sugar or cocoa powder if the mixture sticks too much. This keeps the truffles smooth and neat.
- Decorate Last: Add candy eyeballs and gel icing only after chilling to avoid melting or smudging decorations.
- Multitasking: While the truffles chill, you can prep other Halloween treats or even heat up a quick meal like the crispy everything bagel salmon to keep dinner stress-free and fast.
Variations & Adaptations
These Oreo eyeball truffles are a flexible base that you can tweak to fit your tastes or dietary needs. Here are a few ideas I’ve tried or thought about:
- Peanut Butter Twist: Add 2 tablespoons of creamy peanut butter to the cream cheese mixture for a nutty flavor that pairs surprisingly well with the chocolate cookies.
- White Chocolate Coating: After chilling, dip the truffles in melted white chocolate for a glossy shell before adding eyeballs. This adds a nice crunch and extra sweetness.
- Vegan Version: Use dairy-free cream cheese and vegan sandwich cookies. The texture will be slightly different but still delicious and perfect for plant-based diets.
- Colorful Eyeballs: Swap out candy eyeballs for colored chocolate chips or jelly beans to match different Halloween themes or parties.
- Spiced Up: Add a pinch of cinnamon or pumpkin spice to the mixture for a subtle fall flavor that complements the holiday spirit.
Serving & Storage Suggestions
These truffles are best served chilled, straight from the fridge. The cool cream cheese filling contrasts perfectly with the crunchy cookie bits, making each bite a little treat of texture and flavor. I like to arrange them on a dark platter with some fake spider webs for that extra spooky touch.
They pair wonderfully with a hot cup of coffee or even a simple glass of milk, making them ideal for Halloween morning breakfasts or afternoon treats. If you’re hosting a party, set them out alongside a savory option like the easy gourmet Trader Joe’s charcuterie board to balance sweet and salty flavors.
Store leftover truffles in an airtight container in the refrigerator for up to one week. They also freeze well—just thaw in the fridge overnight before serving. Don’t forget that the candy eyeball decorations may soften a bit after freezing, so add fresh ones if you want that crisp look.
Over time, the flavors meld even more, making these truffles taste richer after a day or two. So if you can resist, prepping them a day ahead actually boosts their deliciousness.
Nutritional Information & Benefits
Each Oreo eyeball truffle clocks in at roughly 90-100 calories, depending on size and exact ingredients. While they’re definitely a treat, the recipe includes some redeeming qualities:
- Moderate Sugar: Using just half a cup of powdered sugar keeps sweetness in check compared to many candy bars or store-bought truffles.
- Calcium Boost: Cream cheese adds a small amount of calcium and protein, which is a nice bonus in a dessert.
- Gluten-Free Options: By swapping for gluten-free cookies, this becomes accessible to those with gluten sensitivities.
- Portion Control: Small bite-sized truffles make it easier to enjoy without overindulging.
From my experience, this recipe balances indulgence with simplicity, making it a fun seasonal treat you can feel good about sharing in moderation at family gatherings or festive parties.
Conclusion
Perfect No-Bake Oreo Eyeball Truffles for Halloween Treats are one of those recipes that show how a little creativity and simple ingredients can turn into something fun, festive, and downright delicious. Whether you’re short on time, avoiding the oven, or just want a guaranteed crowd-pleaser, these truffles fit the bill perfectly.
They’ve become my go-to spooky treat that’s easy to customize and always impresses without stress. I love how they bring a smile (and a little shiver) to the table every time. So go ahead, make a batch, add your own twist, and share the spooky love this Halloween. And if you try this recipe, I’d love to hear what fun variations you come up with!
Don’t forget to share your thoughts or photos in the comments—there’s nothing better than swapping spooky dessert stories with fellow treat-makers!
FAQs
Can I make these Oreo eyeball truffles ahead of time?
Yes! They keep well in the refrigerator for up to one week and can be frozen for longer storage. Just thaw in the fridge before serving.
What can I use if I can’t find candy eyeballs?
You can substitute mini chocolate chips, colored icing dots, or even homemade eyeballs using white and colored frosting or fondant.
Are these truffles gluten-free?
Traditional Oreos contain gluten, but you can easily use gluten-free sandwich cookies to make a gluten-free version.
Can I add other flavors to the truffles?
Absolutely! Try mixing in peanut butter, pumpkin spice, or dipping them in white chocolate for extra flavor.
Do I need any special skills to make these truffles?
Not at all! This recipe is beginner-friendly and requires no baking. Just mix, roll, chill, and decorate.
Pin This Recipe!
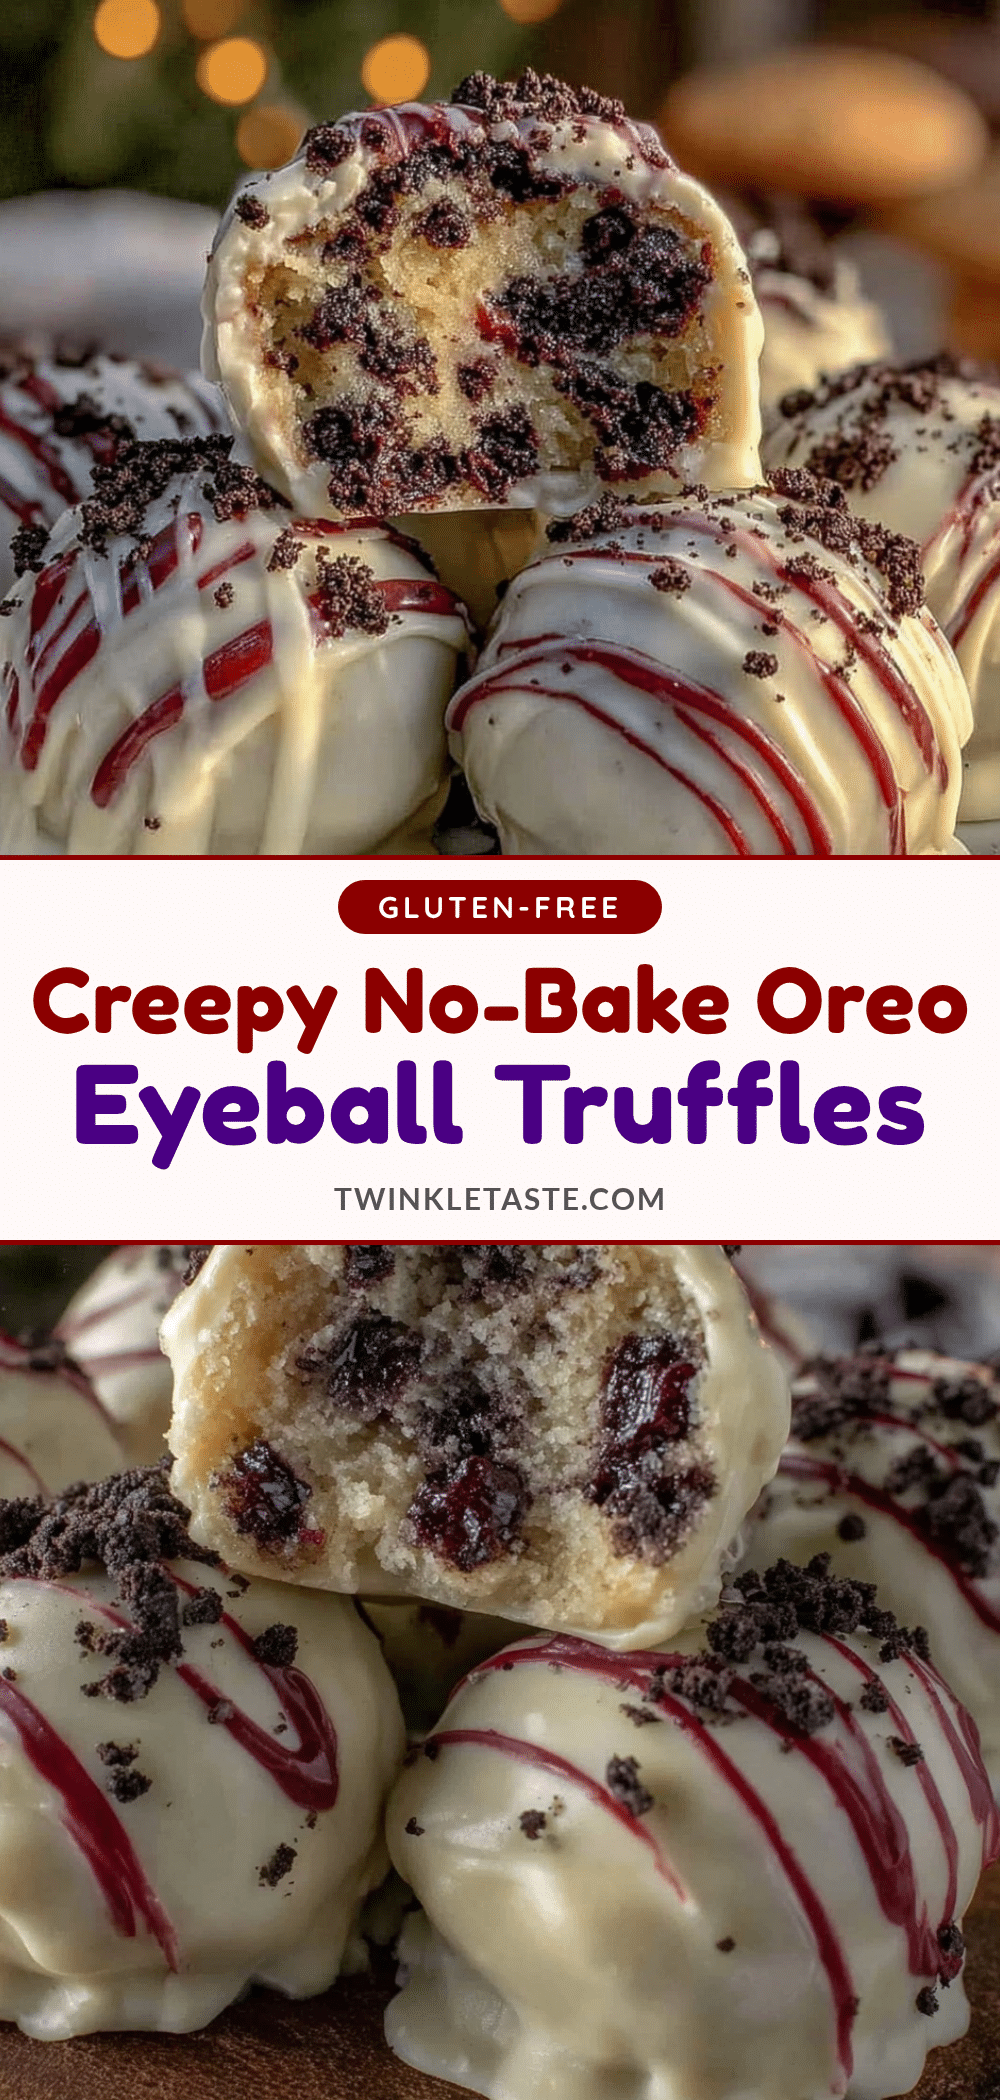
Perfect No-Bake Oreo Eyeball Truffles Easy Halloween Treat Recipe

These no-bake Oreo eyeball truffles are a quick, fun, and crowd-pleasing Halloween treat that requires no oven and simple ingredients. They are creamy, rich, and spooky, perfect for parties and festive occasions.
- Prep Time: 15 minutes
- Cook Time: 0 minutes
- Total Time: 1 hour 30 minutes
- Yield: 24 truffles 1x
- Category: Dessert
- Cuisine: American
Ingredients
- 24 Oreo cookies (about 360 grams or 12.7 ounces)
- 8 ounces (225 grams) cream cheese, softened
- ½ cup (60 grams) powdered sugar
- 1 teaspoon vanilla extract
- 24 candy eyeballs for decorating
- Optional: red gel icing or edible marker for red veins effect
Instructions
- Crush the Oreos: Place 24 Oreo cookies in a food processor and pulse until finely crushed but not powdered (about 30 seconds). Alternatively, crush in a zip-top bag with a rolling pin until fine crumbs with some small chunks remain.
- Mix With Cream Cheese: In a mixing bowl, combine the crushed Oreos with 8 ounces of softened cream cheese. Add ½ cup powdered sugar and 1 teaspoon vanilla extract. Stir with a spatula until uniform and mixture holds together when pressed (about 2-3 minutes).
- Form Truffles: Using a small cookie scoop or tablespoon, scoop portions of the mixture and roll between palms to form smooth balls about 1 inch (2.5 cm) in diameter. Place on a parchment-lined baking sheet or plate.
- Chill: Refrigerate the truffles for at least 1 hour to firm up.
- Decorate the Eyeballs: Once chilled, place one candy eyeball on top of each truffle. For extra effect, use red gel icing or edible marker to draw thin red veins extending from the eyeball onto the truffle surface.
- Final Chill: Refrigerate the decorated truffles for another 15 minutes to set decorations before serving.
Notes
Use softened cream cheese for best mixing results. Do not over-pulse Oreos to keep some texture. Chill truffles for at least 1 hour to firm up. Dust hands with powdered sugar if mixture sticks when rolling. Decorate after chilling to avoid melting decorations. Can substitute candy eyeballs with mini chocolate chips or colored icing dots. For gluten-free, use gluten-free sandwich cookies. For vegan, use dairy-free cream cheese and vegan cookies.
Nutrition
- Serving Size: 1 truffle
- Calories: 95
- Sugar: 9
- Sodium: 70
- Fat: 5
- Saturated Fat: 3
- Carbohydrates: 12
- Fiber: 0.5
- Protein: 1
Keywords: no-bake, Oreo, truffles, Halloween, easy dessert, candy eyeballs, spooky treats, quick recipe