My cousin Sarah wasn’t trying to impress anyone. I’d stopped by her place on a random Tuesday to drop off a book I’d borrowed, and the smell of rich, melted chocolate hit me before I even got past the front door. It was that deep, almost fudgy scent that makes you stop mid-sentence. I found her in the kitchen, pulling two tiny ramekins out of the oven, looking like she’d just made instant oatmeal. She was wearing an old concert t-shirt and had flour on her elbow.
“Oh, it’s nothing,” she said when I asked what smelled so good. “Just a little chocolate thing.” She shrugged like it was no big deal, but the way those little cakes were jiggling in their dishes told a different story. She wasn’t hosting a dinner party or trying to be a pastry chef. She was just making a Tuesday night feel a little bit special. That’s the magic of this lighter chocolate lava cake for two. It’s not a production. It’s a quiet, personal indulgence that feels like a secret.
Honestly, I’ve been chasing that exact feeling ever since. Most lava cake recipes are built for a crowd or a special occasion, loaded with butter and sugar. But this one? It’s scaled down and lightened up without losing that soul-satisfying, gooey center. It’s the kind of dessert you make when you want something decadent but don’t want to feel like you need a nap afterward. Maybe you’ve been there—staring at a box mix and wishing for something that tastes homemade but doesn’t leave you with a sink full of dishes. This is that recipe. It’s the one that stayed with me because it proved you can have a little bit of magic on a completely ordinary day.
Why You’ll Love This Recipe
This isn’t just another chocolate dessert. This is the one that makes you feel like you’re getting away with something. It’s rich, it’s indulgent, and it’s ready in 20 minutes flat. Here’s why it’s become my go-to for those quiet nights in:
- Quick & Easy: From craving to fork in under 20 minutes. No stand mixer, no complicated water baths. Just a bowl, a whisk, and a hot oven.
- Simple Ingredients: You probably have everything in your pantry right now. No trips to a specialty store for obscure flours or fancy chocolate.
- Perfect for Date Night (or Solo Night): This recipe makes exactly two servings. It’s the perfect ending to a romantic dinner, or, let’s be honest, a Tuesday night when you just want something for yourself and maybe a friend.
- Crowd-Pleaser (for Two): That first spoonful, cracking through the thin cake layer to see the molten center spill out, never gets old. It’s pure, unadulterated joy.
- Unbelievably Delicious (and Lighter): We’ve swapped some of the heavy butter for Greek yogurt and cut the sugar, but I promise you won’t miss a thing. The texture is still perfectly fudgy, and the flavor is intensely chocolatey.
What makes this recipe different from the rest is the technique. By using a combination of a high-quality cocoa powder and a touch of Greek yogurt, we get that ultra-rich, moist texture without the heavy fat content. It’s a trick I learned from a pastry chef friend who swore by it for keeping cakes tender. This isn’t just another version of lava cake—it’s the one you’ll actually want to make on a whim because it feels good to eat.
What Ingredients You Will Need
This recipe uses simple, wholesome ingredients to deliver a dessert that feels both decadent and sensible. You don’t need a lot of fancy stuff to get that perfect molten center. Here’s what you’ll need:
- Unsalted Butter (1 tablespoon, melted): We use just enough for richness and to grease the ramekins. I like using a good European-style butter for flavor, but any unsalted butter works fine.
- Semi-Sweet Chocolate (2 ounces, chopped): This is the heart of the recipe. Use a good quality chocolate bar (I prefer Ghirardelli or Lindt) rather than chocolate chips, as they melt more smoothly and have a better flavor.
- Large Egg (1 whole + 1 egg yolk): The yolk adds richness and helps create that gooey texture. The white gives the cake structure. Make sure they are at room temperature for the best emulsion.
- Granulated Sugar (2 tablespoons): Just enough to sweeten the cake without making it cloying. You can substitute with coconut sugar for a slightly different flavor profile.
- Plain Greek Yogurt (2 tablespoons, full-fat or 2%): This is our secret weapon! It replaces some of the butter and oil, adding moisture and a slight tang that balances the sweetness. Don’t use non-fat, as it can make the cake a bit rubbery.
- All-Purpose Flour (1 tablespoon): A tiny amount gives the cake just enough structure to hold its shape. You can use a gluten-free 1:1 baking blend here if needed.
- Unsweetened Cocoa Powder (1 tablespoon): This boosts the chocolate flavor without adding extra fat or sugar. I use a Dutch-processed cocoa for a deeper, more mellow flavor.
- Vanilla Extract (¼ teaspoon): Enhances the chocolate and rounds out the flavors.
- Pinch of Salt: Absolutely essential. It makes all the other flavors pop and prevents the cake from tasting flat.
- Optional for serving: Powdered sugar, fresh raspberries, or a tiny scoop of vanilla ice cream.
Ingredient Selection Tips: For the best results, use a chocolate you love to eat on its own. The flavor really shines through. If you only have chocolate chips, that’s fine, but the texture might be slightly less smooth. Also, make sure your yogurt isn’t watery—give it a quick stir before measuring.
Equipment Needed
You don’t need a fancy pastry kitchen for this one. The list is short and sweet, just like the recipe.
- Two 6-ounce Ramekins: These are the perfect size for individual lava cakes. You can also use a 6-ounce oven-safe custard cup or even a small coffee mug. Personal note: I once used a small ceramic soup bowl, and it worked perfectly, though the cake was a bit flatter.
- Medium Mixing Bowls: One for the chocolate mixture and one for the egg mixture. Glass or stainless steel works best.
- Whisk: For combining the wet ingredients smoothly. A fork works in a pinch, but a whisk gets the eggs airier.
- Rubber Spatula: For scraping every last bit of batter into the ramekins.
- Baking Sheet: To place the ramekins on in case of any overflow. It just makes cleanup easier.
- Small Saucepan (or Microwave-Safe Bowl): For melting the butter and chocolate together. I prefer a double boiler method (a heatproof bowl set over a pot of simmering water) for the most control, but the microwave is faster and works just as well if you’re careful.
Budget-Friendly Options: If you don’t have ramekins, a standard muffin tin works! Just line two cups with parchment paper and fill them with the batter. The baking time will be slightly shorter, so start checking at 10 minutes.
Preparation Method
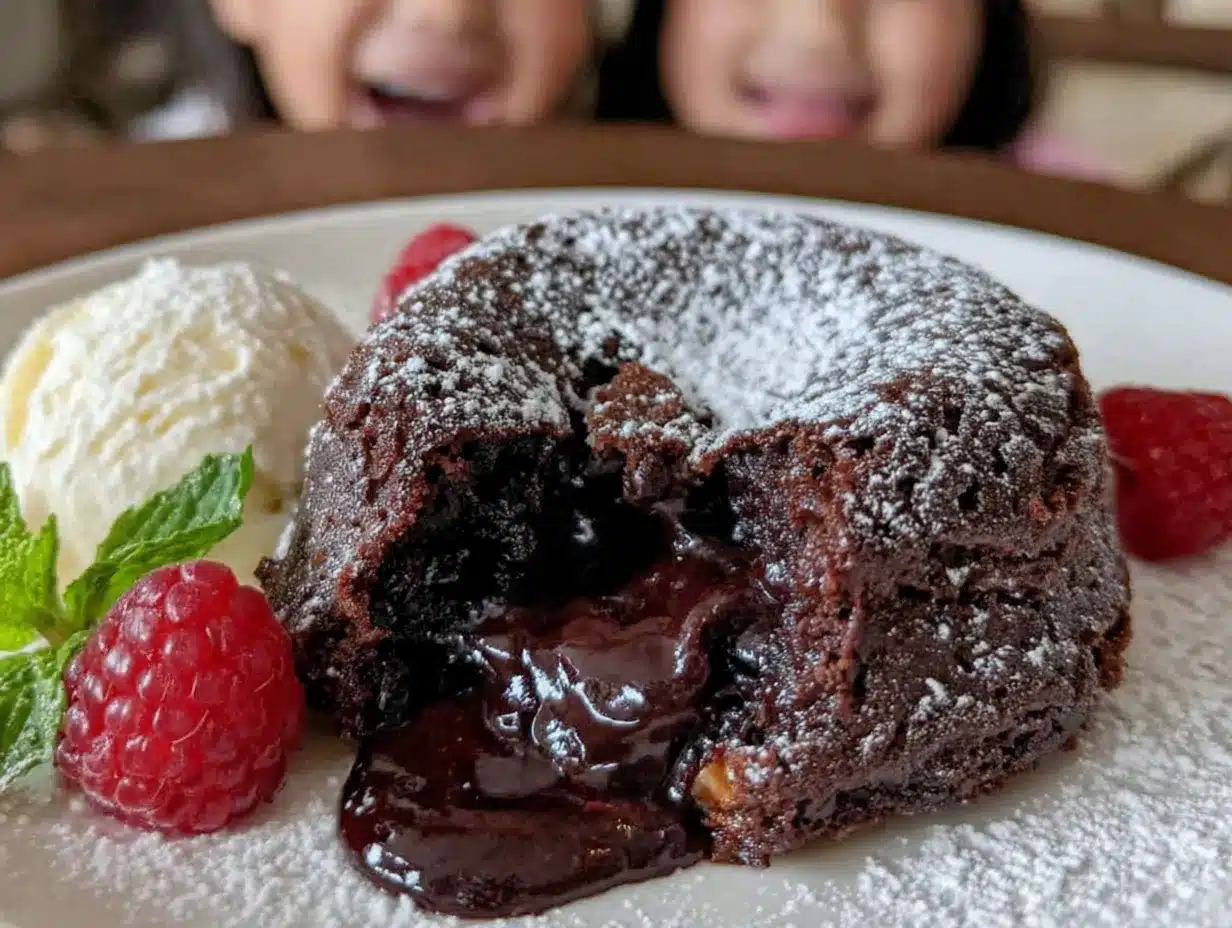
Let’s get to the good part. Follow these steps, and you’ll have two perfect lava cakes in no time. The key is speed and not overthinking it.
- Preheat and Prep (5 minutes): First, preheat your oven to 425°F (220°C). While it’s heating, generously butter the inside of your two ramekins. Then, dust them with a little cocoa powder (this gives a nice dark finish and helps the cake release). Tap out any excess. Place the ramekins on a small baking sheet.
- Melt the Chocolate (2 minutes): In a small saucepan over low heat, or in a microwave-safe bowl in 30-second bursts, melt the 2 ounces of chopped chocolate and 1 tablespoon of butter together. Stir until completely smooth and glossy. Set it aside to cool for a minute while you work on the next step. Tip: Don’t rush this. If the chocolate seizes (gets grainy), you’ve overheated it. Slow and steady wins the race.
- Whisk the Eggs and Sugar (3 minutes): In a medium bowl, combine the whole egg, the egg yolk, and 2 tablespoons of granulated sugar. Whisk vigorously for about 2 minutes, until the mixture is pale, thick, and doubled in volume. You’re looking for a “ribbon stage”—when you lift the whisk, the batter should fall back in a thick ribbon that sits on the surface for a few seconds before dissolving. This is crucial for a light cake.
- Combine the Wet Ingredients (1 minute): Gently fold the melted chocolate mixture into the egg mixture using your rubber spatula. Be careful not to deflate the eggs. Fold until just combined—a few streaks are okay. Then, fold in the 2 tablespoons of Greek yogurt and the ¼ teaspoon of vanilla extract until smooth.
- Add the Dry Ingredients (1 minute): In a tiny bowl, whisk together the 1 tablespoon of flour, 1 tablespoon of cocoa powder, and your pinch of salt. Sift this over the chocolate batter (this prevents lumps). Fold it in gently until no dry streaks remain. The batter will be thick and fudgy.
- Fill the Ramekins (1 minute): Divide the batter evenly between the two prepared ramekins. It should fill them about ¾ of the way full. Smooth the tops gently with the back of a spoon.
- Bake to Perfection (12-14 minutes): Place the baking sheet with the ramekins in the preheated oven. Bake for exactly 12 to 14 minutes. The edges should look set and firm, but the center should still jiggle slightly when you gently shake the ramekin. This is the most important part. If you overbake them, you’ll have a chocolate cake instead of a lava cake. Underbake them, and you’ll have pudding. That jiggle is your friend.
- Rest and Serve (2 minutes): Remove the ramekins from the oven and let them rest on a wire rack for exactly 1 minute. This allows the cake to pull away from the edges slightly. Run a thin knife around the inside of each ramekin to loosen the cake. Place a small plate upside down over the ramekin, then carefully invert it. Give it a gentle shake, and the cake should release onto the plate. Serve immediately, dusted with powdered sugar and a few fresh raspberries.
Cooking Tips & Techniques
I’ve made this recipe more times than I can count, and I’ve definitely had my share of failures. Here’s what I’ve learned so you don’t have to make the same mistakes.
- The Jiggle Test is Everything: I cannot stress this enough. The difference between a perfect lava cake and a fully cooked chocolate cake is about 90 seconds. Start checking at the 12-minute mark. Gently nudge the ramekin. If the center wobbles like jelly, it’s ready. If the whole thing is firm, you’ve gone too far.
- Room Temperature Eggs: Cold eggs won’t whip up to the same volume. If you forget to take them out of the fridge, place them in a bowl of warm water for 5 minutes. This small step makes a big difference in the cake’s texture.
- Don’t Overmix: Once you add the flour, fold gently and stop as soon as it’s combined. Overmixing develops the gluten, which will make your cake tough instead of tender.
- Use a Good Baking Sheet: I once used a flimsy, warped baking sheet, and the ramekins wobbled, causing the batter to spill over. A sturdy, flat sheet keeps everything stable.
- Make Ahead Option: You can prepare the batter in the ramekins up to a day in advance. Just cover them with plastic wrap and store them in the fridge. Add 2-3 minutes to the baking time if baking from cold.
Common Mistake to Avoid: The biggest mistake I made was using a non-stick ramekin that wasn’t greased well enough. The cake stuck, and I ended up with a messy pile of chocolate. Always butter and dust your ramekins generously. It’s worth the extra 30 seconds.
Variations & Adaptations
This recipe is a fantastic base, and it’s easy to tweak based on what you have or what you’re craving. Here are a few of my favorite spins:
- Peppermint Lava Cake: Add ¼ teaspoon of peppermint extract along with the vanilla. Top with a crushed candy cane for a festive holiday treat.
- Spicy Mexican Chocolate: Add a pinch of cayenne pepper and a dash of cinnamon to the dry ingredients. The warmth of the spice pairs beautifully with the rich chocolate.
- Peanut Butter Swirl: After filling the ramekins, drop a small teaspoon of creamy peanut butter into the center of each. Gently push it down into the batter. You’ll get a molten peanut butter center alongside the chocolate. It’s incredible.
- Vegan Adaptation: Use a flax egg (1 tablespoon ground flaxseed + 3 tablespoons water) instead of the egg, a vegan butter stick, and a dairy-free yogurt. The texture will be slightly less airy but still deliciously gooey.
- Gluten-Free: Simply swap the all-purpose flour for a good quality 1:1 gluten-free baking blend. I’ve used Bob’s Red Mill with great results.
Serving & Storage Suggestions
These cakes are best enjoyed immediately, but let’s talk about how to make that moment perfect.
Serving: Serve the lava cakes warm, right after they’ve been inverted. The contrast between the warm, gooey center and a cold topping is what makes this dessert sing. A small scoop of vanilla bean ice cream is the classic choice, but a dollop of lightly sweetened whipped cream or a drizzle of coconut cream works beautifully too. Fresh berries, like raspberries or strawberries, add a bright, tart counterpoint that cuts through the richness.
Storage: Look, these are really meant to be eaten fresh. The magic is in the molten center, which solidifies as it cools. If you have leftovers (unlikely!), you can cover the ramekin with plastic wrap and store it in the fridge for up to 2 days.
Reheating: To get that lava effect back, you need to reheat them carefully. The best method is to pop the ramekin back into a 350°F (175°C) oven for about 5-7 minutes. You can also microwave it for 20-30 seconds, but the texture will be a bit more like a pudding. It’s still good, just different.
Nutritional Information & Benefits
I’m not a nutritionist, but I do care about what I put in my body. This recipe lets me have my cake and feel good about it. By swapping some of the butter for Greek yogurt, we’ve cut the saturated fat and added a boost of protein and probiotics. The portion control is built right in—it’s a satisfying, single-serving dessert that doesn’t leave you with a whole cake to pick at.
Estimated Nutritional Information (per serving, without toppings):
- Calories: ~280
- Fat: 16g
- Carbohydrates: 30g
- Protein: 7g
- Sugar: 20g
Dietary Considerations: This recipe can easily be made gluten-free and can be adapted for a vegetarian diet (it already is). The use of cocoa powder provides antioxidants, and the dark chocolate is rich in minerals like iron and magnesium. It’s a dessert that feels indulgent but is made with real, whole ingredients.
Frequently Asked Questions
Can I make this in a microwave instead of an oven?
Yes, you can! For a quick microwave version, prepare the batter in a microwave-safe mug or ramekin. Cook on high power for about 45 seconds to 1 minute. The texture will be more like a molten mug cake than a traditional baked lava cake, but it’s still deliciously gooey.
Why did my lava cake not have a liquid center?
This is almost always a result of overbaking. The center needs to remain slightly undercooked to stay liquid. Make sure your oven temperature is accurate, and start checking at the 12-minute mark. The edges should be set, but the center should jiggle like jelly when you shake the ramekin.
Can I use milk chocolate instead of semi-sweet?
You can, but the cake will be much sweeter and less intensely chocolatey. Milk chocolate also has a different fat content, which can affect the texture. If you only have milk chocolate, reduce the sugar in the recipe by one tablespoon.
How do I prevent the cake from sticking to the ramekin?
The key is a thorough greasing and dusting. Use a generous amount of softened butter (not melted) and a pastry brush to get into all the nooks and crannies. Then, add a spoonful of cocoa powder and tilt the ramekin to coat the buttered surface evenly. Tap out the excess. This creates a non-stick barrier that also adds a nice dark color to the cake’s exterior.
Can I double this recipe?
Absolutely! This recipe scales up perfectly. Just double all the ingredients and use four ramekins. The baking time will remain roughly the same, but you may need to rotate the baking sheet halfway through for even baking.
Conclusion
This lighter chocolate lava cake for two is more than just a dessert. It’s a reminder that you don’t need a special occasion to treat yourself. It’s quick enough for a weeknight, simple enough for a beginner, and impressive enough to serve to someone you want to wow. I love that it feels both decadent and sensible—a balance that’s hard to find in the dessert world.
I hope you give this recipe a try. Don’t be afraid to make it your own. Swap in your favorite extract, add a pinch of spice, or just enjoy it exactly as written. The first time you crack that spoon through the top and see the chocolate lava flow out, you’ll know exactly what I mean. It’s pure, simple happiness.
If you make this, I’d love to hear about it! Leave a comment below or tag me in your photos. What variation did you try? Did you serve it with ice cream or berries? Your feedback helps this little community of home bakers grow. Happy baking!
Pin This Recipe!
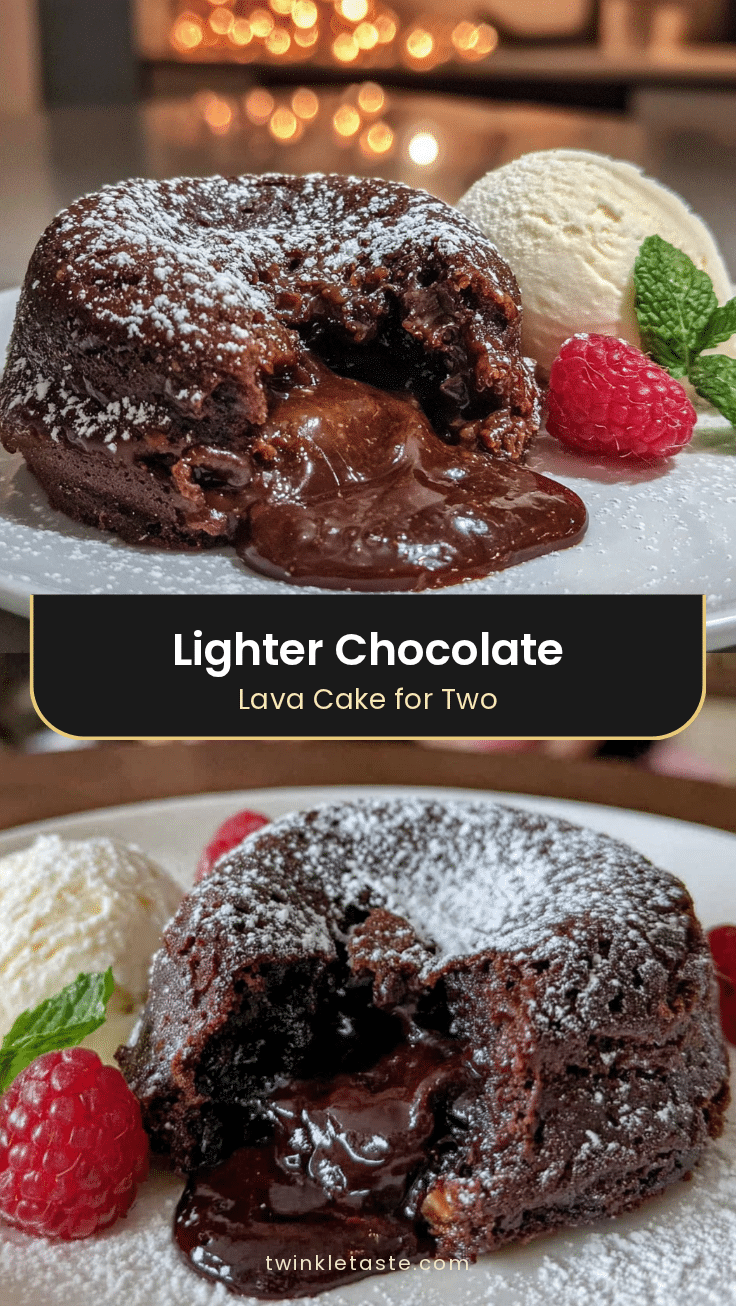
Lighter Chocolate Lava Cake for Two: Easy 20-Minute Dessert
A quick and easy lighter chocolate lava cake for two, made with Greek yogurt and cocoa powder for a rich, gooey center without the heavy fat. Perfect for a weeknight indulgence or a romantic date night dessert.
- Prep Time: 5 minutes
- Cook Time: 14 minutes
- Total Time: 19 minutes
- Yield: 2 servings 1x
- Category: Dessert
- Cuisine: American
Ingredients
- 1 tablespoon unsalted butter, melted (plus more for greasing)
- 2 ounces semi-sweet chocolate, chopped
- 1 large egg
- 1 large egg yolk
- 2 tablespoons granulated sugar
- 2 tablespoons plain Greek yogurt (full-fat or 2%)
- 1 tablespoon all-purpose flour
- 1 tablespoon unsweetened cocoa powder (Dutch-processed preferred)
- ¼ teaspoon vanilla extract
- Pinch of salt
- Optional for serving: powdered sugar, fresh raspberries, or vanilla ice cream
Instructions
- Preheat your oven to 425°F (220°C). Generously butter the inside of two 6-ounce ramekins, then dust with cocoa powder, tapping out any excess. Place the ramekins on a small baking sheet.
- In a small saucepan over low heat or in a microwave-safe bowl in 30-second bursts, melt the 2 ounces of chopped chocolate and 1 tablespoon of butter together. Stir until smooth and glossy. Set aside to cool for a minute.
- In a medium bowl, combine the whole egg, egg yolk, and 2 tablespoons of granulated sugar. Whisk vigorously for about 2 minutes until pale, thick, and doubled in volume (ribbon stage).
- Gently fold the melted chocolate mixture into the egg mixture using a rubber spatula until just combined. Then fold in the 2 tablespoons of Greek yogurt and ¼ teaspoon of vanilla extract until smooth.
- In a tiny bowl, whisk together the 1 tablespoon of flour, 1 tablespoon of cocoa powder, and a pinch of salt. Sift over the chocolate batter and fold gently until no dry streaks remain.
- Divide the batter evenly between the two prepared ramekins, filling them about ¾ full. Smooth the tops gently.
- Bake for 12 to 14 minutes. The edges should look set and firm, but the center should jiggle slightly when you gently shake the ramekin.
- Remove from the oven and let rest on a wire rack for exactly 1 minute. Run a thin knife around the inside of each ramekin to loosen the cake. Place a small plate upside down over the ramekin, then carefully invert it. Serve immediately, dusted with powdered sugar and fresh raspberries if desired.
Notes
The jiggle test is crucial: the center should wobble like jelly when done. Use room temperature eggs for best volume. Do not overmix after adding flour. For make-ahead, prepare batter in ramekins, cover, and refrigerate up to 1 day; add 2-3 minutes to baking time. For a gluten-free version, use a 1:1 gluten-free baking blend.
Nutrition
- Serving Size: 1 lava cake
- Calories: 280
- Sugar: 20
- Sodium: 100
- Fat: 16
- Saturated Fat: 8
- Carbohydrates: 30
- Fiber: 2
- Protein: 7
Keywords: chocolate lava cake, lava cake for two, easy lava cake, lighter lava cake, quick dessert, molten chocolate cake, date night dessert