“Hey, you’ve got to try these bars!” my neighbor shouted across the fence one sweltering July afternoon. I was skeptical—ice cream sandwiches usually meant sticky fingers and soggy cookies, right? But she insisted, promising something different: bright, festive, and bursting with fun. When I finally took a bite of these Flavorful Red White and Blue Funfetti Ice Cream Sandwich Bars, the crunch of the cookie gave way to creamy, colorful ice cream that was just the right amount of sweet and nostalgic. Honestly, it felt like a perfect little celebration in every bite.
That summer, I found myself making these bars over and over—whether it was for a last-minute cookout or a quick sweet fix after a long, hectic day. The recipe’s charm wasn’t just in the patriotic colors or the sprinkles; it was how effortlessly it brought smiles around my kitchen table. I’ve always loved experimenting with desserts, but this one quietly stole a spot as my go-to for holidays and casual get-togethers alike.
What stuck with me was how this recipe balances fun and flavor without fuss. It’s like those happy childhood memories of ice cream sandwiches, but with a grown-up twist that’s still playful. The ease, the familiar yet exciting taste, and the celebratory vibe make it a dessert you’ll want to keep in your recipe box for more than just July 4th. I’m excited to share this little gem with you, hoping it finds a place in your summer traditions too.
Why You’ll Love This Recipe
This recipe has been tested through countless warm afternoons and surprise guests, and it never disappoints. Here’s why I keep coming back to these Flavorful Red White and Blue Funfetti Ice Cream Sandwich Bars:
- Quick & Easy: You can have these bars ready in under 30 minutes, perfect for when time’s tight but dessert cravings aren’t.
- Simple Ingredients: No need for specialty stores—most of the ingredients are pantry staples or easy to find in any grocery.
- Perfect for Summer Celebrations: They bring a festive pop to BBQs, picnics, or just a casual weekend treat.
- Crowd-Pleaser: From kids to adults, everyone loves the playful sprinkles and creamy ice cream combo.
- Unbelievably Delicious: The chewy, soft cookies sandwiching a smooth, colorful ice cream filling is pure joy.
What sets this recipe apart is the way it layers texture and flavor without complicated steps. The cookies are buttery but tender, dotted with vibrant red and blue sprinkles that add festive charm and a little crunch. The ice cream center is creamy, with a hint of vanilla that complements the cookie perfectly. You don’t just eat these bars—you experience them, especially on a warm day when you want something fun but not fussy.
Honestly, these bars have become my secret weapon when I want to impress guests without breaking a sweat. Whether it’s a spontaneous summer party or a cozy night in, they bring a smile and a sense of celebration. It’s a recipe that’s both nostalgic and fresh, making dessert feel like a special occasion every time.
What Ingredients You Will Need
This recipe uses simple, wholesome ingredients to deliver bold flavor and satisfying texture without the fuss. Most ingredients are pantry staples, and the festive sprinkles add that unmistakable red, white, and blue flair.
- For the Cookie Layers:
- All-purpose flour, 2 ½ cups (312 g)
- Baking soda, 1 tsp
- Salt, ½ tsp
- Unsalted butter, 1 cup (227 g), softened (I recommend using a quality brand like Kerrygold for best richness)
- Granulated sugar, ¾ cup (150 g)
- Brown sugar, ½ cup (100 g), packed (adds moisture and depth)
- Large eggs, 2, room temperature
- Pure vanilla extract, 2 tsp (use real vanilla for best flavor)
- Red, white, and blue sprinkles, ½ cup (adds festive color and fun texture)
- For the Ice Cream Filling:
- Vanilla ice cream, 1 quart (approximately 946 ml), softened (choose a creamy, high-quality brand like Haagen-Dazs or Breyers for smooth texture)
- Additional red and blue sprinkles, ¼ cup (to mix into the ice cream for a funfetti effect)
If you want to customize, you can swap regular sprinkles for sugar-free versions or use dairy-free ice cream options like coconut milk-based ice cream for a vegan twist. For gluten-free options, almond or oat flour can work, but expect a slightly different texture in the cookies.
Equipment Needed
- Mixing bowls (medium and large)
- Electric mixer or hand mixer (helps cream butter and sugar well, but you can mix by hand if you don’t mind the workout)
- Measuring cups and spoons (accuracy matters for cookie texture)
- Rubber spatula (great for scraping bowls clean)
- Baking sheets, lined with parchment paper (prevents sticking and makes clean-up easy)
- Cooling racks (to let cookies cool evenly)
- 9×13 inch (23×33 cm) baking pan or dish (to assemble the bars)
- Plastic wrap or parchment paper (to cover the ice cream layer and chill)
If you don’t have an electric mixer, a sturdy wooden spoon and some elbow grease will do. For the ice cream, let it soften at room temperature for about 10 minutes before spreading to get that perfect creamy layer. A silicone spatula is my favorite for this because it spreads smoothly without tearing the cookie base.
Preparation Method
- Preheat and prep: Heat your oven to 350°F (175°C). Line two baking sheets with parchment paper. This keeps the cookies from sticking and helps with easy removal.
- Mix the dry ingredients: In a medium bowl, whisk together 2 ½ cups (312 g) all-purpose flour, 1 tsp baking soda, and ½ tsp salt. Set aside. This step prevents clumps and ensures even distribution of leavening.
- Cream butter and sugars: In a large bowl, beat 1 cup (227 g) softened unsalted butter with ¾ cup (150 g) granulated sugar and ½ cup (100 g) packed brown sugar until light and fluffy, about 3-4 minutes. It should look pale and airy—that’s your texture secret.
- Add eggs and vanilla: Beat in 2 large eggs, one at a time, followed by 2 tsp pure vanilla extract. Mix until just combined. Don’t overbeat here; you want the dough tender, not tough.
- Combine wet and dry: Gradually add the flour mixture to the wet ingredients, mixing on low speed or folding gently with a spatula until just incorporated. Overmixing can lead to dense cookies.
- Fold in sprinkles: Gently fold in ½ cup red, white, and blue sprinkles. They add festive bursts of color and a subtle crunch, but be careful not to overmix or the colors might bleed.
- Shape and bake cookies: Scoop dough onto prepared baking sheets using a cookie scoop or tablespoon, spacing about 2 inches apart. Flatten slightly with your fingers or a spatula. Bake for 10-12 minutes until edges are lightly golden but centers still soft. Cookies will firm up as they cool.
- Cool completely: Transfer cookies to cooling racks and let cool fully, about 30 minutes. This step is crucial so the ice cream doesn’t melt when assembled.
- Prepare ice cream layer: Soften 1 quart (946 ml) vanilla ice cream at room temperature for about 10 minutes. Stir in ¼ cup additional red and blue sprinkles for funfetti flair.
- Assemble bars: Line a 9×13 inch (23×33 cm) baking pan with parchment paper. Arrange half of the cooled cookies in a single layer on the bottom. Spread the ice cream evenly over the cookie base, smoothing with a spatula. Top with the remaining cookies, pressing gently to create a sandwich layer.
- Freeze to set: Cover with plastic wrap and freeze for at least 4 hours or overnight until firm.
- Slice and serve: Remove from freezer 10 minutes before slicing to soften slightly. Use a sharp knife to cut into bars. Serve chilled and watch everyone’s eyes light up.
Pro tip: If your cookies spread too much during baking, chill the dough for 30 minutes before scooping. Also, if your ice cream is too hard to spread, let it sit out a little longer but don’t let it melt completely or the bars will be soggy.
Cooking Tips & Techniques
Making these Flavorful Red White and Blue Funfetti Ice Cream Sandwich Bars is straightforward, but a few tricks can take them from good to memorable.
- Butter temperature matters: Softened butter (not melted) gives you that perfect cookie texture—creamy and tender, not greasy or flat.
- Don’t overbake the cookies: They’ll look slightly underdone when you pull them out. This helps keep them chewy and perfect for sandwiching ice cream.
- Work quickly with the ice cream: Once softened, spread it swiftly over the cookie base to avoid melting. Using a silicone spatula helps smooth the ice cream without tearing the cookies.
- Freezing time is key: At least 4 hours ensures the bars hold their shape and slice neatly without crumbling or melting.
- Multitasking tip: While cookies bake and cool, soften the ice cream to save time. This way, assembly goes smoothly.
- Sprinkle placement: Folding sprinkles gently preserves their shape and color. Overmixing can cause the colors to bleed, making the cookies less visually appealing.
I once tried swapping the vanilla ice cream for strawberry—delicious, but the pink hue clashed with the red and blue sprinkles, so I’d stick with vanilla for the classic look. Also, if you want crispier cookies, bake them a minute or two longer but watch closely to avoid burning.
Variations & Adaptations
This recipe is flexible and can be tweaked to suit different tastes and dietary needs:
- Dairy-Free/Vegan: Use coconut milk-based ice cream and replace butter with vegan margarine or coconut oil. Choose vegan sprinkles to keep it plant-friendly.
- Flavor Twists: Add lemon zest to the cookie dough for a citrusy zing or swap vanilla ice cream with blueberry or raspberry sorbet for a fruity punch.
- Gluten-Free: Substitute all-purpose flour with a gluten-free baking mix (make sure it contains xanthan gum for texture). The bars may be a little crumbly but still tasty.
- Extra Crunch: Mix chopped toasted nuts like pecans or almonds into the cookie dough for added texture.
- Personal Favorite: I once added mini white chocolate chips to the cookie dough alongside sprinkles—such a lovely melty surprise in every bite!
For a different assembly, try layering the ice cream and cookie crumbs in a parfait glass for a quick no-bake dessert inspired by these bars. Or use store-bought sugar cookie dough to speed things up, but homemade always tastes best.
Serving & Storage Suggestions
These ice cream sandwich bars shine best straight from the freezer, slightly softened. Serve them chilled for a refreshing, festive treat that cools you down on hot days.
They pair beautifully with fresh berries or a drizzle of warm chocolate sauce for an extra indulgent finish. For summer picnics or parties, they’re a standout dessert that’s easy to grab and go.
To store, wrap each bar individually in plastic wrap or parchment paper and keep them in an airtight container in the freezer. They’ll stay fresh for up to 2 weeks. When reheating (if you want a softer texture), pop them in the microwave for about 10-15 seconds—just enough to take the chill off without melting the entire bar.
Flavors actually deepen after a day or two in the freezer, so don’t hesitate to make these ahead of time for your next gathering.
Nutritional Information & Benefits
Each bar (depending on size) contains approximately:
| Calories | 280-320 kcal |
|---|---|
| Carbohydrates | 35-40 g |
| Fat | 15-18 g |
| Protein | 3-4 g |
| Sugar | 20-22 g |
While these bars are definitely a treat, the homemade cookies allow control over ingredients—no preservatives or artificial additives like some packaged ice creams and cookies. Using real vanilla and quality butter adds wholesome flavor.
The sprinkles bring joy, but they do contain sugar and food coloring, so moderation is key. Opting for natural or organic sprinkles can be a small health-conscious switch. For those watching dairy or gluten intake, the recipe’s adaptable nature means you can enjoy a version that fits your needs without missing out on fun.
Conclusion
These Flavorful Red White and Blue Funfetti Ice Cream Sandwich Bars are a cheerful, easy dessert that brings a festive touch without stress. Their playful colors and delicious textures make them perfect for summer celebrations or any time you want a sweet, nostalgic treat.
Feel free to tweak the recipe to suit your taste buds—adding a twist here or a substitute there. I love how this recipe manages to be both fun and approachable, turning simple ingredients into a dessert that feels special and memorable.
If you make these bars, I’d love to hear how you customize them or which variations become your favorites. There’s nothing better than sharing a recipe that brings smiles and a little bit of joy to your table. Here’s to many more sweet moments!
FAQs
Can I make these bars ahead of time?
Absolutely! They freeze well and can be made a day or two before serving. Just keep them wrapped tightly to prevent freezer burn.
What if I don’t have sprinkles on hand?
You can leave them out or substitute with mini chocolate chips or chopped nuts for texture, but the sprinkles add that signature festive flair.
Can I use store-bought cookies instead of homemade?
Yes, for a shortcut, sturdy sugar cookies work best. Just make sure they’re thick enough to hold the ice cream without breaking.
How do I prevent the cookies from getting soggy?
Cool cookies completely before assembling and keep the bars frozen until serving. Also, spreading the ice cream evenly helps maintain structure.
Is there a way to make this recipe vegan?
Yes! Use vegan butter or coconut oil for the cookies and dairy-free ice cream. Make sure sprinkles are vegan-friendly too.
For more crowd-pleasing desserts, you might enjoy trying the soft chewy thick chocolate chip cookies or the gooey chocolate chip skillet cookie for a warm treat that’s just as comforting.
Pin This Recipe!

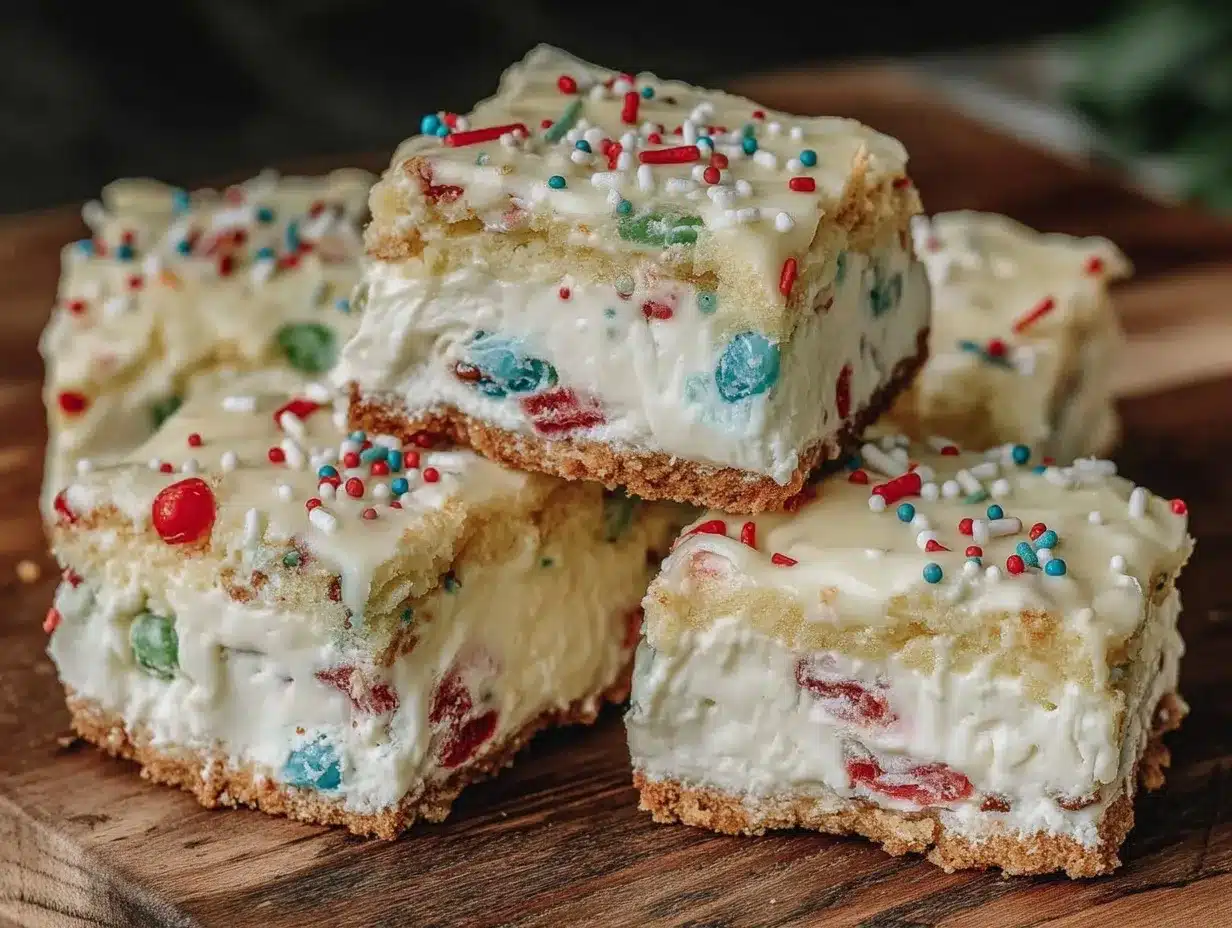
Flavorful Red White and Blue Funfetti Ice Cream Sandwich Bars

These festive ice cream sandwich bars feature soft, buttery cookies dotted with red, white, and blue sprinkles, layered with creamy vanilla ice cream for a perfect summer dessert.
- Prep Time: 15 minutes
- Cook Time: 12 minutes
- Total Time: 4 hours 27 minutes
- Yield: 12 servings 1x
- Category: Dessert
- Cuisine: American
Ingredients
- 2 ½ cups (312 g) all-purpose flour
- 1 tsp baking soda
- ½ tsp salt
- 1 cup (227 g) unsalted butter, softened
- ¾ cup (150 g) granulated sugar
- ½ cup (100 g) packed brown sugar
- 2 large eggs, room temperature
- 2 tsp pure vanilla extract
- ½ cup red, white, and blue sprinkles
- 1 quart (946 ml) vanilla ice cream, softened
- ¼ cup additional red and blue sprinkles
Instructions
- Preheat oven to 350°F (175°C). Line two baking sheets with parchment paper.
- In a medium bowl, whisk together flour, baking soda, and salt. Set aside.
- In a large bowl, beat softened butter with granulated sugar and brown sugar until light and fluffy, about 3-4 minutes.
- Beat in eggs one at a time, then add vanilla extract and mix until just combined.
- Gradually add flour mixture to wet ingredients, mixing on low speed or folding gently until just incorporated.
- Gently fold in ½ cup red, white, and blue sprinkles.
- Scoop dough onto prepared baking sheets about 2 inches apart and flatten slightly.
- Bake for 10-12 minutes until edges are lightly golden but centers still soft.
- Transfer cookies to cooling racks and cool completely, about 30 minutes.
- Soften vanilla ice cream at room temperature for about 10 minutes. Stir in ¼ cup additional sprinkles.
- Line a 9×13 inch baking pan with parchment paper. Arrange half of the cooled cookies in a single layer on the bottom.
- Spread ice cream evenly over cookie base, smoothing with a spatula.
- Top with remaining cookies, pressing gently to create a sandwich layer.
- Cover with plastic wrap and freeze for at least 4 hours or overnight until firm.
- Remove from freezer 10 minutes before slicing. Cut into bars and serve chilled.
Notes
Use softened butter (not melted) for best cookie texture. Do not overbake cookies to keep them chewy. Work quickly when spreading softened ice cream to avoid melting. Freeze bars at least 4 hours for best slicing. Chill dough 30 minutes before baking if cookies spread too much. For vegan or dairy-free options, use coconut milk-based ice cream and vegan butter or coconut oil. Gluten-free flour can be substituted but expect a different texture.
Nutrition
- Serving Size: 1 bar (approximate)
- Calories: 300
- Sugar: 21
- Sodium: 150
- Fat: 16.5
- Saturated Fat: 10
- Carbohydrates: 37.5
- Fiber: 1
- Protein: 3.5
Keywords: ice cream sandwich bars, funfetti, red white and blue dessert, summer dessert, easy dessert, patriotic dessert, ice cream bars