I honestly did not trust chewy cookies as the go-to lunchbox treat for kids. I figured they’d either turn into crumbly messes or get too soggy by midday. My own experience with baking was more about crisp edges and firm centers, so the idea of soft, chewy cookies surviving a few hours in a lunchbox felt like wishful thinking. But there was this one afternoon when I watched my kid open her lunchbox, pull out a cookie, and light up with that unmistakable “wow” expression. That moment made me reconsider everything.
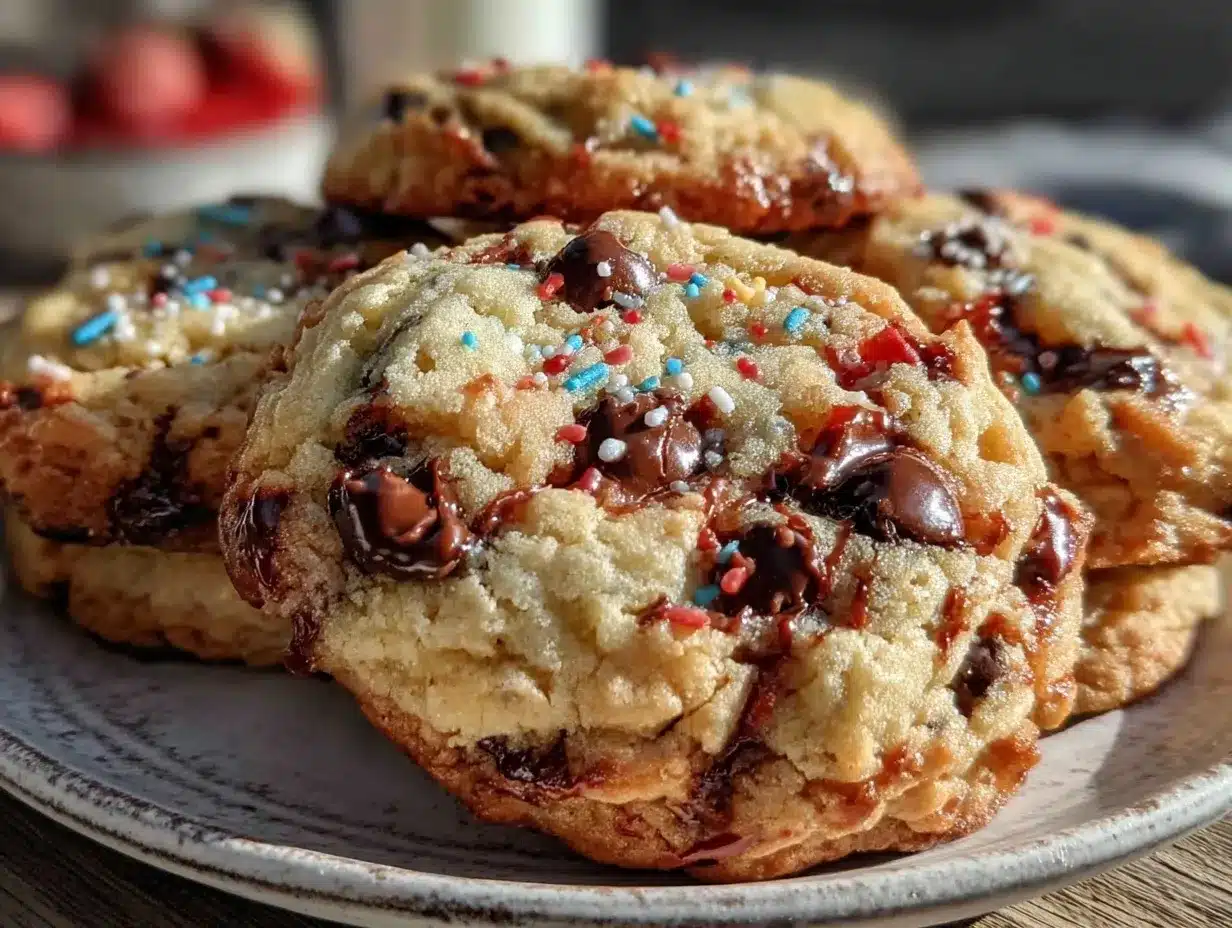
Turns out, the magic lies in the balance of ingredients and just a touch of patience. The texture wasn’t just soft — it was perfectly chewy, with a slight bend that made you want to savor each bite slowly. These cookies didn’t crumble into crumbs, nor did they turn into a sad, squishy blob hours later. They stayed intact, packed with flavor, and honestly, it was a quiet revelation.
What stuck with me is how these Easy Chewy Lunchbox Cookies for Kids became a staple, not because they were fancy or complicated, but because they were reliable and downright delicious. The recipe has this comforting simplicity that makes packing lunches less of a chore and more of a little moment of joy for both of us. And as stubborn as I was about it at first, I now trust these cookies to deliver that smile every single time.
Why You’ll Love This Recipe
From my kitchen trials and kid-tested feedback, these Easy Chewy Lunchbox Cookies for Kids have stood out as a dependable favorite. Here’s why you might find yourself reaching for this recipe again and again:
- Quick & Easy: Whip these up in about 25 minutes total, which is perfect when the afternoon hits and you realize the cookie stash is empty.
- Simple Ingredients: No need for fancy or hard-to-find items; odds are you have most of these pantry staples already.
- Perfect for Lunchbox or Snack Time: These cookies hold up well in a lunchbox without losing their chewy charm, making them ideal for school or day trips.
- Crowd-Pleaser: Whether it’s your picky toddler or a classroom full of kids, these cookies usually go fast – no leftovers here.
- Unbelievably Delicious: The subtle chewiness combined with hints of vanilla and chocolate chips hits that comfort food note without being overly sweet.
This recipe isn’t just another cookie on the block. The trick is in mixing the dough just right and baking until the edges are set but the centers remain soft. I experimented with blending cottage cheese into another batch of treats, but for these cookies, sticking to classic ingredients with a small twist—like a touch of brown sugar—makes all the difference. It’s a reliable recipe that’s both nostalgic and fresh.
Honestly, these cookies have become my little secret weapon when I want something homemade but fuss-free. They’re the kind of treat that makes you pause, close your eyes, and remember why homemade snacks matter.
What Ingredients You Will Need
This recipe uses simple, wholesome ingredients to deliver chewy texture and sweet satisfaction without any fuss. Most of these are pantry staples, and substitutions are easy if you need to tweak for allergies or preferences.
- All-purpose flour – 2 ¼ cups (280g); provides structure and chewiness
- Baking soda – 1 teaspoon; for lift and light texture
- Salt – ½ teaspoon; balances the sweetness and enhances flavor
- Unsalted butter – ¾ cup (170g), softened; adds richness and moisture (I usually use Land O Lakes for consistent results)
- Brown sugar – 1 cup packed (200g); key for that chewy softness and caramel notes
- Granulated sugar – ¼ cup (50g); balances the brown sugar sweetness and helps with crisp edges
- Large eggs – 2, room temperature; bind the dough and add tenderness
- Pure vanilla extract – 2 teaspoons; critical for that warm, homemade cookie flavor
- Semi-sweet chocolate chips – 1 ½ cups (270g); classic choice, but you can swap for dairy-free chips if needed
- Optional add-ins:
- Chopped walnuts or pecans (½ cup) for crunch
- Dried cranberries (½ cup) for a tart twist
If you want to keep it gluten-free, I’ve had decent success substituting the all-purpose flour with a gluten-free blend like Bob’s Red Mill 1-to-1. For dairy-free, swap the butter with a plant-based spread, and you’re set. In summer months, I sometimes sneak in chopped fresh strawberries or swap chocolate chips for white chocolate to mix things up.
Equipment Needed
- Mixing bowls: At least two – one for dry ingredients, one for wet.
- Electric mixer or sturdy whisk: Makes creaming butter and sugar easier.
- Measuring cups and spoons: Accurate measuring keeps the cookie texture consistent.
- Baking sheets: Use a rimmed cookie sheet lined with parchment paper or a silicone baking mat to prevent sticking.
- Cooling rack: Essential to cool cookies quickly and prevent sogginess.
If you don’t have an electric mixer, a strong arm and a wooden spoon will do just fine—just be ready for a little workout. I always recommend parchment paper over greasing pans because it makes cleanup less of a pain and helps keep cookies evenly baked. For budget-friendly tools, silicone mats last forever and cut down on waste.
Preparation Method
- Preheat your oven to 350°F (175°C). Line two baking sheets with parchment paper or silicone mats. This gets things ready so you can move quickly once the dough is mixed.
- Mix dry ingredients: In a medium bowl, whisk together 2 ¼ cups (280g) all-purpose flour, 1 teaspoon baking soda, and ½ teaspoon salt. Set aside.
- Cream the butter and sugars: In a large bowl, beat ¾ cup (170g) softened unsalted butter, 1 cup packed (200g) brown sugar, and ¼ cup (50g) granulated sugar until light and fluffy—about 3-4 minutes. This step is key for that chewy texture, so don’t rush it.
- Add eggs and vanilla: Beat in 2 large eggs, one at a time, then stir in 2 teaspoons pure vanilla extract. Make sure each egg is fully incorporated before adding the next.
- Combine wet and dry: Gradually add the flour mixture to the wet ingredients, mixing on low speed just until combined. Overmixing here will make cookies tough, so stop as soon as you don’t see flour streaks.
- Fold in chocolate chips: Gently stir 1 ½ cups (270g) semi-sweet chocolate chips into the dough. If you want to add nuts or dried fruit, fold them in here too.
- Scoop the dough: Use a cookie scoop or tablespoon to drop rounded balls of dough about 2 inches apart on the baking sheets. This spacing lets cookies spread without merging.
- Bake: Bake for about 10-12 minutes. You’ll notice the edges set and start to turn golden, but the centers will still look slightly underbaked. That’s perfect—chewy cookies need this exact timing.
- Cool: Let cookies rest on the baking sheet for 5 minutes before transferring to a cooling rack. This step helps them firm up without losing that chewiness.
Pro tip: If you find your cookies spreading too much, chill the dough for 15-20 minutes before baking. Also, don’t skip the cooling step on the sheet—it’s tempting to move them right away, but they need that time to set properly.
Cooking Tips & Techniques
Making the perfect chewy cookie is part science, part feel. Here’s what I’ve learned from plenty of batches—some great, some less so:
- Butter temperature matters: Softened butter is easier to cream with sugars, which traps air and creates that perfect texture. Too melted, and your dough will be greasy and spread too much.
- Don’t overmix: Once you add the flour, mix just until combined. Overworking dough develops gluten and can make cookies tough.
- Brown sugar is your friend: It adds moisture and chewiness thanks to its molasses content. I usually don’t skimp here.
- Watch the baking time carefully: The difference between chewy and dry can be just a minute or two. Pull them out when the edges are golden but centers are still soft.
- Chill if needed: If your kitchen’s warm or your dough feels too soft, a short chill can prevent excessive spreading.
- Use parchment or silicone mats: They help cookies bake evenly and prevent sticking without extra grease.
- Multitasking tip: While the first batch bakes, prep the next batch of dough to keep the flow going and save time.
One time, I accidentally baked a batch for 15 minutes straight—lesson learned: chewy does not mean crunchy! But by adjusting bake time and butter temp, I nailed it the next round. It’s all trial and error, honestly.
Variations & Adaptations
These Easy Chewy Lunchbox Cookies for Kids are a great base for creativity. Here are a few tweaks I’ve tried or recommend:
- Peanut Butter Swirl: Add ½ cup peanut butter to the creamed butter and sugar for a rich, nutty twist. Kids loved this one at school.
- Oatmeal Chocolate Chip: Substitute ½ cup of the flour with rolled oats for a heartier texture and a bit more fiber.
- Fruit and Nut: Mix in ½ cup dried cranberries and ½ cup chopped walnuts instead of chocolate chips for a tart and crunchy combo.
- Gluten-Free: Use a 1-to-1 gluten-free flour blend and add an extra egg yolk for moisture.
- Dairy-Free: Swap butter for coconut oil or vegan butter; use dairy-free chocolate chips.
I once made a batch with a hint of cinnamon and orange zest for a festive feel—turned out surprisingly delightful! These cookies adapt well to whatever you have on hand or what your kids prefer.
Serving & Storage Suggestions
These cookies are best enjoyed at room temperature but are sturdy enough to survive a lunchbox trip without losing their charm. I usually pack one or two with a small container of fresh fruit or veggies—something like a quick pickled cucumber snack pairs surprisingly well, balancing sweetness with a little tang.
To store, keep cookies in an airtight container at room temperature for up to 5 days. For longer storage, freeze them in a single layer on a baking sheet, then transfer to a freezer bag. They thaw quickly and still taste freshly baked.
When reheating, a 10-second zap in the microwave restores softness nicely, but honestly, they’re just as good cold. Over time, the flavors meld and get even more mellow—a quiet treat that ages well if your kids don’t eat them all in one sitting.
Nutritional Information & Benefits
Each cookie (assuming about 24 per batch) contains roughly 150-170 calories, with a moderate amount of fat and sugar to keep it a treat, not an everyday meal. The use of brown sugar and real butter means you’re avoiding overly processed ingredients.
The chocolate chips add antioxidants, and if you include nuts or oats, you get a nice boost of fiber and healthy fats. This recipe can easily be adjusted to be gluten-free or dairy-free, making it accessible for various dietary needs.
From a wellness perspective, these cookies hit the sweet spot between indulgence and mindful homemade quality—something you feel better about handing over compared to store-bought options loaded with preservatives.
Conclusion
These Easy Chewy Lunchbox Cookies for Kids are more than just a quick recipe; they’re a little lesson in trusting simple ingredients and timing. They’ve earned their place in my baking rotation because they deliver a reliable chewy texture and familiar flavor that kids actually love. Plus, they’re flexible enough to suit your family’s tastes and dietary needs.
Whether you stick to the classic chocolate chip or try adding your own mix-ins, these cookies offer a dependable, homemade touch to school lunches and snack times. Honestly, I love them because they make busy mornings a bit easier and pack a little happiness into a kid’s day.
If you give them a shot, I’d love to hear how you customize your batch or what your kids think—comments and stories always brighten my day. Baking for kids can be a challenge, but these cookies are a sweet little win.
FAQs
- Can I make these cookies vegan? Yes! Use a dairy-free butter substitute and replace eggs with flax eggs (1 tbsp ground flaxseed + 3 tbsp water per egg), then adjust baking time as needed.
- How do I keep cookies chewy longer? Store in an airtight container at room temperature with a slice of bread to maintain moisture.
- Can I freeze the cookie dough? Absolutely! Shape the dough into balls and freeze on a baking sheet, then transfer to a bag. Bake straight from frozen, adding a couple of extra minutes.
- What’s the best way to measure flour for this recipe? Use the spoon-and-level method—spoon flour into your measuring cup and level off with a knife to avoid packing too much and making cookies dry.
- Can I swap chocolate chips for something else? Yes, you can use white chocolate, butterscotch chips, or dried fruit like raisins or cranberries depending on your kid’s preferences.
Pin This Recipe!

Easy Chewy Lunchbox Cookies for Kids

These chewy cookies are a dependable favorite for kids’ lunchboxes, offering a perfect balance of soft texture and rich flavor that holds up well throughout the day.
- Prep Time: 15 minutes
- Cook Time: 12 minutes
- Total Time: 27 minutes
- Yield: 24 cookies 1x
- Category: Snack
- Cuisine: American
Ingredients
- 2 1/4 cups all-purpose flour (280g)
- 1 teaspoon baking soda
- 1/2 teaspoon salt
- 3/4 cup unsalted butter, softened (170g or 12 tablespoons)
- 1 cup packed brown sugar (200g)
- 1/4 cup granulated sugar (50g)
- 2 large eggs, room temperature
- 2 teaspoons pure vanilla extract
- 1 1/2 cups semi-sweet chocolate chips (270g)
- Optional add-ins: 1/2 cup chopped walnuts or pecans, 1/2 cup dried cranberries
Instructions
- Preheat your oven to 350°F (175°C). Line two baking sheets with parchment paper or silicone mats.
- In a medium bowl, whisk together the flour, baking soda, and salt. Set aside.
- In a large bowl, beat the softened butter, brown sugar, and granulated sugar until light and fluffy, about 3-4 minutes.
- Beat in the eggs one at a time, ensuring each is fully incorporated before adding the next, then stir in the vanilla extract.
- Gradually add the flour mixture to the wet ingredients, mixing on low speed just until combined. Avoid overmixing.
- Fold in the chocolate chips and any optional add-ins like nuts or dried fruit.
- Use a cookie scoop or tablespoon to drop rounded balls of dough about 2 inches apart on the prepared baking sheets.
- Bake for 10-12 minutes until edges are golden but centers still look slightly underbaked.
- Let cookies rest on the baking sheet for 5 minutes before transferring to a cooling rack to cool completely.
Notes
For chewier cookies, do not overbake; remove when edges are golden but centers are still soft. Chill dough for 15-20 minutes if cookies spread too much. Use parchment paper or silicone mats for even baking and easy cleanup. Store cookies in an airtight container with a slice of bread to maintain moisture.
Nutrition
- Serving Size: 1 cookie
- Calories: 160
- Sugar: 15
- Sodium: 120
- Fat: 8
- Saturated Fat: 5
- Carbohydrates: 22
- Fiber: 1
- Protein: 2
Keywords: chewy cookies, lunchbox cookies, kids snacks, chocolate chip cookies, easy cookies, homemade cookies