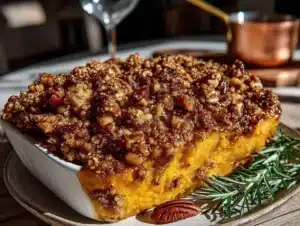
“I don’t really like pumpkin pie.” My sister said it like a confession, like she was admitting she didn’t like puppies or sunshine. We were standing in her kitchen, the October air carrying that first real chill of the season through the open window. I had just pulled a full-sized pumpkin pie out of her oven, the smell of cinnamon and cloves filling every corner of the room. It was my go-to for fall gatherings—the one dessert I made without even thinking.
And honestly? I kind of got it. A full pie is a lot. It’s a commitment. You have to slice it, serve it, deal with leftovers that sit in the fridge for a week, and somehow the crust always ends up a little soggy by day three. That’s when the idea for these perfect small-batch pumpkin pie bars was born—right there, over a lukewarm slice of pie she was politely nibbling. I wanted something that had all the cozy, spiced flavor of the classic dessert but in a format that made sense for two people, or maybe just one person who wants dessert for a few days without the guilt of an entire pie staring at them from the fridge.
These bars are that answer. They have a buttery, crisp shortbread crust that actually stays crunchy, a silky smooth pumpkin filling that’s perfectly spiced, and a ratio of crust to filling that just works. No flimsy pie plates, no blind baking stress, no leftover pie nobody finishes. Just pure, concentrated fall flavor in a little square that feels special but never fussy. It’s the kind of dessert you make on a random Tuesday because you deserve a little celebration, and honestly, that’s the best kind of baking.
Why You’ll Love This Recipe
Let me tell you why these small-batch pumpkin pie bars have become my most-requested fall recipe. I’ve tested this about six times to get the texture just right—tweaking the baking time, adjusting the spice blend, and figuring out how to keep the crust from getting soft. It was worth every single batch.
- Perfect for Two (or One): This recipe makes just 9 bars in an 8×8 pan. No massive 9×13 pan of dessert that you’re stuck eating for a week. It’s ideal for a small household or when you just want a little taste of fall.
- Crust That Stays Crisp: This is the real game-changer. The shortbread crust is pre-baked and sturdy enough to hold the filling without turning into a sad, soggy bottom. It’s buttery, slightly sweet, and has the most satisfying snap.
- Simple Pantry Ingredients: You probably already have everything you need. A can of pumpkin puree, basic baking staples, and your favorite fall spices. No fancy grocery store trips required.
- Quick to Make: The whole thing comes together in about an hour, with most of that being hands-off baking time. It’s perfect for a lazy Sunday afternoon or a last-minute dessert for a small dinner party.
- Crowd-Pleaser: Even people who claim they don’t love pumpkin pie (like my sister) go back for seconds of these bars. The bar format feels more approachable, less formal, and somehow just more fun to eat.
What makes this recipe different from the hundreds of other pumpkin bar recipes out there is the attention to detail. The crust isn’t just any crust—it’s a carefully measured shortbread that bakes up golden and firm. The filling uses a specific ratio of egg to pumpkin to cream that creates a silky, almost cheesecake-like texture without being dense or heavy. And the spice blend? I spent time getting that right too. It’s warm and aromatic without being overpowering, letting the natural sweetness of the pumpkin shine through. This isn’t just another version of pumpkin bars—it’s the best version, the one you’ll come back to year after year.
What Ingredients You Will Need
This recipe uses simple, wholesome ingredients to deliver bold flavor and satisfying texture without the fuss. Most of these are pantry staples, especially if you do any fall baking at all.
For the Shortbread Crust
- All-purpose flour, 1 cup (120g) – Provides structure. Spoon and level it for accuracy; don’t scoop directly from the bag or you’ll end up with too much.
- Unsalted butter, 1/2 cup (1 stick or 113g), cold and cut into small cubes – Cold butter is crucial for a flaky, tender crust. I like using Kerrygold for its rich flavor, but any good quality unsalted butter works.
- Powdered sugar, 1/4 cup (30g) – Dissolves more easily into the dough than granulated sugar, giving the crust a finer, melt-in-your-mouth texture.
- Vanilla extract, 1/2 teaspoon – Adds warmth and depth. Pure vanilla is best, but imitation works in a pinch.
- Salt, 1/4 teaspoon – Balances the sweetness and enhances the buttery flavor.
For the Pumpkin Filling
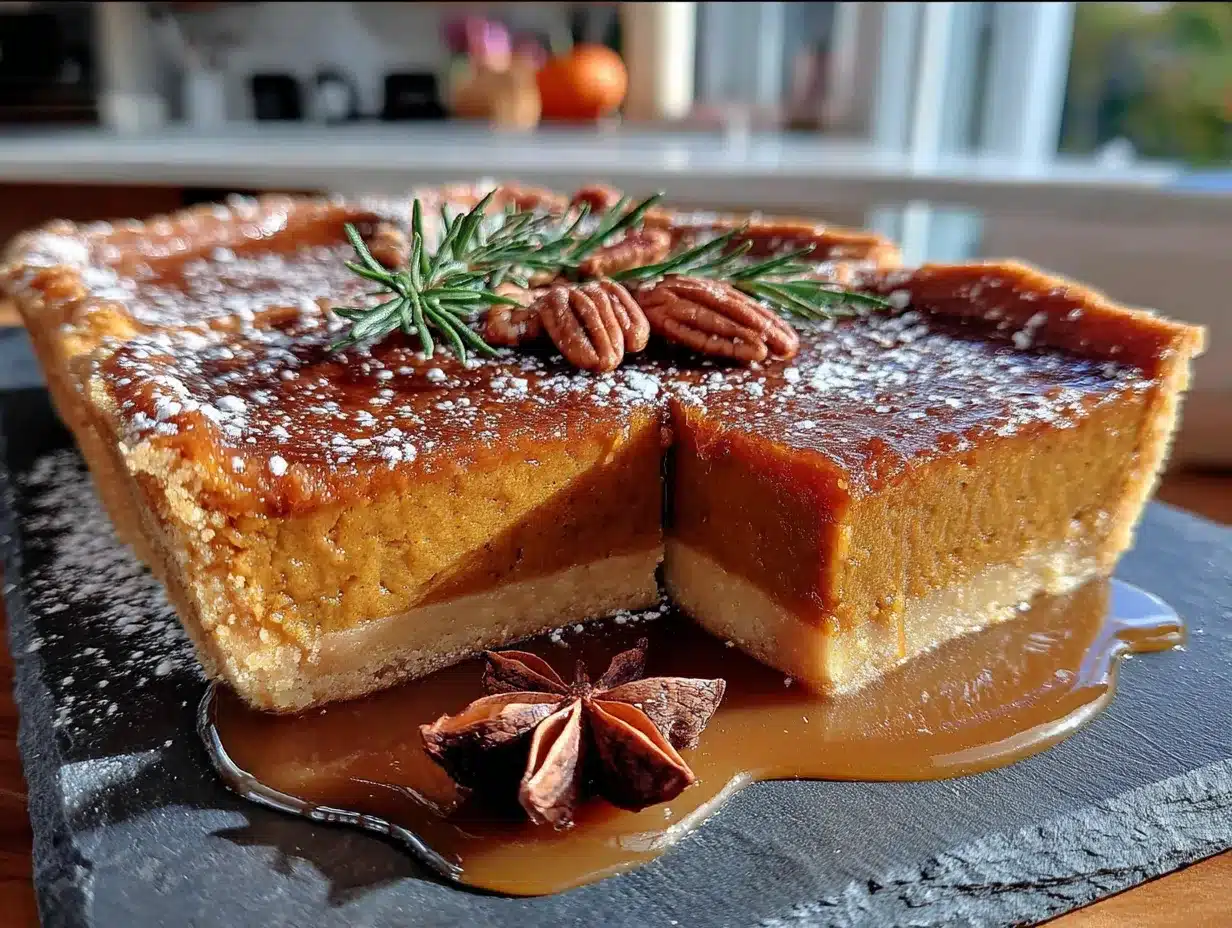
- Pumpkin puree, 1 cup (240g) – Make sure you’re using 100% pure pumpkin puree, not pumpkin pie filling (which is pre-sweetened and spiced). Libby’s is my go-to brand for consistent results.
- Sweetened condensed milk, 1/2 cup (150g) – This is the secret to the creamy, luscious texture. It adds sweetness and richness without making the filling grainy. Don’t substitute with evaporated milk; the texture won’t be the same.
- Large egg, 1 – Binds the filling and gives it structure. Let it come to room temperature before using for the smoothest incorporation.
- Egg yolk, 1 – Adds extra richness and a velvety texture. Save the white for another use (or make a quick omelet).
- Brown sugar, 2 tablespoons (25g), packed – Adds a deeper, molasses-like sweetness that complements the pumpkin beautifully. Light or dark both work; dark brown sugar gives a more intense flavor.
- Pumpkin pie spice, 1 1/2 teaspoons – You can use store-bought or make your own blend. I prefer making my own with 1 teaspoon cinnamon, 1/4 teaspoon ginger, 1/4 teaspoon nutmeg, and a pinch of cloves. It’s fresher and you can adjust it to your taste.
- Cinnamon, 1/2 teaspoon – Because you can never have too much cinnamon in a pumpkin dessert.
- Salt, 1/8 teaspoon – Just a pinch to brighten all the flavors.
Equipment Needed
You don’t need a fully stocked bakery to make these bars. Here’s what you’ll need:
- 8×8-inch baking pan – The perfect size for a small batch. If you only have a 9×9, the bars will be slightly thinner and may bake a few minutes faster. Adjust your baking time accordingly.
- Parchment paper – Non-negotiable for easy removal. Leave an overhang on two opposite sides to create “handles” for lifting the bars out cleanly.
- Mixing bowls – One medium bowl for the crust, one small bowl for the filling. Nothing fancy.
- Pastry cutter or fork – For cutting the butter into the flour for the crust. If you have a food processor, you can use that for an even quicker crust, but a pastry cutter gives you more control and is easier to clean.
- Whisk – For smoothing out the filling. A fork works in a pinch, but a whisk ensures a silky, lump-free texture.
- Spatula – For scraping every last bit of filling into the pan. The silicone kind is my favorite.
- Oven – Preheated to 350°F (175°C). Make sure your oven is properly calibrated; an oven thermometer is a small investment that makes a huge difference in baking.
If you don’t have an 8×8 pan, you can use a 9-inch pie plate or a small cast-iron skillet. Just keep an eye on the baking time as it will vary slightly. I’ve made these in a well-seasoned 8-inch cast iron skillet before and they turned out beautifully, with an extra crispy crust along the edges.
Preparation Method
Let’s get baking! I’ve broken this down into clear steps so you can follow along easily. Trust me, the result is worth every minute.
Step 1: Preheat and Prep the Pan
Preheat your oven to 350°F (175°C). While it’s heating, line your 8×8-inch baking pan with a sheet of parchment paper, leaving about 2 inches of overhang on two opposite sides. This will make lifting the finished bars out a breeze. Lightly spray the parchment with non-stick cooking spray or brush with a little melted butter.
Step 2: Make the Shortbread Crust
In a medium mixing bowl, whisk together the 1 cup of all-purpose flour, 1/4 cup of powdered sugar, and 1/4 teaspoon of salt. Add the cold, cubed unsalted butter. Using a pastry cutter or two forks, cut the butter into the flour mixture until it resembles coarse meal with some pea-sized butter pieces remaining. You want some visible butter bits—that’s what creates the flaky texture. Drizzle in the 1/2 teaspoon of vanilla extract and toss with a fork until the dough just starts to come together. It will be crumbly, and that’s exactly what you want.
Step 3: Press and Pre-Bake the Crust
Transfer the crumbly dough into your prepared pan. Press it down firmly and evenly into the bottom of the pan. I like to use the bottom of a flat measuring cup or a glass to get it really even. Make sure there are no gaps or thin spots. Bake for 15-18 minutes, until the edges are just starting to turn a light golden brown and the top feels set. Don’t over-bake at this stage—it will bake again with the filling. Let the crust cool on a wire rack for about 10 minutes while you make the filling.
Step 4: Make the Pumpkin Filling
While the crust is cooling, make the filling. In a small bowl, whisk together the 1 cup of pumpkin puree, 1/2 cup of sweetened condensed milk, 1 large egg, 1 egg yolk, 2 tablespoons of packed brown sugar, 1 1/2 teaspoons of pumpkin pie spice, 1/2 teaspoon of cinnamon, and 1/8 teaspoon of salt. Whisk until the mixture is completely smooth and well-combined. You shouldn’t see any streaks of egg white or lumps of spice. The mixture will be thick and luscious. Give it a taste—it should be perfectly sweet and warmly spiced.
Step 5: Assemble and Bake
Pour the pumpkin filling over the pre-baked crust. Gently tilt the pan or use a spatula to spread it into an even layer, making sure it reaches all the corners. Tap the pan gently on the counter a few times to release any air bubbles. Bake at 350°F (175°C) for 25-30 minutes, or until the filling is set around the edges but still has a slight jiggle in the very center. It will continue to set as it cools. You’ll know it’s done when a toothpick inserted about an inch from the center comes out mostly clean with just a few moist crumbs.
Step 6: Cool and Chill
Place the pan on a wire rack and let the bars cool completely at room temperature, about 1 hour. Then, transfer the pan to the refrigerator and chill for at least 2 hours, or up to overnight. This step is non-negotiable—chilling allows the filling to fully set and makes for clean, beautiful slices. Once chilled, use the parchment overhang to lift the entire block of bars out of the pan. Place it on a cutting board and use a sharp knife to cut into 9 even squares. For the cleanest cuts, wipe the knife clean between each slice.
Cooking Tips & Techniques
After making these bars more times than I care to admit, I’ve learned a few tricks that make a real difference. Here are my best tips:
Don’t Overwork the Crust Dough. The more you handle it, the tougher it gets. Mix just until it comes together, and when pressing it into the pan, use gentle, even pressure. Over-packing can make it dense and hard.
Room Temperature Ingredients Matter. For the filling, make sure your egg and egg yolk are at room temperature. Cold eggs can seize the mixture and create a lumpy texture. Simply place them in a bowl of warm water for 5 minutes before using.
Watch the Bake Time Closely. Ovens vary wildly. Start checking your bars at the 22-minute mark. The filling should be set around the edges but still jiggly in the center. If you over-bake them, the filling can crack and become rubbery. It’s better to under-bake slightly than over-bake.
The Chill is Crucial. I know it’s tempting to cut into them while they’re still warm, but resist the urge. Warm bars will be a mess—the filling won’t hold its shape and the crust will crumble. A full chill in the fridge gives you those perfect, clean squares that look like they came from a bakery.
Use a Sharp Knife. For the cleanest cuts, use a long, sharp chef’s knife. Wipe it clean with a damp paper towel between each slice. This prevents the filling from dragging and smearing.
I once made the mistake of using a dull knife and ended up with a pan of sad, squished bars. They still tasted amazing, but they weren’t pretty. Lesson learned!
Variations & Adaptations
One of the best things about this recipe is how easy it is to customize. Here are some of my favorite variations:
Gluten-Free Version: Swap the all-purpose flour with a 1:1 gluten-free baking flour blend that contains xanthan gum. I’ve had great results with Bob’s Red Mill 1:1 Baking Flour. The texture is slightly more crumbly, but the flavor is just as good.
Spice It Up: For a bolder flavor, add a pinch of cardamom or a tiny pinch of cayenne pepper to the filling. The heat from the cayenne pairs surprisingly well with the sweet pumpkin and creates a lovely warmth that lingers.
Maple Pecan Twist: Before pressing the crust into the pan, stir in 1/4 cup of finely chopped pecans. Then, after baking, drizzle the cooled bars with a simple maple glaze made from 1/2 cup powdered sugar and 2 tablespoons of maple syrup. It’s absolutely divine and tastes like fall in every bite.
Dairy-Free Option: Use a high-quality vegan butter stick (like Miyoko’s) for the crust and substitute the sweetened condensed milk with a can of full-fat coconut sweetened condensed milk. The texture will be slightly less rich, but still deliciously creamy.
Extra Crunchy Crust: For a nuttier, more flavorful crust, replace 2 tablespoons of the all-purpose flour with almond flour. Toast the almond flour lightly in a dry pan first for even more depth. I tried this on a whim one afternoon and it’s become my secret weapon for an elevated crust.
Serving & Storage Suggestions
These bars are incredibly versatile when it comes to serving. Here’s how to make the most of them:
Serving Temperature: I prefer them cold, straight from the fridge. The filling is firm and fudge-like, and the crust is perfectly crisp. But they’re also wonderful at room temperature if you let them sit out for about 15 minutes. The filling softens slightly and becomes even more luscious.
Presentation Ideas: For a beautiful presentation, top each bar with a small dollop of lightly sweetened whipped cream and a dusting of cinnamon. A drizzle of caramel sauce is also stunning. For a more elegant look, serve them on a platter with fresh rosemary sprigs and a few whole star anise.
What to Serve With Them: These bars are perfect on their own, but they pair beautifully with a hot cup of coffee, a chai latte, or a glass of cold milk. For a full fall dessert spread, serve them alongside some easy baked apple cider donut holes or a slice of pumpkin chocolate chip snack cake for a truly indulgent treat.
Storage Instructions: Store the bars in an airtight container in the refrigerator for up to 5 days. Place a sheet of parchment paper between layers if stacking them. They actually get better after a day or two as the flavors meld together.
Freezing Instructions: These bars freeze beautifully. Once they’re fully chilled and cut, place them on a baking sheet lined with parchment paper and freeze for 1 hour, or until solid. Transfer the frozen bars to a freezer-safe container or zip-top bag, separating layers with parchment paper. They’ll keep for up to 3 months. To thaw, transfer them to the refrigerator overnight or let them sit at room temperature for about 30 minutes.
Nutritional Information & Benefits
While these are definitely a treat, they do have some redeeming qualities. Here’s the estimated nutritional breakdown for one bar (based on 9 servings):
| Nutrient | Amount Per Serving |
|---|---|
| Calories | 285 |
| Total Fat | 15g |
| Saturated Fat | 9g |
| Cholesterol | 75mg |
| Sodium | 180mg |
| Total Carbohydrates | 34g |
| Dietary Fiber | 2g |
| Sugars | 21g |
| Protein | 5g |
| Vitamin A | 190% DV |
The star ingredient here is pumpkin, which is packed with vitamin A (in the form of beta-carotene) for healthy vision and immune function. It’s also a good source of fiber and antioxidants. The sweetened condensed milk adds calcium and protein, while the egg provides high-quality protein and essential vitamins. Of course, this is a dessert, so enjoy it in moderation as part of a balanced diet. I like to think of it as a slightly more nutritious way to satisfy a sweet craving—especially compared to a store-bought candy bar!
Conclusion
These perfect small-batch pumpkin pie bars have become my go-to fall dessert for a reason. They capture everything I love about pumpkin pie—the silky filling, the warm spices, the comforting aroma—but in a format that’s actually practical for everyday life. No fussing with pie dough, no worrying about a soggy crust, no leftovers that go to waste. Just 9 perfect little squares of pure autumn joy.
I love that this recipe feels special enough for a holiday gathering but simple enough for a random weeknight. It’s the kind of dessert that makes you slow down, pour a cup of coffee, and savor the moment. And honestly, isn’t that what fall baking is all about?
I’d love to hear how these turn out for you! Did you try any of the variations? Have your own twist to share? Drop a comment below and let me know. And if you’re looking for more cozy fall recipes, don’t miss my spiced brown butter pumpkin cream cheese muffins or the easy one-bowl pumpkin banana bread. Happy baking, friends!
Frequently Asked Questions
Can I use a different size pan?
Yes, but the baking time will change. A 9×9-inch pan will give you thinner bars that bake faster (check at 20 minutes). A 9×13-inch pan is too large for this recipe—the bars would be very thin and the crust-to-filling ratio would be off. Stick with an 8×8 for the best results.
Can I use fresh pumpkin instead of canned?
Absolutely, but you’ll need to roast and puree it first. Be sure to strain the puree through a cheesecloth or fine-mesh sieve to remove excess water. Fresh pumpkin can be more watery than canned, which can make the filling loose. If using fresh, you may need to bake the bars for an extra 5-10 minutes.
Why is my crust soggy?
A soggy crust usually means it wasn’t baked long enough before adding the filling, or the filling was too wet. Make sure your crust is fully baked (golden edges, set top) and that your pumpkin puree isn’t watery. If you’re using a very moist puree, you can cook it on the stove for a few minutes to reduce it.
Can I make these bars vegan?
I haven’t tested a vegan version, but you could try using a flax egg (1 tablespoon ground flaxseed mixed with 3 tablespoons water) in place of the egg and egg yolk, and a vegan butter stick for the crust. For the filling, replace the sweetened condensed milk with a canned coconut version. The texture will be different, but it’s worth experimenting with.
How do I know when the bars are done baking?
The edges should be set and slightly puffed, while the center should still have a gentle jiggle when you shake the pan. A toothpick inserted about an inch from the center should come out mostly clean with a few moist crumbs. Don’t over-bake, as the filling can crack and become dry.
Pin This Recipe!
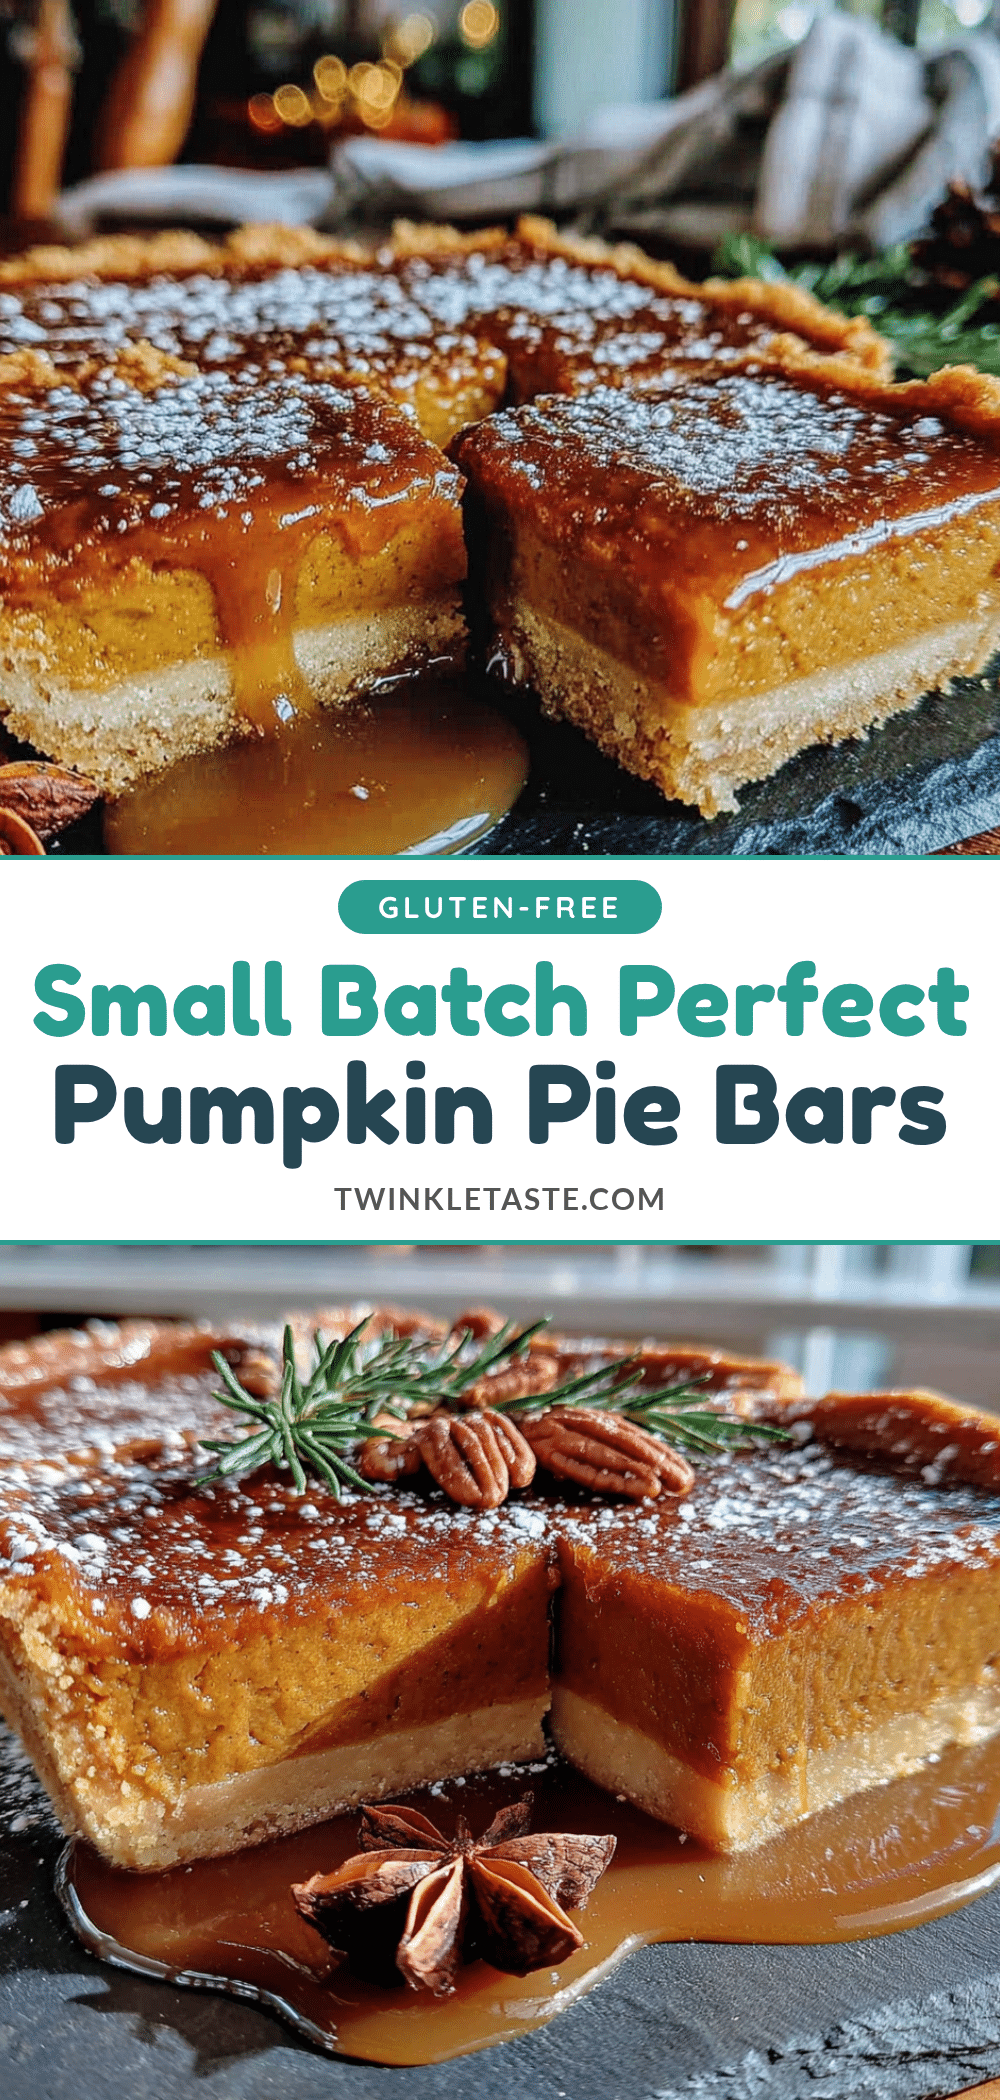
Perfect Small-Batch Pumpkin Pie Bars: Easy Fall Dessert
These small-batch pumpkin pie bars feature a buttery shortbread crust and a silky, spiced pumpkin filling. Perfect for two (or one), they deliver all the cozy fall flavor without the commitment of a full pie.
- Prep Time: 15 minutes
- Cook Time: 30 minutes
- Total Time: 45 minutes
- Yield: 9 bars 1x
- Category: Dessert
- Cuisine: American
Ingredients
- 1 cup (120g) all-purpose flour
- 1/2 cup (1 stick or 113g) unsalted butter, cold and cut into small cubes
- 1/4 cup (30g) powdered sugar
- 1/2 teaspoon vanilla extract
- 1/4 teaspoon salt
- 1 cup (240g) pumpkin puree
- 1/2 cup (150g) sweetened condensed milk
- 1 large egg
- 1 egg yolk
- 2 tablespoons (25g) packed brown sugar
- 1 1/2 teaspoons pumpkin pie spice
- 1/2 teaspoon cinnamon
- 1/8 teaspoon salt
Instructions
- Preheat oven to 350°F (175°C). Line an 8×8-inch baking pan with parchment paper, leaving overhang on two sides. Lightly spray with non-stick spray or brush with melted butter.
- In a medium bowl, whisk together flour, powdered sugar, and 1/4 teaspoon salt. Cut in cold butter using a pastry cutter or fork until mixture resembles coarse meal with pea-sized butter pieces. Drizzle in vanilla and toss until dough just comes together (crumbly is fine).
- Press dough evenly into the prepared pan. Bake for 15-18 minutes until edges are light golden and top is set. Let cool on a wire rack for 10 minutes.
- In a small bowl, whisk together pumpkin puree, sweetened condensed milk, egg, egg yolk, brown sugar, pumpkin pie spice, cinnamon, and 1/8 teaspoon salt until smooth.
- Pour filling over pre-baked crust and spread evenly. Tap pan gently to release air bubbles. Bake for 25-30 minutes until edges are set and center jiggles slightly. Cool completely at room temperature (about 1 hour), then refrigerate for at least 2 hours or overnight.
- Use parchment overhang to lift bars out. Cut into 9 squares with a sharp knife, wiping clean between cuts.
Notes
For clean slices, chill bars thoroughly before cutting. Use a sharp knife and wipe it clean between cuts. The crust can be made with a food processor for speed. If using a 9×9 pan, bars will be thinner and may bake faster (check at 20 minutes).
Nutrition
- Serving Size: 1 bar
- Calories: 285
- Sugar: 21
- Sodium: 180
- Fat: 15
- Saturated Fat: 9
- Carbohydrates: 34
- Fiber: 2
- Protein: 5
Keywords: pumpkin pie bars, small batch, fall dessert, pumpkin bars, shortbread crust