My husband took one bite of these iced pumpkin sugar cookie bars, stopped mid-chew, and just looked at me. Not a word. Just that look. I knew exactly what it meant—I’d finally nailed it. After three batches that were either too cakey, too flat, or just not pumpkin-y enough, this version made him ask for them four days straight without me even offering. That’s when I knew the recipe was ready to share.
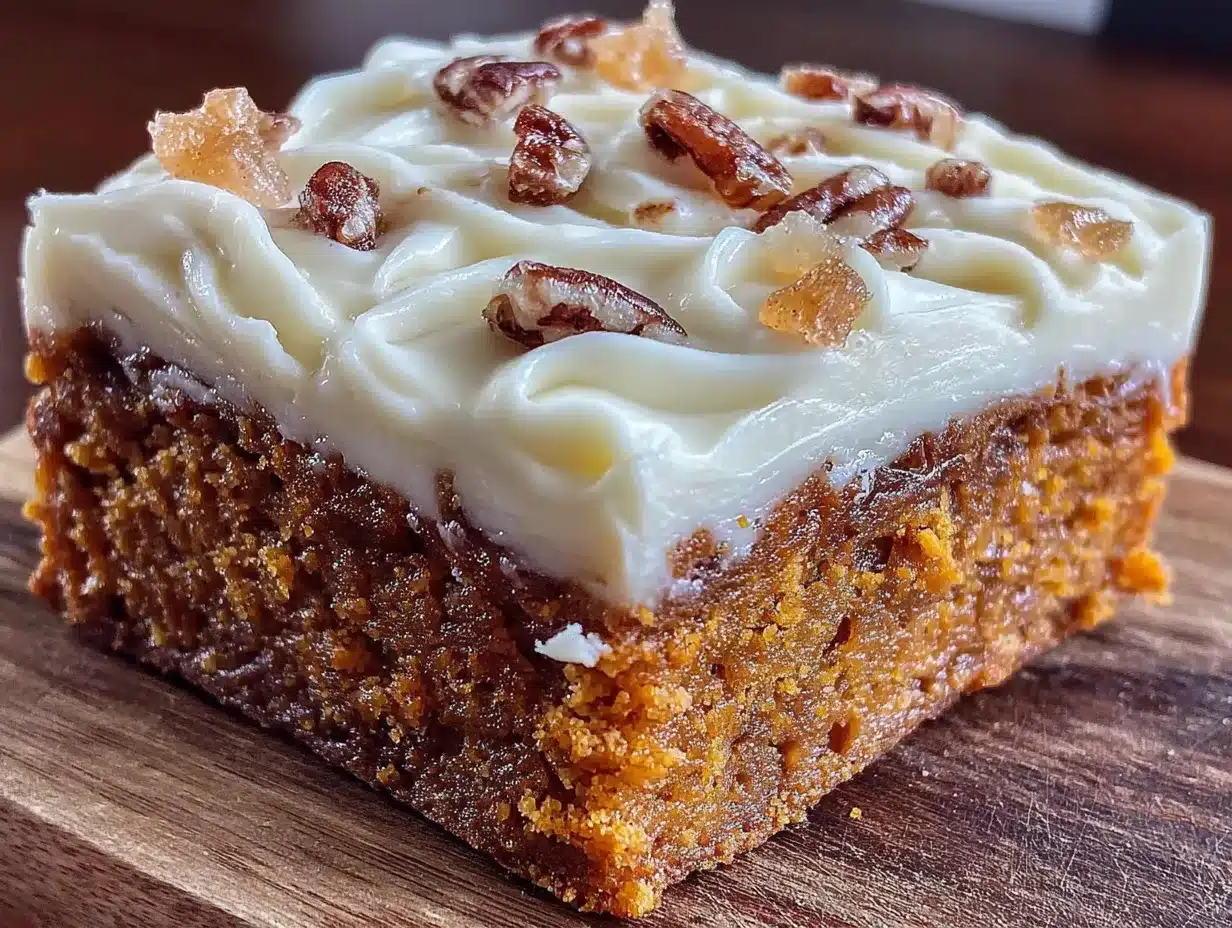
These bars have a soft, almost melt-in-your mouth texture with that perfect pumpkin spice warmth that just hits different in October. The icing sets up just enough to crackle when you bite into it, but stays creamy underneath. Honestly, I wasn’t even trying to make a cookie bar at first. I was attempting regular pumpkin cookies and got frustrated with how they spread into weird shapes. So I pressed the dough into a pan instead, and boom—problem solved, and a new fall favorite was born.
What I love most about these is how they capture that cozy fall feeling without requiring a ton of effort. You don’t need a stand mixer or any fancy equipment. Just a bowl, a pan, and maybe some self-control if you’re trying not to eat the whole pan in one sitting. Trust me, that part is harder than the recipe itself.
Why You’ll Love This Recipe
After testing these bars on neighbors, my kid’s teachers, and even my skeptical sister-in-law (who “doesn’t do pumpkin”), I can confidently say these are crowd-pleasers. Here’s why they work:
- Quick & Easy: From start to finish, you’re looking at about 35 minutes. No chilling dough, no rolling out cookies, no fussing with a piping bag for the icing. Just mix, press, bake, and glaze.
- Simple Ingredients: You probably already have most of what you need. Canned pumpkin puree, butter, sugar, flour, eggs, and your pumpkin pie spice blend. Nothing weird or hard to find.
- Perfect for Fall Gatherings: These bars are my go-to for pumpkin patch trips, Halloween parties, and Thanksgiving dessert tables. They travel well and slice cleanly, which matters when you’re bringing food to someone else’s house.
- Crowd-Pleaser: I’ve watched kids who swear they hate pumpkin go back for seconds. The cookie base is buttery and soft, and the icing adds just enough sweetness without being overwhelming.
- Unbelievably Delicious: The texture is what gets people. It’s denser than cake but softer than a traditional sugar cookie. That sweet spot in between that makes you close your eyes after the first bite.
What makes these different from other pumpkin bar recipes is the technique. I use melted butter instead of creaming room-temperature butter, which gives the bars a chewier, more cookie-like texture. Most pumpkin bar recipes turn out like cake—which is fine, but not what I wanted. These hold together like a bar cookie should, with that slight bend before they break.
This is the kind of recipe that makes you feel like a hero without breaking a sweat. Perfect for impressing guests or just treating yourself on a crisp fall afternoon.
What Ingredients You Will Need
This recipe uses simple, wholesome ingredients to deliver that perfect pumpkin flavor and soft-baked texture. Most of these are pantry staples, especially if you’ve done any fall baking before.
For the Cookie Bars
- Unsalted butter, melted – ½ cup (1 stick). Melting the butter instead of creaming it gives the bars a denser, chewier texture. I use Land O’Lakes because it’s consistent, but any brand works.
- Granulated sugar – ¾ cup. Adds sweetness and helps with that slightly crispy edge.
- Light brown sugar, packed – ¼ cup. Adds moisture and a hint of molasses flavor that pairs beautifully with pumpkin.
- Large egg – 1, room temperature. Helps bind everything together. If you forget to take it out ahead of time, place it in warm water for 5 minutes.
- Pumpkin puree – ½ cup. Not pumpkin pie filling! Make sure you grab 100% pure pumpkin. Libby’s is my go-to because it’s consistently thick and not watery.
- Vanilla extract – 1 teaspoon. Pure vanilla extract makes a difference here, but imitation works in a pinch.
- All-purpose flour – 1 ¾ cups. Spoon and level it—don’t scoop directly from the bag or you’ll end up with dry bars.
- Pumpkin pie spice – 1 ½ teaspoons. You can use store-bought or make your own with cinnamon, nutmeg, ginger, and cloves.
- Cinnamon – ½ teaspoon. Extra warmth because you can never have too much cinnamon in fall baking.
- Baking powder – ½ teaspoon. Gives the bars just enough lift without making them cakey.
- Salt – ¼ teaspoon. Balances the sweetness and enhances the spices.
For the Icing
- Powdered sugar – 1 ½ cups, sifted if you want a super smooth glaze (I usually skip sifting and it’s fine).
- Milk – 2 to 3 tablespoons. Whole milk gives the creamiest texture, but 2% or even oat milk work too.
- Vanilla extract – ½ teaspoon. That little extra vanilla in the icing makes a difference.
- Pinch of salt – Just a tiny one to cut the sweetness.
Ingredient Selection Tip: When choosing pumpkin puree, look for cans that feel heavy for their size. That usually means the pumpkin is thicker and less watery. If your puree looks watery, let it drain in a fine-mesh strainer for 10 minutes before using. I learned this the hard way after a batch turned out gummy.
Substitution Guidance: For a dairy-free version, use plant-based butter and your favorite non-dairy milk in the icing. For gluten-free, swap the all-purpose flour with a 1:1 gluten-free baking blend. I’ve tested this with King Arthur’s Measure for Measure flour and it worked beautifully.
Equipment Needed
You don’t need a bakery-level kitchen for these bars. Here’s what you’ll need:
- 8×8-inch baking pan – This is the perfect size for thick, sliceable bars. A 9×9 pan works too, but your bars will be slightly thinner and may bake a few minutes faster.
- Parchment paper – Non-negotiable for easy removal. Leave overhang on two sides so you can lift the whole block out.
- Mixing bowls – One large, one medium. I use glass bowls because they’re easy to clean and don’t hold onto odors.
- Whisk and spatula – A whisk for the wet ingredients and a rubber spatula for folding in the dry ingredients.
- Measuring cups and spoons – Accurate measurements matter in baking more than cooking.
- Cooling rack – Helps the bars cool evenly so the icing doesn’t melt right off.
- Small whisk or fork – For mixing the icing smooth.
If you don’t have an 8×8 pan, you can use a 9-inch round cake pan or even a loaf pan—just adjust the baking time. I’ve used my grandmother’s old Pyrex dish before and it worked fine, just needed an extra 5 minutes in the oven. No need to run out and buy special equipment for this one.
Preparation Method
Let me walk you through this step by step. I’ll include all the little things I wish someone had told me the first time I made these.
- Preheat your oven to 350°F. Line your 8×8 pan with parchment paper, leaving overhang on two opposite sides. Lightly spray the parchment with non-stick spray just to be safe.
- Melt your butter in a microwave-safe bowl or on the stovetop. Let it cool for 2-3 minutes—you don’t want it hot enough to cook the egg when you mix it in.
- In a large bowl, whisk together the melted butter, granulated sugar, and brown sugar until smooth. It should look like wet sand. Don’t worry if it separates a little; that’s normal.
- Add the egg, pumpkin puree, and vanilla extract. Whisk until everything is completely combined. The mixture will look a little thicker than you’d expect, almost like a thin pudding. That’s good.
- In a separate medium bowl, whisk together the flour, pumpkin pie spice, cinnamon, baking powder, and salt. Make sure there are no clumps of baking powder hiding in there—I’ve bitten into a pocket of baking powder before and it’s not fun.
- Gradually add the dry ingredients to the wet ingredients, folding gently with a rubber spatula. Mix just until you don’t see any more streaks of flour. Overmixing will make the bars tough. Stop when it looks like a thick, slightly sticky dough.
- Transfer the dough to your prepared pan. It will be thick and a little stubborn. Use the back of a spoon or your spatula to press it evenly into the corners. Wet your fingers slightly and press down to smooth the top—this helps it bake evenly.
- Bake for 22-25 minutes. At 22 minutes, start checking. The edges should be lightly golden and the center should look set, not jiggly. A toothpick inserted in the center should come out with a few moist crumbs, not raw batter. If it comes out clean, you’ve overbaked them a bit—still delicious, just a little drier.
- Let the bars cool in the pan on a wire rack for 15 minutes. Then use the parchment overhang to lift the entire block out and transfer it to the cooling rack. Let them cool completely before icing. I know it’s tempting, but warm icing will just slide right off and pool at the bottom.
- While the bars cool, make the icing. In a small bowl, whisk together the powdered sugar, 2 tablespoons of milk, vanilla extract, and a pinch of salt. Start with 2 tablespoons of milk and add more a teaspoon at a time until it’s thick but pourable. You want it to spread easily but not be runny.
- Once the bars are completely cool, pour the icing over the top and spread it evenly with a spatula or the back of a spoon. Let the icing set for about 15-20 minutes before slicing. If you’re impatient like me, pop the pan in the fridge for 10 minutes.
- Slice into 16 squares (4 rows by 4 rows) or 9 larger bars if you’re feeling generous. Use a sharp knife and wipe it clean between cuts for neat edges.
Cooking Tips & Techniques
After making these bars more times than I’d like to admit, here are the things I’ve learned the hard way so you don’t have to.
Don’t overmix the dough. This is the number one mistake people make with cookie bars. Once you add the flour, mix just until it disappears. Overmixing develops gluten, which makes the bars tough and bread-like instead of tender and soft.
Check your pumpkin puree for water content. Some brands are thinner than others. If your puree looks watery or there’s liquid sitting on top of the opened can, pour it off or blot the puree with a paper towel. Too much moisture will make the bars gummy and they won’t set up right.
Let them cool completely. I know, I know. The smell of pumpkin and spice filling your kitchen is practically torture. But if you ice these bars while they’re still warm, the icing will melt into a thin, sticky mess. Trust me, I’ve done it. The wait is worth it.
Use room temperature ingredients. Cold egg straight from the fridge can seize up the melted butter and give you a lumpy batter. Let your egg sit on the counter for 20 minutes or warm it in a bowl of lukewarm water for 5 minutes. Same goes for the pumpkin puree.
Press the dough evenly. Uneven dough means uneven baking. Thicker parts will be underdone while thinner edges get overbaked. Take the extra 30 seconds to really press it into an even layer.
Multitasking tip: While the bars are baking, measure out your icing ingredients so you can mix it up as soon as they come out of the oven. That way, by the time the bars are cool enough to ice, your icing is ready to go.
Variations & Adaptations
One of the best things about this recipe is how adaptable it is. Here are some variations I’ve tried and loved.
Add chocolate chips. Fold in ½ cup of semi-sweet chocolate chips with the dry ingredients. The chocolate and pumpkin combo is classic for a reason. My kids prefer this version, and honestly, I do too sometimes.
Make them gluten-free. Swap the all-purpose flour with a 1:1 gluten-free baking blend. I’ve tested this with King Arthur’s Measure for Measure and the texture was almost identical to the original. Just make sure your blend contains xanthan gum for structure.
Add a cream cheese swirl. Before baking, drop spoonfuls of a cream cheese mixture (4 oz softened cream cheese, 2 tablespoons sugar, 1 egg yolk) over the dough and swirl it in with a knife. It adds a tangy richness that’s absolutely divine. This is my favorite variation for Thanksgiving.
Spice it up. Add ¼ teaspoon of ground ginger and a pinch of cloves to the spice blend for a more complex flavor profile. I do this when I want the bars to taste extra cozy and warm.
Make them dairy-free. Use plant-based butter and your favorite non-dairy milk in the icing. I’ve used Miyoko’s vegan butter and oat milk with great results. The texture is slightly less tender but still delicious.
Try a different glaze. Instead of vanilla icing, try a maple glaze (replace the vanilla with maple extract and use 1 tablespoon maple syrup plus 1 tablespoon milk) or a cream cheese glaze (add 2 oz softened cream cheese to the icing ingredients). Both are amazing.
Serving & Storage Suggestions
These bars are best served at room temperature. The texture is soft and tender, and the icing has that perfect slight crackle when you bite into it. If you’ve chilled them, let them sit out for 15-20 minutes before serving.
Presentation ideas: Arrange the bars on a wooden board or a simple white platter. Dust with a little extra cinnamon or pumpkin pie spice right before serving for a pretty finish. For fall parties, I like to cut them into smaller bite-sized squares and serve them on a tiered tray alongside other treats like my easy baked apple cider donut holes.
What to serve with them: A hot cup of coffee or spiced chai latte is perfect. For a dessert spread, pair them with my cozy spiced brown butter pumpkin cream cheese muffins for a full pumpkin-themed brunch. A scoop of vanilla ice cream on the side never hurts either.
Storage: Store the bars in an airtight container at room temperature for up to 4 days. If you stack them, place a piece of parchment paper between layers to keep the icing from sticking. They actually taste even better on day two—the flavors meld together and the texture softens slightly.
Freezer instructions: These freeze beautifully. Freeze the un-iced bars in an airtight container for up to 3 months. When you’re ready to serve, thaw them at room temperature, then make the icing fresh and spread it on. Don’t freeze them with the icing already on—it gets weird and watery when thawed. I learned that one the hard way.
Reheating tip: If you want that fresh-from-the-oven warmth, pop a single bar in the microwave for 10-15 seconds. The icing will soften but won’t melt off completely. For a crispier edge, warm them in a 300°F oven for 5 minutes.
Nutritional Information & Benefits
Let’s be real—these are a treat, not a health food. But that doesn’t mean they can’t have some redeeming qualities. Here’s the estimated nutritional breakdown per bar (based on 16 servings):
- Calories: 185
- Total Fat: 7g
- Saturated Fat: 4g
- Carbohydrates: 29g
- Sugar: 19g
- Protein: 2g
- Fiber: 1g
Health benefits of key ingredients: Pumpkin puree is packed with vitamin A (beta-carotene), which supports eye health and immune function. It also provides fiber and potassium. Cinnamon has anti-inflammatory properties and can help regulate blood sugar. So while these aren’t exactly health food, you’re getting a little nutritional boost with every bite.
Dietary considerations: This recipe contains gluten, dairy, and eggs. For gluten-free and dairy-free options, see the variations section above. These bars are nut-free as written, making them a safe choice for school bake sales and parties.
My perspective: I believe in balance. These bars are meant to be enjoyed, not analyzed. Make them for the pure joy of fall baking and sharing something delicious with the people you love. One bar isn’t going to derail your goals, but it might just make your day a little brighter.
Conclusion
These iced pumpkin sugar cookie bars have become my most-requested fall recipe, and I think they’ll become yours too. They’re simple enough for a weekday baking project but impressive enough for holiday gatherings. The soft, buttery cookie base with that creamy vanilla icing and warm pumpkin spices—it’s everything you want in a fall dessert.
I love how forgiving this recipe is. You don’t need to be a pastry chef to nail it. Just follow the steps, don’t overmix, and let them cool before icing. That’s really all there is to it. And once you taste one, you’ll understand why my husband couldn’t stop asking for them.
If you make these, I’d love to hear about it. Leave a comment below and let me know how they turned out, or tag me in your photos if you share them on social media. Did you add chocolate chips? Try the cream cheese swirl? I’m always looking for new variations to test. Happy fall baking, friends!
Frequently Asked Questions
Can I use pumpkin pie filling instead of pumpkin puree?
No, please don’t. Pumpkin pie filling is pre-sweetened and spiced, so it will throw off the sugar and spice balance in this recipe. Stick with 100% pure pumpkin puree for the best results.
Why did my bars turn out cakey instead of dense and chewy?
You probably overmixed the batter or used too much pumpkin puree. Mix just until the flour disappears, and make sure your pumpkin puree isn’t watery. Also, check that you used melted butter, not softened butter—melted butter gives a chewier texture.
Can I double this recipe?
Absolutely. Double all the ingredients and bake in a 9×13 pan. You’ll need to increase the baking time to about 28-32 minutes. Check with a toothpick around the 28-minute mark.
How do I know when the bars are done baking?
The edges should be lightly golden and the center should look set, not jiggly. A toothpick inserted in the center should come out with a few moist crumbs, not raw batter. If the toothpick comes out clean, they’re overbaked.
Can I make these ahead of time?
Yes! You can bake the bars a day ahead and ice them the next day. Store the un-iced bars in an airtight container at room temperature. Make the icing fresh when you’re ready to serve. They’re actually even better on day two.
Pin This Recipe!
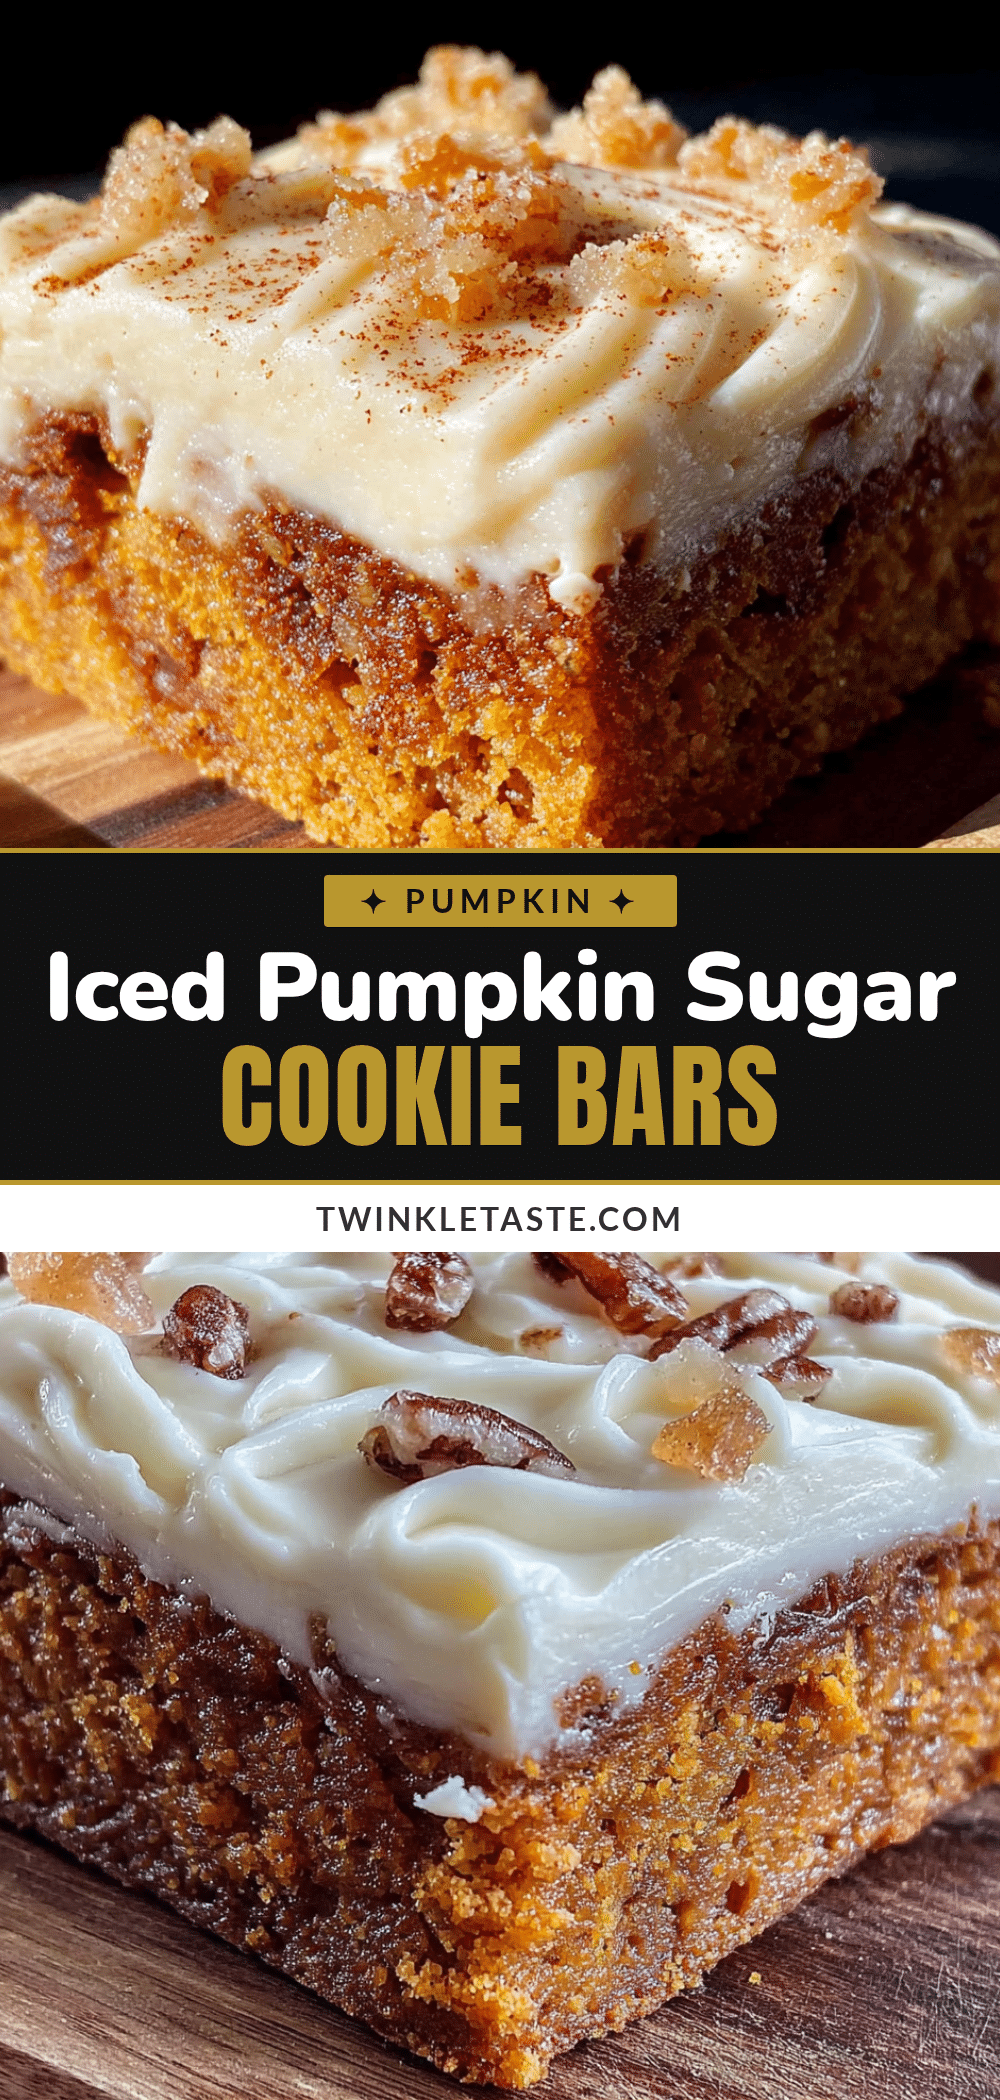
Easy Iced Pumpkin Sugar Cookie Bars – Best Fall Dessert
These iced pumpkin sugar cookie bars have a soft, melt-in-your mouth texture with warm pumpkin spice and a creamy vanilla icing. They’re quick, easy, and perfect for fall gatherings, made with simple ingredients and no fancy equipment.
- Prep Time: 15 minutes
- Cook Time: 25 minutes
- Total Time: 40 minutes
- Yield: 16 servings 1x
- Category: Dessert
- Cuisine: American
Ingredients
- ½ cup unsalted butter, melted
- ¾ cup granulated sugar
- ¼ cup light brown sugar, packed
- 1 large egg, room temperature
- ½ cup pumpkin puree (100% pure, not pie filling)
- 1 teaspoon vanilla extract
- 1 ¾ cups all-purpose flour
- 1 ½ teaspoons pumpkin pie spice
- ½ teaspoon cinnamon
- ½ teaspoon baking powder
- ¼ teaspoon salt
- 1 ½ cups powdered sugar
- 2 to 3 tablespoons milk (whole milk preferred)
- ½ teaspoon vanilla extract
- Pinch of salt
Instructions
- Preheat your oven to 350°F. Line an 8×8-inch baking pan with parchment paper, leaving overhang on two opposite sides. Lightly spray the parchment with non-stick spray.
- Melt the butter in a microwave-safe bowl or on the stovetop. Let it cool for 2-3 minutes.
- In a large bowl, whisk together the melted butter, granulated sugar, and brown sugar until smooth.
- Add the egg, pumpkin puree, and vanilla extract. Whisk until completely combined. The mixture will be thick, like a thin pudding.
- In a separate medium bowl, whisk together the flour, pumpkin pie spice, cinnamon, baking powder, and salt until no clumps remain.
- Gradually add the dry ingredients to the wet ingredients, folding gently with a rubber spatula. Mix just until no streaks of flour remain. Do not overmix.
- Transfer the dough to the prepared pan. It will be thick and sticky. Use the back of a spoon or spatula to press it evenly into the corners. Wet your fingers slightly and press down to smooth the top.
- Bake for 22-25 minutes. The edges should be lightly golden and the center should look set, not jiggly. A toothpick inserted in the center should come out with a few moist crumbs.
- Let the bars cool in the pan on a wire rack for 15 minutes. Then use the parchment overhang to lift the entire block out and transfer it to the cooling rack. Let them cool completely before icing.
- While the bars cool, make the icing: In a small bowl, whisk together the powdered sugar, 2 tablespoons of milk, vanilla extract, and a pinch of salt. Add more milk a teaspoon at a time until it’s thick but pourable.
- Once the bars are completely cool, pour the icing over the top and spread it evenly with a spatula. Let the icing set for 15-20 minutes before slicing (or refrigerate for 10 minutes).
- Slice into 16 squares (4 rows by 4 rows) or 9 larger bars. Use a sharp knife and wipe it clean between cuts for neat edges.
Notes
Don’t overmix the dough to avoid tough bars. Check pumpkin puree for water content; blot if watery. Let bars cool completely before icing to prevent melting. Use room temperature ingredients for best results. For dairy-free, use plant-based butter and non-dairy milk. For gluten-free, use a 1:1 gluten-free baking blend. Bars can be stored in an airtight container at room temperature for up to 4 days. Freeze un-iced bars for up to 3 months.
Nutrition
- Serving Size: 1 bar
- Calories: 185
- Sugar: 19
- Sodium: 95
- Fat: 7
- Saturated Fat: 4
- Carbohydrates: 29
- Fiber: 1
- Protein: 2
Keywords: pumpkin sugar cookie bars, iced pumpkin bars, fall dessert, pumpkin spice, easy pumpkin recipe, cookie bars, pumpkin bars with icing