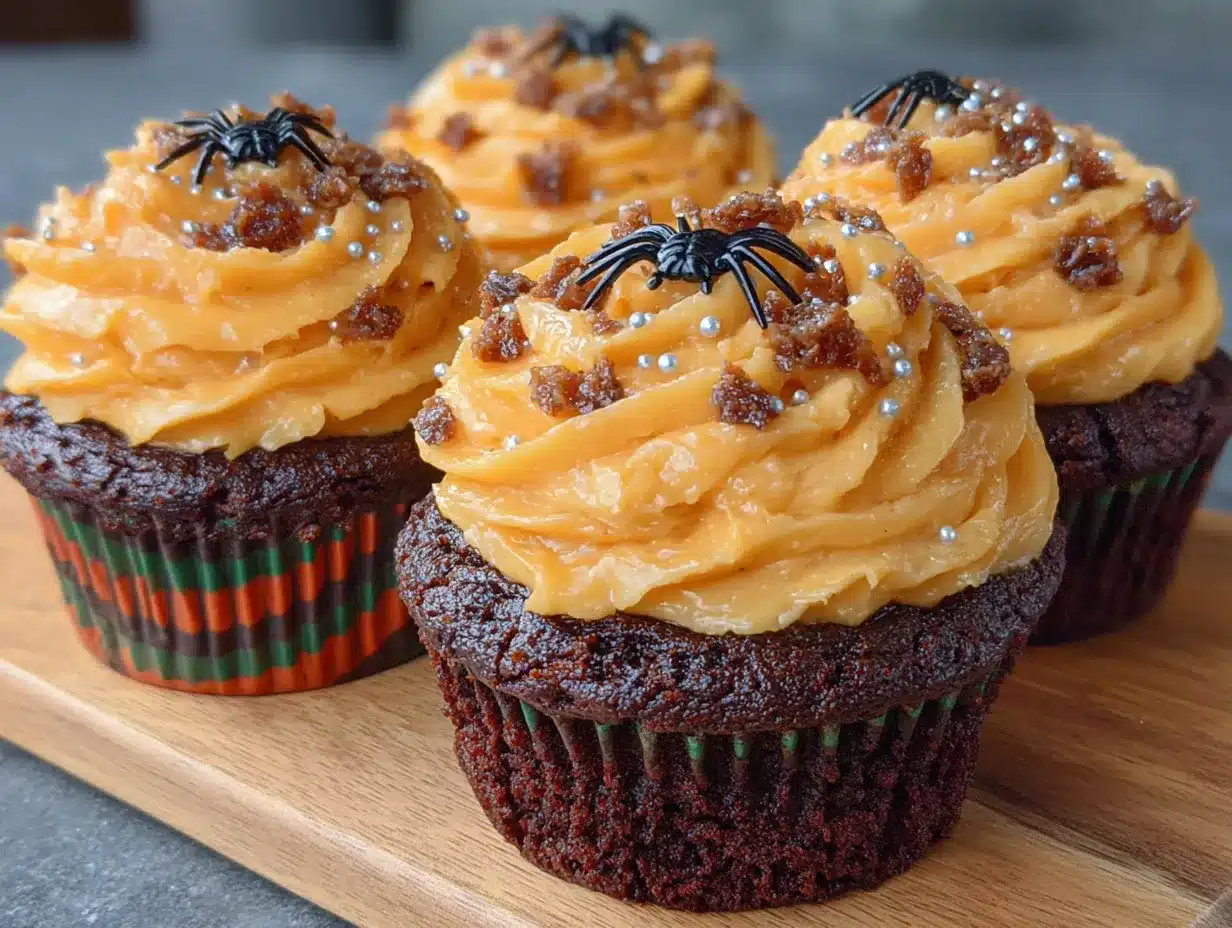
My six-year-old nephew took one bite, looked at me with those huge, serious eyes, and whispered, “Auntie, this is the best cupcake I’ve ever had. And I’ve had a lot.” I nearly dropped the piping bag. This from a kid who routinely abandons desserts after two bites to go chase the dog. But these black velvet cupcakes—dark, moist, topped with a swirl of bright orange buttercream—had stopped him mid-chew. He polished off the whole thing, black crumbs on his chin, and asked for another one to take home. That was the moment I knew this Halloween recipe was something special.
I’d been tinkering with black velvet cake for years. You know how some recipes just never feel quite right? Too dry, too crumbly, or that weird artificial black color that stains your teeth for days. I wanted something that actually tasted good, not just looked spooky. Something with the tender, velvety crumb of a red velvet cake, but… well, black. And honestly, it took more trial batches than I care to admit. Some turned out gray. Some turned out greenish (don’t ask). Some had a bitter aftertaste from too much black cocoa.
But this version? This is the one. The cake is impossibly soft, with a hint of vanilla and a deep, dark color that comes from a clever combination of black cocoa powder and just enough food coloring (you can use natural options, I promise). And the orange buttercream—it’s not just for looks. The bright, citrusy tang cuts through the richness of the cake perfectly. It’s the kind of treat that feels festive without being fussy. No fondant, no complicated decorations. Just a really, really good cupcake dressed up for the occasion.
Why You’ll Love This Recipe
These aren’t just Halloween cupcakes. They’re the kind of dessert that makes people stop and say, “Wait, what flavor is this?” The black cake is a conversation starter, and the orange buttercream is a flavor bomb. Here’s why this recipe works:
- Incredibly Moist & Tender: Buttermilk and oil keep the crumb soft for days. No dry, crumbly cake here.
- Deep, Real Chocolate Flavor: Black cocoa powder gives that Oreo-like taste, not just artificial coloring.
- No Bitter Aftertaste: The right balance of cocoa and coloring means you get spooky color without the chemical taste.
- Perfect for Halloween Parties: They look dramatic on a dessert table and are easy to transport.
- Kid-Approved & Adult-Loved: My nephew’s review says it all. But adults go crazy for the sophisticated flavor combo.
- Simple Decorating: A swirl of frosting and some sprinkles is all you need. No piping skills required.
What makes these different from every other black cupcake recipe? It’s the texture. I spent months testing ratios of flour, cocoa, and fat to get that signature velvet crumb—fine, soft, almost melt-in-your-mouth. And the orange buttercream isn’t just colored orange; it’s flavored with fresh orange zest and a touch of juice, so it tastes like a Creamsicle in the best way. This isn’t just a Halloween gimmick. It’s a genuinely delicious cupcake that happens to be black.
What Ingredients You Will Need
This recipe uses simple, everyday baking ingredients to create something truly special. The magic is in how they work together. Most of these are pantry staples, so you might already have everything on hand.
For the Black Velvet Cupcakes
- All-purpose flour (1 ½ cups / 188g) – Provides structure. Spoon and level it for accuracy; don’t scoop directly from the bag.
- Black cocoa powder (¼ cup / 25g) – This is the key ingredient. It’s Dutch-processed cocoa that’s been heavily alkalized, giving it a dark color and mild, Oreo-like flavor. I prefer the brand Rodelle for the deepest color.
- Unsweetened natural cocoa powder (2 tablespoons / 10g) – Adds a bit of classic chocolate depth that black cocoa alone lacks. Don’t skip it.
- Granulated sugar (1 cup / 200g) – Sweetens and helps with tenderness.
- Baking soda (1 teaspoon) – The leavening agent that reacts with the buttermilk for rise.
- Salt (½ teaspoon) – Balances sweetness and enhances flavor.
- Vegetable oil (½ cup / 120ml) – Keeps the cupcakes incredibly moist. Use a neutral oil like canola or grapeseed.
- Buttermilk (½ cup / 120ml), room temperature – The acid in buttermilk tenderizes the gluten and activates the baking soda. If you don’t have buttermilk, add 1 tablespoon of lemon juice or white vinegar to ½ cup of milk and let it sit for 5 minutes.
- Large eggs (2), room temperature – Provide structure and richness.
- Vanilla extract (2 teaspoons) – Enhances the chocolate flavor.
- White vinegar (1 teaspoon) – Sounds weird, but it reacts with the baking soda for extra lift and a tender crumb. You won’t taste it.
- Black gel food coloring (1-2 teaspoons) – Optional, but it deepens the color to a true, dark black. Liquid coloring won’t work as well; use a gel or paste. For a natural option, you can use black cocoa powder exclusively, but the color will be more of a very dark gray. (I’ve done it, and they still look spooky!)
For the Orange Buttercream Frosting
- Unsalted butter (1 cup / 226g, 2 sticks), softened to room temperature – The base of the frosting. Make sure it’s soft but not melty.
- Powdered sugar (3-4 cups / 360-480g) – Sweetens and thickens the frosting. Sift it if it’s lumpy.
- Orange zest (1 tablespoon from about 1 large orange) – This is where the real orange flavor comes from. Don’t skip it!
- Fresh orange juice (2 tablespoons) – Adds flavor and thins the frosting to the right consistency.
- Vanilla extract (1 teaspoon) – Rounds out the flavor.
- Salt (a pinch) – Balances the sweetness.
- Orange gel food coloring (a few drops) – Optional, for that vibrant Halloween color. A little goes a long way.
Equipment Needed
You don’t need a professional bakery setup for these. Here’s what you’ll need:
- Standard 12-cup muffin tin – For baking the cupcakes.
- Paper cupcake liners – I like using black or orange liners for extra spooky points. White works too, but they’ll look a little less dramatic.
- Mixing bowls – One large, one medium.
- Whisk – For combining dry ingredients.
- Hand mixer or stand mixer with paddle attachment – For the frosting. You can whisk it by hand, but your arm will get a workout. A hand mixer is totally fine.
- Rubber spatula – For scraping down the bowl and folding ingredients.
- Piping bag with a large star tip (like a Wilton 1M) – For that classic swirl. If you don’t have a piping bag, a zip-top bag with the corner snipped off works in a pinch.
- Cooling rack – Essential for letting cupcakes cool completely before frosting. Warm cupcakes + buttercream = a melty mess.
- Measuring cups and spoons – For accuracy.
For the piping bag, if you’re new to it, get a disposable one. They’re cheap and easy to use. I’ve had my reusable ones for years, but I still reach for disposables when I’m making a big batch for a party.
Preparation Method
Let’s make some magic. This process is straightforward, but I’ve added notes so you get perfect results every time.
- Preheat and prep. Preheat your oven to 350°F (175°C). Line your muffin tin with 12 paper liners. Set aside.
- Whisk the dry ingredients. In a large bowl, whisk together the all-purpose flour, black cocoa powder, natural cocoa powder, granulated sugar, baking soda, and salt. Make sure there are no lumps of cocoa. The mixture will look like dark gray sand. That’s perfect.
- Mix the wet ingredients. In a medium bowl or a large liquid measuring cup, whisk together the vegetable oil, buttermilk, eggs, vanilla extract, and white vinegar until smooth. The mixture will be a bit thin.
- Combine wet and dry. Pour the wet ingredients into the dry ingredients. Stir with a rubber spatula or whisk until just combined. Do not overmix! A few small lumps are okay. Overmixing will make the cupcakes tough. If you’re using black gel food coloring, add it now and stir until the batter is an even, deep black color.
- Fill the liners. Divide the batter evenly among the 12 cupcake liners. I use a ¼-cup measuring cup or a cookie scoop to get even portions. Each liner should be about ⅔ to ¾ full. This gives them a nice domed top without spilling over.
- Bake. Bake for 18-22 minutes, or until a toothpick inserted into the center of a cupcake comes out clean or with a few moist crumbs. The tops will spring back when lightly touched. My oven runs a little hot, so I check at the 18-minute mark. Every oven is different, so start checking early.
- Cool completely. Let the cupcakes cool in the pan for 5 minutes. Then transfer them to a wire rack to cool completely. This is the hardest part—the waiting. But I promise, if you frost them while they’re warm, the buttercream will slide right off. I’ve learned this the hard way more times than I’d like to admit.
- Make the buttercream. While the cupcakes cool, make the frosting. In a large bowl with a hand mixer (or in a stand mixer fitted with the paddle attachment), beat the softened butter on medium speed until smooth and creamy, about 1 minute. Add the orange zest and beat until fragrant, about 30 seconds.
- Add the sugar and juice. Gradually add the powdered sugar, 1 cup at a time, beating on low speed after each addition. Add the vanilla extract and a pinch of salt. Then add the orange juice, 1 tablespoon at a time, beating on medium-high speed until the frosting is light, fluffy, and spreadable. If it’s too thick, add a little more orange juice (or milk). If it’s too thin, add a bit more powdered sugar. Add a few drops of orange gel food coloring if you want that bright Halloween color, and beat until evenly combined.
- Frost the cupcakes. Fit a piping bag with a large star tip. Fill the bag with the orange buttercream. Pipe a swirl onto each completely cooled cupcake. Start from the outside edge and work your way in, lifting up at the end to create a peak. If you don’t have a piping bag, you can simply spread the frosting on with a knife or offset spatula. It will still taste amazing.
- Decorate (optional). Add Halloween sprinkles, a small candy eyeball, or a tiny plastic spider on top for extra fun. I like to keep it simple—just the swirl and a few sprinkles—so the beautiful color contrast is the star.
Cooking Tips & Techniques
I’ve made a lot of mistakes with black velvet cake over the years. Here’s what I’ve learned so you don’t have to repeat them.
Room temperature ingredients matter. Seriously. Cold eggs and buttermilk won’t emulsify properly with the oil and sugar, leading to a denser, less tender crumb. Take them out of the fridge 30-60 minutes before you start baking. Set a timer if you have to. I’ve forgotten and tried to speed things up with a warm water bath for the eggs, and it’s just not the same.
Don’t overmix the batter. The biggest mistake home bakers make is overmixing. Once the flour is added, gluten development kicks in. Stir just until you don’t see any more streaks of flour. A few lumps are totally fine. They’ll bake out. Overmixed batter leads to tough, dense cupcakes with pointy tops. You want a soft, domed top.
Black cocoa is not regular cocoa. It’s less acidic and has a much milder flavor. If you substitute 100% black cocoa for regular cocoa, the cake can taste a little flat. That’s why I use a mix of black cocoa and natural cocoa. The natural cocoa provides the classic chocolate punch, while the black cocoa gives the color and that Oreo-like nuance. Don’t skip either one.
Gel food coloring is your friend. Liquid food coloring will thin out your batter and give you a muddy gray color. Gel or paste coloring is concentrated, so you need less of it, and it won’t affect the batter’s consistency. If you’re avoiding artificial colors, you can skip it entirely and rely solely on black cocoa powder. The cupcakes will be a very dark gray—still spooky, just a little more “haunted mansion” than “pitch black night.”
Let the cupcakes cool completely. I cannot stress this enough. I once frosted a batch that was still slightly warm. The buttercream melted into a puddle, and I ended up with a sad, greasy mess. Patience is a virtue, especially in baking. Pop them in the fridge for 10 minutes if you’re in a rush—but only if they’re already at room temperature.
Variations & Adaptations
This recipe is a great base for all kinds of spooky treats. Here are a few ways to switch it up:
- Make it a Cake: Pour the batter into two 8-inch round cake pans (greased and floured) and bake for 25-30 minutes. Double the frosting recipe for a layered cake. It makes a stunning Halloween centerpiece.
- Add a Filling: Before frosting, use a small knife or an apple corer to remove a small cone from the center of each cupcake. Fill the hole with a spoonful of raspberry jam, chocolate ganache, or a dollop of marshmallow fluff. Then frost as usual. The red jam looks especially spooky when you bite into it!
- Swap the Frosting: Not an orange fan? Try a cream cheese frosting for a tangy contrast, a chocolate buttercream for a double-chocolate treat, or a simple vanilla bean buttercream. For a really dramatic look, use a white buttercream and add black sprinkles on top.
- Make it Gluten-Free: Substitute the all-purpose flour with a 1:1 gluten-free baking blend (like King Arthur or Bob’s Red Mill). Add ¼ teaspoon of xanthan gum if your blend doesn’t already contain it. The texture will be slightly more delicate, but still delicious.
- Make it Dairy-Free: Use a plant-based buttermilk (1 tablespoon lemon juice + ½ cup unsweetened almond or oat milk) and a dairy-free butter substitute (like Miyoko’s or Earth Balance) for the frosting. The cake will still be moist and tender.
- Spiderweb Design: Pipe the orange buttercream in a smooth layer. Then, pipe a few concentric circles of black gel frosting on top. Drag a toothpick from the center outward through the circles to create a spiderweb pattern. It’s easier than it sounds and looks incredibly impressive.
Serving & Storage Suggestions
These cupcakes are best served at room temperature. The cake is soft, and the buttercream is perfectly creamy. If you’ve refrigerated them, let them sit out for about 20-30 minutes before serving.
They’re perfect for a Halloween party, a spooky movie night, or a fall bake sale. Pair them with a glass of cold milk, a warm apple cider, or a pumpkin spice latte. For a more grown-up gathering, they’d be fantastic alongside a cup of dark coffee or a glass of bourbon. The rich chocolate and bright orange are a surprisingly good match for a warm cocktail.
Storage: Store unfrosted cupcakes in an airtight container at room temperature for up to 3 days. Frosted cupcakes should be stored in the refrigerator, but bring them to room temperature before serving for the best texture. They’ll keep in the fridge for up to 5 days.
Freezing: You can freeze the unfrosted cupcakes for up to 3 months. Wrap each one tightly in plastic wrap, then place them in a freezer-safe bag. Thaw at room temperature before frosting. The buttercream can also be frozen in an airtight container for up to 3 months. Thaw it in the fridge overnight, then re-whip it with a mixer to bring back its fluffy texture.
Honestly, the flavors actually get better after a day. The black cocoa has time to mellow and deepen. So if you’re making these for a party, bake them a day ahead. Your future self will thank you.
Nutritional Information & Benefits
Let’s be real—these are cupcakes, not health food. But here’s a rough estimate per cupcake (with frosting):
| Nutrient | Amount |
|---|---|
| Calories | ~380 |
| Fat | 22g |
| Carbohydrates | 44g |
| Protein | 4g |
| Sugar | 33g |
On the plus side, black cocoa powder is rich in antioxidants (more than regular cocoa, actually). It contains flavonoids that can help with heart health. And the orange zest provides a tiny hit of vitamin C. So, you know, there are some redeeming qualities.
This recipe contains gluten, dairy, and eggs. For a dairy-free or gluten-free version, see the variations section above. It’s not a low-sugar or low-fat treat, but it’s perfect for an occasional indulgence. Life is about balance, right? Enjoying a really good cupcake on Halloween is part of a happy life.
Conclusion
These Spooky Black Velvet Halloween Cupcakes with Orange Buttercream are the kind of recipe that makes you feel like a baking rockstar. They look dramatic and professional, but they’re secretly simple to make. The cake is unbelievably tender, the frosting is bright and creamy, and the whole package is just plain fun.
I love that I can make these for a Halloween party and get compliments all night long, but I also love that they’re just really, really good cupcakes. The black color isn’t a gimmick—it’s part of a genuinely delicious chocolate cake. And the orange buttercream isn’t just for show—it’s a flavor combination that works.
I’d love to hear how yours turn out. Did you add a filling? Did you try a different frosting? Did your kids (or nephews) give them the seal of approval? Drop a comment below and let me know. And if you’re looking for another fun Halloween treat, you might enjoy these cozy pumpkin cinnamon rolls or this creamy caramel apple overnight oats for a festive breakfast the next morning.
Happy Halloween, and happy baking!
Frequently Asked Questions
Can I use only black cocoa powder and skip the natural cocoa?
I don’t recommend it. Black cocoa has a very mild flavor on its own. The natural cocoa gives the cake its classic chocolate taste. The combination is what makes these cupcakes special. Without the natural cocoa, they’ll taste more like an Oreo cookie than a chocolate cake.
Why did my cupcakes turn out gray instead of black?
This usually happens for a few reasons: not enough black cocoa powder, using liquid food coloring instead of gel, or overmixing the batter. Make sure you’re measuring the cocoa correctly and using a quality gel coloring. Also, the type of cocoa matters—make sure you’re using black cocoa powder, not just regular Dutch-process cocoa.
Can I make these cupcakes ahead of time?
Absolutely. You can bake the cupcakes up to 3 days in advance and store them unfrosted in an airtight container at room temperature. Frost them the day you plan to serve them. You can also make the buttercream up to a week ahead and keep it in the fridge. Just bring it to room temperature and re-whip it before using.
My buttercream is too runny. What did I do wrong?
The most common culprit is using too much orange juice. Add the juice slowly, 1 tablespoon at a time. If it’s already too thin, you can fix it by adding more powdered sugar, ¼ cup at a time, until it reaches the right consistency. Also, make sure your butter is properly softened but not melted. Melted butter will make a runny frosting every time.
Can I use a different type of food coloring for a natural option?
Yes! For a natural black color, you can use activated charcoal powder (start with 1 teaspoon and add more until you reach your desired color). It’s flavorless and gives a very dark gray/black color. You can also try black cocoa powder alone, but the color will be more of a dark charcoal gray. For the orange frosting, you can use a pinch of turmeric mixed with a tiny bit of paprika for a natural orange hue, though the color will be more muted than with gel coloring.
Pin This Recipe!
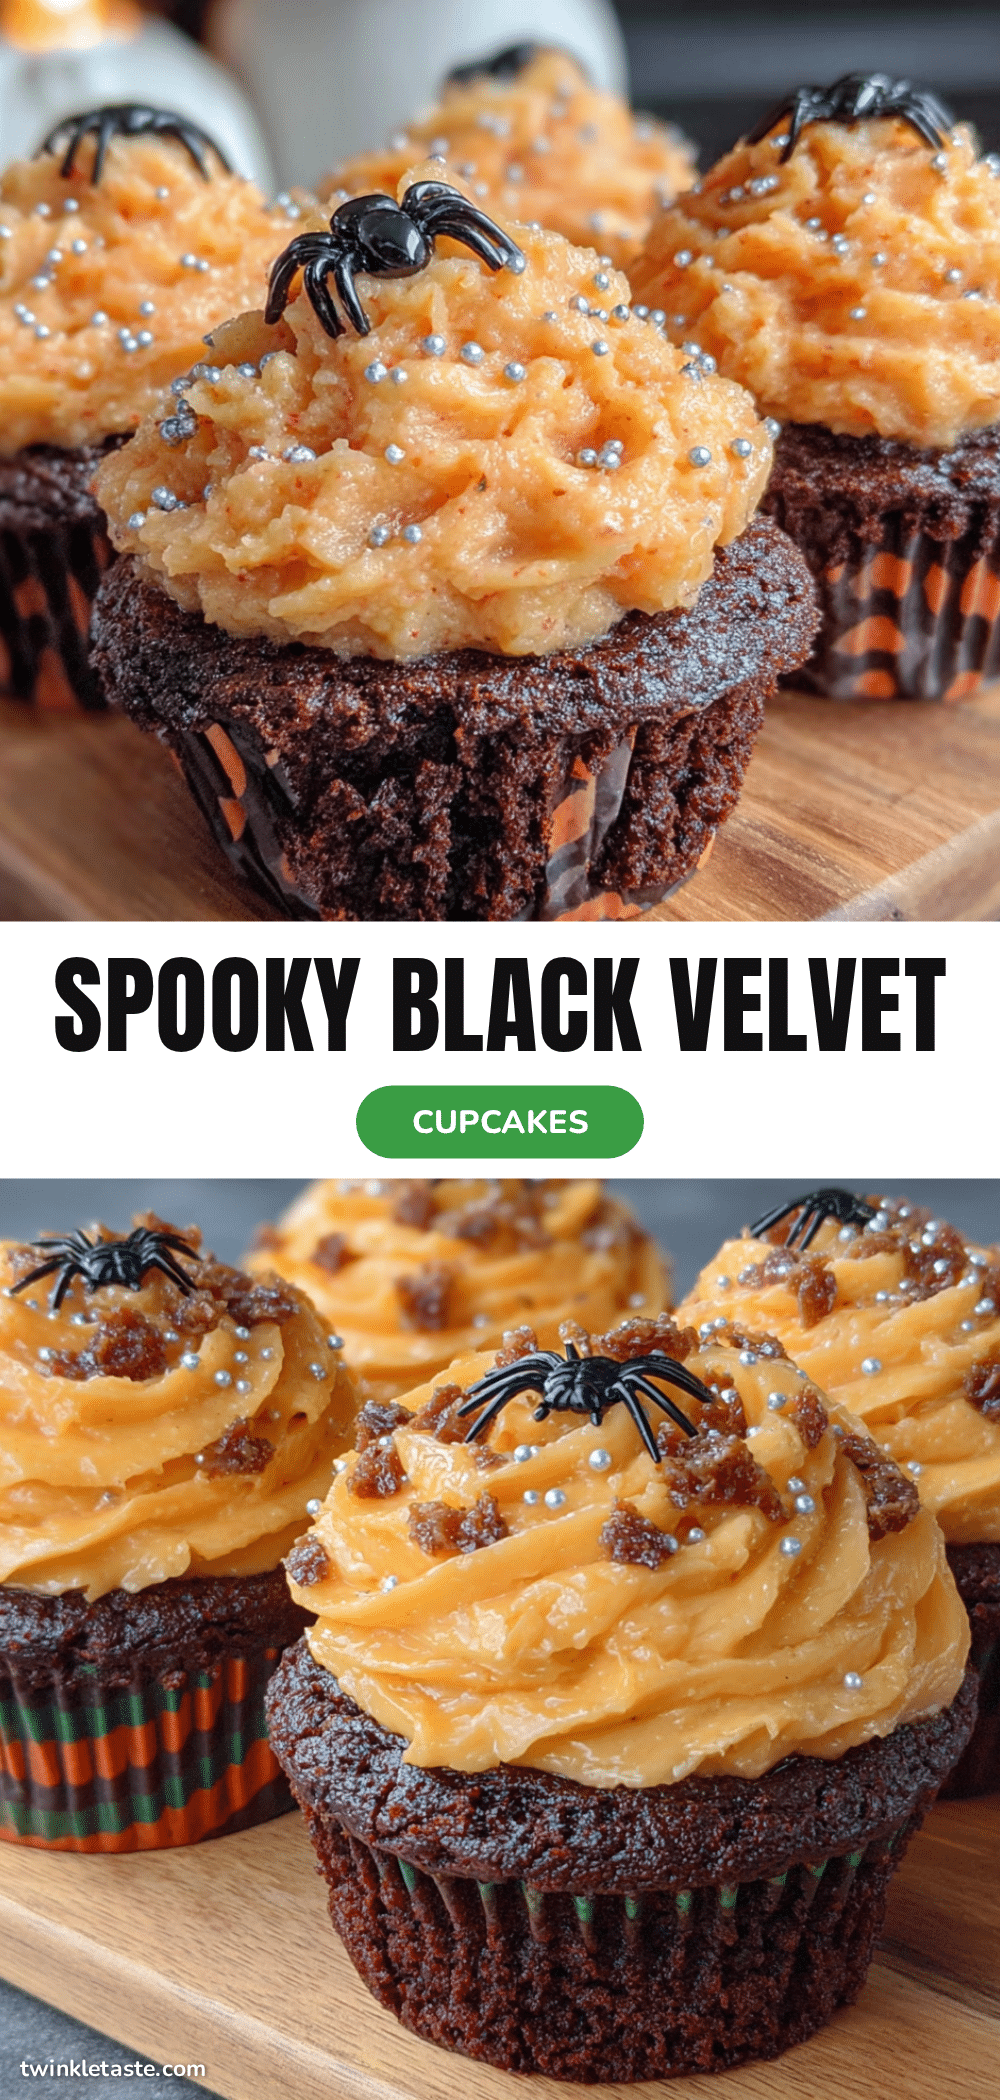
Spooky Black Velvet Cupcakes: Best Halloween Treats
These black velvet cupcakes are impossibly soft with a deep, dark color from black cocoa powder, topped with a bright orange buttercream that cuts through the richness perfectly. A festive Halloween treat that’s kid-approved and adult-loved.
- Prep Time: 20 minutes
- Cook Time: 20 minutes
- Total Time: 40 minutes
- Yield: 12 cupcakes 1x
- Category: Dessert
- Cuisine: American
Ingredients
- 1 ½ cups (188g) all-purpose flour
- ¼ cup (25g) black cocoa powder
- 2 tablespoons (10g) unsweetened natural cocoa powder
- 1 cup (200g) granulated sugar
- 1 teaspoon baking soda
- ½ teaspoon salt
- ½ cup (120ml) vegetable oil
- ½ cup (120ml) buttermilk, room temperature
- 2 large eggs, room temperature
- 2 teaspoons vanilla extract
- 1 teaspoon white vinegar
- 1–2 teaspoons black gel food coloring (optional)
- 1 cup (226g, 2 sticks) unsalted butter, softened
- 3–4 cups (360-480g) powdered sugar
- 1 tablespoon orange zest (from about 1 large orange)
- 2 tablespoons fresh orange juice
- 1 teaspoon vanilla extract
- Pinch of salt
- Few drops orange gel food coloring (optional)
Instructions
- Preheat oven to 350°F (175°C). Line a 12-cup muffin tin with paper liners.
- In a large bowl, whisk together flour, black cocoa powder, natural cocoa powder, sugar, baking soda, and salt until no lumps remain.
- In a medium bowl, whisk together vegetable oil, buttermilk, eggs, vanilla extract, and white vinegar until smooth.
- Pour wet ingredients into dry ingredients. Stir with a rubber spatula until just combined (a few lumps are okay). If using black gel food coloring, add it now and stir until batter is evenly black.
- Divide batter evenly among the 12 liners, filling each about ⅔ to ¾ full.
- Bake for 18-22 minutes, until a toothpick inserted in the center comes out clean or with a few moist crumbs. Cool in pan for 5 minutes, then transfer to a wire rack to cool completely.
- While cupcakes cool, make the frosting: In a large bowl, beat softened butter on medium speed until smooth and creamy, about 1 minute. Add orange zest and beat until fragrant, about 30 seconds.
- Gradually add powdered sugar, 1 cup at a time, beating on low speed after each addition. Add vanilla extract and a pinch of salt. Add orange juice, 1 tablespoon at a time, beating on medium-high until light, fluffy, and spreadable. Add orange gel food coloring if desired and beat until combined.
- Fit a piping bag with a large star tip and fill with buttercream. Pipe a swirl onto each completely cooled cupcake, starting from the outside edge and working inward, lifting up at the end to create a peak.
- Decorate with Halloween sprinkles or candy eyeballs if desired.
Notes
Room temperature ingredients are crucial for proper emulsification. Do not overmix the batter to avoid tough cupcakes. Black cocoa powder is key for the dark color and Oreo-like flavor; do not substitute with regular cocoa alone. Gel food coloring is recommended over liquid for deeper color without thinning the batter. Cool cupcakes completely before frosting to prevent melting.
Nutrition
- Serving Size: 1 cupcake
- Calories: 380
- Sugar: 33
- Sodium: 220
- Fat: 22
- Saturated Fat: 10
- Carbohydrates: 44
- Fiber: 2
- Protein: 4
Keywords: black velvet cupcakes, Halloween cupcakes, black cocoa cupcakes, orange buttercream, spooky desserts, Halloween treats, chocolate cupcakes