Let me tell you, the scent of freshly baked breadsticks soaked in garlicky butter wafting from my kitchen is enough to make anyone’s mouth water. The first time I pulled these soft Olive Garden breadsticks out of the oven, I was instantly hooked—the kind of moment where you pause, take a deep breath, and just smile because you know you’re onto something truly special. When I was knee-high to a grasshopper, my grandma used to make the most heavenly homemade bread, but these breadsticks bring back that nostalgia with a little modern twist.
I stumbled on this recipe on a rainy weekend when I was craving the iconic Olive Garden breadsticks but wanted to avoid a takeout run. Honestly, these breadsticks are dangerously easy to whip up and deliver pure, nostalgic comfort every single time. My family couldn’t stop sneaking them off the cooling rack (and I can’t really blame them). Whether you’re looking to brighten up your Pinterest cookie board or need a sweet (well, savory) treat for your kids’ next lunch, these garlic butter breadsticks fit the bill perfectly.
After testing this recipe multiple times in the name of research, of course, it’s now a staple for family gatherings, gifting, and those quiet nights when you crave something soft, buttery, and downright irresistible. Trust me, you’re going to want to bookmark this one.
Why You’ll Love This Soft Olive Garden Breadsticks Recipe
Honestly, I’ve tried a handful of breadstick recipes before landing on this one, and here’s why this version stands out:
- Quick & Easy: Comes together in under 2 hours, including rising time—perfect for busy weeknights or those surprising dinner guests.
- Simple Ingredients: You likely already have everything in your pantry—no fancy grocery store runs needed.
- Perfect for Any Occasion: Great for weeknight dinners, potlucks, or even as a cozy snack while binge-watching your favorite show.
- Crowd-Pleaser: Kids, adults, picky eaters—everyone loves them. Seriously, I’ve lost count of how many times these disappeared too fast.
- Unbelievably Delicious: The soft, pillowy texture combined with the rich garlic butter glaze is next-level comfort food.
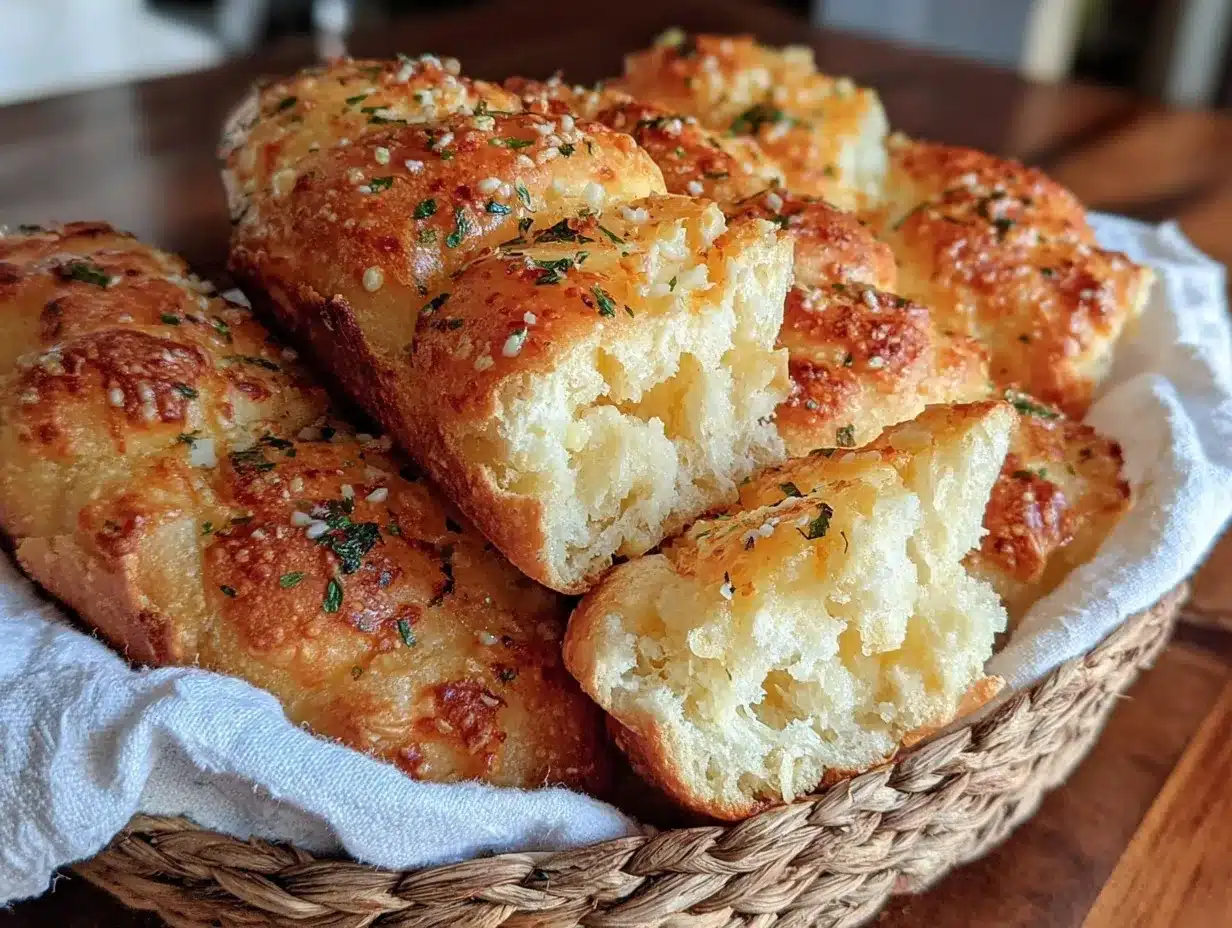
What really makes this recipe different is the perfect balance between a tender crumb and that golden, buttery crust. The dough is gently enriched with a touch of sugar and olive oil, making it just the right mix of soft and flavorful. The garlic butter topping? Oh, it’s made with real garlic, fresh herbs, and a sprinkle of Parmesan that’s pure magic. This isn’t just another breadstick recipe—it’s your best version of that beloved Olive Garden classic.
After the first bite, you might just close your eyes and savor the buttery, garlicky goodness. It’s comfort food that feels familiar but made fresh at home without the fuss. Whether you want to impress guests without breaking a sweat or just treat yourself, these breadsticks have got you covered.
What Ingredients You Will Need
This recipe uses simple, wholesome ingredients to deliver bold flavor and satisfying texture without the fuss. Most are pantry staples, and a few are fresh touches that add that authentic Olive Garden vibe.
- For the Dough:
- 2 ¼ teaspoons active dry yeast (one packet) – Make sure it’s fresh for the best rise.
- 1 ½ cups warm water (about 110°F / 43°C) – Not too hot or yeast might die.
- 1 tablespoon granulated sugar – feeds the yeast and adds a touch of sweetness.
- 3 ½ cups all-purpose flour – I recommend King Arthur for best texture.
- 2 tablespoons olive oil (plus extra for greasing) – adds richness and softness.
- 1 teaspoon salt – balances flavor.
- For the Garlic Butter Topping:
- 6 tablespoons unsalted butter, melted – real butter makes all the difference.
- 3 garlic cloves, finely minced – fresh garlic packs a punch.
- 1 teaspoon dried parsley (or 1 tablespoon fresh parsley, chopped) – adds color and freshness.
- ¼ cup grated Parmesan cheese (optional but highly recommended) – gives that signature Olive Garden touch.
- Salt to taste – enhances the garlic butter seasoning.
For substitutions, you can use dairy-free butter or coconut oil for a vegan twist. If you’re gluten-sensitive, swapping with a gluten-free flour blend can work, but be prepared for a slightly different texture. In summer, I love adding fresh herbs like basil or oregano for a seasonal flair.
Equipment Needed
- Large mixing bowl – for combining your dough ingredients.
- Measuring cups and spoons – accuracy matters for yeast-based doughs.
- Stand mixer with dough hook (optional) – makes kneading easier but hand-kneading works just fine.
- Baking sheet or stone – lined with parchment paper for easy cleanup.
- Pastry brush – for applying the garlic butter glaze evenly.
- Kitchen towel or plastic wrap – to cover the dough during rising.
If you don’t have a stand mixer, no worries! I’ve kneaded this dough by hand plenty of times. It’s a bit of elbow grease but totally doable. For budget-friendly options, a silicone baking mat can replace parchment paper. Remember to keep your tools clean and dry to avoid any yeast mishaps.
Preparation Method
- Activate the Yeast: In a large mixing bowl, combine 1 ½ cups warm water and 1 tablespoon sugar. Sprinkle the yeast over the top and let it sit for 5–10 minutes until foamy and bubbly. If it doesn’t foam, your yeast might be dead—start fresh.
- Mix the Dough: Add 3 ½ cups flour, 2 tablespoons olive oil, and 1 teaspoon salt to the yeast mixture. Stir with a wooden spoon or dough hook until the dough begins to come together, about 2 minutes.
- Knead the Dough: Turn the dough onto a lightly floured surface and knead for 8–10 minutes until smooth and elastic. If using a stand mixer, knead with the dough hook on medium speed for about 6 minutes. The dough should be soft but not sticky—add small amounts of flour if too wet.
- First Rise: Lightly oil a large bowl and place the dough inside, turning to coat it with oil. Cover with a damp kitchen towel or plastic wrap and let it rise in a warm spot for 1 to 1 ½ hours, or until doubled in size. You’ll know it’s ready when you gently poke the dough and it springs back slowly.
- Shape the Breadsticks: Punch down the risen dough and turn it onto a lightly floured surface. Divide the dough into 12 equal pieces (about 80 grams / 2.8 oz each). Roll each piece into a 6-inch (15 cm) long breadstick. Place them evenly spaced on a parchment-lined baking sheet.
- Second Rise: Cover the shaped breadsticks with a kitchen towel and let them rise for another 30 minutes until puffed up.
- Preheat the Oven: While the breadsticks rise, preheat your oven to 400°F (200°C).
- Bake: Bake the breadsticks for 12–15 minutes until golden brown on top. Keep an eye on them—oven times can vary.
- Prepare Garlic Butter: While the breadsticks bake, melt 6 tablespoons of butter in a small saucepan over low heat. Stir in minced garlic, parsley, and a pinch of salt. Warm gently for 2–3 minutes until fragrant but not browned.
- Brush & Serve: Remove breadsticks from the oven and immediately brush generously with the garlic butter mixture. Sprinkle Parmesan cheese on top if you like, then serve warm. Seriously, don’t wait—these are best fresh out of the oven!
Pro tip: If your breadsticks feel a bit dense, it probably means the dough didn’t rise enough. Give it more time next round, and trust me, the patience pays off.
Cooking Tips & Techniques
Getting these soft Olive Garden breadsticks just right is a bit of an art, but I’ve learned a few tricks over the years.
- Water Temperature Matters: If your water is too hot, it kills the yeast; too cold, and the yeast won’t activate. Aim for that cozy 110°F (43°C) zone—warm to the touch but not scalding.
- Kneading Is Key: Proper kneading develops gluten, which gives you that soft, chewy texture. If you’re hand-kneading, don’t rush—about 10 minutes is ideal. If you’re short on time, a stand mixer helps.
- Don’t Skip the Rises: Let the dough rise fully each time. It’s tempting to hurry, but the flavor and texture depend on this. A warm spot near a window or on top of a fridge works wonders.
- Garlic Butter Timing: Brush the breadsticks right out of the oven. The warm bread soaks up the garlic butter better, making each bite bursting with flavor.
- Watch Your Baking Time: Breadsticks can go from golden to overdone quickly. Set a timer and peek at the 12-minute mark to avoid drying them out.
I once forgot to add salt to the dough—big mistake! The breadsticks tasted flat. Lesson learned: salt balances sweetness and boosts flavor, so don’t skip it.
Variations & Adaptations
Feel like switching things up? These breadsticks are super versatile.
- Cheesy Twist: Add shredded mozzarella or cheddar into the dough or sprinkle extra cheese on top before baking for a melty surprise.
- Herb Infusion: Swap parsley for rosemary, thyme, or Italian seasoning in the garlic butter for a fresh herbal note.
- Gluten-Free Version: Use a store-bought gluten-free flour blend designed for bread. The texture will be a little different but still delicious.
- Spicy Kick: Add a pinch of red pepper flakes to the garlic butter for some heat.
- Vegan Option: Replace butter with vegan butter or olive oil, and omit the Parmesan or use a plant-based alternative.
I personally tried adding sun-dried tomatoes and basil into the dough once—it was a hit at a summer picnic and gave the breadsticks a Mediterranean flair.
Serving & Storage Suggestions
These breadsticks are best served warm—fresh from the oven when that garlic butter is still melty and heavenly. Pair them with your favorite pasta dishes, soups, or salads for a complete meal.
If you want to get fancy, arrange them on a platter with a small bowl of marinara sauce or ranch dressing for dipping. A crisp white wine or a cold sparkling water with lemon makes a refreshing beverage companion.
To store, place cooled breadsticks in an airtight container at room temperature for up to 2 days. For longer storage, freeze them in a zip-top bag for up to 3 months. Reheat gently in the oven at 350°F (175°C) for 5–7 minutes or until warmed through; this helps keep them soft and tasty.
Flavors actually deepen after a day, so leftovers can be even more flavorful the next day—if you can resist eating them all immediately!
Nutritional Information & Benefits
Each soft Olive Garden breadstick (about 80 grams) contains roughly:
| Calories | 180-200 |
|---|---|
| Carbohydrates | 25-28g |
| Fat | 7-9g |
| Protein | 4-5g |
| Fiber | 1-2g |
Thanks to olive oil and real butter, these breadsticks provide a good dose of healthy fats and a comforting richness. Garlic is known for its immune-boosting properties, and parsley adds a bit of vitamin C and antioxidants. While not low-carb or gluten-free by default, the recipe can be adapted to your dietary needs.
From a wellness perspective, making bread from scratch means you control what goes in—no preservatives or unwanted additives. It’s a wholesome way to enjoy comfort food without guilt.
Conclusion
In the end, this soft Olive Garden breadsticks recipe is more than just a side dish—it’s a little joy wrapped in buttery, garlicky goodness. It’s perfect for customizing to your taste and easy enough to become a go-to recipe when you want that cozy, homemade feel without the fuss.
I love this recipe because it reminds me of family dinners and simple pleasures. Honestly, it feels like a warm hug on a plate.
Give it a try, play around with the flavors, and I’d love to hear how you made it your own. Don’t forget to leave a comment or share your favorite variations. Now, go on—get baking, and enjoy every soft, buttery bite!
FAQs About Soft Olive Garden Breadsticks with Garlic Butter
How long do these breadsticks stay fresh?
They’re best eaten within 2 days at room temperature. You can freeze them for up to 3 months and reheat before serving.
Can I make the dough ahead of time?
Absolutely! You can prepare the dough, cover it tightly, and refrigerate it overnight. Bring it back to room temperature and proceed with shaping and baking.
How do I get the breadsticks soft and not crusty?
The key is the right amount of oil in the dough and not overbaking. Also, brushing with garlic butter immediately after baking keeps them moist and soft.
Can I use garlic powder instead of fresh garlic?
Yes, but fresh garlic gives a much brighter and more authentic flavor. If using powder, start with about 1 teaspoon and adjust to taste.
What’s the best way to reheat leftover breadsticks?
Warm them in a preheated oven at 350°F (175°C) for 5–7 minutes. This keeps them soft and restores that fresh-baked flavor.
Pin This Recipe!
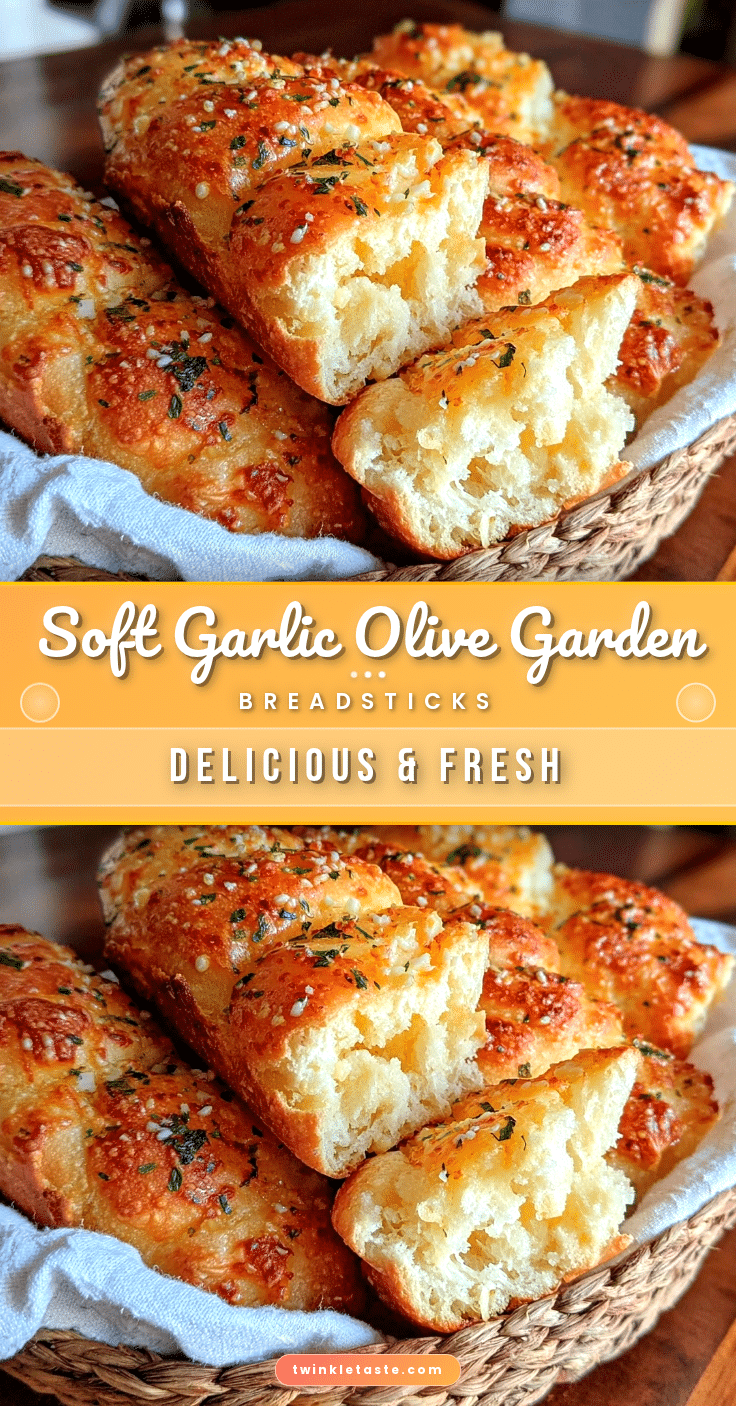
Soft Olive Garden Breadsticks Recipe Easy Homemade Garlic Butter Breadsticks

These soft Olive Garden-style breadsticks are easy to make at home with a tender crumb and a rich garlic butter glaze, perfect for any occasion and loved by all ages.
- Prep Time: 15 minutes
- Cook Time: 15 minutes
- Total Time: 1 hour 45 minutes
- Yield: 12 breadsticks 1x
- Category: Side Dish
- Cuisine: Italian-American
Ingredients
- 2 ¼ teaspoons active dry yeast (one packet)
- 1 ½ cups warm water (about 110°F / 43°C)
- 1 tablespoon granulated sugar
- 3 ½ cups all-purpose flour
- 2 tablespoons olive oil (plus extra for greasing)
- 1 teaspoon salt
- 6 tablespoons unsalted butter, melted
- 3 garlic cloves, finely minced
- 1 teaspoon dried parsley or 1 tablespoon fresh parsley, chopped
- ¼ cup grated Parmesan cheese (optional)
- Salt to taste
Instructions
- In a large mixing bowl, combine 1 ½ cups warm water and 1 tablespoon sugar. Sprinkle the yeast over the top and let it sit for 5–10 minutes until foamy and bubbly.
- Add 3 ½ cups flour, 2 tablespoons olive oil, and 1 teaspoon salt to the yeast mixture. Stir until the dough begins to come together, about 2 minutes.
- Turn the dough onto a lightly floured surface and knead for 8–10 minutes until smooth and elastic. Alternatively, knead with a stand mixer dough hook on medium speed for about 6 minutes.
- Lightly oil a large bowl and place the dough inside, turning to coat it with oil. Cover with a damp kitchen towel or plastic wrap and let it rise in a warm spot for 1 to 1 ½ hours, or until doubled in size.
- Punch down the risen dough and turn it onto a lightly floured surface. Divide the dough into 12 equal pieces (about 80 grams / 2.8 oz each). Roll each piece into a 6-inch long breadstick. Place them evenly spaced on a parchment-lined baking sheet.
- Cover the shaped breadsticks with a kitchen towel and let them rise for another 30 minutes until puffed up.
- Preheat the oven to 400°F (200°C).
- Bake the breadsticks for 12–15 minutes until golden brown on top.
- While baking, melt 6 tablespoons of butter in a small saucepan over low heat. Stir in minced garlic, parsley, and a pinch of salt. Warm gently for 2–3 minutes until fragrant but not browned.
- Remove breadsticks from the oven and immediately brush generously with the garlic butter mixture. Sprinkle Parmesan cheese on top if desired, then serve warm.
Notes
Use warm water at about 110°F to activate yeast properly. Knead dough until smooth and elastic for best texture. Let dough rise fully twice for soft breadsticks. Brush garlic butter immediately after baking to keep breadsticks moist and flavorful. For vegan option, substitute butter with dairy-free butter or olive oil and omit Parmesan or use plant-based alternative. Gluten-free flour blend can be used but expect different texture.
Nutrition
- Serving Size: 1 breadstick (about
- Calories: 190
- Sugar: 1
- Sodium: 250
- Fat: 8
- Saturated Fat: 4.5
- Carbohydrates: 26
- Fiber: 1.5
- Protein: 4.5
Keywords: Olive Garden breadsticks, garlic butter breadsticks, soft breadsticks, homemade breadsticks, easy breadsticks recipe, garlic breadsticks