“You seriously made cookies that look like diplomas?” my nephew asked, eyes wide as he pointed at the tray. Honestly, I didn’t expect the royal icing to turn out that neat on my first try decorating graduation cookies for boys, but there they were—perfect little edible celebrations. It started as a last-minute scramble the night before his big graduation party. With just a handful of ingredients and a tired kitchen, I was skeptical about pulling off something both tasty and visually cool enough for a teenage boy’s milestone.
But as I squeezed the icing bag and watched those sharp edges and bold colors take shape, something clicked. The cookies weren’t just sweets; they were little symbols of accomplishment. And the best part? The whole process became my quiet way of honoring that moment—no fancy tools, just a bit of patience and some good old-fashioned fun. Those cookies stuck with me, not because they were perfect (they weren’t), but because they were made with a mix of nerves, excitement, and pride. It’s a recipe that’s simple, approachable, and honestly, a little addictive once you get the hang of the royal icing technique.
So if you’re looking for a way to make graduation celebrations extra special for the boys in your life, these perfect graduation cookies decorated with royal icing for boys might just be your new go-to. They bring a neat balance of style and flavor, plus a chance to get a little creative without stress. Let’s just say, this recipe is about more than cookies—it’s about marking moments with something handmade and heartfelt.
Why You’ll Love This Recipe
Making graduation cookies for boys isn’t always easy—finding the right balance of masculine design, flavor, and ease can be tricky. But this recipe nails it every time, and here’s why I’m confident you’ll love it too:
- Quick & Easy: You can whip up the dough and royal icing in under 90 minutes, perfect for a last-minute celebration or a weekend baking session.
- Simple Ingredients: No weird or hard-to-find items here. Just pantry staples and a few basics that make the royal icing smooth and glossy.
- Perfect for Graduation Parties: Whether it’s a high school send-off or college cap toss, these cookies fit right in with bold, classic designs like caps, diplomas, and numbers.
- Crowd-Pleaser: Boys and adults alike appreciate the clean look and sweet flavor combo—no frills, just honest-to-goodness yum.
- Unbelievably Delicious: The cookie base is buttery and tender, and the royal icing adds just the right texture contrast with a subtle vanilla hint.
What really sets this recipe apart is the royal icing technique I share, which creates smooth, sharp-edged designs that don’t crack or dull after drying. Plus, I’ve included five decorating ideas that are boy-friendly but still fun to make, like bold stripes, varsity-style numbers, and little mortarboards. I tweaked this recipe after a few less-than-stellar batches to get the perfect icing consistency that flows easily but holds shape, which is honestly the trickiest part.
If you want cookies that make you pause and smile after one bite, this is it. It’s a simple way to make the graduation day feel a bit more special—without fuss or fancy tools. You might even find yourself making these for other celebrations, like birthdays or sports victories. And if you ever crave a cozy, comforting treat with a grown-up twist, these cookies fit the bill.
What Ingredients You Will Need
This recipe uses simple, wholesome ingredients to deliver bold flavor and satisfying texture without the fuss. Most are pantry staples, and there are easy substitutions if needed.
- For the Cookie Dough:
- All-purpose flour – 2 ¾ cups (340g), sifted (for the best tender crumb)
- Unsalted butter – 1 cup (226g), softened (I prefer Plugrá for extra creaminess)
- Granulated sugar – 1 cup (200g)
- Large egg – 1, room temperature
- Pure vanilla extract – 1 teaspoon (adds warm flavor)
- Baking powder – 1 teaspoon
- Salt – ¼ teaspoon (balances sweetness)
- For the Royal Icing:
- Powdered sugar – 4 cups (480g), sifted for smooth icing
- Pasteurized egg whites – 3 tablespoons (or 2 tablespoons meringue powder + 4 tablespoons water for a safer option)
- Fresh lemon juice – 1 tablespoon (helps with drying and adds brightness)
- Food coloring gels – blue, black, gold, and white (gel colors give vibrant, clean shades)
- Vanilla extract – 1 teaspoon (optional, for flavor)
If you want to keep it gluten-free, swap the all-purpose flour for a 1-to-1 gluten-free baking flour blend. For a dairy-free twist, use a vegan butter substitute that’s solid at room temp. When it comes to food coloring, I recommend AmeriColor gels for consistent results and bright hues.
In warmer months, you might want to add a pinch of cream of tartar to the royal icing to help it set faster, especially if the humidity is high. And if you’re short on time, you can prepare the dough a day ahead and chill it wrapped tightly in the fridge.
Equipment Needed
Making perfect graduation cookies decorated with royal icing for boys doesn’t require fancy equipment, but having the right tools definitely helps. Here’s what you’ll need:
- Mixing bowls – Medium and large sizes for dough and icing
- Electric hand mixer or stand mixer – For creaming butter and mixing dough efficiently
- Measuring cups and spoons – Accuracy matters for consistent cookies
- Rolling pin – A smooth, standard rolling pin works well; I find silicone rolling pins easier to clean
- Cookie cutters – Graduation-themed shapes like caps, diplomas, stars, or numbers (you can also use simple circles or squares)
- Parchment paper or silicone baking mats – For baking and easy cleanup
- Plastic piping bags or disposable icing bags – For piping royal icing
- Small round piping tips – Sizes #1 or #2 for outlining and detail work
- Toothpicks or scribe tools – For smoothing icing edges and fixing small mistakes
- Food-safe brushes (optional) – Useful for delicate gold detailing or dusting
If you don’t have piping tips, you can snip a small hole at the piping bag’s end to create a fine opening. Budget-friendly silicone mats can replace parchment paper and are reusable. For mixing, I’ve used everything from a simple whisk to a KitchenAid mixer; the mixer saves time, but you can get good results with a sturdy hand mixer or even by hand for the icing.
Preparation Method
- Make the Cookie Dough – (15 minutes prep + chilling 1 hour)
In a large bowl, cream together the softened butter and granulated sugar until light and fluffy (about 3-4 minutes with a mixer). Add the egg and vanilla extract, mixing until fully combined.
In a separate bowl, whisk the all-purpose flour, baking powder, and salt. Gradually add the dry ingredients to the wet, mixing on low speed until just combined. The dough will be soft but not sticky.
Wrap the dough in plastic wrap and chill in the refrigerator for at least 1 hour. This step is key to keep the cookies from spreading too much during baking. - Roll Out and Cut Cookies – (15 minutes)
Preheat your oven to 350°F (175°C). On a lightly floured surface, roll out the dough to about ¼-inch (6mm) thickness.
Use your graduation-themed cookie cutters to cut shapes and place them about 1 inch (2.5 cm) apart on parchment-lined baking sheets.
Gather scraps, reroll, and cut more cookies until all dough is used. - Bake the Cookies – (10-12 minutes)
Bake the cookies for 10-12 minutes, or until the edges just begin to turn golden. Avoid overbaking to keep them soft.
Let the cookies cool on the baking sheet for 5 minutes before transferring to a wire rack to cool completely. - Prepare the Royal Icing – (10 minutes)
In a clean bowl, combine the sifted powdered sugar, egg whites (or meringue powder mixture), and lemon juice. Beat on medium speed until the icing forms stiff peaks (about 5-7 minutes).
Divide the icing into separate bowls and tint each with your desired gel colors. Add water a few drops at a time to thin the icing to flood consistency for filling.
Keep the icing covered with a damp cloth or plastic wrap when not in use to prevent drying. - Decorate the Cookies – (30-40 minutes)
Use a piping bag with a small round tip to outline each cookie shape with royal icing; let it dry for 5 minutes.
Flood the inside with thinned icing using either a piping bag or a spoon.
Add details like stripes, numbers, stars, or mortarboards using contrasting icing colors.
Use a toothpick to smooth edges or pop air bubbles.
Allow the cookies to dry completely at room temperature for at least 4 hours, preferably overnight.
Pro tip: If your icing feels too thick while piping, add a tiny bit of water, but be careful not to make it runny. Also, working in small batches helps keep the icing fresh and manageable. I like to start with the lightest colors first and add darker details last to avoid color bleeding.
Cooking Tips & Techniques
Getting royal icing just right can be a bit tricky, but a few lessons I learned (sometimes the hard way) should help you avoid common pitfalls:
- Consistency Is Key: For outlining, the icing should be thicker (like toothpaste). For flooding, it should be thinner but still hold its shape without running off the edges.
- Don’t Skip Sifting: Powdered sugar clumps cause rough icing. Sift it well for a smooth finish.
- Work Quickly: Royal icing dries fast, so pipe outlines and flood sections promptly before the icing sets.
- Use a Damp Cloth: Cover your icing bowls to prevent crusting if you’re taking breaks.
- Practice Piping on Parchment: If you’re new to royal icing, try piping designs on parchment paper first to get the hang of pressure and flow.
One lesson I learned the hard way: don’t skip chilling the dough. I once rushed it and ended up with cookies that spread into unrecognizable blobs. Also, when adding gold or metallic details, a light brush-on after the icing dries works better than mixing color into the icing.
Multitasking tip: While cookies bake, prepare your icing so you can start decorating right away. This timing keeps everything smooth and less stressful.
Variations & Adaptations
Want to mix things up or tailor these graduation cookies for different tastes? Here are some ideas I’ve tried and loved:
- Flavor Variations: Add a teaspoon of almond extract or lemon zest to the dough for a subtle twist. I once made a batch with cinnamon and it added a cozy warmth that felt perfect for fall graduations.
- Dietary Adaptations: Use almond flour or a gluten-free blend for a gluten-free version. Swap butter for coconut oil and egg for flax egg to make them vegan-friendly.
- Decorating Styles: Instead of royal icing, try melted chocolate for a rustic look. Or use edible markers to draw designs on white-iced cookies for simplicity.
- Seasonal Themes: Incorporate school colors by switching your icing colors accordingly. For summer graduations, pair with brightly colored sprinkles or edible glitter for extra pop.
One personal favorite variation was making a “team spirit” batch with colors and logos inspired by my nephew’s school mascot. It was a hit and felt extra special. For a faster decorating method, you can also pipe just simple stripes or polka dots in classic navy and silver, which still look sharp but save time.
Serving & Storage Suggestions
These graduation cookies are best served at room temperature, allowing the royal icing to fully reveal its crisp finish. Arrange them on a platter with a few fresh flowers or graduation caps for a festive touch.
They pair nicely with cold milk, iced coffee, or even a sparkling lemonade for a refreshing contrast. If you’re hosting a party, consider placing them alongside other easy treats like crispy air fryer cinnamon sugar donuts for a sweet spread that everyone will love.
To store, keep the cookies in an airtight container at room temperature for up to 5 days. If you need to keep them longer, freeze them in layers separated by parchment paper for up to 3 months. Thaw at room temperature before serving to avoid condensation on the icing.
Reheating isn’t recommended since it can melt the royal icing, but letting the cookies sit out for a few minutes after refrigeration brings back some softness to the cookie base. Over time, the flavors meld nicely, making day-old cookies even more enjoyable.
Nutritional Information & Benefits
Each cookie (assuming 12 cookies per batch) contains approximately 150 calories, 7 grams of fat, 20 grams of carbohydrates, and 2 grams of protein. These are estimates and can vary based on cookie size and exact ingredients.
Key benefits come from using real butter for healthy fats and fresh eggs for protein. The recipe is free from artificial preservatives and dyes (if you choose natural food coloring alternatives). For those watching carbs, almond flour substitutions can reduce carbohydrate content and add fiber.
Keep in mind the royal icing contains egg whites, so this recipe is not suitable for those with egg allergies unless you use meringue powder alternatives. Moderation is best, but these cookies offer a heartfelt, homemade treat that feels honoring without being overly indulgent.
Conclusion
These perfect graduation cookies decorated with royal icing for boys have become a staple in my celebrations—not because they’re flawless, but because they carry meaning and sweetness in every bite. Whether you’re a newbie or a seasoned baker, this recipe offers a clear path to making festive, hand-decorated cookies that look impressive and taste fantastic.
Feel free to make them your own—swap colors, add your favorite flavors, or try new designs. They’re forgiving enough to encourage creativity and rewarding enough to keep you coming back. I love how these cookies turn a simple moment into a small celebration, and I hope they bring the same joy to your table.
If you give this recipe a try, I’d love to hear how your cookies turned out or any decorating twists you experimented with. Sharing stories and photos always makes this baking journey more fun!
Frequently Asked Questions
1. How long does royal icing take to dry completely?
Typically, royal icing needs about 4 to 8 hours to dry fully at room temperature. Overnight drying is best for firm, crack-free designs.
2. Can I make the cookie dough ahead of time?
Yes! The dough can be wrapped tightly and refrigerated for up to 48 hours or frozen for up to 3 months. Just thaw before rolling out.
3. What if my royal icing is too runny or too thick?
Add powdered sugar to thicken or a few drops of water to thin it. The right consistency flows smoothly but holds its shape.
4. Can I use royal icing without raw egg whites?
Absolutely. Meringue powder is a great substitute for egg whites and is safer for those concerned about raw eggs.
5. How do I store decorated graduation cookies?
Store them in an airtight container at room temperature for up to 5 days. Freezing is possible for longer storage, but thaw fully before serving.
Pin This Recipe!
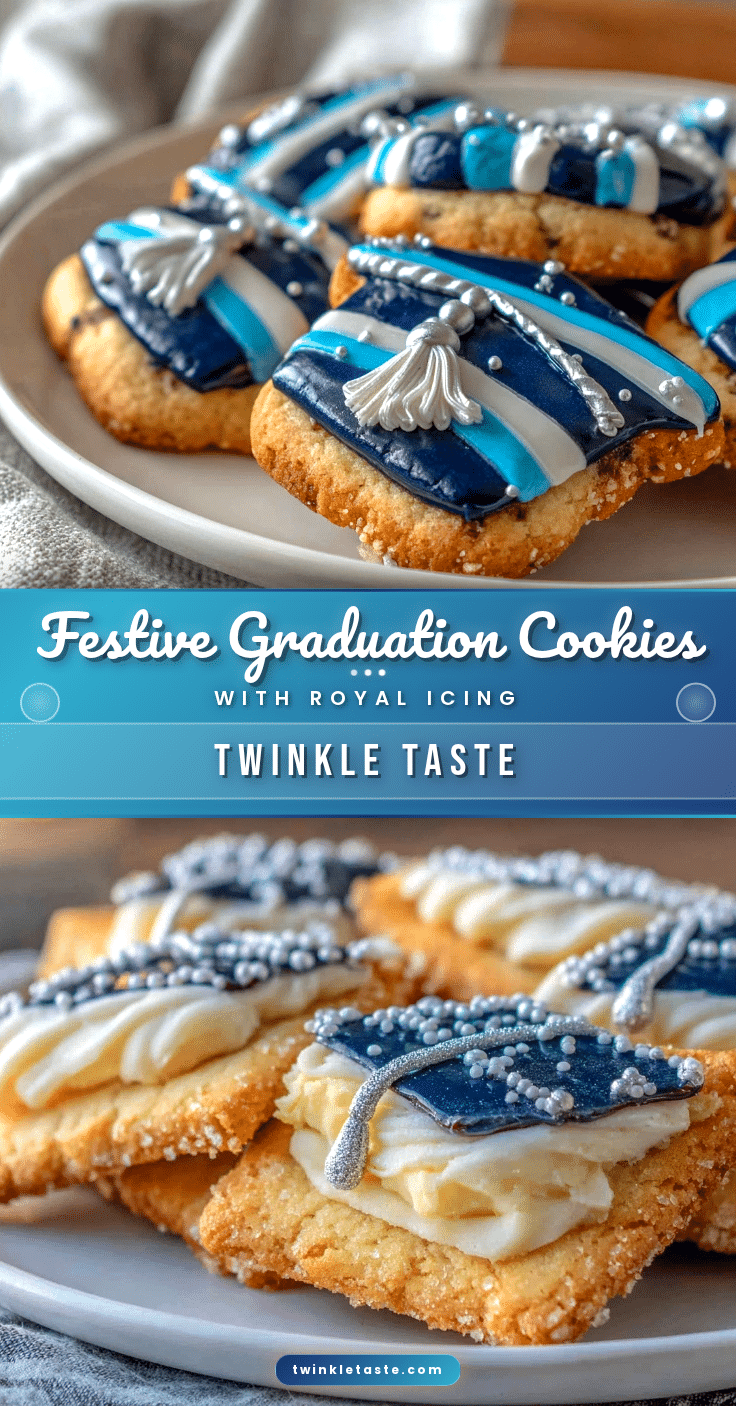
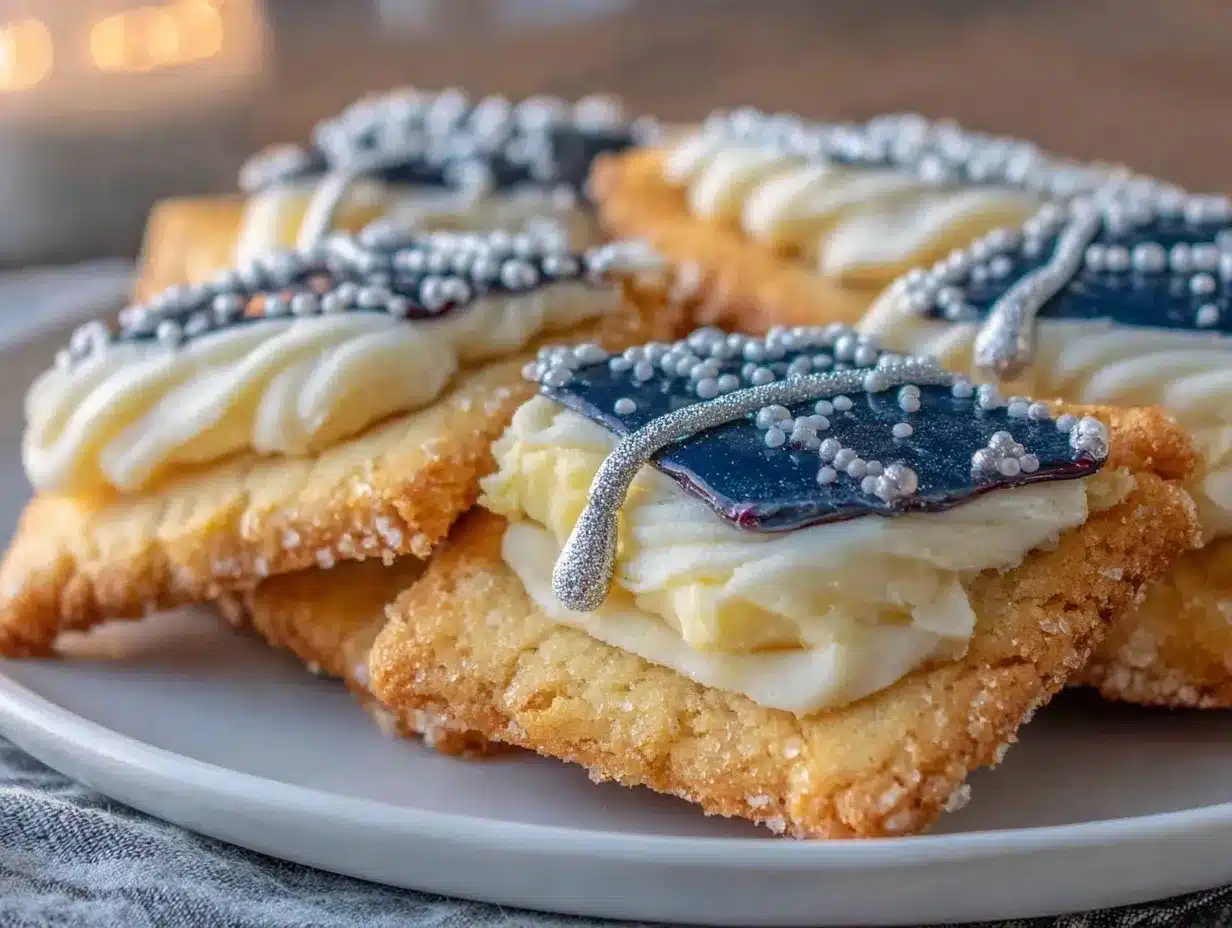
Perfect Graduation Cookies for Boys with 5 Easy Royal Icing Decorating Ideas

These graduation cookies decorated with royal icing are perfect for celebrating boys’ milestones with bold, masculine designs and a delicious buttery base. The recipe is simple, approachable, and yields beautifully decorated cookies that are both tasty and visually impressive.
- Prep Time: 30 minutes
- Cook Time: 12 minutes
- Total Time: 1 hour 42 minutes
- Yield: 12 cookies
- Category: Dessert
- Cuisine: American
Ingredients
- All-purpose flour – 2 ¾ cups (340g), sifted
- Unsalted butter – 1 cup (226g), softened
- Granulated sugar – 1 cup (200g)
- Large egg – 1, room temperature
- Pure vanilla extract – 1 teaspoon
- Baking powder – 1 teaspoon
- Salt – ¼ teaspoon
- Powdered sugar – 4 cups (480g), sifted
- Pasteurized egg whites – 3 tablespoons (or 2 tablespoons meringue powder + 4 tablespoons water)
- Fresh lemon juice – 1 tablespoon
- Food coloring gels – blue, black, gold, and white
- Vanilla extract – 1 teaspoon (optional)
Instructions
- Make the Cookie Dough – In a large bowl, cream together the softened butter and granulated sugar until light and fluffy (about 3-4 minutes with a mixer). Add the egg and vanilla extract, mixing until fully combined. In a separate bowl, whisk the all-purpose flour, baking powder, and salt. Gradually add the dry ingredients to the wet, mixing on low speed until just combined. The dough will be soft but not sticky. Wrap the dough in plastic wrap and chill in the refrigerator for at least 1 hour.
- Roll Out and Cut Cookies – Preheat your oven to 350°F (175°C). On a lightly floured surface, roll out the dough to about ¼-inch (6mm) thickness. Use your graduation-themed cookie cutters to cut shapes and place them about 1 inch (2.5 cm) apart on parchment-lined baking sheets. Gather scraps, reroll, and cut more cookies until all dough is used.
- Bake the Cookies – Bake the cookies for 10-12 minutes, or until the edges just begin to turn golden. Avoid overbaking to keep them soft. Let the cookies cool on the baking sheet for 5 minutes before transferring to a wire rack to cool completely.
- Prepare the Royal Icing – In a clean bowl, combine the sifted powdered sugar, egg whites (or meringue powder mixture), and lemon juice. Beat on medium speed until the icing forms stiff peaks (about 5-7 minutes). Divide the icing into separate bowls and tint each with your desired gel colors. Add water a few drops at a time to thin the icing to flood consistency for filling. Keep the icing covered with a damp cloth or plastic wrap when not in use to prevent drying.
- Decorate the Cookies – Use a piping bag with a small round tip to outline each cookie shape with royal icing; let it dry for 5 minutes. Flood the inside with thinned icing using either a piping bag or a spoon. Add details like stripes, numbers, stars, or mortarboards using contrasting icing colors. Use a toothpick to smooth edges or pop air bubbles. Allow the cookies to dry completely at room temperature for at least 4 hours, preferably overnight.
Notes
If you want to keep it gluten-free, swap the all-purpose flour for a 1-to-1 gluten-free baking flour blend. For a dairy-free twist, use a vegan butter substitute that’s solid at room temperature. Add a pinch of cream of tartar to royal icing in warm/humid conditions to help it set faster. Chill dough for at least 1 hour to prevent spreading. Work quickly with royal icing to avoid drying out. Start decorating with light colors first and add darker details last to prevent color bleeding. Store cookies in an airtight container at room temperature for up to 5 days or freeze for up to 3 months.
Nutrition
- Serving Size: 1 cookie
- Calories: 150
- Fat: 7
- Carbohydrates: 20
- Protein: 2
Keywords: graduation cookies, royal icing cookies, boys graduation treats, easy decorated cookies, buttery cookies, royal icing decorating, graduation party desserts