“Pass me the chips and cheese,” my friend called out, halfway through setting up the living room for game night. We’d planned for a casual evening, nothing fancy, but somehow the snack situation felt like a last-minute scramble. I wasn’t in the mood to spend hours chopping or cooking—honestly, the thought of turning the kitchen into a disaster zone was exhausting. That’s when the idea hit me: why not whip up an easy no-cook charcuterie stadium board that looks impressive without all the fuss?
What started as a “let’s throw some stuff on a board” moment quickly turned into a ritual. I found myself repeating this simple, crowd-pleasing snack spread multiple times a week during football season. The mix of savory meats, creamy cheeses, crunchy nuts, and fresh fruits became the perfect way to gather friends without the stress of cooking. It’s funny how a dish that requires zero heat can feel so satisfying and festive, isn’t it?
There’s something about the way the colors pop and the variety of textures on that board that just invites conversation—and let’s be real, a little grazing while cheering on our favorite team. The best part? No one suspects how little effort it takes to pull together. This guide isn’t about fuss or fancy tricks. It’s about bringing together ingredients you probably already have and arranging them in a way that turns simple snacks into a winning game day experience.
By the end of this, you might just find yourself reaching for this easy no-cook charcuterie stadium board idea every time you need quick, tasty, and visually stunning snacks. It’s comfort food, social food, and hassle-free food all rolled into one.
Why You’ll Love This Recipe
Having tested this easy no-cook charcuterie stadium board over countless game nights and casual get-togethers, I can honestly say it hits all the right notes. Here’s why this recipe stands out:
- Quick & Easy: You can assemble the entire board in under 20 minutes—perfect for last-minute cravings or unexpected guests.
- Simple Ingredients: No need to hunt down specialty items. Most components are pantry staples or easy-to-find at your local store.
- Perfect for Game Day: Whether it’s football, basketball, or just hanging out, this board feeds a crowd without keeping you away from the action.
- Crowd-Pleaser: Kids, adults, picky eaters—everyone loves the variety and easy grab-and-go style.
- Unbelievably Delicious: The combination of creamy cheeses, salty meats, fresh fruits, and crunchy crackers hits that satisfying flavor and texture trifecta.
What makes this board different? Honestly, it’s the thoughtful balance of flavors and textures—nothing overpowering, no complicated sauces. I like to include a mix of sharp and mild cheeses, a couple of cured meats with distinct personalities, and fresh elements like grapes or sliced apples for that juicy snap. Plus, nuts and olives add a briny crunch that rounds everything out.
This isn’t just a snack platter; it’s a way to bring people together with food that looks fancy but feels effortless. You’ll close your eyes after the first bite and know that you nailed it. If you’ve ever enjoyed a creamy chicken pot pie or a crispy tater tot casserole from this site, you’ll appreciate how this board offers a no-cook alternative that’s just as comforting and satisfying.
What Ingredients You Will Need
This easy no-cook charcuterie stadium board calls for straightforward, wholesome ingredients designed to deliver a range of flavors and textures without any cooking required. Most of these are pantry staples, making it perfect for spontaneous snack sessions or planned parties alike.
- Cured Meats: Slices of prosciutto, salami, and pepperoni (I prefer Boar’s Head for rich flavor and quality)
- Cheeses: A mix of soft and hard options works best:
- Brie or Camembert (creamy and mild)
- Sharp Cheddar (adds a bold kick)
- Manchego or Gouda (for a slightly nutty vibe)
- Fresh Fruits: Red grapes, sliced green apples, and figs (seasonal, but figs are a real treat when available)
- Crackers & Bread: Assorted crackers (multigrain, water crackers) and sliced baguette or breadsticks
- Nuts: Roasted almonds and candied pecans for crunch and sweetness
- Olives & Pickles: Kalamata olives and cornichons add a briny punch
- Spreads & Dips: Honey (for drizzling), grainy mustard, and a small bowl of hummus or fig jam
For substitutions, you can swap out cured meats for vegetarian deli slices or smoked tofu if preferred. Dairy-free cheeses and gluten-free crackers work great for dietary needs. When fresh figs aren’t in season, dried apricots make a nice alternative, adding a chewy sweetness that pairs well with cheese.
One tip: choose small-curd cottage cheese or ricotta as an optional creamy addition if you want to add a bit of softness without cooking. I’ve also used cream cheese spreads spiked with herbs on crackers for an extra touch of indulgence.
Equipment Needed
Since this is a no-cook recipe, the equipment list is refreshingly short and budget-friendly. Here’s what you’ll want on hand:
- Large Serving Board or Platter: A wooden cutting board, slate board, or even a large tray works well. I prefer wooden boards because they feel rustic and hold everything in place better.
- Sharp Knife: For slicing cheese, meats, and fruits neatly. A serrated knife is handy for crusty bread.
- Small Bowls or Ramekins: To hold olives, nuts, honey, and dips separately so they don’t mingle on the board.
- Tongs or Small Forks: For picking up olives or delicate items without mixing flavors.
Alternatives: If you don’t have a dedicated charcuterie board, a large baking sheet lined with parchment paper is a great option. For knives, a sturdy kitchen knife you already own will do just fine—no need for fancy gadgets here.
To keep boards in good shape, I recommend oiling wooden boards periodically with food-safe mineral oil. This keeps the surface smooth and less prone to cracking.
Preparation Method
- Prepare the Board (5 minutes): Lay out your serving board or platter on a sturdy surface. If you want, place parchment paper underneath for easier cleanup—especially if using soft cheeses or sticky spreads.
- Slice Cheeses and Meats (10 minutes): Cut cheeses into bite-sized cubes, wedges, or thin slices—whatever feels right. For soft cheeses like Brie, slice into small triangles. Arrange cured meats by folding or rolling slices to add dimension.
- Wash and Prepare Fruits (5 minutes): Rinse grapes and dry thoroughly to avoid moisture pooling. Slice apples into thin wedges and toss them briefly in a little lemon juice if you’re worried about browning.
- Arrange Components on Board (10 minutes): Start by placing small bowls for olives, nuts, and dips around the board. Then, artfully arrange cheese clusters and meat folds nearby. Fill in gaps with crackers, bread slices, and fresh fruit. Try to balance colors and textures—placing green grapes next to rich brown meats, for example.
- Add Finishing Touches (5 minutes): Drizzle honey over some cheese wedges, scatter candied pecans around, and place small spoons or spreaders in dips. This step makes the board look intentional and inviting.
Tip: Don’t overcrowd the board; leave space so guests can easily pick items without knocking things over. It’s tempting to pile on everything, but a little negative space helps the presentation shine.
When I’m in a rush, I sometimes skip the bowls and place olives and nuts directly on the board, but it can get messy. Using bowls keeps flavors distinct and cleanup easier.
Cooking Tips & Techniques
While this recipe is no-cook, there are a few tricks I’ve picked up to make your charcuterie stadium board truly stand out:
- Balance Flavors: Include a variety of salty, sweet, creamy, and crunchy elements. The contrast makes every bite interesting.
- Temperature Matters: Let cheeses sit out for 15-20 minutes before serving. Cold cheese dulls flavors and texture.
- Use Color Wisely: Bright fruits and green herbs or olives add pops of color that make the board visually appealing.
- Folding vs. Rolling Meats: Fold thin slices like prosciutto into loose piles for softness; roll firmer salami slices into tight cylinders to add height.
- Prevent Soggy Crackers: Don’t place crackers directly under moist items like grapes or cheese spreads.
- Multi-task: Assemble dips and slice fruits while waiting for friends to arrive or during halftime to save time.
I once learned the hard way that serving cold Brie right from the fridge is a no-go—no one wanted frozen cheese! Now I always remember to pull it out early. Also, if you’re combining this with a cooked dish like philly cheesesteak casserole, this board’s no-cook ease balances out the heavier, warm meal perfectly.
Variations & Adaptations
The beauty of this easy no-cook charcuterie stadium board is how flexible it is. Here are some ways to make it your own:
- Vegetarian: Swap cured meats for marinated artichoke hearts, roasted red peppers, grilled vegetables, and extra cheeses.
- Seasonal: In summer, add fresh berries or stone fruits like peaches. In fall, substitute figs with dried cranberries or apple slices with pear slices.
- Kid-Friendly: Include mild cheeses like mozzarella balls and add sweet elements like mini pretzels or honey-roasted nuts.
- Low-Carb: Skip crackers and bread, and increase nuts, olives, and meats. Add celery sticks or cucumber slices for crunch.
- International Twist: Try adding Spanish chorizo, Manchego cheese, and marcona almonds for a Mediterranean vibe.
One of my favorite twists was adding a small bowl of fig jam alongside the standard honey—it gave a deeper sweetness that paired beautifully with sharp cheddar. It’s a great way to impress guests without extra work.
Serving & Storage Suggestions
Serve your no-cook charcuterie stadium board at room temperature for best flavor. Arrange the board just before guests arrive to keep ingredients fresh and crisp.
This board pairs wonderfully with light, sparkling beverages or a crisp white wine to complement the salty and creamy flavors. For a non-alcoholic option, iced herbal teas or sparkling water with citrus slices work well.
To store leftovers, wrap cheeses tightly in wax paper or parchment and refrigerate. Meats should be kept in airtight containers. Fresh fruits and crackers are best eaten within a day, but nuts can last longer stored in sealed containers.
When reheating or refreshing the board next day (if you’re lucky to have leftovers!), bring cheeses out to room temperature again and replace any soggy crackers. Flavors tend to meld overnight, especially in spreads like hummus or fig jam, which can deepen the taste.
If you want to add a warm component without cooking, consider pairing this board with warm soft pretzels or freshly baked breadsticks from your local bakery.
Nutritional Information & Benefits
While this easy no-cook charcuterie stadium board leans indulgent, it includes plenty of nutritious elements. Here’s a rough estimate per serving (about 1/6th of the board):
| Calories | 350-400 kcal |
|---|---|
| Protein | 15-20 grams |
| Fat | 25 grams (mostly from healthy nuts and cheese) |
| Carbohydrates | 15-20 grams (from fruit and crackers) |
The cheeses provide calcium and protein, while the nuts offer heart-healthy fats and fiber. Fresh fruits contribute vitamins and a natural sweetness that balances the saltier components. For gluten-free or low-carb eaters, simply adjust crackers and bread accordingly.
Keep in mind the cured meats can be high in sodium, so balance servings with plenty of fresh veggies or salads—something like a fresh strawberry spinach salad works beautifully alongside.
Conclusion
If you’re looking for a snack spread that’s quick, fuss-free, and impresses every time, this easy no-cook charcuterie stadium board is your go-to. It’s the kind of recipe that doesn’t demand hours in the kitchen but still delivers big on flavor and presentation.
Feel free to swap ingredients based on what you have and what your guests enjoy. The flexibility is part of the fun—make it your own and watch as it becomes a regular hit at your gatherings. I love how it brings people together effortlessly, offering a simple way to celebrate flavors and good company.
Give it a try next game day or casual get-together, and don’t hesitate to share your favorite twists or questions below—I’d love to hear how your board turns out!
FAQs
What is a charcuterie stadium board?
It’s a large, typically rectangular or oval board arranged with a variety of no-cook snacks like cured meats, cheeses, fruits, nuts, and crackers, designed to feed a crowd during game days or parties.
Can I prepare this board ahead of time?
You can prep most ingredients a few hours ahead, but it’s best to assemble the board close to serving time to keep everything fresh and prevent sogginess.
What if I don’t eat meat or dairy?
Simply swap meats for marinated veggies or plant-based deli slices, and use dairy-free cheeses or hummus for creamy elements.
How many people does this board serve?
This guide is sized to serve about 6-8 people as snacks, perfect for small to medium gatherings.
What beverages pair well with this charcuterie board?
Light wines like Sauvignon Blanc, sparkling water with lemon, or iced herbal teas complement the flavors nicely without overpowering the palate.
PrintEasy No-Cook Charcuterie Stadium Board Guide for Perfect Game Day Snacks

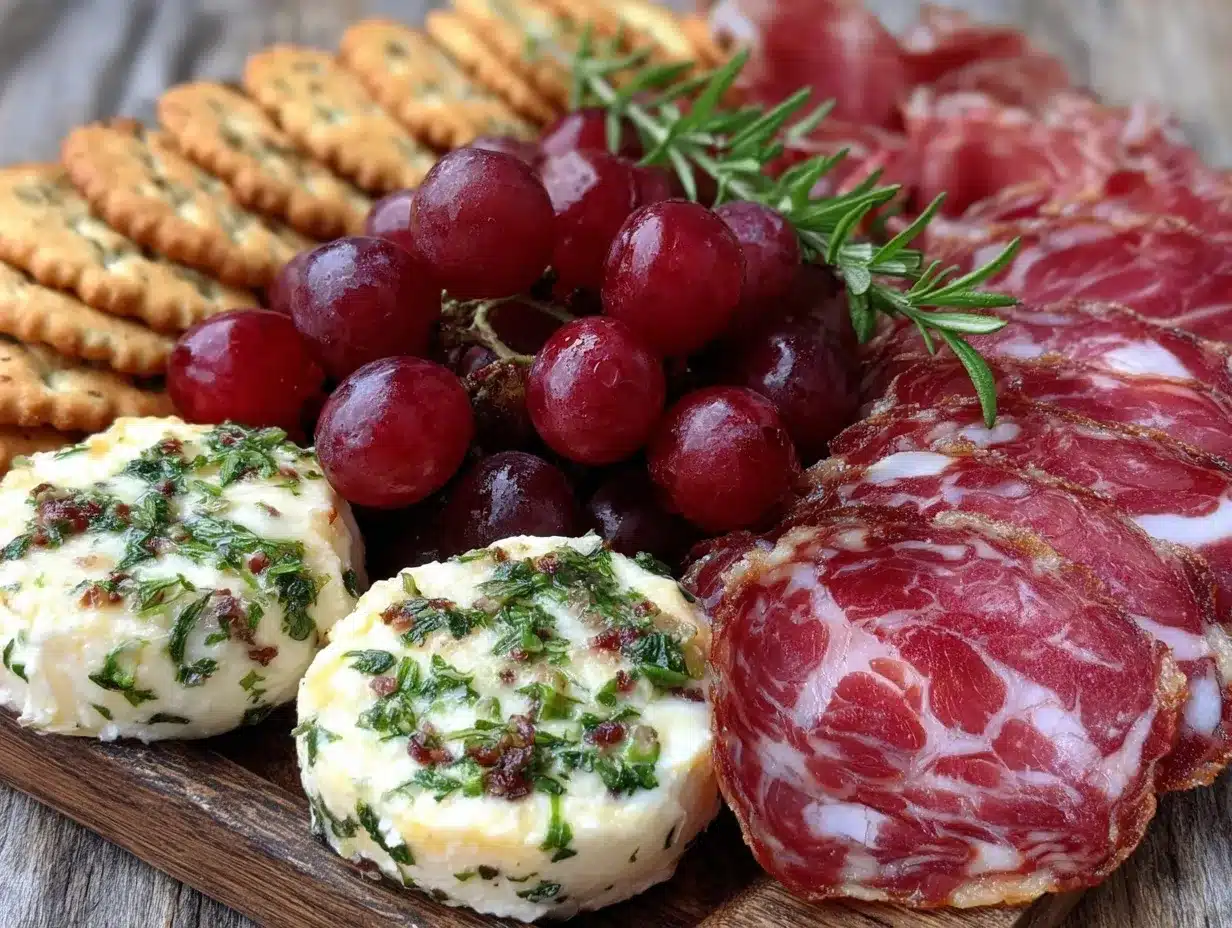
An easy no-cook charcuterie stadium board featuring a variety of cured meats, cheeses, fresh fruits, nuts, and crackers, perfect for quick and impressive game day snacks.
- Prep Time: 20 minutes
- Cook Time: 0 minutes
- Total Time: 20 minutes
- Yield: 6-8 servings
- Category: Snack
- Cuisine: American
Ingredients
- Slices of prosciutto, salami, and pepperoni
- Brie or Camembert cheese
- Sharp Cheddar cheese
- Manchego or Gouda cheese
- Red grapes
- Sliced green apples
- Figs (seasonal)
- Assorted crackers (multigrain, water crackers)
- Sliced baguette or breadsticks
- Roasted almonds
- Candied pecans
- Kalamata olives
- Cornichons
- Honey (for drizzling)
- Grainy mustard
- Hummus or fig jam
Instructions
- Prepare the board by laying out your serving board or platter on a sturdy surface. Optionally place parchment paper underneath for easier cleanup.
- Slice cheeses into bite-sized cubes, wedges, or thin slices. For soft cheeses like Brie, slice into small triangles. Fold or roll cured meats to add dimension.
- Wash and dry grapes thoroughly. Slice apples into thin wedges and toss briefly in lemon juice to prevent browning.
- Arrange small bowls for olives, nuts, and dips around the board. Artfully arrange cheese clusters and meat folds nearby. Fill gaps with crackers, bread slices, and fresh fruit, balancing colors and textures.
- Drizzle honey over some cheese wedges, scatter candied pecans around, and place small spoons or spreaders in dips to finish the board.
Notes
Let cheeses sit out for 15-20 minutes before serving to enhance flavor and texture. Use bowls to keep olives, nuts, and dips separate to avoid mixing flavors. Avoid placing crackers directly under moist items to prevent sogginess. For substitutions, use vegetarian deli slices or smoked tofu for meats, dairy-free cheeses, and gluten-free crackers as needed.
Nutrition
- Serving Size: About 1/6th of the b
- Calories: 350400
- Fat: 25
- Carbohydrates: 1520
- Protein: 1520
Keywords: charcuterie board, no-cook snacks, game day snacks, easy appetizer, party platter, cured meats, cheeses, fresh fruits, nuts, crackers