“You won’t believe how simple this is,” my neighbor said, sliding a tiny jar across the porch table. The smell of fresh strawberries and rich cream hit me before I even tasted it. I was skeptical at first—no-bake cheesecake? In a jar? Honestly, I thought it was just a cute gimmick. But after one spoonful of those Easy No-Bake Strawberry Cheesecake Jars, all doubts melted away like butter on warm toast.
It started as a last-minute plan when I had unexpected guests drop by on a chaotic Saturday afternoon. No oven, no fancy gadgets, just pantry staples and a handful of fresh strawberries from the farmer’s market. I whipped up these jars in under five minutes, and they became the surprise hit of the day. You know that feeling when something so simple just works? That’s exactly it—comfort food without the fuss.
What really stuck with me was how each jar felt like an individual treat, perfect for sharing or keeping all to yourself (no judgment here). It’s become my go-to when I want something sweet but don’t want to mess up the kitchen or spend hours waiting. The creamy texture, the crumbly crust, and the bright strawberry topping come together in a way that just feels right.
Since that day, I’ve found myself making these jars more times than I care to admit—sometimes for friends, sometimes just for a quiet moment after dinner. They remind me that dessert doesn’t have to be complicated to be memorable. And honestly? It’s nice to have a recipe that feels fancy but is ridiculously easy.
So here’s the thing: if you’re looking for a quick, no-fuss dessert that still brings that “wow” factor, these strawberry cheesecake jars might just become your new favorite. Let me walk you through why I love this recipe so much and why it’s worth keeping in your dessert arsenal.
Why You’ll Love This Recipe
After testing this recipe multiple times (okay, maybe a dozen), I can confidently say it’s a winner for so many reasons. Here’s what makes these Easy No-Bake Strawberry Cheesecake Jars stand out:
- Quick & Easy: Ready in just 5 minutes—perfect for last-minute cravings or when you need a sweet fix without the wait.
- Simple Ingredients: No fancy or hard-to-find items here. Most of these are pantry staples, plus fresh strawberries for that summery pop.
- Perfect for Any Occasion: Whether it’s a casual get-together, a picnic, or a quiet night in, these jars fit right in.
- Crowd-Pleaser: Kids, adults, picky eaters—everyone asks for seconds. I’ve brought these jars to potlucks and they disappear fast.
- Unbelievably Delicious: The creamy, silky cheesecake layer paired with a buttery graham cracker crust and tangy strawberry topping is pure comfort food magic.
This recipe isn’t just another no-bake cheesecake. The trick is in blending the cream cheese until it’s silky smooth, which gives it that dreamy texture, and layering it carefully in jars so every bite has the perfect balance of crust, filling, and fruit. Plus, making individual jars feels so much more special than a big cake.
Honestly, these jars are like a little celebration in every bite—effortless, delightful, and just right when you want dessert without the drama. It’s comfort food reinvented for busy lives.
What Ingredients You Will Need
This recipe uses simple, wholesome ingredients that come together to deliver bold flavor and satisfying texture without any fuss. Most are pantry staples, with fresh strawberries bringing that seasonal brightness.
- For the Crust:
- Graham cracker crumbs (about 1 ½ cups / 150g) – I prefer Honey Maid for the best crunch.
- Unsalted butter, melted (6 tbsp / 85g) – adds richness and helps the crust set nicely.
- Granulated sugar (2 tbsp / 25g) – balances the buttery flavor.
- For the Cheesecake Filling:
- Cream cheese, softened (8 oz / 225g) – use full-fat for creaminess; Philadelphia brand works great.
- Powdered sugar (½ cup / 60g) – sweetens without grit.
- Heavy cream (⅓ cup / 80ml) – whipped to soft peaks for that fluffy texture.
- Vanilla extract (1 tsp) – brings warmth and depth.
- Fresh lemon juice (1 tbsp) – adds a subtle tang that brightens the filling.
- For the Strawberry Topping:
- Fresh strawberries, chopped (1 cup / 150g) – ripe and juicy, the star of the show.
- Granulated sugar (1 tbsp / 12g) – to macerate the strawberries and bring out their natural sweetness.
- Optional: a splash of balsamic vinegar (½ tsp) – for a subtle flavor twist.
You can swap the graham cracker crust for crushed digestive biscuits if you prefer, and if you’re avoiding dairy, try using dairy-free cream cheese and coconut cream (though the texture will be a bit different). For the strawberry topping, frozen berries can work in a pinch—just thaw and drain excess liquid.
Equipment Needed
- Mixing bowls (medium and large) – any basic set will do, but glass or stainless steel bowls keep things cool.
- Electric hand mixer or stand mixer – essential for whipping the cream cheese and heavy cream to the right texture. If you don’t have one, a sturdy whisk and some elbow grease can work, but it takes longer.
- Spoons and spatulas – flexible silicone spatulas help scrape down the sides cleanly.
- Measuring cups and spoons – for accuracy, especially with sugar and lemon juice.
- Small jars or dessert glasses – anything from 4 to 8 oz (120 to 240 ml) works well. Mason jars are perfect if you have them.
- Knife and cutting board – for chopping strawberries.
I once tried making these jars with a fork, thinking it would be fine, but trust me, the mixer really makes a difference for that creamy smooth filling. Also, if you don’t have fancy jars, small wine glasses or even teacups bring a charming touch.
Preparation Method
- Prepare the Crust: In a medium bowl, combine 1 ½ cups (150g) graham cracker crumbs, 6 tablespoons (85g) melted unsalted butter, and 2 tablespoons (25g) granulated sugar. Stir until the mixture looks like wet sand and holds together when pressed. This should take about 3 minutes.
- Layer the Crust: Spoon about 2 tablespoons (30g) of the crust mixture into each jar. Press down firmly using the back of a spoon or your fingers to create an even, compact base. This step is key for that satisfying crunch. Set the jars aside while you make the filling.
- Make the Cheesecake Filling: In a large mixing bowl, beat 8 oz (225g) of softened cream cheese with ½ cup (60g) powdered sugar and 1 teaspoon vanilla extract until completely smooth (about 2-3 minutes). Scrape down the sides as needed to avoid lumps.
- Whip the Cream: In a separate bowl, whip ⅓ cup (80ml) heavy cream until soft peaks form. Be careful not to overwhip—it should hold shape but still be silky.
- Combine: Gently fold the whipped cream into the cream cheese mixture along with 1 tablespoon lemon juice. Use a spatula to lift and fold, preserving the airy texture. This should take 1-2 minutes.
- Assemble the Jars: Spoon or pipe the cheesecake filling over the crust layer in each jar, filling about three-quarters full. Smooth the tops with a small spatula or the back of a spoon for a polished look.
- Prepare the Strawberry Topping: In a small bowl, toss 1 cup (150g) chopped fresh strawberries with 1 tablespoon (12g) sugar and optional ½ teaspoon balsamic vinegar. Let it sit for 5-10 minutes until juicy and syrupy.
- Add the Topping: Spoon the macerated strawberries on top of each cheesecake jar, distributing evenly.
- Chill: Refrigerate the jars for at least 1 hour before serving so the crust firms up and flavors meld. If you’re in a hurry, 30 minutes works, but it won’t be quite as set.
Pro tip: When pressing the crust, don’t be shy—compact it well so it doesn’t crumble out when you dig in. And make sure your cream cheese is really softened; cold lumps make the filling grainy. I once rushed this step, and the texture was all wrong—lesson learned!
Cooking Tips & Techniques
Making no-bake cheesecakes can be deceptively simple, but a few tricks make all the difference with these jars. First, always let your cream cheese come to room temperature. It blends so much easier, and the filling ends up silky, not lumpy.
When whipping the heavy cream, watch it closely. It’s easy to go from soft peaks to overwhipped and grainy. Soft peaks mean the cream holds shape but still moves gently when you tilt the bowl. This ensures your filling stays light and fluffy.
Pressing the crust firmly into the jars prevents it from falling apart when you scoop out your dessert. I like to use the bottom of a small glass or a measuring cup to press evenly.
Another thing I’ve learned? Let the strawberry topping macerate for at least 10 minutes. That little sugar bath unlocks the natural juices and sweetens the berries without cooking them down to mush.
Timing-wise, assembling the jars is quick, so multitasking works well here—start the topping while your crust sets, or whip the cream while the crust mixture chills. Efficiency goes a long way when you want dessert fast.
Finally, if you want to make the crust gluten-free, crushed gluten-free cookies or almonds work well. Just watch the texture and press firmly to get that satisfying bite.
Variations & Adaptations
This recipe is so flexible, it’s fun to make it your own. Here are a few ideas I’ve tried or thought about:
- Berry Mix: Swap the strawberries for a combination of blueberries, raspberries, or blackberries. It’s colorful and adds a variety of flavors.
- Chocolate Twist: Mix 2 tablespoons (15g) cocoa powder into the crust or sprinkle mini chocolate chips over the filling before adding the strawberries for a hint of chocolate.
- Dairy-Free Option: Use dairy-free cream cheese and coconut cream whipped to soft peaks. The texture is a bit different but still delicious and perfect for those avoiding dairy.
- Alternative Sweeteners: Substitute powdered sugar with maple syrup or honey in the filling for a natural sweetness.
- Herb Infusion: Add a teaspoon of fresh chopped mint or basil to the strawberry topping for a fresh, unexpected flavor.
One personal favorite is stirring a spoonful of lemon cheesecake filling into the base for an extra zing. It brightens the whole jar and pairs beautifully with the strawberries.
Serving & Storage Suggestions
Serve these cheesecake jars chilled, straight from the fridge. The cool temperature really brings out the creamy texture and keeps the crust crisp. Presentation-wise, adding a fresh strawberry or a mint leaf on top makes them look extra inviting.
They pair nicely with a cup of fresh coffee or a light, fruity iced tea. For a brunch spread, serve alongside soft buttery breadsticks like these homemade garlic breadsticks—the contrast is delightful.
Store any leftovers covered tightly in the refrigerator for up to 3 days. The crust will soften a bit over time but remains tasty. If you want to keep them longer, freeze the jars without the strawberry topping for up to 1 month. Thaw overnight and add fresh fruit before serving.
Reheating isn’t recommended since this is a no-bake dessert, but letting them sit out for 10 minutes before eating can soften the texture slightly, making it easier to spoon.
Nutritional Information & Benefits
Each jar contains approximately:
| Calories | 320 kcal |
|---|---|
| Fat | 22g |
| Carbohydrates | 25g |
| Protein | 5g |
The cream cheese and heavy cream provide a good dose of calcium and protein, while fresh strawberries add vitamin C and antioxidants. This dessert is gluten-containing due to the graham cracker crust (unless swapped), and contains dairy.
From a wellness perspective, it’s a treat that balances indulgence with fresh fruit, making it a feel-good dessert option you can feel comfortable serving. If you want a lighter version, try reducing sugar or swapping in Greek yogurt for part of the cream cheese.
Conclusion
These Easy No-Bake Strawberry Cheesecake Jars have become a staple in my kitchen for good reason. They’re simple, fast, and deliver that creamy, fruity satisfaction every time without the hassle of baking. Whether you’re feeding a crowd or just treating yourself, these jars offer a fuss-free way to enjoy classic cheesecake flavors in a fresh, modern format.
I love how customizable they are, and honestly, it’s so nice to have a dessert that feels homemade but doesn’t require you to stand over a hot oven or wait forever. If you experiment with the variations or add your own twist, I’d love to hear how it turns out!
Next time you’re in the mood for something sweet, give this recipe a shot and see how quickly it becomes a new favorite. And if you’re interested in other quick comfort meal ideas, you might enjoy the easy cheesy single serve lasagna or the quick mug pizza microwave recipe. Trust me, they fit right into busy days with big flavor!
Frequently Asked Questions
Can I make these cheesecake jars ahead of time?
Yes! They keep well in the fridge for up to 3 days. Just add the strawberry topping fresh before serving to keep it bright and fresh.
What if I don’t have graham crackers for the crust?
You can use digestive biscuits, vanilla wafers, or even crushed pretzels for a salty-sweet twist. Just make sure to press the crust firmly to avoid crumbling.
Is it possible to make this recipe dairy-free?
Absolutely. Substitute cream cheese with a dairy-free alternative and whip coconut cream instead of heavy cream. The texture will be a bit different but still delicious.
Can I use frozen strawberries for the topping?
Yes, but thaw them completely and drain any excess liquid before using to avoid soggy layers.
How do I prevent the crust from becoming soggy?
Press the crust firmly into the jars and chill the jars for at least an hour before adding the topping. This helps set the crust and keeps it crunchy longer.
Pin This Recipe!
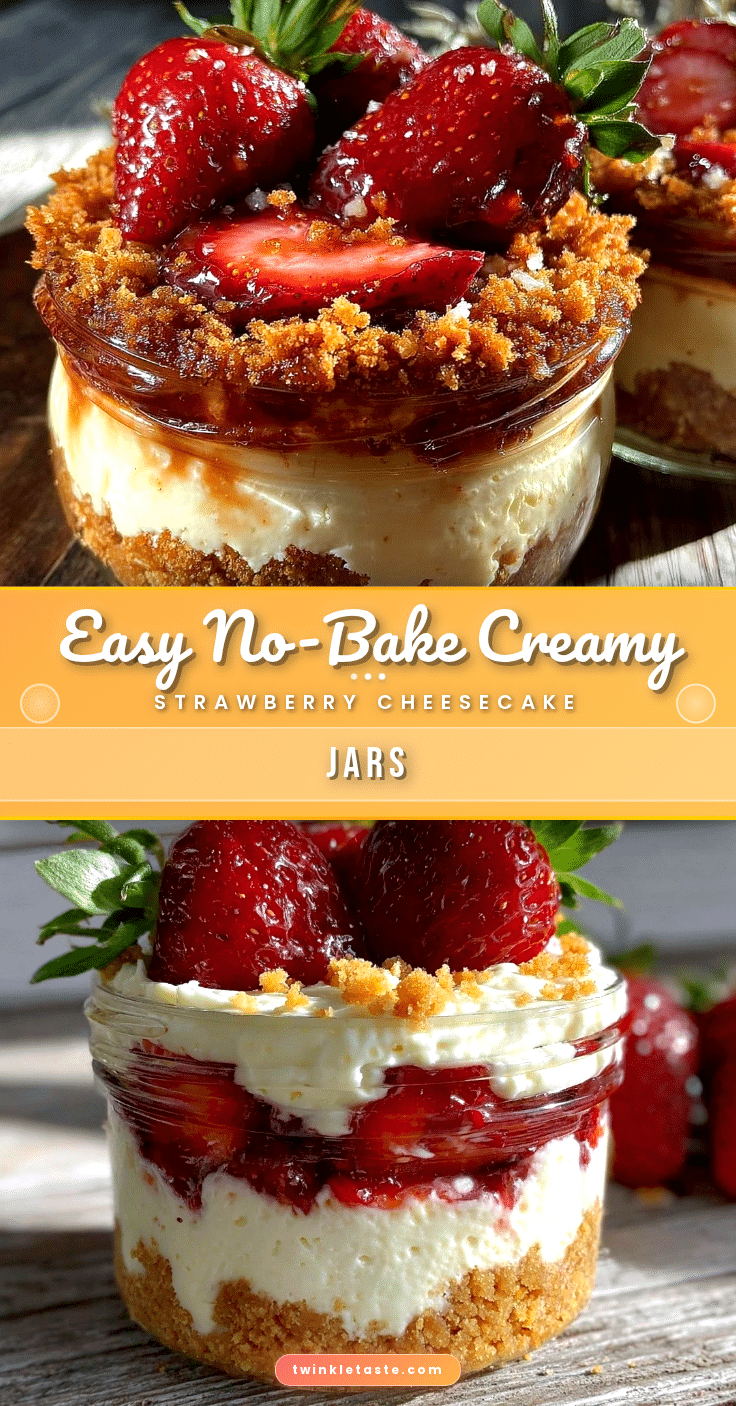
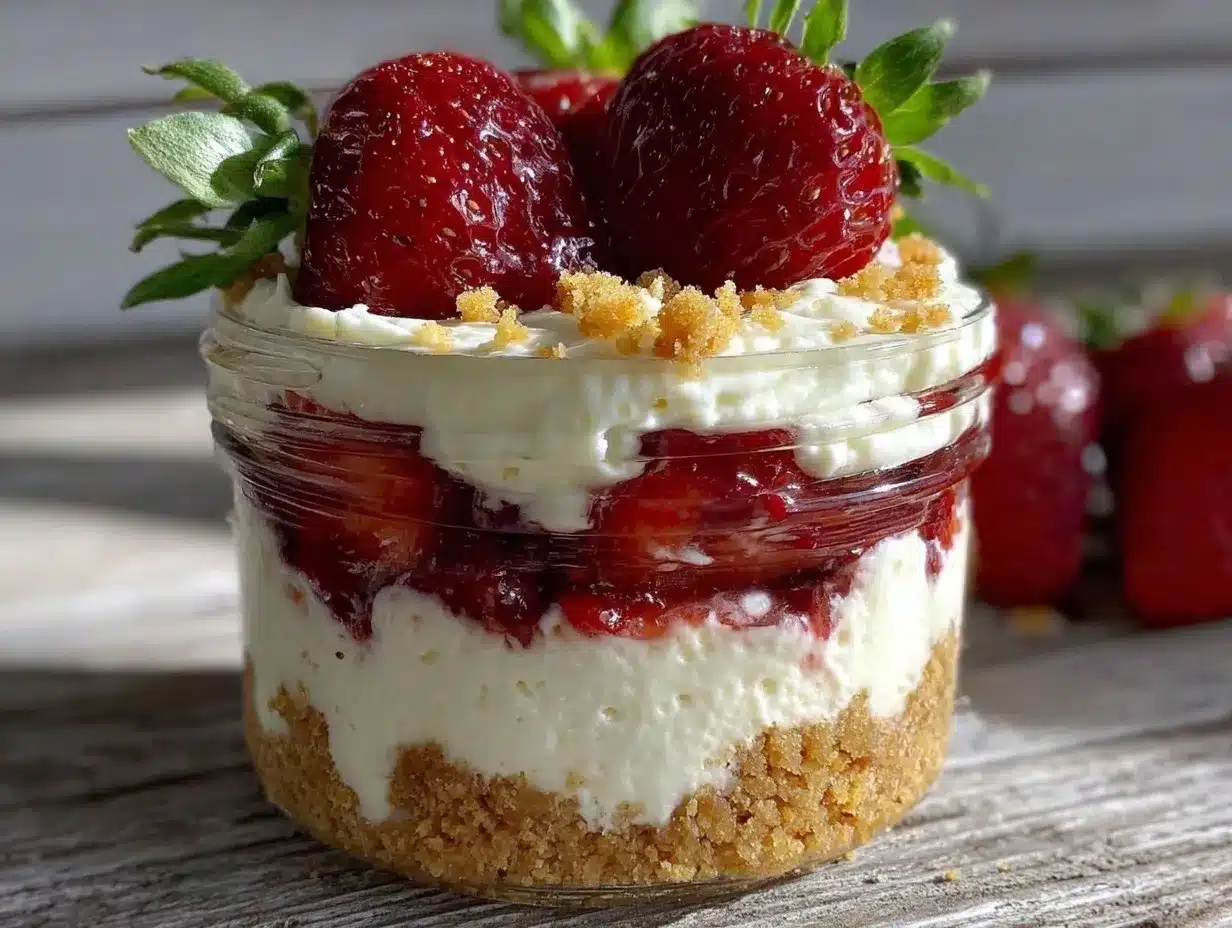
Easy No-Bake Strawberry Cheesecake Jars
A quick and simple no-bake dessert featuring creamy cheesecake filling, a buttery graham cracker crust, and fresh strawberry topping, all served in individual jars.
- Prep Time: 10 minutes
- Cook Time: 0 minutes
- Total Time: 1 hour 10 minutes
- Yield: 6 servings 1x
- Category: Dessert
- Cuisine: American
Ingredients
- 1 ½ cups (150g) graham cracker crumbs
- 6 tablespoons (85g) unsalted butter, melted
- 2 tablespoons (25g) granulated sugar
- 8 oz (225g) cream cheese, softened
- ½ cup (60g) powdered sugar
- ⅓ cup (80ml) heavy cream
- 1 teaspoon vanilla extract
- 1 tablespoon fresh lemon juice
- 1 cup (150g) fresh strawberries, chopped
- 1 tablespoon (12g) granulated sugar
- Optional: ½ teaspoon balsamic vinegar
Instructions
- In a medium bowl, combine graham cracker crumbs, melted unsalted butter, and granulated sugar. Stir until the mixture looks like wet sand and holds together when pressed, about 3 minutes.
- Spoon about 2 tablespoons (30g) of the crust mixture into each jar. Press down firmly to create an even, compact base. Set jars aside.
- In a large mixing bowl, beat softened cream cheese with powdered sugar and vanilla extract until completely smooth, about 2-3 minutes. Scrape down sides as needed.
- In a separate bowl, whip heavy cream until soft peaks form, being careful not to overwhip.
- Gently fold whipped cream into the cream cheese mixture along with lemon juice, preserving the airy texture, about 1-2 minutes.
- Spoon or pipe the cheesecake filling over the crust layer in each jar, filling about three-quarters full. Smooth the tops.
- In a small bowl, toss chopped strawberries with granulated sugar and optional balsamic vinegar. Let sit for 5-10 minutes until juicy and syrupy.
- Spoon the macerated strawberries on top of each cheesecake jar evenly.
- Refrigerate the jars for at least 1 hour before serving to allow the crust to firm up and flavors to meld. A minimum of 30 minutes can be used if in a hurry.
Notes
Press the crust firmly into the jars to prevent crumbling. Use room temperature cream cheese for a smooth filling. Whip heavy cream to soft peaks to maintain light texture. Macerate strawberries for at least 10 minutes to enhance sweetness and juiciness. Refrigerate at least 1 hour for best texture. Variations include using different berries, adding cocoa powder to crust, or dairy-free substitutions.
Nutrition
- Serving Size: 1 jar (approximately
- Calories: 320
- Fat: 22
- Carbohydrates: 25
- Protein: 5
Keywords: no-bake cheesecake, strawberry cheesecake, easy dessert, quick dessert, cheesecake jars, no-bake dessert, summer dessert