Let me tell you, the sight of a beautifully arranged charcuterie board is enough to make anyone’s mouth water before the first bite even touches their lips. The colors, the textures, the way the savory meats mingle with sweet fruits and crunchy nuts—it’s pure visual and flavor magic. The first time I put together one of these easy charcuterie board ideas, I was honestly hooked. It was one of those moments where you pause, take a deep breath, and just smile because you know you’re onto something truly special.
I remember making my very first charcuterie board years ago, when I was knee-high to a grasshopper, well, maybe not that long ago but it feels like it! I was trying to recreate a fancy spread I’d seen at a friend’s party on a rainy weekend, hoping to brighten up my own gathering. My family couldn’t stop sneaking slices off the board while I was still arranging it (and I can’t really blame them). It quickly became a staple for our family get-togethers and gifting, bringing pure, nostalgic comfort with every bite.
You know what makes these easy charcuterie board ideas perfect? They’re dangerously easy to pull off and perfect for potlucks, last-minute celebrations, or even just as a sweet treat to brighten up your Pinterest cookie board. You’re going to want to bookmark this one because once you try it, you’ll find yourself making it again and again.
Why You’ll Love This Recipe
Honestly, these easy charcuterie board ideas are a game-changer for anyone who loves entertaining or just wants to impress without the stress. Here’s why you’re going to adore them:
- Quick & Easy: Comes together in under 30 minutes, perfect for those last-minute parties or spontaneous snack cravings.
- Simple Ingredients: No need for fancy or hard-to-find items; most are pantry staples or easy to grab at any grocery store.
- Perfect for Any Occasion: Whether it’s brunch, game night, holiday parties, or casual hangouts, this board fits right in.
- Crowd-Pleaser: Always gets rave reviews from kids, adults, and even picky eaters who love the mix of sweet, salty, and savory flavors.
- Unbelievably Delicious: The balance of creamy cheeses, flavorful meats, fresh fruits, and crunchy nuts makes it comfort food with a classy twist.
This isn’t just another charcuterie board—it’s the best version I’ve found after countless tests and tweaks. From choosing the right cheeses to the art of arranging, these ideas bring out the best in every ingredient. You’ll find yourself closing your eyes after the first bite, savoring every flavor and texture. It’s comfort food reimagined—simple, satisfying, and seriously impressive.
What Ingredients You Will Need
This recipe uses simple, wholesome ingredients to deliver bold flavors and a satisfying mix of textures without any fuss. Most of these are pantry staples or easy to find at your local market, making your charcuterie board both stunning and stress-free.
- Cheeses:
- Brie (creamy and mild, perfect for spreading)
- Sharp Cheddar (adds punch and color)
- Goat Cheese (soft, tangy, great for crumbling)
- Manchego or Gouda (firm and nutty, adds texture)
- Cured Meats:
- Prosciutto (thinly sliced, delicate flavor)
- Soppressata or Salami (adds spice and bite)
- Chorizo (smoky and bold)
- Fresh Fruits:
- Grapes (seedless, easy to pick)
- Figs or fresh berries (seasonal, adds sweetness)
- Apple or Pear slices (tart and crisp, lightly brushed with lemon to prevent browning)
- Dried Fruits & Nuts:
- Dried apricots or cherries (for chewy sweetness)
- Almonds, walnuts, or pistachios (adds crunch and richness)
- Crackers & Bread:
- Assorted crackers (plain water crackers or seeded varieties)
- Baguette slices or crostini (toasted, adds crunch)
- Extras:
- Olives (green and black, briny and bold)
- Honey or fig jam (for drizzling or dipping)
- Fresh herbs like rosemary or thyme (for garnish and aroma)
I usually recommend brands like Président for brie, and Boar’s Head for meats—just personal favorites that bring consistent quality. If you want to switch things up, swap goat cheese for a dairy-free cream cheese to keep it vegan-friendly. In summer, fresh berries shine, but when it’s colder, dried fruits really bring warmth and depth. The key is variety and balance, so your board feels inviting and full of surprises.
Equipment Needed
Putting together these easy charcuterie board ideas doesn’t require fancy gadgets, but a few tools make the process smoother and more enjoyable.
- Serving Board or Platter: A large wooden cutting board, slate, or marble slab works beautifully. I like wooden boards for their rustic charm and easy cleanup.
- Cheese Knives: A set with different blades for soft, hard, and crumbly cheeses helps keep things neat. You can use small butter knives if you don’t have special ones.
- Small Bowls or Ramekins: Perfect for olives, nuts, and dips to prevent rolling away.
- Tongs or Toothpicks: For easy grabbing without the mess. Trust me, guests appreciate the thought.
- Sharp Knife: For slicing fruits and bread. A serrated knife works wonders here.
Honestly, I’ve crafted plenty of boards with just a kitchen knife and a sturdy platter, so don’t stress if you’re on a budget. Just keep your tools clean and sharp for the best presentation and ease of serving.
Preparation Method
- Prep Your Ingredients (10-15 minutes): Start by slicing your cheeses into varied shapes—wedges, cubes, or rounds. Slice cured meats into thin ribbons and fold or roll them for a pretty look. Wash and dry fresh fruits thoroughly. Slice apples or pears thinly and brush with lemon juice to prevent browning.
- Arrange Small Bowls (5 minutes): Place olives, nuts, and jams in small bowls or ramekins. This keeps the board tidy and ingredients contained.
- Lay Down the Cheese (5 minutes): Spread the cheeses around the board first, spacing them out. This acts as your foundation and helps balance the layout.
- Add Meats (5 minutes): Tuck folded or rolled cured meats near the cheeses. Vary placement to create visual interest.
- Fill in with Fruits (5 minutes): Scatter clusters of grapes, fig halves, and sliced apples between cheeses and meats. Try to alternate colors and textures.
- Scatter Nuts and Dried Fruits (3 minutes): Fill any gaps with nuts and dried fruits, adding crunch and chewiness.
- Add Crackers and Bread (3 minutes): Arrange crackers and toasted bread slices along one side or in a separate basket for easy access.
- Garnish and Final Touches (2 minutes): Sprinkle fresh herbs like rosemary sprigs for aroma and visual appeal. Drizzle honey or spread fig jam near cheeses for dipping.
Keep in mind: don’t overcrowd the board—leave some breathing room so guests can easily pick their favorites. The colors and textures should pop and invite tasting. I always test my boards by stepping back and looking for balance and variety before serving.
Cooking Tips & Techniques
Putting together stunning charcuterie boards might seem straightforward, but a few tricks make all the difference.
- Room Temperature Cheese: Let your cheeses sit out for 20-30 minutes before serving. It brings out their full flavor and creamy texture.
- Balance Flavors and Textures: Pair salty meats with sweet fruits, creamy cheeses with crunchy nuts. This contrast keeps every bite interesting.
- Use Odd Numbers: Odd numbers of items (3, 5, 7) make arrangements look more natural and visually pleasing.
- Fold, Don’t Just Lay: Rolling or folding meats adds height and depth to the board, making it more inviting.
- Keep It Fresh: Assemble your board no more than an hour before serving to keep fruits crisp and meats fresh.
- Watch the Space: Avoid overcrowding to prevent messiness and make it easier for guests to serve themselves.
I learned the hard way that overcrowded boards lead to a chaotic mess and unhappy guests. Also, skipping the lemon juice on apple slices leads to sad, brown fruit—trust me, it matters! Multitasking by prepping meats and cheeses while fruits soak or chill saves time and stress.
Variations & Adaptations
One of the best things about easy charcuterie board ideas is how customizable they are. Here are a few ways to make it your own:
- Dietary Adjustments: For gluten-free guests, swap regular crackers for gluten-free options or serve extra bread-free snacks like marinated olives and nuts.
- Seasonal Flavors: In fall, add roasted pumpkin seeds and sliced persimmons; in summer, swap dried fruits for fresh berries and melon slices.
- Flavor Twists: Add a spicy kick with pepper jack cheese or smoked chorizo. For a Mediterranean vibe, include hummus and pita chips.
- Personal Favorite: I once made a dessert charcuterie board with dark chocolate chunks, honey-roasted nuts, fresh strawberries, and mascarpone cheese—served as a sweet surprise that wowed everyone.
Don’t be afraid to experiment with what’s in your fridge or pantry. The key is to keep a balance of flavors and textures while making it fun and personal.
Serving & Storage Suggestions
Serve your charcuterie board at room temperature, so the flavors shine and textures stay inviting. Present it on a large, flat surface where guests can gather around and graze at leisure.
Pair your board with crisp white wines, sparkling water with citrus, or even craft beers for a fun contrast. Fresh baguette slices and simple salads complement the richness beautifully.
If you have leftovers (rare, but it happens), wrap tightly in plastic wrap or store in airtight containers in the fridge. Most cheeses and meats keep well for up to 3 days. Fruits are best eaten fresh but can be refrigerated for 1-2 days.
To reheat bread or crostini, toast quickly in a 350°F (175°C) oven for 5 minutes to regain crunch. Avoid reheating meats or cheeses as they lose texture and flavor.
Flavors often develop beautifully after resting a bit, especially when honey or jam melds with cheeses—so if you can, make your board ahead and let it sit covered for about 30 minutes before serving.
Nutritional Information & Benefits
This charcuterie board is a balanced mix of protein, healthy fats, and fresh produce, making it a satisfying snack or appetizer. Depending on portion sizes, a serving typically contains around 300-400 calories, with good amounts of calcium from cheese and antioxidants from fruits.
The nuts provide heart-healthy fats and fiber, while cured meats offer protein but should be enjoyed in moderation due to sodium content. Fresh fruits add vitamins and natural sweetness without added sugars.
For gluten-free or dairy-free diets, the board can be easily adapted by swapping crackers and cheeses. It’s a versatile option that fits many lifestyles without compromising on taste or presentation.
I find this kind of snack board perfect for mindful eating—small bites, varied flavors, and wholesome ingredients that satisfy without feeling heavy.
Conclusion
These easy charcuterie board ideas are worth every minute you spend assembling them. They bring together simple ingredients that look stunning and taste incredible, making your party displays truly unforgettable. Whether you’re hosting a casual gathering or a special celebration, this recipe is your go-to for impressing guests without stress.
Feel free to customize it, swap ingredients, and make it your own—after all, that’s part of the fun! Personally, I love how this board brings people together, sparking conversation and smiles over shared bites.
If you try it, don’t be shy—drop a comment below with your favorite combos or questions. And hey, share this with your friends who love to entertain. Remember, good food is best when it’s shared!
Here’s to many delicious gatherings ahead, filled with laughter, flavor, and beautiful boards!
FAQs About Easy Charcuterie Board Ideas
What is the best cheese to use for a beginner charcuterie board?
Start with mild and easy-to-love cheeses like brie, cheddar, and goat cheese. They’re versatile, easy to find, and pair well with most meats and fruits.
How far ahead can I prepare a charcuterie board?
It’s best to assemble the board no more than an hour before serving to keep fruits fresh and cheeses at room temperature. You can prep ingredients earlier and assemble just before guests arrive.
Can I make a charcuterie board for a large crowd?
Absolutely! Just scale up your ingredients and use multiple boards or large platters. Variety and presentation are key, so keep balancing flavors and textures.
What are good gluten-free options on a charcuterie board?
Use gluten-free crackers, extra nuts, olives, and fresh or dried fruits. You can also serve vegetable sticks like cucumber or bell pepper for crunch.
How do I store leftovers from the charcuterie board?
Wrap cheeses and meats tightly in plastic wrap or airtight containers and refrigerate for up to 3 days. Fresh fruits are best eaten within 1-2 days for optimal taste and texture.
Pin This Recipe!

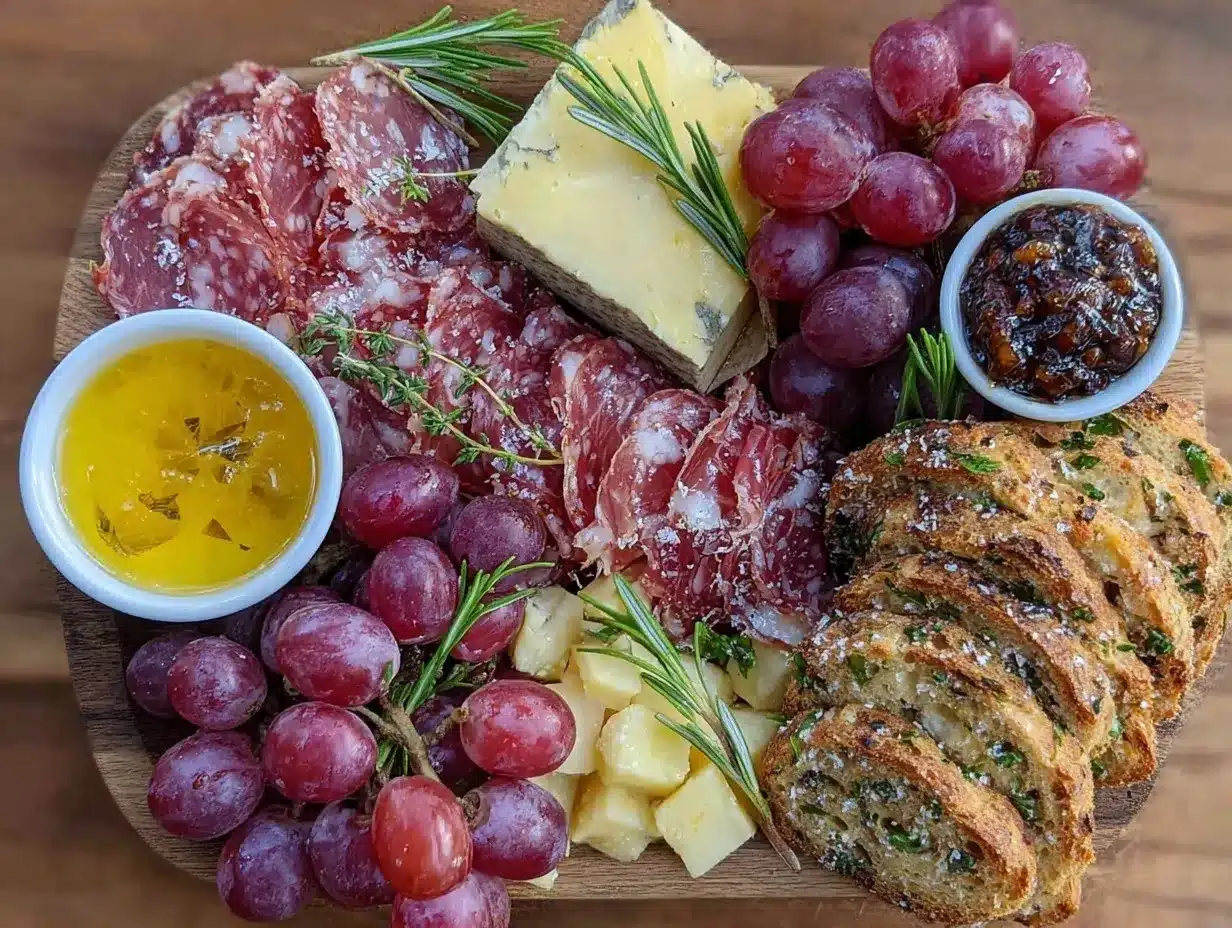
Easy Charcuterie Board Ideas for Stunning Party Displays to Impress Guests

A simple and quick guide to assembling beautiful and delicious charcuterie boards perfect for any occasion, featuring a balanced mix of cheeses, cured meats, fruits, nuts, and crackers.
- Prep Time: 15 minutes
- Cook Time: 0 minutes
- Total Time: 15 minutes
- Yield: 6-8 servings
- Category: Appetizer
- Cuisine: American
Ingredients
- Brie cheese (creamy and mild, perfect for spreading)
- Sharp Cheddar cheese (adds punch and color)
- Goat Cheese (soft, tangy, great for crumbling)
- Manchego or Gouda cheese (firm and nutty, adds texture)
- Prosciutto (thinly sliced, delicate flavor)
- Soppressata or Salami (adds spice and bite)
- Chorizo (smoky and bold)
- Seedless grapes
- Figs or fresh berries (seasonal, adds sweetness)
- Apple or Pear slices (tart and crisp, lightly brushed with lemon to prevent browning)
- Dried apricots or cherries (for chewy sweetness)
- Almonds, walnuts, or pistachios (adds crunch and richness)
- Assorted crackers (plain water crackers or seeded varieties)
- Baguette slices or crostini (toasted, adds crunch)
- Olives (green and black, briny and bold)
- Honey or fig jam (for drizzling or dipping)
- Fresh herbs like rosemary or thyme (for garnish and aroma)
Instructions
- Prep your ingredients by slicing cheeses into varied shapes such as wedges, cubes, or rounds.
- Slice cured meats into thin ribbons and fold or roll them for a pretty look.
- Wash and dry fresh fruits thoroughly. Slice apples or pears thinly and brush with lemon juice to prevent browning.
- Place olives, nuts, and jams in small bowls or ramekins to keep the board tidy.
- Spread the cheeses around the board first, spacing them out to act as a foundation and balance the layout.
- Tuck folded or rolled cured meats near the cheeses, varying placement to create visual interest.
- Scatter clusters of grapes, fig halves, and sliced apples between cheeses and meats, alternating colors and textures.
- Fill any gaps with nuts and dried fruits to add crunch and chewiness.
- Arrange crackers and toasted bread slices along one side or in a separate basket for easy access.
- Sprinkle fresh herbs like rosemary sprigs for aroma and visual appeal.
- Drizzle honey or spread fig jam near cheeses for dipping.
- Avoid overcrowding the board to leave breathing room for easy picking and to highlight colors and textures.
Notes
[‘Let cheeses sit at room temperature for 20-30 minutes before serving to enhance flavor and texture.’, ‘Use odd numbers of items (3, 5, 7) for a natural and visually pleasing arrangement.’, ‘Fold or roll meats to add height and depth to the board.’, ‘Assemble the board no more than an hour before serving to keep fruits fresh and cheeses at optimal texture.’, ‘Avoid overcrowding to prevent messiness and make it easier for guests to serve themselves.’, ‘Brush apple or pear slices with lemon juice to prevent browning.’, ‘For gluten-free guests, swap regular crackers for gluten-free options or serve extra bread-free snacks like marinated olives and nuts.’, ‘To reheat bread or crostini, toast quickly in a 350°F oven for 5 minutes; avoid reheating meats or cheeses.’]
Nutrition
- Serving Size: Approximately 1/6 to
- Calories: 350
- Sugar: 8
- Sodium: 450
- Fat: 25
- Saturated Fat: 10
- Carbohydrates: 15
- Fiber: 3
- Protein: 12
Keywords: charcuterie board, easy appetizer, party snacks, cheese board, cured meats, fruit platter, nuts, entertaining, quick recipes