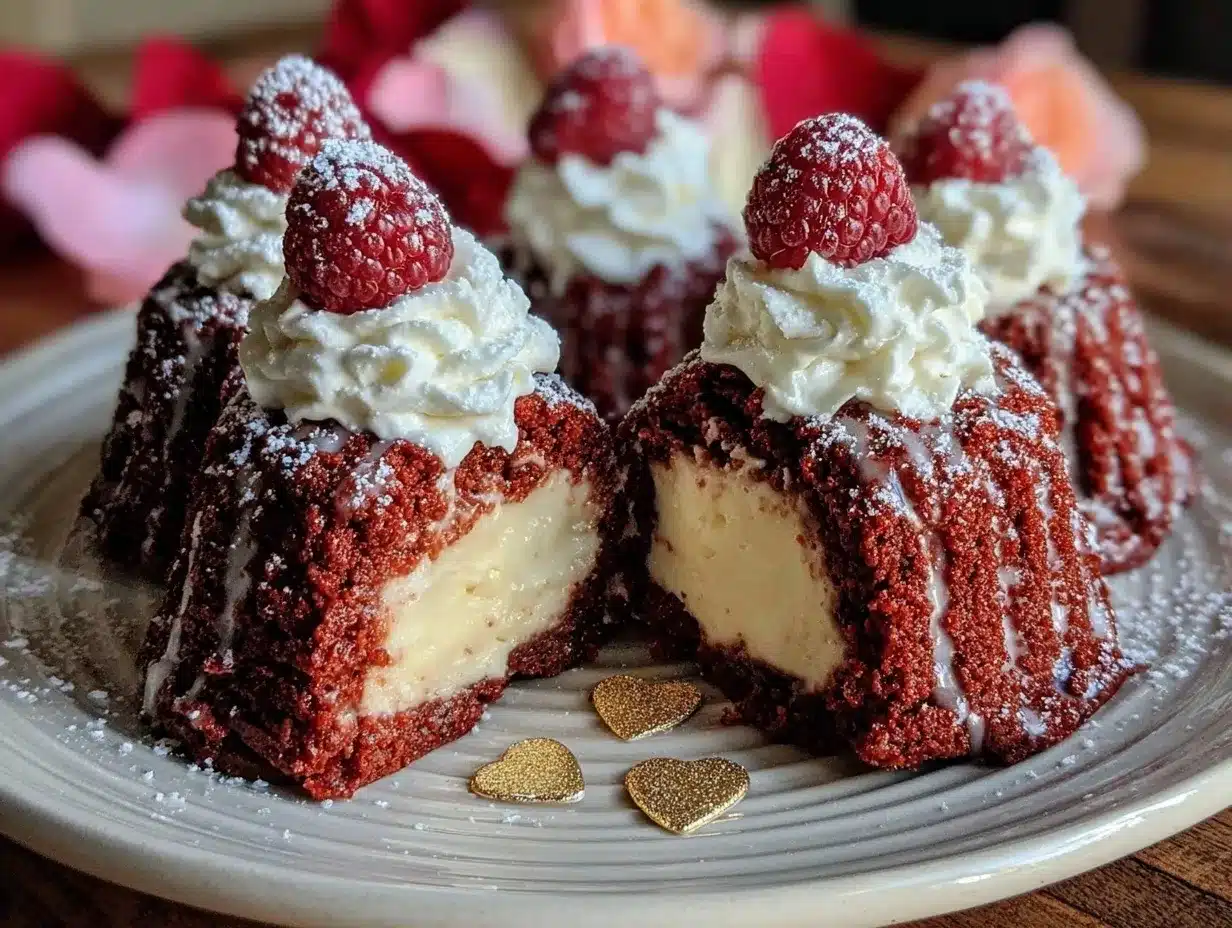
Let me tell you, the scent of rich cocoa and sweet cream cheese wafting from my kitchen when I first made these Decadent Valentine’s Red Velvet Cheesecake Domes was enough to make anyone’s mouth water. The moment I took that first bite, I was instantly hooked—the kind of moment where you pause, take a deep breath, and just smile because you know you’re onto something truly special. Honestly, it felt like a little love letter wrapped in dessert form.
Years ago, when I was knee-high to a grasshopper, my grandma used to bake her famous red velvet cake for Valentine’s Day, and I always admired how it brought the whole family together. This recipe is my spin on that nostalgic favorite, blending the velvety cake with creamy cheesecake into charming domes that are perfect for sharing—or sneaking away to enjoy solo. I stumbled upon this idea on a rainy weekend when I wanted something sweet but also show-stopping for a date night at home.
My family couldn’t stop sneaking these domes off the cooling rack (and I can’t really blame them). They’re dangerously easy to make and deliver pure, nostalgic comfort with a modern twist. Whether you’re looking to brighten up your Pinterest cookie board or impress your sweetheart, these Red Velvet Cheesecake Domes are perfect for potlucks, romantic dinners, or just because. I’ve tested this recipe multiple times—in the name of research, of course—and it’s now a staple for family gatherings and gifting during the season. Trust me, you’re going to want to bookmark this one.
Why You’ll Love This Recipe
As someone who has spent countless hours in the kitchen perfecting desserts, I can say this Decadent Valentine’s Red Velvet Cheesecake Domes recipe stands out for so many reasons. It’s not just another red velvet cake; it’s a thoughtfully crafted fusion dessert that brings together the best textures and flavors. Here’s why you’ll want to make it again and again:
- Quick & Easy: Comes together in under 45 minutes prep time, perfect for busy weeknights or last-minute sweet cravings.
- Simple Ingredients: No fancy grocery trips needed; you likely already have everything in your kitchen pantry and fridge.
- Perfect for Date Night: Creates an intimate, elegant dessert without the fuss—impress your special someone effortlessly.
- Crowd-Pleaser: Always gets rave reviews from kids and adults alike, thanks to its creamy cheesecake center and moist cake shell.
- Unbelievably Delicious: The texture combo of smooth cheesecake hugging the tender, slightly tangy red velvet cake is next-level comfort food.
What sets this recipe apart is the little technique of baking the cheesecake inside the red velvet dome, which keeps everything moist and perfectly balanced. Plus, the hint of vanilla and cream cheese in the filling makes it so decadent without being too sweet. Honestly, this recipe isn’t just good—it’s the kind that makes you close your eyes after the first bite and savor every moment. It’s comfort food reimagined, healthier than a giant cake but with all the soul-soothing satisfaction, perfect for impressing guests or turning a simple night in into something memorable.
What Ingredients You Will Need
This recipe uses simple, wholesome ingredients to deliver bold flavor and satisfying texture without the fuss. Most are pantry staples, which means you can whip these up on a whim. Here’s what you’ll need:
- For the Red Velvet Cake Domes:
- All-purpose flour – 1 ¼ cups (160 g), sifted
- Unsweetened cocoa powder – 2 tbsp (15 g), use a good quality Dutch-processed for richer flavor
- Baking powder – 1 tsp
- Baking soda – ½ tsp
- Salt – ¼ tsp
- Granulated sugar – 1 cup (200 g)
- Unsalted butter – 6 tbsp (85 g), softened (I prefer Kerrygold for creaminess)
- Large eggs – 2, room temperature
- Buttermilk – ¾ cup (180 ml), room temp (or make your own by adding 1 tbsp lemon juice to milk)
- Red food coloring – 2 tbsp (adjust as desired for vibrant color)
- Pure vanilla extract – 1 tsp
- White vinegar – 1 tsp
- For the Cheesecake Filling:
- Cream cheese – 8 oz (225 g), softened (use full fat for best texture)
- Granulated sugar – ⅓ cup (65 g)
- Large egg – 1, room temperature
- Pure vanilla extract – 1 tsp
- Sour cream – 2 tbsp (30 ml), adds tang and creaminess
- Optional Garnishes:
- White chocolate shavings
- Fresh raspberries or strawberries
- Edible rose petals for that romantic touch
For substitutions, use almond flour for a gluten-free option, though texture will be slightly different. Swap sour cream with dairy-free coconut yogurt if needed. If you want to skip food coloring, natural beet juice can add a pretty red hue but may alter flavor slightly. In summer, swapping tart fresh berries as garnish brings a fresh brightness perfect for warmer weather.
Equipment Needed
- Muffin tin or silicone dome molds – essential for shaping the domes perfectly
- Mixing bowls – at least two, for cake batter and cheesecake filling
- Electric mixer or stand mixer – for smooth batter and filling (I love my KitchenAid, but a handheld works too)
- Measuring cups and spoons – for precise ingredients
- Rubber spatula – to scrape bowls clean
- Cooling rack – to cool domes evenly without sogginess
- Toothpicks or skewer – to test doneness
- Optional: piping bag – for filling domes neatly, but a spoon works fine too
If you don’t have silicone dome molds, muffin tins with parchment cups are a good budget-friendly alternative. Just be mindful that domes might be less rounded but still delicious. For maintenance, keep your mixer beaters and spatulas clean and dry to avoid any funky flavors sneaking in. I’ve found that using silicone molds means less sticking and easier cleanup—definitely worth the investment if you bake often!
Preparation Method
- Preheat your oven to 350°F (175°C). Lightly grease your silicone dome molds or muffin tin with butter or non-stick spray.
- Make the red velvet cake batter: In a medium bowl, sift together the flour, cocoa powder, baking powder, baking soda, and salt. Set aside.
- In a separate large bowl, beat the softened butter and sugar together with an electric mixer until light and fluffy (about 3-4 minutes). This step is crucial to get that tender crumb.
- Add eggs one at a time, beating well after each addition. Then stir in vanilla extract, red food coloring, and white vinegar.
- Alternate adding the dry ingredients and buttermilk to the butter mixture, starting and ending with dry ingredients. Mix until just combined—overmixing can make the cake tough.
- Prepare the cheesecake filling: In a clean bowl, beat the cream cheese until smooth. Add sugar and beat again until creamy. Mix in the egg, vanilla extract, and sour cream until fully combined. Be careful not to overbeat to prevent cracks.
- Fill the molds: Spoon about 1 tablespoon (15 ml) of red velvet batter into each mold, then add 1 tablespoon (15 ml) of cheesecake filling on top. Cover with another tablespoon of red velvet batter, gently smoothing the top.
- Bake for 20-25 minutes, or until a toothpick inserted into the cake dome (not the filling) comes out clean. The cheesecake filling should be set but still creamy.
- Remove from the oven and let the domes cool in the molds for 10 minutes before transferring to a cooling rack to cool completely. This prevents cracking and sogginess.
- Once cooled, chill the domes in the refrigerator for at least 2 hours to firm up the cheesecake center.
Pro tip: The domes should feel slightly springy to the touch but not wet. If you see cracks, it means the cheesecake overbaked—next time, try lowering oven temp by 10°F (5°C). If your batter seems too thick to spread, add a teaspoon of milk to loosen it up.
Cooking Tips & Techniques
Getting these domes just right takes a little attention but it’s worth every second. First, make sure your cream cheese is room temperature—cold cream cheese creates lumps and uneven texture. I learned that the hard way after one batch was more clumpy than creamy!
Be gentle when folding wet and dry ingredients; overmixing develops gluten and toughens the cake, which you definitely don’t want for this tender treat. When layering the batter and filling, try to keep the cheesecake filling centered to avoid it leaking out during baking.
Use an oven thermometer if you can—oven temps often vary and affect baking time and texture. Also, resist the urge to open the oven door too often; sudden temperature changes can make the domes crack. Multitasking tip: while the domes bake, wash your mixing bowls and prep garnishes to keep everything moving smoothly.
Finally, chilling is essential. It helps the cheesecake center set properly and makes the domes easier to handle and serve. Trust me, skipping the chill leads to messy, sad-looking domes that don’t impress as much.
Variations & Adaptations
If you want to switch things up or accommodate dietary needs, here are some ideas I’ve tried and love:
- Chocolate Lover’s Variation: Add mini chocolate chips to the red velvet batter for extra texture and melty pockets of joy.
- Vegan Adaptation: Use flax eggs (1 tbsp ground flaxseed + 3 tbsp water per egg) and vegan cream cheese alternatives. Swap butter with coconut oil and plant-based milk for the buttermilk.
- Berry Infusion: Add a spoonful of raspberry jam to the cheesecake filling before baking for a fruity surprise center.
- Cooking Method: You can bake these in a water bath to keep the cheesecake extra moist and crack-free, though it takes longer and cleanup is trickier.
- Flavor Customization: Swap vanilla extract in the filling for almond or orange extract for a subtle flavor twist that pairs beautifully with red velvet.
Personally, I once tried a gluten-free version using almond flour and it was a hit—though the texture was denser, the flavors still shined through. Feel free to experiment and make it your own!
Serving & Storage Suggestions
These Red Velvet Cheesecake Domes are best served chilled or at room temperature. I like to garnish mine with fresh raspberries and a sprinkle of white chocolate shavings for an extra touch of romance. They also pair wonderfully with a cup of rich coffee or a glass of sparkling rosé to set the mood.
To store, keep them in an airtight container in the refrigerator for up to 4 days. They freeze well too—wrap individually in plastic wrap and place in a freezer bag for up to 2 months. When ready to enjoy, thaw overnight in the fridge and bring to room temperature before serving.
Flavors actually develop over time after chilling, making the cheesecake filling creamier and the cake layers more tender. So if you can wait a day before serving, do it—you’ll thank me later!
Nutritional Information & Benefits
Each Red Velvet Cheesecake Dome contains approximately 280 calories, 18 grams of fat, 25 grams of carbohydrates, and 5 grams of protein. The cream cheese provides a good dose of calcium and protein, while the cocoa powder contributes antioxidants. Using buttermilk adds a slight tang and some probiotics, which is a nice bonus.
This dessert can be enjoyed as an occasional treat, especially when made with whole food ingredients and moderate portions. The option to use almond flour or vegan substitutes makes it adaptable for gluten-intolerant or dairy-sensitive folks. Just be mindful of the sugar content if you’re watching your intake.
From a wellness perspective, I love that this recipe brings joy and comfort without requiring complicated ingredients or procedures. It’s about balance and savoring the moment, which is just as important as nutrition.
Conclusion
If you’re looking for a dessert that’s dangerously easy, irresistibly delicious, and perfect for that special Valentine’s or date night, these Decadent Valentine’s Red Velvet Cheesecake Domes are it. They combine the nostalgic flavors of red velvet cake with rich, creamy cheesecake in a way that feels both classic and fresh. You can customize them to suit your taste or dietary needs, which makes this recipe a keeper in my book.
Honestly, I love how these domes bring out smiles and sweet moments every time I make them. I encourage you to give this recipe a try, tweak it to your liking, and share your results—I’d love to hear how it turns out for you. Please leave a comment below or share this post with your fellow dessert lovers. Here’s to many cozy, delicious date nights ahead!
FAQs
Can I make these cheesecake domes ahead of time?
Yes! You can bake them a day or two in advance and store them in the fridge. Just bring to room temperature before serving for the best texture.
What if I don’t have buttermilk?
No worries—just add 1 tablespoon of lemon juice or white vinegar to ¾ cup of regular milk and let it sit for 5 minutes to curdle, then use as buttermilk substitute.
Can I use a different shape mold?
Absolutely! Silicone dome molds give the classic look, but muffin tins or mini bundt pans work fine too. Just adjust baking time slightly and watch closely.
How do I prevent the cheesecake filling from cracking?
Avoid overbaking and overmixing the filling. Also, chilling the domes properly after baking helps keep the filling smooth and cracks at bay.
Are these domes suitable for freezing?
Yes! Wrap individually in plastic wrap and freeze for up to 2 months. Thaw overnight in the fridge before serving for best results.
Pin This Recipe!
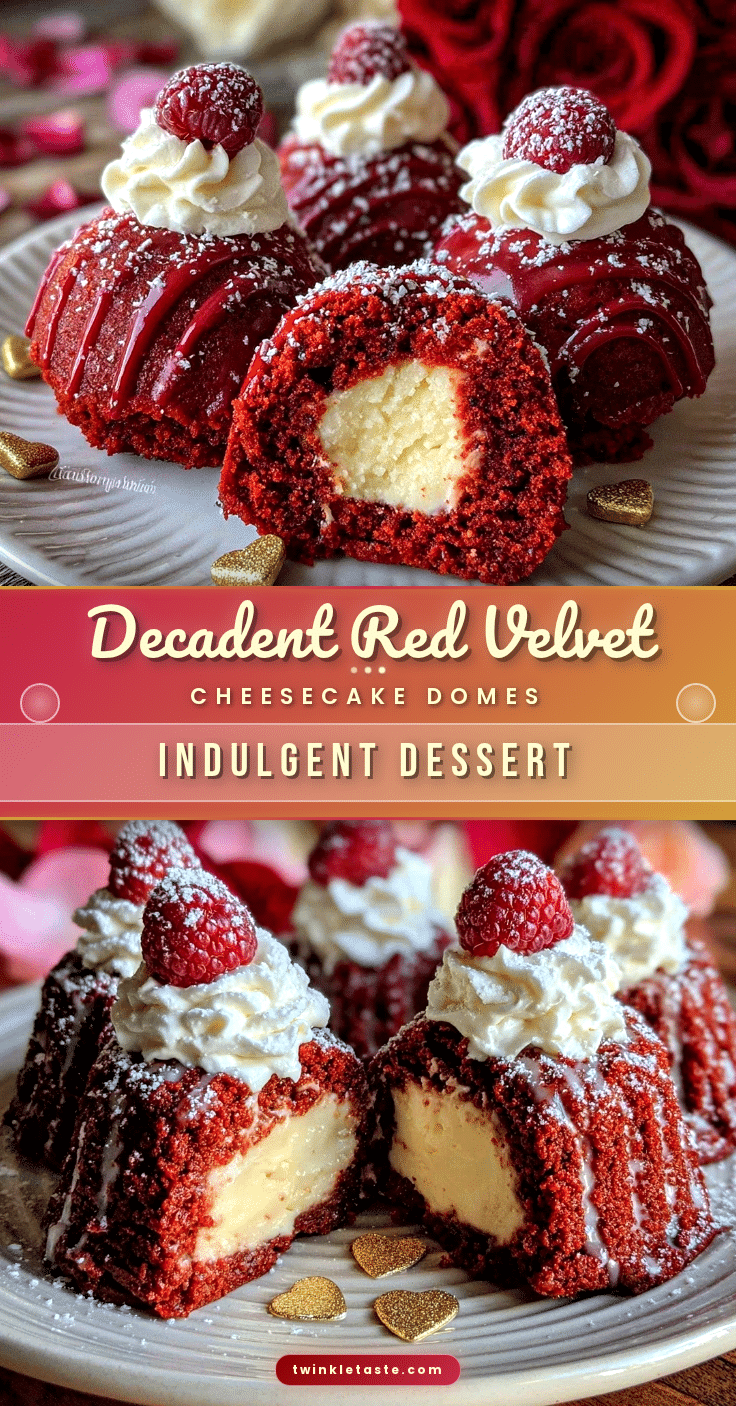
Decadent Valentine’s Red Velvet Cheesecake Domes

A rich and creamy fusion dessert combining velvety red velvet cake with a smooth cheesecake center, perfect for date night or special occasions.
- Prep Time: 15 minutes
- Cook Time: 25 minutes
- Total Time: 2 hours 40 minutes
- Yield: 12 domes
- Category: Dessert
- Cuisine: American
Ingredients
- All-purpose flour – 1 ¼ cups (160 g), sifted
- Unsweetened cocoa powder – 2 tbsp (15 g), Dutch-processed recommended
- Baking powder – 1 tsp
- Baking soda – ½ tsp
- Salt – ¼ tsp
- Granulated sugar – 1 cup (200 g)
- Unsalted butter – 6 tbsp (85 g), softened
- Large eggs – 2, room temperature
- Buttermilk – ¾ cup (180 ml), room temperature (or ¾ cup milk + 1 tbsp lemon juice/vinegar)
- Red food coloring – 2 tbsp
- Pure vanilla extract – 1 tsp
- White vinegar – 1 tsp
- Cream cheese – 8 oz (225 g), softened
- Granulated sugar – ⅓ cup (65 g)
- Large egg – 1, room temperature
- Pure vanilla extract – 1 tsp
- Sour cream – 2 tbsp (30 ml)
- Optional garnishes: white chocolate shavings, fresh raspberries or strawberries, edible rose petals
Instructions
- Preheat oven to 350°F (175°C). Lightly grease silicone dome molds or muffin tin with butter or non-stick spray.
- In a medium bowl, sift together flour, cocoa powder, baking powder, baking soda, and salt. Set aside.
- In a large bowl, beat softened butter and sugar with an electric mixer until light and fluffy, about 3-4 minutes.
- Add eggs one at a time, beating well after each addition. Stir in vanilla extract, red food coloring, and white vinegar.
- Alternate adding dry ingredients and buttermilk to the butter mixture, starting and ending with dry ingredients. Mix until just combined.
- Prepare cheesecake filling by beating cream cheese until smooth. Add sugar and beat until creamy. Mix in egg, vanilla extract, and sour cream until fully combined.
- Fill molds by spooning about 1 tablespoon of red velvet batter into each mold, then 1 tablespoon of cheesecake filling on top. Cover with another tablespoon of red velvet batter, smoothing the top gently.
- Bake for 20-25 minutes, or until a toothpick inserted into the cake dome (not the filling) comes out clean. Cheesecake filling should be set but creamy.
- Remove from oven and let domes cool in molds for 10 minutes. Transfer to a cooling rack to cool completely.
- Chill domes in refrigerator for at least 2 hours to firm up cheesecake center before serving.
Notes
Use room temperature cream cheese to avoid lumps. Avoid overmixing batter to keep cake tender. Chill domes well to set cheesecake filling and prevent cracking. Oven temperature may vary; use an oven thermometer for best results. If batter is too thick, add a teaspoon of milk to loosen. For gluten-free option, substitute almond flour. Vegan adaptations include flax eggs, vegan cream cheese, coconut oil, and plant-based milk.
Nutrition
- Serving Size: 1 dome
- Calories: 280
- Fat: 18
- Carbohydrates: 25
- Protein: 5
Keywords: red velvet, cheesecake, dessert, Valentine’s Day, date night, easy dessert, red velvet cheesecake domes