“You’ve got to try this—the crunch lasts, no joke,” my friend said over the phone, practically whispering like it was a secret weapon. I was skeptical. Fried chicken thighs that stay crispy hours after frying? Usually, that crunch fades faster than you can say “leftovers.” But that night, tired and craving comfort food, I decided to put my trust in this recipe for crispy extra crispy fried chicken thighs with long-lasting crunch. Honestly, I was blown away.
The kitchen smelled like a carnival mixed with grandma’s Sunday dinner—a warm, spicy aroma that promised something special. As I bit into that first thigh, the crackle of the crust was unmistakable, loud enough to make me pause and appreciate the magic of what I’d just made. And the best part? Even hours later, at room temperature, that satisfying crunch stuck around like a loyal friend. It wasn’t just fried chicken; it was a little crunchy miracle.
I’m not usually the “make-it-again-twice-this-week” type, but I found myself making these thighs repeatedly, tweaking the spice mix and double-dredging technique. They became my go-to comfort meal, especially on those evenings when I just want food that tastes like love but doesn’t take forever. If you’ve ever been disappointed by soggy fried chicken or wished for that perfect crunch without complicated steps, this recipe is for you. It’s straightforward, dependable, and honestly, pretty fun to make.
There’s something quietly satisfying about hearing that crunch and knowing it’s not going anywhere soon. This recipe stuck with me because it’s proof that with a few smart tricks, you can turn simple chicken thighs into something memorably crispy and deeply comforting.
Why You’ll Love This Recipe
Coming from someone who’s fried more chicken than I care to admit, this recipe stands out for a bunch of reasons I want to share upfront:
- Quick & Easy: You’re looking at about 30-40 minutes from start to finish, perfect for busy weeknights or whenever you need a last-minute feast with serious crunch.
- Simple Ingredients: There’s no need for fancy spices or hard-to-find items—just pantry staples and fresh chicken thighs. I always use King Arthur flour for the dredge because it gives the best crispiness, but any all-purpose will do.
- Perfect for Gatherings: Whether you’re hosting a backyard BBQ or a casual dinner, these crispy fried chicken thighs impress every time. They pair beautifully with sides like creamy mac and cheese or a fresh summer salad.
- Crowd-Pleaser: Kids and adults alike gobble these up. The extra crunch keeps everyone coming back for seconds, and the juicy meat inside balances the crispy exterior perfectly.
- Unbelievably Delicious: The secret double dredge and a touch of cornstarch create a crust that’s not just crispy but extra crispy, holding up even when cooled.
This isn’t your average fried chicken recipe. I’ve tested it alongside classic versions and even one with a buttermilk brine, but this method nails the crisp factor without extra fuss or hours of waiting. The blend of spices and the technique to create a long-lasting crunch make it truly special. It feels like comfort food, but with a little modern twist that makes it stand out on the dinner table.
Honestly, it’s the kind of recipe you keep in your back pocket for those moments when you want to impress without stress. Plus, if you’re curious about sides, these thighs go great with quick creamy microwave mug mac and cheese or a fresh no-cook summer roll bowl with creamy peanut sauce.
What Ingredients You Will Need
This recipe uses simple, wholesome ingredients that come together to deliver bold flavor and that satisfying extra crunch without any complicated steps. Most of these are pantry staples, so no surprise trips to specialty stores needed.
- Chicken thighs, bone-in, skin-on, about 4-6 pieces (skin is key for crispy texture)
- Buttermilk, 1 cup (helps tenderize and adds subtle tang; plain yogurt diluted with milk works too)
- All-purpose flour, 1 ½ cups (King Arthur brand recommended for a reliable crisp)
- Cornstarch, ½ cup (the secret weapon for extra crunch)
- Baking powder, 1 teaspoon (helps the crust puff up a bit)
- Seasoning blend:
- Salt, 1 tablespoon
- Pepper, 1 teaspoon
- Paprika, 2 teaspoons (smoked paprika works wonders)
- Garlic powder, 1 teaspoon
- Onion powder, 1 teaspoon
- Cayenne pepper, ½ teaspoon (optional, for a mild kick)
- Vegetable oil or peanut oil, for frying (enough to fill your pan about 2 inches deep; peanut oil adds a nice flavor and has a high smoke point)
Ingredient tips: When choosing chicken thighs, I look for firm, fresh cuts with good skin coverage. If you want a gluten-free version, swapping the all-purpose flour with a mix of rice flour and cornstarch works well. And if you’re avoiding dairy, the buttermilk step can be skipped entirely, but the texture might be a bit different.
Equipment Needed
- Large heavy-bottomed skillet or cast iron pan: This helps maintain even heat for frying. Cast iron is my go-to because it holds heat so well and gives consistent results.
- Deep-fry thermometer: A must-have to keep the oil at a steady 350°F (175°C). Overheating or underheating the oil can mess with the crunch and cooking time.
- Wire rack with baking sheet: After frying, draining the chicken on a wire rack prevents sogginess—trust me, I’ve learned this the hard way.
- Mixing bowls: For marinating and dredging chicken, preferably one for wet and another for dry ingredients.
- Tongs: For safely flipping and removing chicken from hot oil.
If you don’t have a thermometer, try to keep the oil at a medium-high heat and test with a small piece of bread or batter to see if it bubbles and browns in about 60 seconds. Budget-friendly options like a digital instant-read thermometer are easy to find and worth the investment for frying.
Preparation Method
- Marinate the chicken: Pour 1 cup of buttermilk into a large bowl. Add half the salt and half the pepper. Submerge the chicken thighs, skin side down. Cover and refrigerate for at least 1 hour, or up to overnight, to tenderize the meat and add flavor. (If pressed for time, 30 minutes still helps.)
- Prepare the dry dredge: In a separate large bowl, combine the all-purpose flour, cornstarch, baking powder, paprika, garlic powder, onion powder, cayenne, and remaining salt and pepper. Mix well to distribute spices evenly.
- Heat the oil: Pour vegetable or peanut oil into your skillet to a depth of about 2 inches. Attach your deep-fry thermometer and heat oil to a steady 350°F (175°C). Maintaining this temperature is crucial for crispiness and avoiding greasy chicken.
- Dredge the chicken: Remove chicken from buttermilk, letting excess drip off. Coat each piece thoroughly in the dry mixture, pressing lightly to help the coating stick. For extra crunch, dip the coated chicken back into the buttermilk briefly, then again in the flour mixture for a double dredge.
- Fry in batches: Carefully place chicken thighs skin side down into the hot oil (don’t overcrowd). Fry for about 8-10 minutes per side, depending on size, turning gently with tongs. The internal temperature should reach 165°F (74°C). The crust should be golden brown and crackly.
- Drain and rest: Transfer fried chicken to a wire rack over a baking sheet. Rest for 5-10 minutes. This step keeps the crust intact and allows juices to redistribute inside the meat.
- Serve warm or room temperature: These thighs stay crispy even when cooled, but if you want to re-crisp, pop them in a 350°F (175°C) oven for 5 minutes before serving.
Pro tip: If you notice the coating browning too quickly, lower the heat slightly. Patience here pays off with a perfectly cooked interior and crunchy exterior. And don’t skip the wire rack draining step—it’s a game-changer for avoiding soggy skin.
Cooking Tips & Techniques
Perfecting crispy fried chicken thighs is all about balancing heat and coating. Here’s what I’ve learned over multiple batches (and a few burnt ones):
- Double dredging is your friend: That second dip in wet and dry creates a thick, crunchy crust that sticks around longer than usual.
- Don’t crowd the pan: Fry in small batches to keep oil temperature steady. Overcrowding lowers the oil heat and leads to greasy, soft crusts.
- Use cornstarch: It’s a small ingredient but crucial for that extra crunch. It crisps up better than flour alone.
- Maintain oil temperature: I keep a close eye on the thermometer and adjust the heat between batches. It’s tempting to crank the burner, but steady medium-high heat wins every time.
- Rest on wire rack: Draining on paper towels traps steam and makes the crust soggy. Wire racks let air circulate and keep the crunch intact.
- Season the coating well: Don’t be shy with spices—they add flavor to every bite, not just the chicken itself.
One time, I tried baking these after frying to save time and keep warm. It worked okay but the crust softened faster. So, for the best crunch, stick with resting at room temperature on a rack.
Variations & Adaptations
Feel like mixing things up? Here are some ways to customize this crispy fried chicken thighs recipe:
- Spice it up: Swap paprika with chipotle powder or add a teaspoon of Cajun seasoning for a smoky heat.
- Gluten-free: Use a mix of rice flour and cornstarch instead of all-purpose flour. The texture stays delightfully crispy.
- Oven-fried alternative: After dredging, bake at 425°F (220°C) on a wire rack for 30-35 minutes, flipping halfway. You get crunch with less oil.
- Dairy-free: Skip the buttermilk and use coconut milk mixed with lemon juice or apple cider vinegar as a marinade substitute.
- Personal twist: I once added a spoonful of finely crushed cornflakes into the dry mix for an even crunchier texture. It’s a fun experiment if you want to try something different.
Serving & Storage Suggestions
These crispy fried chicken thighs are best enjoyed warm, right out of the fryer, but here’s the good news—they keep their crunch longer than you’d expect.
- Serving: Pair with classic sides like coleslaw, mashed potatoes, or for an easy weeknight meal, try quick creamy microwave mug mac and cheese. The creamy texture contrasts perfectly with the crunch.
- Storage: Keep leftovers in an airtight container in the fridge for up to 3 days. To reheat and preserve crunch, warm in a 350°F (175°C) oven for 5-7 minutes on a wire rack.
- Make-ahead tip: You can prep the dredged chicken and refrigerate it for a few hours before frying. Just let it come to room temperature before cooking.
- Flavors develop: If you let the chicken rest overnight in the fridge, the spices deepen, and the crust firms up nicely when reheated.
For a lighter side, fresh salads like the fresh no-cook summer roll bowls with creamy peanut sauce work wonderfully to balance the richness.
Nutritional Information & Benefits
Each crispy fried chicken thigh (approximate) provides:
| Nutrient | Amount |
|---|---|
| Calories | 320-350 kcal |
| Protein | 22-25 g |
| Fat | 22-25 g (mostly from skin and frying oil) |
| Carbohydrates | 10-12 g |
| Sodium | 500-600 mg |
The chicken thighs offer a good source of protein and essential nutrients like iron and zinc. Using skin-on thighs adds flavor and healthy fats, while the cornstarch-based coating keeps carbs moderate. If you’re watching sodium, adjust seasoning accordingly.
This recipe suits gluten-free diets with simple flour substitutions and can be adapted for dairy-free eaters. Personally, I appreciate how it balances indulgence with straightforward ingredients, making it a satisfying but mindful treat.
Conclusion
These crispy extra crispy fried chicken thighs with long-lasting crunch have earned their place in my regular rotation. They hit that sweet spot between juicy, tender meat and a crust that stays crackly well past the first bite. What I love most is how simple the ingredients are and how reliable the method proves every time.
Give yourself permission to tweak the spices or try different coatings—you’ll find your own perfect version. Whether you’re cooking for family dinners, casual hangouts, or just craving that unmistakable crunch, this recipe delivers without drama.
And if you try it out, I’d love to hear how you made it your own. Share your thoughts, questions, or even your favorite sides—I’m always here to talk chicken and crunch.
Frequently Asked Questions
How do I keep fried chicken crispy for longer?
Rest the chicken on a wire rack instead of paper towels to avoid steam buildup. Also, double dredging with cornstarch helps the crust stay crunchy longer.
Can I use boneless chicken thighs for this recipe?
Yes, boneless thighs work well, but cooking time will be shorter—about 5-7 minutes per side. The skin-on pieces give the best texture, though.
Is it necessary to marinate the chicken in buttermilk?
Marinating tenderizes and adds flavor, but if you’re short on time, you can skip it. Just season the chicken well before dredging.
What oil is best for frying chicken?
Peanut and vegetable oils are great because they have high smoke points and neutral flavors. Avoid olive oil, which burns too quickly.
Can I bake the chicken instead of frying?
You can bake at 425°F (220°C) on a wire rack for about 30-35 minutes for a healthier version, but the crust won’t be quite as crunchy as frying.
Pin This Recipe!

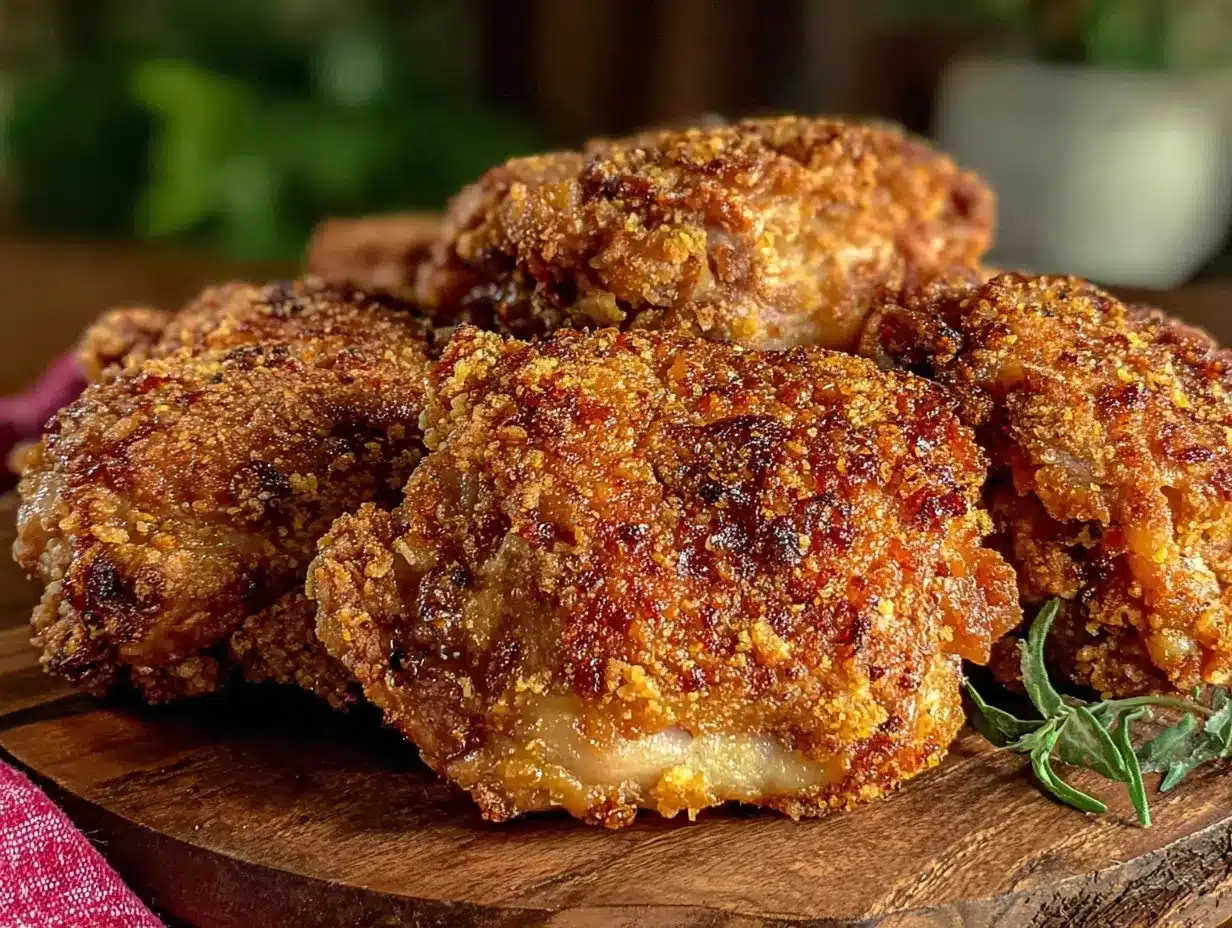
Crispy Fried Chicken Thighs Recipe Easy Extra Crunchy and Perfect

This recipe delivers extra crispy fried chicken thighs with a long-lasting crunch and juicy meat inside. Perfect for quick weeknight meals or gatherings, it uses simple pantry staples and a double dredge technique for unbeatable crispiness.
- Prep Time: 1 hour 15 minutes
- Cook Time: 20 minutes
- Total Time: 1 hour 35 minutes
- Yield: 4-6 servings 1x
- Category: Main Course
- Cuisine: American
Ingredients
- 4–6 bone-in, skin-on chicken thighs
- 1 cup buttermilk (or plain yogurt diluted with milk)
- 1 ½ cups all-purpose flour (King Arthur brand recommended)
- ½ cup cornstarch
- 1 teaspoon baking powder
- 1 tablespoon salt (divided)
- 1 teaspoon black pepper (divided)
- 2 teaspoons paprika (smoked paprika works well)
- 1 teaspoon garlic powder
- 1 teaspoon onion powder
- ½ teaspoon cayenne pepper (optional)
- Vegetable oil or peanut oil for frying (enough to fill pan about 2 inches deep)
Instructions
- Marinate the chicken: In a large bowl, combine 1 cup buttermilk with half the salt and half the pepper. Submerge chicken thighs skin side down. Cover and refrigerate for at least 1 hour or up to overnight. (30 minutes if pressed for time.)
- Prepare the dry dredge: In a separate large bowl, mix all-purpose flour, cornstarch, baking powder, paprika, garlic powder, onion powder, cayenne pepper, and remaining salt and pepper until evenly combined.
- Heat the oil: Pour vegetable or peanut oil into a large heavy-bottomed skillet or cast iron pan to a depth of about 2 inches. Heat oil to 350°F (175°C) using a deep-fry thermometer.
- Dredge the chicken: Remove chicken from buttermilk, letting excess drip off. Coat each piece thoroughly in the dry mixture, pressing lightly. For extra crunch, dip coated chicken back into buttermilk briefly, then again in the flour mixture for a double dredge.
- Fry in batches: Carefully place chicken thighs skin side down into hot oil without overcrowding. Fry about 8-10 minutes per side, turning gently, until internal temperature reaches 165°F (74°C) and crust is golden brown and crackly.
- Drain and rest: Transfer fried chicken to a wire rack over a baking sheet. Rest for 5-10 minutes to keep crust intact and allow juices to redistribute.
- Serve warm or at room temperature. To re-crisp, warm in a 350°F (175°C) oven for 5 minutes before serving.
Notes
Maintain oil temperature at 350°F for best crispiness. Double dredging with buttermilk and flour mixture creates extra crunchy crust. Rest chicken on wire rack to avoid sogginess. Avoid overcrowding pan to keep oil temperature steady. For gluten-free, substitute all-purpose flour with rice flour and cornstarch. For dairy-free, skip buttermilk or use coconut milk with lemon juice or vinegar.
Nutrition
- Serving Size: 1 chicken thigh
- Calories: 320350
- Sodium: 500600
- Fat: 2225
- Carbohydrates: 1012
- Protein: 2225
Keywords: fried chicken, crispy chicken thighs, extra crunchy fried chicken, comfort food, easy fried chicken, double dredge, buttermilk fried chicken