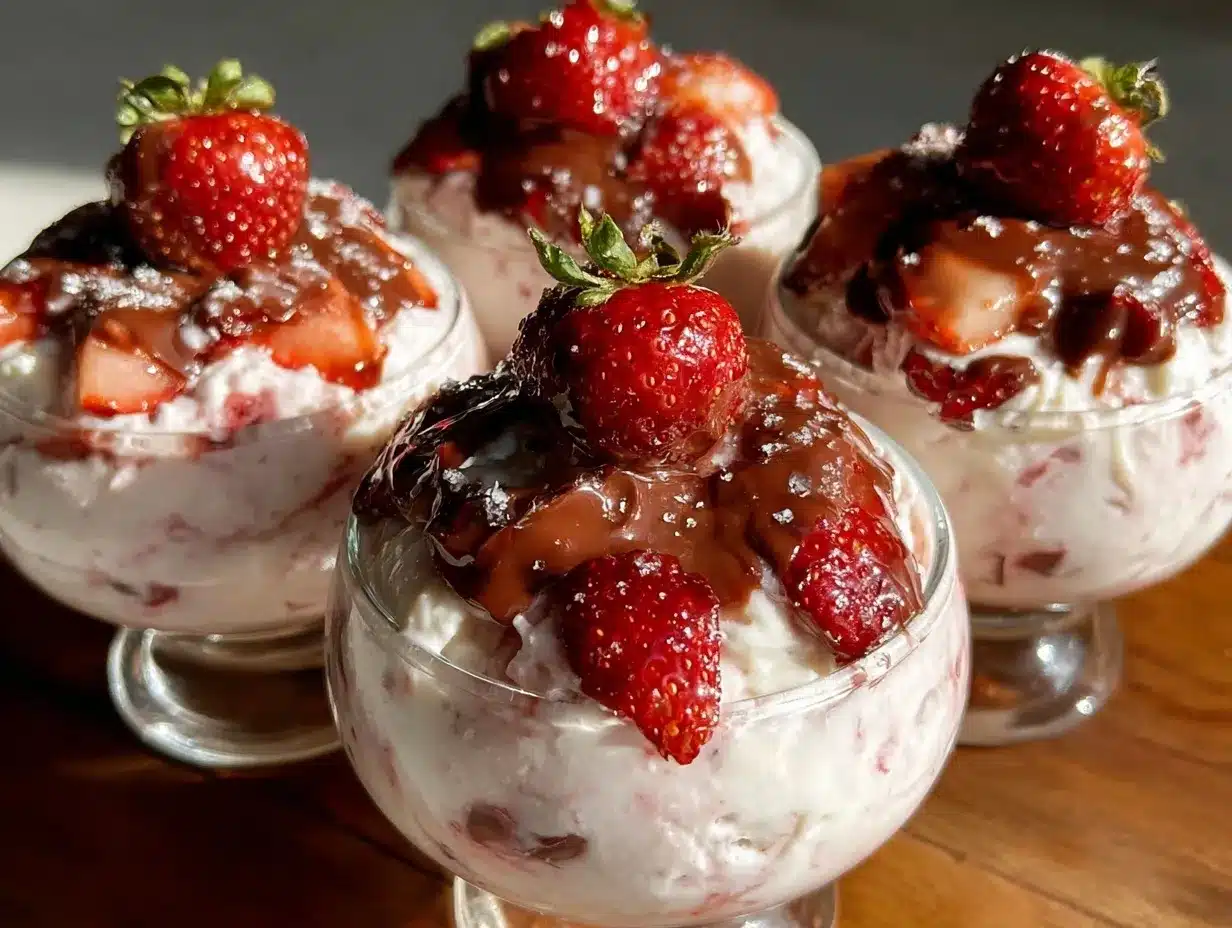
Let me tell you, the scent of fresh strawberries and melting chocolate swirling together is enough to make anyone’s mouth water. The first time I whipped up these creamy chocolate-covered strawberry ice cream cups, I was instantly hooked—the kind of moment where you pause, take a deep breath, and just smile because you know you’re onto something truly special. It all started years ago, when I was knee-high to a grasshopper, sneaking strawberries from the garden and dreaming up sweet treats. But honestly, nothing beats the joy of biting into a silky, frozen strawberry ice cream cup cloaked in a crisp chocolate shell. My family couldn’t stop sneaking them off the cooling rack (and I can’t really blame them). This recipe is dangerously easy and provides pure, nostalgic comfort that brightens up any summer afternoon or cozy night in.
You know what makes these ice cream cups perfect? They’re fantastic for potlucks, a sweet treat for your kids, or even a way to brighten up your Pinterest cookie board with something a little different. After testing the recipe multiple times (in the name of research, of course), it quickly became a staple for family gatherings, gifting, and whenever a warm hug in dessert form is needed. You’re going to want to bookmark this one!
Why You’ll Love This Recipe
Honestly, this recipe isn’t just good—it’s the kind that makes you close your eyes after the first bite. It combines creamy textures with a delightful chocolate crunch that’s comfort food reimagined—healthier, faster, but with the same soul-soothing satisfaction. Here’s why these creamy chocolate-covered strawberry ice cream cups stand out:
- Quick & Easy: Comes together in under 30 minutes, perfect for busy weeknights or last-minute cravings.
- Simple Ingredients: No fancy grocery trips needed; you likely already have everything in your kitchen.
- Perfect for Summer Gatherings: Great for barbecues, picnics, or just cooling off after a long day.
- Crowd-Pleaser: Always gets rave reviews from kids and adults alike—trust me, it’s hard not to sneak seconds.
- Unbelievably Delicious: The texture and flavor combo is next-level comfort food that feels fancy but isn’t complicated.
What makes this recipe different? Well, the magic lies in the silky, creamy strawberry ice cream nestled inside a crisp chocolate shell that you create yourself. No store-bought coatings here—just real chocolate that snaps beautifully. Plus, blending fresh strawberries into the ice cream base adds a natural sweetness and vibrant color that you won’t find in most ice cream cups. This recipe is perfect if you want to impress guests without stress or treat yourself to a memorable dessert that feels homemade.
What Ingredients You Will Need
This recipe uses simple, wholesome ingredients to deliver bold flavor and satisfyingly creamy texture without any fuss. Most are pantry staples or easy to find fresh. Here’s what you’ll want to gather before starting:
- For the Ice Cream Base:
- 2 cups heavy cream (480 ml, for rich creaminess)
- 1 cup whole milk (240 ml, room temperature)
- ¾ cup granulated sugar (150 grams, adjust for sweetness)
- 1 teaspoon pure vanilla extract (for depth of flavor)
- 1 cup fresh strawberries, hulled and chopped (about 150 grams, adds natural sweetness and color)
- 2 teaspoons lemon juice (optional, to brighten strawberry flavor)
- For the Chocolate Shell:
- 1 ½ cups semi-sweet chocolate chips (270 grams, I prefer Ghirardelli for smooth melting)
- 1 tablespoon coconut oil (15 ml, helps chocolate snap and shine)
- Optional Garnishes:
- Chopped nuts (almonds or pistachios, for crunch)
- Freeze-dried strawberry pieces (for an extra berry punch)
For substitutions, use almond milk and coconut cream for a dairy-free version, and dark chocolate if you prefer less sweetness. In summer, swapping fresh strawberries with raspberries or mixed berries works beautifully too. Just remember that ripe, juicy strawberries are the heart of this recipe, so pick the best you can find!
Equipment Needed
- Ice cream maker (optional but recommended for smooth texture; I use a Cuisinart 1.5-quart model that’s budget-friendly and reliable)
- Mixing bowls (glass or stainless steel preferred)
- Whisk or electric mixer (for blending cream and sugar)
- Spatula (silicone for scraping and folding)
- Measuring cups and spoons (precision helps)
- Small silicone molds or cupcake liners (to shape the ice cream cups)
- Microwave-safe bowl or double boiler (for melting chocolate)
- Freezer-safe container (if making ice cream without a machine)
If you don’t have an ice cream maker, no worries! I’ve got tips in the preparation section for a no-churn method. For melting chocolate, a microwave is quicker, but a double boiler gives you more control (and less risk of burning). Silicone molds are great because they pop out easily and clean up like a breeze. Honestly, these simple tools will make the process smooth and fun.
Preparation Method
- Prepare the Strawberry Puree: In a blender or food processor, combine the fresh strawberries and lemon juice. Blend until smooth but still a little chunky for texture. Set aside.
(About 5 minutes) - Mix the Ice Cream Base: In a large bowl, whisk together the heavy cream, whole milk, sugar, and vanilla extract until the sugar dissolves completely. Stir in the strawberry puree gently to keep that lovely pink hue intact.
(About 10 minutes) - Churn the Ice Cream: Pour the mixture into your ice cream maker and churn according to the manufacturer’s instructions—usually around 20-25 minutes until it reaches a soft-serve consistency. If you don’t have an ice cream maker, pour the mixture into a freezer-safe container, stir every 30 minutes to break up ice crystals until firm (about 3-4 hours).
(20-25 minutes with machine; 3-4 hours without) - Melt the Chocolate Shell: In a microwave-safe bowl, combine the chocolate chips and coconut oil. Microwave in 30-second bursts, stirring in between, until smooth and glossy. Alternatively, use a double boiler.
(About 5 minutes) - Assemble the Cups: Spoon a thin layer of melted chocolate into silicone molds or cupcake liners. Freeze for 5-7 minutes until just set but not hard. Then, scoop the strawberry ice cream into each mold, pressing gently to fill. Top with another layer of melted chocolate, making sure to seal the edges.
(Assembly about 15 minutes) - Freeze to Firm Up: Place the molds in the freezer for at least 2 hours, or until the chocolate shell is fully hardened and the ice cream is firm.
(2 hours minimum) - Serve and Enjoy: To unmold, briefly run warm water over the outside of the molds or liners, then gently pop the ice cream cups out. Serve immediately for that perfect creamy and crunchy contrast.
(Less than 5 minutes)
Pro tip: If your chocolate shell cracks when unmolding, let the cups sit at room temperature for a minute or two before serving—that softness brings everything together beautifully. Also, if you want extra flair, sprinkle crushed freeze-dried strawberries or nuts on the chocolate before it sets.
Cooking Tips & Techniques
First off, patience is key when making these creamy chocolate-covered strawberry ice cream cups. Rushing the freezing process or assembly can lead to cracked shells or icy ice cream. When melting your chocolate, keep the heat low and stir often to avoid grainy texture. I learned this the hard way after burning my first batch—definitely a bummer!
Using fresh, ripe strawberries really makes a difference. Too tart or underripe berries will throw off the balance, so taste the puree before mixing it into the cream. If it’s too tart, a little extra sugar can help round it out.
When churning ice cream, resist the urge to stop too early. The texture should be soft and creamy before freezing solid, or it turns icy. If you don’t have an ice cream maker, stirring every 30 minutes during freezing keeps ice crystals small, but it takes some elbow grease.
Lastly, when assembling the cups, don’t skip the step of freezing the chocolate shell layer before adding ice cream. It helps the chocolate set crisp and prevents it from mixing with the ice cream. Multi-task by melting the chocolate while the ice cream churns, saving time and keeping your workflow smooth.
Variations & Adaptations
- Dairy-Free Version: Swap heavy cream and milk for full-fat coconut milk and coconut cream. Use dairy-free chocolate chips to keep it vegan-friendly. The coconut flavor adds a tropical twist that pairs beautifully with strawberries.
- Flavor Twists: Add a splash of balsamic vinegar or fresh basil to the strawberry puree for an unexpected but delicious flavor depth. Alternatively, mix in crushed freeze-dried raspberries or blueberries for a mixed berry version.
- Chocolate Variations: Use white chocolate or dark chocolate to coat the cups, depending on your sweet tooth. You can even swirl in a bit of peanut butter or caramel into the melted chocolate for a richer shell.
For a kid-friendly adaptation, sprinkle rainbow nonpareils on the chocolate shell before it sets—adds fun and color! I once tried adding chopped mint leaves to the ice cream base, which was surprisingly refreshing and perfect for hot days.
Serving & Storage Suggestions
These creamy chocolate-covered strawberry ice cream cups are best served straight from the freezer for that perfect contrast of creamy ice cream and crunchy chocolate shell. Present them on a pretty plate with fresh strawberry slices and a sprig of mint to impress your guests. They pair wonderfully with a cup of cold lemonade or even a light rosé for grown-up gatherings.
Store leftovers in an airtight container in the freezer for up to one week. For easy access, keep the cups arranged in a single layer to avoid sticking. When ready to enjoy again, let them sit at room temperature for 2-3 minutes to soften just enough to bite without melting everywhere.
Flavors actually deepen after a day or two in the freezer, so if you can wait, that’s the sweet spot. Just avoid refreezing multiple times, or the shell may lose its crispness.
Nutritional Information & Benefits
Each creamy chocolate-covered strawberry ice cream cup contains approximately 250-300 calories, depending on size. The fresh strawberries pack vitamin C and antioxidants, while the dark or semi-sweet chocolate adds a dose of flavonoids that can be good for heart health. Using real cream and natural sugar keeps the recipe indulgent but simple—no weird additives here.
For those watching carbs, swapping sugar for a natural sweetener like erythritol works well. The recipe is gluten-free by default, making it suitable for many dietary needs. Just keep in mind the potential allergens like dairy and nuts if you add toppings.
Personally, I love that this dessert strikes a balance between feeling indulgent and still having some fresh fruit benefits—making it a treat that feels a little more wholesome than your average ice cream cup.
Conclusion
These creamy chocolate-covered strawberry ice cream cups are a winner all around—easy to make, irresistibly delicious, and perfect for sharing or savoring solo. Whether you’re looking for a quick homemade dessert or a show-stopping treat for your next party, this recipe has you covered. Feel free to customize the flavors, chocolate, or toppings to suit your tastes—you really can’t go wrong.
I genuinely love this recipe because it brings back those carefree summer memories while satisfying a serious sweet tooth. Give it a try, and I’d love to hear how you make it your own! Don’t forget to leave a comment or share your photos—sharing is caring, after all. Happy indulging!
FAQs About Creamy Chocolate-Covered Strawberry Ice Cream Cups
Can I make these ice cream cups without an ice cream maker?
Yes! Simply pour the ice cream base into a freezer-safe container and stir vigorously every 30 minutes to break up ice crystals until smooth and firm (about 3-4 hours). It takes a bit more effort but works well.
How long do the ice cream cups keep in the freezer?
Stored in an airtight container, they last up to one week. For best texture and flavor, enjoy within a few days.
What’s the best chocolate to use for the shell?
Semi-sweet chocolate chips are ideal for a balanced sweetness and smooth snap. I recommend brands like Ghirardelli or Callebaut for reliable melting and flavor.
Can I prepare these ahead of time for a party?
Absolutely! Assemble and freeze them a day or two in advance. Just let them soften slightly before serving for perfect creaminess.
Are there any allergy-friendly options?
Yes, swap dairy with coconut milk/cream and use dairy-free chocolate for a vegan-friendly treat. Avoid nuts if allergic or choose nut-free toppings.
Pin This Recipe!
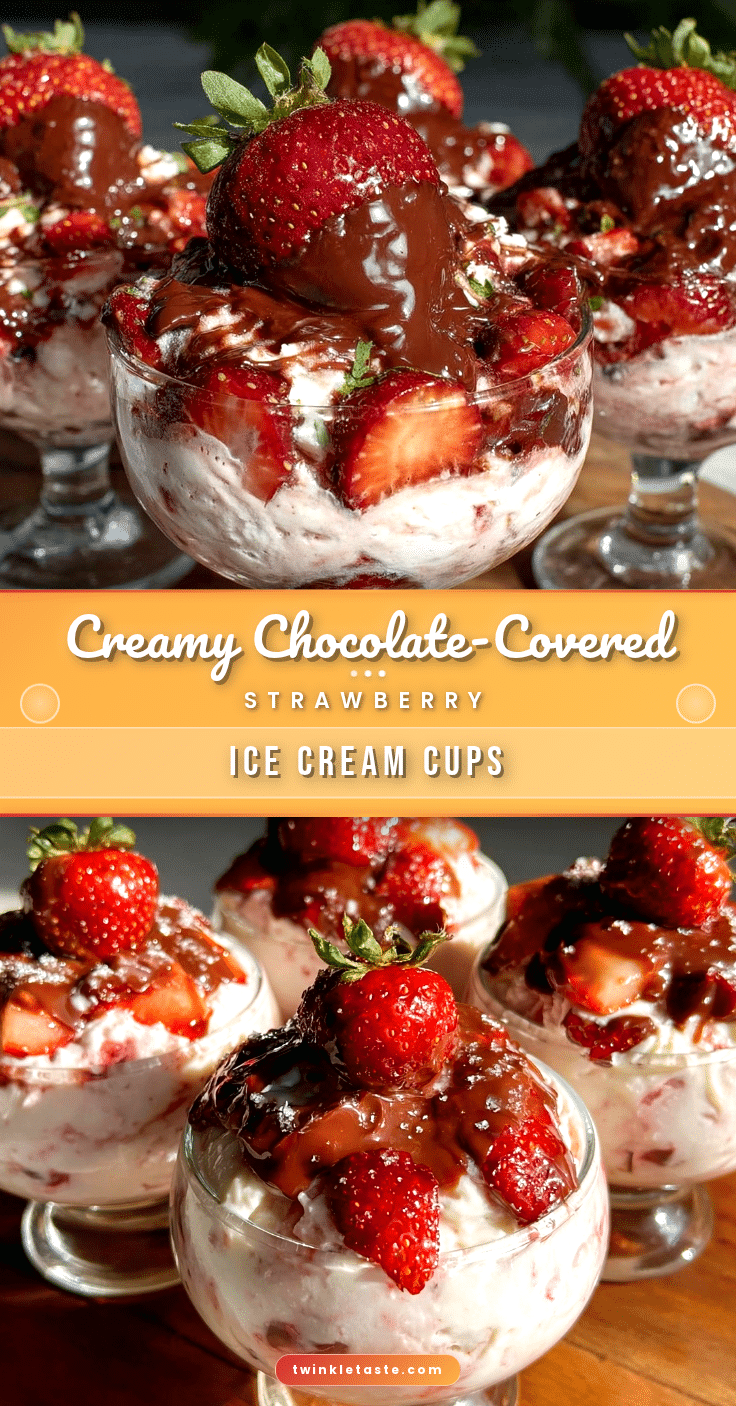
Creamy Chocolate-Covered Strawberry Ice Cream Cups

Deliciously creamy strawberry ice cream nestled inside a crisp homemade chocolate shell, perfect for summer gatherings or cozy nights in. Easy to make with simple ingredients and customizable for dietary preferences.
- Prep Time: 15 minutes
- Cook Time: 25 minutes
- Total Time: 2 hours 40 minutes
- Yield: 8 servings 1x
- Category: Dessert
- Cuisine: American
Ingredients
- 2 cups heavy cream (480 ml)
- 1 cup whole milk (240 ml), room temperature
- 3/4 cup granulated sugar (150 grams)
- 1 teaspoon pure vanilla extract
- 1 cup fresh strawberries, hulled and chopped (about 150 grams)
- 2 teaspoons lemon juice (optional)
- 1 1/2 cups semi-sweet chocolate chips (270 grams)
- 1 tablespoon coconut oil (15 ml)
- Optional garnishes: chopped nuts (almonds or pistachios), freeze-dried strawberry pieces
Instructions
- Prepare the strawberry puree by blending fresh strawberries and lemon juice until smooth but slightly chunky. Set aside.
- In a large bowl, whisk together heavy cream, whole milk, sugar, and vanilla extract until sugar dissolves. Gently stir in the strawberry puree.
- Pour mixture into an ice cream maker and churn for 20-25 minutes until soft-serve consistency. Without an ice cream maker, pour into a freezer-safe container and stir every 30 minutes for 3-4 hours until firm.
- Melt chocolate chips and coconut oil in a microwave-safe bowl in 30-second bursts, stirring until smooth and glossy, or use a double boiler.
- Spoon a thin layer of melted chocolate into silicone molds or cupcake liners. Freeze for 5-7 minutes until set but not hard.
- Scoop strawberry ice cream into molds, pressing gently to fill. Top with another layer of melted chocolate, sealing the edges.
- Freeze molds for at least 2 hours until chocolate shell is hardened and ice cream is firm.
- To serve, briefly run warm water over molds and gently pop out the ice cream cups. Serve immediately.
Notes
If chocolate shell cracks when unmolding, let cups sit at room temperature for 1-2 minutes before serving. For no ice cream maker, stir ice cream base every 30 minutes during freezing to avoid ice crystals. Use fresh ripe strawberries for best flavor. Optional garnishes like freeze-dried strawberries or nuts add extra texture and flavor.
Nutrition
- Serving Size: 1 ice cream cup
- Calories: 275
- Sugar: 18
- Sodium: 40
- Fat: 20
- Saturated Fat: 13
- Carbohydrates: 22
- Fiber: 2
- Protein: 3
Keywords: strawberry ice cream, chocolate shell, homemade dessert, easy ice cream cups, summer dessert, creamy ice cream, chocolate covered strawberries