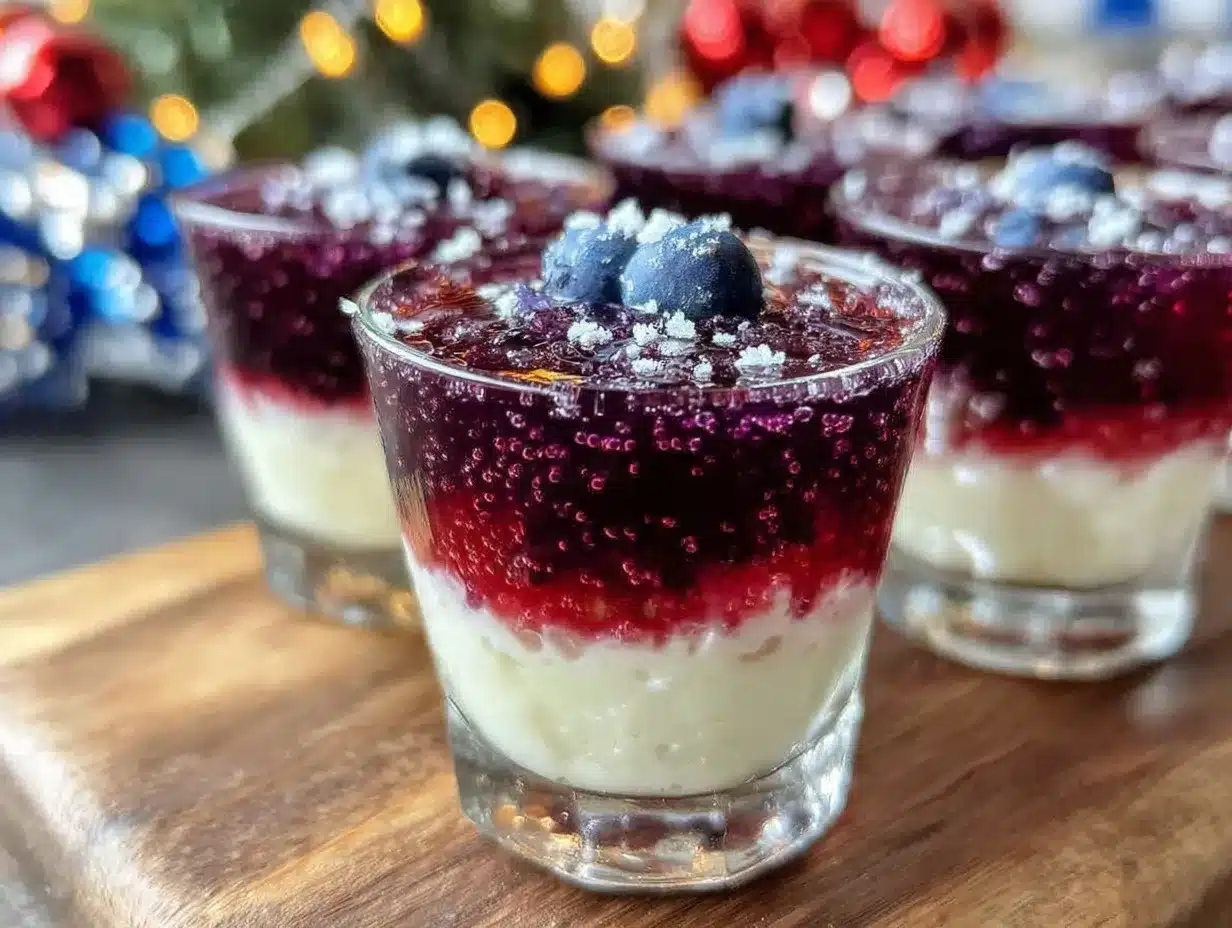
That sharp, tangy snap of gelatin wobbling on a tray — the kind that hits you before you even raise the glass — still pulls me back to those sun-soaked Fourth of July afternoons at my friend’s backyard. The bright red, white, and blue layers shimmering under the summer sun, each one a promise of a burst of flavor and a little buzz to match. Honestly, making these Perfect Red White and Blue Layered Vodka Jello Shots became my go-to way to bring a bit of playful patriotism and fun to any party. The colors remind me of fireworks and childhood celebrations, but the vodka twist? Well, that’s for the grown-up kind of joyful chaos.
It wasn’t always so easy, though. Early on, I struggled to get those layers just right — the white middle layer was always too runny, or the red would bleed into the blue. But after a few test batches (and a lot of laughter with friends), I nailed the technique that gives you those crisp, clean layers that look as good as they taste. I guess what I love most is how this recipe lets me slow down a little, enjoy the process, and share something that’s both simple and a bit special. It’s a little moment of pride in a cup, perfect for kicking off summer nights or any occasion that calls for a splash of festive flair.
So, if you’ve been hunting for a fun, reliably impressive party treat, this might just be your new secret weapon. It’s not about flashy bartending tricks, but about flavors that feel familiar, colors that catch the eye, and a method that respects your time — which, honestly, makes all the difference. This recipe has stuck with me because it’s easy to love but also a treat to make, and I’m betting you’ll find a quiet thrill in pulling off those perfect layers, too.
Why You’ll Love This Recipe
From my many evenings perfecting these vodka jello shots, I’ve come to trust this recipe for its foolproof balance of flavor, color, and party-ready presentation. What sets it apart isn’t just the patriotic hues — it’s the way each layer offers a distinct taste that blends effortlessly on your tongue, creating that unforgettable Red White and Blue flavor experience.
- Quick & Easy: Comes together in under 30 minutes, with chilling time included. Great for last-minute party prep or spontaneous celebrations.
- Simple Ingredients: You probably have most of what you need in your kitchen already — gelatin, vodka, and a few pantry staples.
- Perfect for Summer Parties: Whether it’s the Fourth of July, Memorial Day, or a casual backyard BBQ, these shots bring a festive pop that’s hard to ignore.
- Crowd-Pleaser: Everyone from the cocktail novices to the seasoned drinkers loves them — the fruity sweetness with a boozy kick hits the spot.
- Unbelievably Delicious: The texture is just right — firm enough to hold the layers, yet soft enough to melt in your mouth.
This recipe isn’t just another jello shot. The trick is in the creamy, smooth middle layer that acts as a flavor bridge between the tangy red and crisp blue layers. I’ve tried versions that skip this, but honestly, it never feels quite as satisfying. Plus, the vodka quantity is balanced so you get a nice buzz without overpowering the flavors.
It’s the kind of recipe that makes you pause and appreciate the little things — the way the colors stack up perfectly, the subtle sweetness, and that satisfying jiggle that means you’re about to have a good time. And trust me, it’s fun enough to make you want to experiment, maybe alongside some fresh peach smoothies to keep things balanced!
What Ingredients You Will Need
This recipe uses simple, wholesome ingredients to deliver bold flavor and satisfying texture without the fuss. Most of these are pantry staples, with room for flexible swaps if needed.
- Red Layer:
- 1 package (3 oz / 85 g) strawberry or cherry-flavored gelatin (I prefer Jell-O for consistent color)
- 1 cup (240 ml) boiling water
- ½ cup (120 ml) cold vodka
- White Layer (Creamy Middle):
- 1 package (3 oz / 85 g) unflavored gelatin
- 1 cup (240 ml) boiling water
- ¾ cup (180 ml) sweetened condensed milk (for that smooth, creamy texture)
- ¼ cup (60 ml) cold vodka
- Blue Layer:
- 1 package (3 oz / 85 g) blue raspberry-flavored gelatin
- 1 cup (240 ml) boiling water
- ½ cup (120 ml) cold vodka
For the best results, use fresh gelatin packets and good-quality vodka — I usually go with a smooth, mid-range brand like Tito’s or Smirnoff. If you want a non-alcoholic version, simply swap the vodka with cold water or fruit juice. And if you’re feeling adventurous, you can substitute the strawberry flavor with raspberry or watermelon depending on what’s in season, or even try fresh berries to add a natural touch.
Equipment Needed
- Measuring cups and spoons – for precise ingredient amounts
- Mixing bowls – at least three, one for each layer
- Whisk – to dissolve gelatin evenly
- 9×9-inch (23×23 cm) square glass dish or silicone mold – to set the jello layers
- Refrigerator – essential for chilling each layer to set properly
- Sharp knife – for cutting the finished jello into neat shots or cubes
- Shot glasses or small disposable cups (optional) – if you want to serve in portioned cups instead of cutting squares
Personally, I find silicone molds a joy to work with because they make popping out the shots so easy, but a glass dish works just as well, especially for cutting uniform squares. If you don’t own a whisk, a fork works in a pinch to stir gelatin. Also, keeping a small spray bottle of cold water handy to lightly mist the top between layers can help avoid sticking.
Preparation Method
- Prepare the Red Layer: In a heatproof bowl, pour 1 cup (240 ml) boiling water over the strawberry or cherry gelatin powder. Whisk for about 2 minutes until fully dissolved. Add ½ cup (120 ml) cold vodka and stir gently. Pour the mixture into your prepared 9×9-inch dish or molds. Refrigerate for about 30-45 minutes until it’s firm but slightly tacky to the touch.
- Make the White Layer: While the red layer sets, dissolve the unflavored gelatin in 1 cup (240 ml) boiling water. Let it cool slightly (about 5 minutes), then stir in ¾ cup (180 ml) sweetened condensed milk and ¼ cup (60 ml) cold vodka. The key here is to let the gelatin cool enough so it doesn’t melt the red layer but not so cool that it starts to set prematurely. Gently pour this creamy mixture over the red layer. Refrigerate for another 45 minutes until set.
- Prepare the Blue Layer: Repeat the gelatin dissolving process with the blue raspberry gelatin and 1 cup (240 ml) boiling water. Add ½ cup (120 ml) cold vodka once dissolved. Let cool for a few minutes, then carefully pour over the white layer. Refrigerate for at least 2 hours or until fully set.
- Cut and Serve: Once all layers are firm, use a sharp knife dipped in hot water (wiped dry) to cut the jello into bite-sized squares or pop out individual shots if using molds. Arrange on a festive platter and enjoy!
Make sure to keep the layers chilled between pours — patience here is your best friend. If you pour the next layer too soon, they’ll blend and lose that crisp separation. Also, for a cleaner cut, warming your knife between slices helps a lot. I remember the first time I tried rushing this step, and the colors bled all over — not the look you want for a party!
Cooking Tips & Techniques
Crafting the perfect layered vodka jello shots is all about timing and temperature control. Here are some tips I’ve picked up over several batches:
- Don’t rush the layers: Each layer should be mostly set but still slightly tacky before adding the next. Too soft, and the layers blend; too firm, and the layers won’t adhere well.
- Cool gelatin mixtures before pouring: Hot gelatin can melt the layer beneath. Let it cool to just above room temperature (around 90°F / 32°C) before pouring gently over the previous layer.
- Use a spoon to pour the layers: Pouring over the back of a spoon slows the liquid and prevents breaking or mixing of layers.
- Keep your knife warm and clean: When cutting, dip the knife in hot water and dry it to get smooth, clean cuts without dragging colors together.
- Don’t skimp on the sweetened condensed milk: This ingredient makes the white layer creamy and beautiful but also helps it set properly and bind the layers.
- Experiment with vodka brands: Some vodkas can have stronger flavors or smoother finishes. I like to stick with neutral-flavored ones like Tito’s for a balanced taste.
I once tried a shortcut by skipping the middle layer, and it just didn’t have the same magic — the texture was off, and the flavors didn’t meld as nicely. So honestly, that creamy white layer is the heart of this recipe.
Variations & Adaptations
If you want to mix things up or cater to different tastes, these ideas might spark some inspiration:
- Non-alcoholic version: Replace vodka with cold sparkling water or fruit juice. It still tastes festive and fun for all ages.
- Flavored vodka swaps: Try berry-flavored or citrus-infused vodka to add a twist on the classic.
- Layer flavors: Switch the red layer to watermelon or raspberry gelatin, or the blue to blueberry for natural fruit variations.
- Different molds: Use star-shaped silicone molds for a more thematic presentation perfect for celebrations.
- Dairy-free option: Swap sweetened condensed milk with coconut condensed milk to make the white layer vegan-friendly.
One time, I swapped the red gelatin for a homemade fresh strawberry puree mixed with gelatin — it was a bit more fragile but added a nice fresh flavor that my friends really loved. If you want to try this, just reduce the water slightly to keep the gel set firm.
Serving & Storage Suggestions
Serve these vodka jello shots chilled for the best texture and flavor. They’re perfect straight from the fridge and make an eye-catching addition to any party table.
- Presentation Tip: Arrange the shots on a white platter or a tray lined with fresh mint or small edible flowers for a festive touch.
- Pair with light snacks or finger foods like creamy whipped feta dip or fresh fruit skewers to balance the sweetness.
- Storage: Keep leftover shots covered and refrigerated. They last up to 3 days but are best enjoyed within 24 hours for optimal texture.
- Reheating isn’t recommended, but if the shots become too firm, let them sit at room temperature for 10 minutes before serving.
- Flavors deepen slightly as they chill, so making them a few hours ahead can help meld the tastes.
Nutritional Information & Benefits
Each jello shot contains approximately 90 calories, mostly from alcohol and sweetened condensed milk. While these are definitely a treat and best enjoyed in moderation, the gelatin provides a bit of protein and collagen, which some find beneficial for skin and joints.
This recipe is naturally gluten-free and can be adapted to be dairy-free if you use coconut condensed milk. Keep in mind, the alcohol content means these are not suitable for children or those avoiding alcohol.
From a wellness perspective, I like that these shots offer a portion-controlled way to enjoy a festive drink — unlike pouring a full cocktail, you get the fun in a neat little package.
Conclusion
These Perfect Red White and Blue Layered Vodka Jello Shots are a delightful, playful way to bring a bit of color and buzz to any gathering. They’re proof that a simple recipe, with a little patience and attention, can wow a crowd and create moments worth remembering. I love how customizable they are, which means you can make them your own — whether that’s dialing back the booze or experimenting with new flavors.
For me, these shots capture the spirit of summer celebrations and the joy of sharing something homemade and festive. If you try them out, don’t hesitate to tweak and personalize — and if you’d like a sweet companion to your party lineup, I highly recommend pairing these with the dark cherry cheesecake swirl brownies for a decadent contrast.
Here’s to many joyful toasts and colorful moments!
FAQs
How long do these layered vodka jello shots take to set?
Each layer needs about 30 to 45 minutes to set enough before adding the next. The final layer should chill for at least 2 hours to firm completely.
Can I make these jello shots ahead of time?
Yes! You can prepare them a day in advance and keep them refrigerated. Just cover tightly to prevent drying out.
What if I don’t have sweetened condensed milk for the white layer?
You can substitute with coconut condensed milk for a dairy-free option or try mixing cream with a little sugar, but the texture might change slightly.
Can I use flavored vodka for these shots?
Absolutely! Flavored vodkas like berry or citrus can add a nice twist, just keep the amount the same so the gelatin sets properly.
How do I prevent the layers from mixing together?
Make sure each layer is mostly set and cool before adding the next. Pour gently over the back of a spoon to avoid breaking the layers.
Pin This Recipe!
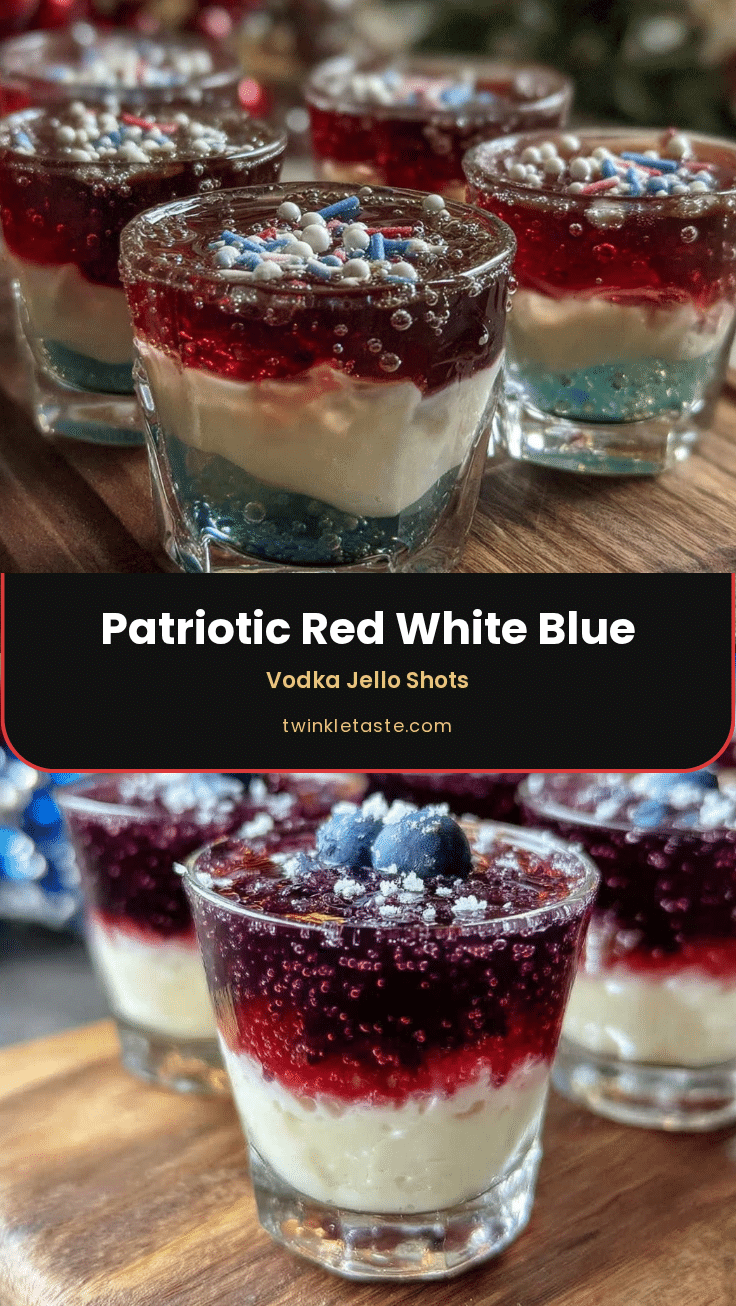
Perfect Red White and Blue Layered Vodka Jello Shots
A festive and fun recipe for layered vodka jello shots with distinct red, white, and blue layers, perfect for summer parties and celebrations.
- Prep Time: 15 minutes
- Cook Time: 3 hours 15 minutes
- Total Time: 3 hours 30 minutes
- Yield: 36 servings
- Category: Party Appetizer
- Cuisine: American
Ingredients
- Red Layer: 1 package (3 oz / 85 g) strawberry or cherry-flavored gelatin
- Red Layer: 1 cup (240 ml) boiling water
- Red Layer: ½ cup (120 ml) cold vodka
- White Layer: 1 package (3 oz / 85 g) unflavored gelatin
- White Layer: 1 cup (240 ml) boiling water
- White Layer: ¾ cup (180 ml) sweetened condensed milk
- White Layer: ¼ cup (60 ml) cold vodka
- Blue Layer: 1 package (3 oz / 85 g) blue raspberry-flavored gelatin
- Blue Layer: 1 cup (240 ml) boiling water
- Blue Layer: ½ cup (120 ml) cold vodka
Instructions
- Prepare the Red Layer: In a heatproof bowl, pour 1 cup boiling water over the strawberry or cherry gelatin powder. Whisk for about 2 minutes until fully dissolved. Add ½ cup cold vodka and stir gently. Pour the mixture into a prepared 9×9-inch dish or molds. Refrigerate for 30-45 minutes until firm but slightly tacky.
- Make the White Layer: While the red layer sets, dissolve the unflavored gelatin in 1 cup boiling water. Let it cool slightly (about 5 minutes), then stir in ¾ cup sweetened condensed milk and ¼ cup cold vodka. Let the gelatin cool enough so it doesn’t melt the red layer but not so cool that it starts to set prematurely. Gently pour this creamy mixture over the red layer. Refrigerate for another 45 minutes until set.
- Prepare the Blue Layer: Dissolve the blue raspberry gelatin in 1 cup boiling water. Add ½ cup cold vodka once dissolved. Let cool for a few minutes, then carefully pour over the white layer. Refrigerate for at least 2 hours or until fully set.
- Cut and Serve: Once all layers are firm, use a sharp knife dipped in hot water (wiped dry) to cut the jello into bite-sized squares or pop out individual shots if using molds. Arrange on a festive platter and enjoy.
Notes
Do not rush the layers; each should be mostly set but still tacky before adding the next to prevent blending. Cool gelatin mixtures before pouring to avoid melting the previous layer. Pour over the back of a spoon to slow the liquid and prevent mixing. Keep the knife warm and clean for smooth cuts. Sweetened condensed milk is key for the creamy white layer and helps bind layers. Use neutral-flavored vodka for balanced taste. For non-alcoholic versions, substitute vodka with cold water or fruit juice. Store covered in the refrigerator and consume within 3 days for best texture.
Nutrition
- Serving Size: 1 jello shot (approx
- Calories: 90
- Sugar: 11
- Sodium: 40
- Fat: 0.5
- Saturated Fat: 0.3
- Carbohydrates: 12
- Protein: 1
Keywords: vodka jello shots, layered jello shots, red white and blue jello, party shots, patriotic jello shots, summer party drinks