“Wait, you made cheesecake bars? For the Fourth of July? Seriously?” I remember my friend’s skeptical tone when I first showed up with these bright, layered bars at our backyard BBQ. Honestly, I didn’t expect much fuss—just a quick festive dessert to bring something different to the table. But you know how sometimes those last-minute ideas turn into the star of the party? That was exactly this recipe’s story.
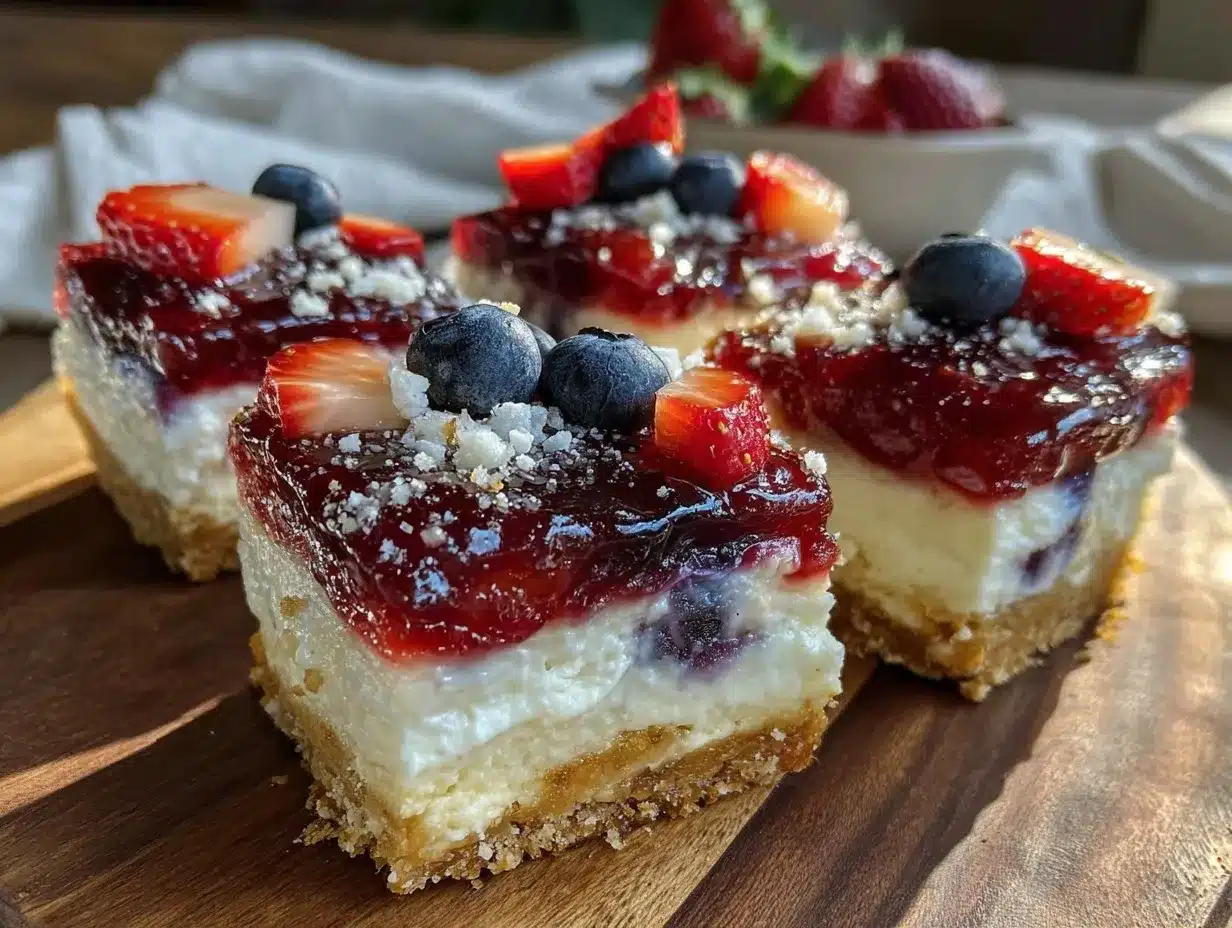
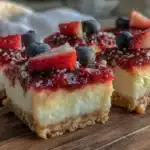
The first time I whipped up these Perfect Red White and Blue Layered Flag Cheesecake Bars, I was juggling a hectic weekend of errands and a looming cookout. I wasn’t even sure if the layers would set right or if the colors would look as crisp as I imagined. Yet, between mixing, layering, and a touch of patience, the result was a dessert that looked like a miniature American flag and tasted like a creamy, fruity dream.
What stuck with me wasn’t just the way they brightened the dessert spread, but how easy and forgiving the recipe felt. No complicated piping or fiddly decorations—just straightforward layers of sweet, tangy, and fresh flavors that everyone instantly loved. This recipe became my go-to for any summer gathering, especially because it packs that perfect combo of eye-catching colors and smooth cheesecake richness.
And yeah, it’s a little fun to see the kids’ eyes light up when they spot those bold red strawberry layers next to the fluffy white cheesecake and the fresh blueberry topping. It’s like a little patriotic celebration on a plate, but without the stress. Honestly, these bars hold a quiet kind of magic for me—reminding me that sometimes the simplest ideas make the best memories.
Why You’ll Love This Recipe
After making these cheesecake bars several times (okay, maybe more than I’d admit), I’ve gathered a few reasons why this recipe keeps coming back to my kitchen:
- Quick & Easy: Comes together in under 45 minutes, plus chilling time. Perfect when you want a no-fuss patriotic dessert without hours in the kitchen.
- Simple Ingredients: No need for specialty stores—basic pantry and fridge staples like cream cheese, fresh berries, and sugar are all you need.
- Perfect for Summer Celebrations: Whether it’s Independence Day, Memorial Day, or a casual weekend barbecue, these bars fit right in.
- Crowd-Pleaser: Kids and adults alike are drawn to the bright, fresh flavors and creamy texture. It’s the kind of dessert everyone asks for seconds of.
- Unbelievably Delicious: The tangy cream cheese layer balanced with sweet strawberry and juicy blueberry layers creates a flavor harmony that’s honestly hard to beat.
This isn’t just another cheesecake bar recipe. What sets it apart is the layering technique that keeps each color distinct yet perfectly blended in taste. I like to use fresh strawberries and real blueberry puree (not just whole berries) to get that smooth, rich color and flavor that pops. Plus, the crust is buttery but light, giving a subtle crunch without overwhelming the creamy layers.
And if you’re like me, sometimes you want dessert that’s festive but not over the top or too sweet. These bars strike that balance just right—comfort food with a fresh twist, a little fun for the eyes, and a lot of love in every bite.
What Ingredients You Will Need
This recipe relies on simple, wholesome ingredients that come together beautifully without fuss. Each component plays a key role in building those iconic red, white, and blue layers that taste as good as they look.
- For the Crust:
- 1 ½ cups graham cracker crumbs (about 10 full sheets, crushed finely)
- ¼ cup granulated sugar
- 6 tablespoons unsalted butter, melted (I recommend Kerrygold for richness)
- Pinch of salt
- For the White Cheesecake Layer:
- 16 oz (450g) cream cheese, softened (Philadelphia brand works best for smooth texture)
- ⅓ cup granulated sugar
- 1 large egg, room temperature
- 1 teaspoon pure vanilla extract
- 2 tablespoons sour cream (adds creaminess and slight tang)
- For the Red Strawberry Layer:
- 1 ½ cups fresh strawberries, hulled and chopped
- 2 tablespoons granulated sugar
- 1 teaspoon lemon juice (brightens the fruit flavor)
- 1 tablespoon cornstarch (to thicken the puree)
- For the Blueberry Layer:
- 1 ½ cups fresh or frozen blueberries
- 2 tablespoons granulated sugar
- 1 teaspoon lemon juice
- 1 tablespoon cornstarch
If fresh berries aren’t in season, frozen ones work just fine—just thaw and drain excess water before using. I also like to swap sour cream for Greek yogurt in the cheesecake layer sometimes, especially if I want a slightly tangier flavor or a thicker texture. For a gluten-free option, almond flour can replace graham cracker crumbs for the crust.
Equipment Needed
Gathering the right tools makes this layered cheesecake bar recipe easier and more enjoyable. You won’t need anything fancy, but a few basics really help with the layering and texture.
- 9×9-inch square baking pan (preferably with removable sides to ease bar removal)
- Mixing bowls (at least three: for crust, cheesecake, and fruit layers)
- Electric mixer or stand mixer (handheld works too, but electric saves time)
- Food processor or blender (to puree strawberries and blueberries smoothly)
- Spatula and rubber scraper (for smooth layering and scraping bowls)
- Measuring cups and spoons
If you don’t have a food processor, a good blender or even a sturdy immersion blender can work for berry purees. I remember once trying to mash the fruit with a fork—definitely not the same silky texture! Also, a springform pan can be used but the square pan is better for neat, uniform bars.
Preparation Method
- Make the Crust: Preheat your oven to 325°F (163°C). In a medium bowl, combine 1 ½ cups graham cracker crumbs, ¼ cup sugar, melted butter, and a pinch of salt. Mix until crumbs are evenly coated and resemble wet sand. Press this mixture firmly into the bottom of the 9×9-inch pan. A flat-bottomed glass works great to get an even crust. Bake for 10 minutes, then let cool while you prepare the layers.
- Prepare the White Cheesecake Layer: Using an electric mixer, beat 16 oz softened cream cheese until smooth and creamy (about 2 minutes). Add ⅓ cup sugar and mix well. Beat in 1 large egg until just combined, followed by 1 teaspoon vanilla extract and 2 tablespoons sour cream. Mix until smooth but don’t overbeat—stop once everything is incorporated. Spread this cheesecake layer evenly over the cooled crust, smoothing the top with a spatula.
- Make the Red Strawberry Layer: In a blender or food processor, puree 1 ½ cups chopped strawberries with 2 tablespoons sugar and 1 teaspoon lemon juice until smooth. Pour into a small saucepan, stir in 1 tablespoon cornstarch, and cook over medium heat, stirring constantly until the mixture thickens (about 3-4 minutes). Remove from heat and let cool completely. Once cooled, gently spread this layer over the white cheesecake layer. It’s key the strawberry layer is cool to avoid mixing colors.
- Prepare the Blueberry Layer: Repeat the same process for blueberries: puree 1 ½ cups blueberries with 2 tablespoons sugar and 1 teaspoon lemon juice. Stir in 1 tablespoon cornstarch and cook until thickened. Cool completely. Spread this final blueberry layer over the strawberry layer carefully.
- Chill and Set: Cover the pan with plastic wrap and refrigerate for at least 4 hours, ideally overnight. This chilling step is essential for the layers to firm up and flavors to meld nicely.
- Cut and Serve: Once chilled, use a sharp knife dipped in hot water and wiped dry to cut neat bars. Clean the knife between cuts for clean edges. Serve cold and enjoy the creamy, colorful layers.
Pro tip: If the fruit layers seem too runny, a bit more cornstarch (up to 2 tablespoons total) can help next time. Also, layering the fruit slowly and chilling between each layer isn’t necessary but helps keep the colors sharp if you’re particular about presentation.
Cooking Tips & Techniques
Making these cheesecake bars is straightforward, but I’ve learned a few things over time that help the process run smoother and the results shine:
- Softened Cream Cheese Is Key: Make sure your cream cheese is fully softened to avoid lumps. I usually leave it on the counter for an hour or zap it for 10 seconds in the microwave if I’m in a rush.
- Don’t Overmix: Overbeating the cheesecake layer can introduce too much air, causing cracks or a grainy texture after baking. Mix just until combined and smooth.
- Puree Fruit Thoroughly: For that smooth, flag-like look, puree your berries completely. Chunks can break the clean lines between layers.
- Thicken the Fruit Layers: The cornstarch is your friend here. Without it, the fruit layers might bleed into the cheesecake, ruining the defined stripes.
- Use a Sharp Knife for Cutting: Warm the blade under hot water and dry it between cuts to get clean lines and avoid smearing the layers.
- Plan Chilling Time: These bars need time to set properly. I usually prepare them the night before a celebration and keep them chilled until serving.
One time, I tried rushing the fruit layers by skipping the cooking step—the bars looked a bit messy and the flavors didn’t set right. Lesson learned: patience pays off! Also, if you want to speed things up, making the crust and cheesecake layers a day ahead really helps.
Variations & Adaptations
While these Perfect Red White and Blue Layered Flag Cheesecake Bars shine as is, I’ve played around with a few tweaks that keep things interesting:
- Berry Swaps: Instead of strawberries and blueberries, try raspberries and blackberries for a different but equally stunning color combo. Just adjust sugar to taste since raspberries are tarter.
- Non-Dairy Version: Use vegan cream cheese and coconut yogurt in place of sour cream for a dairy-free option. Replace butter with coconut oil in the crust.
- Flavor Boost: Add a splash of almond extract to the cheesecake layer for a nutty twist or a teaspoon of lemon zest in the fruit layers for extra brightness.
I’ve even swapped out the graham cracker crust for a classic brown sugar pound cake base once for a more cakey texture, which was a fun change for a brunch dessert. Also, if you prefer no-bake options, the cheesecake layer can be chilled without baking, but the texture will be softer.
Serving & Storage Suggestions
These cheesecake bars are best served chilled, straight from the fridge, to maintain their firm layers and creamy texture. They look gorgeous plated simply or alongside fresh berries and a sprig of mint for a festive touch.
Pair them with light, refreshing drinks like sparkling lemonade or iced tea to balance the richness. For a fun combo, serve them after a savory dish like crispy chicken lettuce wraps, which offers a great contrast of flavors at summer gatherings.
Store leftover bars in an airtight container in the refrigerator for up to 4 days. They can also be frozen—wrap tightly in plastic wrap and foil, then freeze for up to 2 months. Thaw overnight in the fridge before serving.
Reheating isn’t recommended as the bars are best enjoyed cold, but if you want a softer texture, let them sit at room temperature for 15 minutes before cutting. Over time, the flavors meld beautifully, especially the berry layers, making each bite even more satisfying the next day.
Nutritional Information & Benefits
Each serving of these cheesecake bars contains approximately:
| Calories | Fat | Carbohydrates | Protein | Sugar |
|---|---|---|---|---|
| 280 kcal | 18g | 25g | 5g | 18g |
The cream cheese provides a good source of calcium and protein, while the fresh berries contribute antioxidants and vitamins C and K. Using real fruit purees rather than artificial flavorings keeps the dessert naturally sweet and nutrient-rich.
This recipe can be adapted to be gluten-free with almond flour crust and lower sugar by adjusting the fruit layer sweetness. It’s not a low-calorie treat, but it’s a balanced indulgence that fits well into a mindful diet.
Conclusion
These Perfect Red White and Blue Layered Flag Cheesecake Bars have earned their place in my summer dessert lineup because they’re as easy to make as they are delightful to eat. Whether you’re celebrating a patriotic holiday or just craving a creamy, fruity treat, these bars deliver on flavor and festive flair.
I love that you can tweak them to suit your taste and dietary needs without losing that signature look and feel. They remind me that sometimes the best desserts are the ones that bring a little joy to the table without fuss or frills.
If you try this recipe, I’d love to hear how you make it your own or what occasion you served it for. It always feels good to share those little kitchen victories and keep the tradition going.
Happy baking—and here’s to sweet celebrations with friends and family!
Frequently Asked Questions
Can I make these cheesecake bars ahead of time?
Absolutely! In fact, they taste even better after chilling overnight. Just cover tightly and keep refrigerated until serving.
What if I don’t have fresh strawberries or blueberries?
Frozen berries work well—just thaw them and drain any excess juice before pureeing. This helps maintain the right consistency for layering.
Can I use a different crust instead of graham crackers?
Yes, a brown sugar pound cake crust or almond flour crust works great. Check out this brown sugar pound cake recipe for an alternative base.
Is it okay to skip baking the cheesecake layer?
You can try a no-bake cheesecake layer, but it will be softer and less structured. Baking helps the layer set firmly so the bars hold their shape when sliced.
How do I get clean layers without colors bleeding together?
Make sure each fruit layer is completely cooled before adding the next, and use cornstarch to thicken the purees. Patience during layering is key to crisp, defined stripes.
Pin This Recipe!
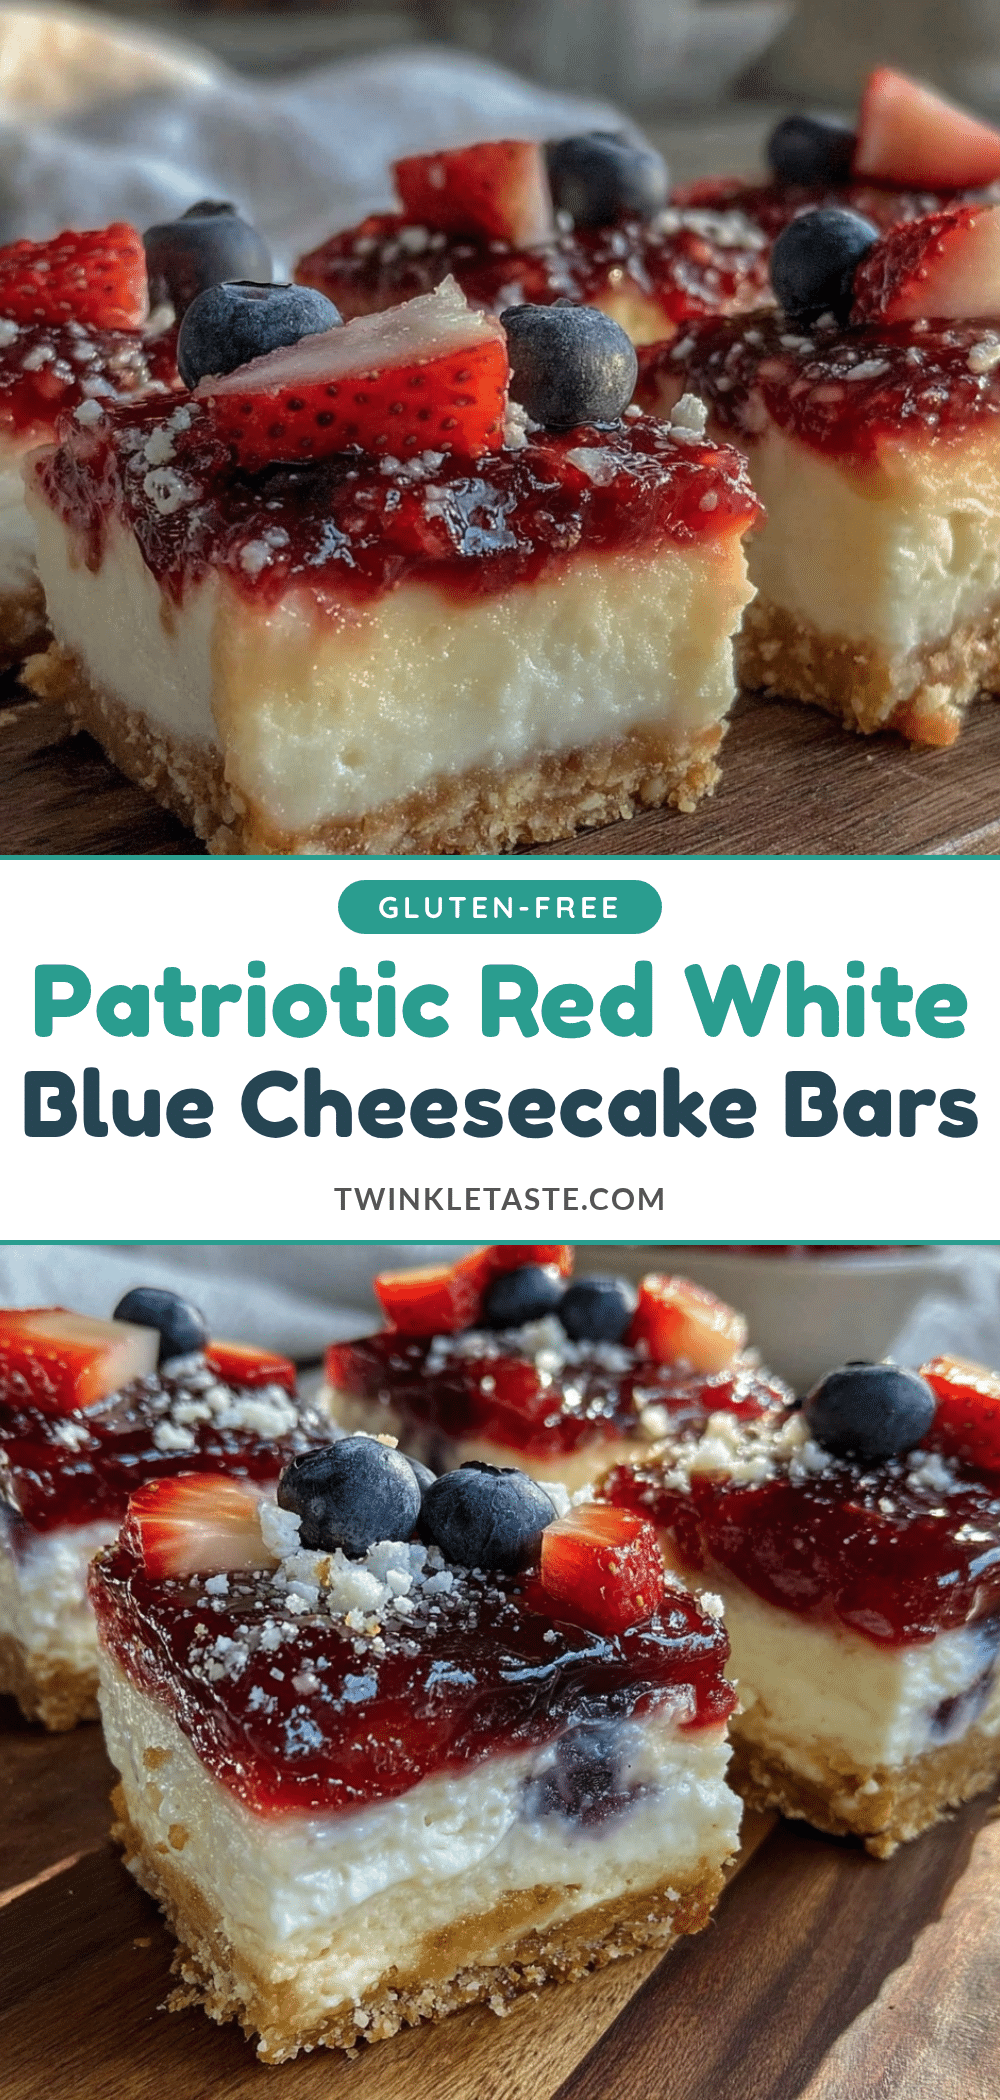
Perfect Red White and Blue Layered Flag Cheesecake Bars
These easy, festive cheesecake bars feature distinct red strawberry, white cheesecake, and blue blueberry layers, perfect for patriotic celebrations like the Fourth of July.
- Prep Time: 15 minutes
- Cook Time: 10 minutes
- Total Time: 4 hours 25 minutes
- Yield: 16 servings 1x
- Category: Dessert
- Cuisine: American
Ingredients
- 1 ½ cups graham cracker crumbs (about 10 full sheets, crushed finely)
- ¼ cup granulated sugar
- 6 tablespoons unsalted butter, melted
- Pinch of salt
- 16 oz (450g) cream cheese, softened
- ⅓ cup granulated sugar
- 1 large egg, room temperature
- 1 teaspoon pure vanilla extract
- 2 tablespoons sour cream
- 1 ½ cups fresh strawberries, hulled and chopped
- 2 tablespoons granulated sugar
- 1 teaspoon lemon juice
- 1 tablespoon cornstarch
- 1 ½ cups fresh or frozen blueberries
- 2 tablespoons granulated sugar
- 1 teaspoon lemon juice
- 1 tablespoon cornstarch
Instructions
- Preheat oven to 325°F (163°C). In a medium bowl, combine graham cracker crumbs, ¼ cup sugar, melted butter, and a pinch of salt. Mix until crumbs are evenly coated and resemble wet sand. Press firmly into the bottom of a 9×9-inch pan. Bake for 10 minutes, then let cool.
- Using an electric mixer, beat softened cream cheese until smooth (about 2 minutes). Add ⅓ cup sugar and mix well. Beat in egg until just combined, then add vanilla extract and sour cream. Mix until smooth but do not overbeat. Spread evenly over cooled crust.
- In a blender or food processor, puree chopped strawberries with 2 tablespoons sugar and 1 teaspoon lemon juice until smooth. Pour into a small saucepan, stir in 1 tablespoon cornstarch, and cook over medium heat, stirring constantly until thickened (3-4 minutes). Remove from heat and cool completely. Spread gently over cheesecake layer.
- Repeat the same process for blueberries: puree with 2 tablespoons sugar and 1 teaspoon lemon juice, stir in 1 tablespoon cornstarch, cook until thickened, cool completely, and spread over strawberry layer.
- Cover pan with plastic wrap and refrigerate for at least 4 hours or overnight to set.
- Use a sharp knife dipped in hot water and wiped dry to cut neat bars. Clean knife between cuts for clean edges. Serve chilled.
Notes
Use softened cream cheese to avoid lumps. Do not overmix cheesecake layer to prevent cracks. Puree fruit thoroughly for smooth layers. Use cornstarch to thicken fruit layers and prevent bleeding. Chill bars overnight for best results. Warm knife blade between cuts for clean edges. Frozen berries can be used if fresh are unavailable; thaw and drain excess water before use. For gluten-free option, substitute almond flour for graham cracker crumbs.
Nutrition
- Serving Size: 1 bar (assuming 16 b
- Calories: 280
- Sugar: 18
- Fat: 18
- Carbohydrates: 25
- Protein: 5
Keywords: cheesecake bars, patriotic dessert, Fourth of July dessert, red white and blue dessert, layered cheesecake, berry cheesecake bars