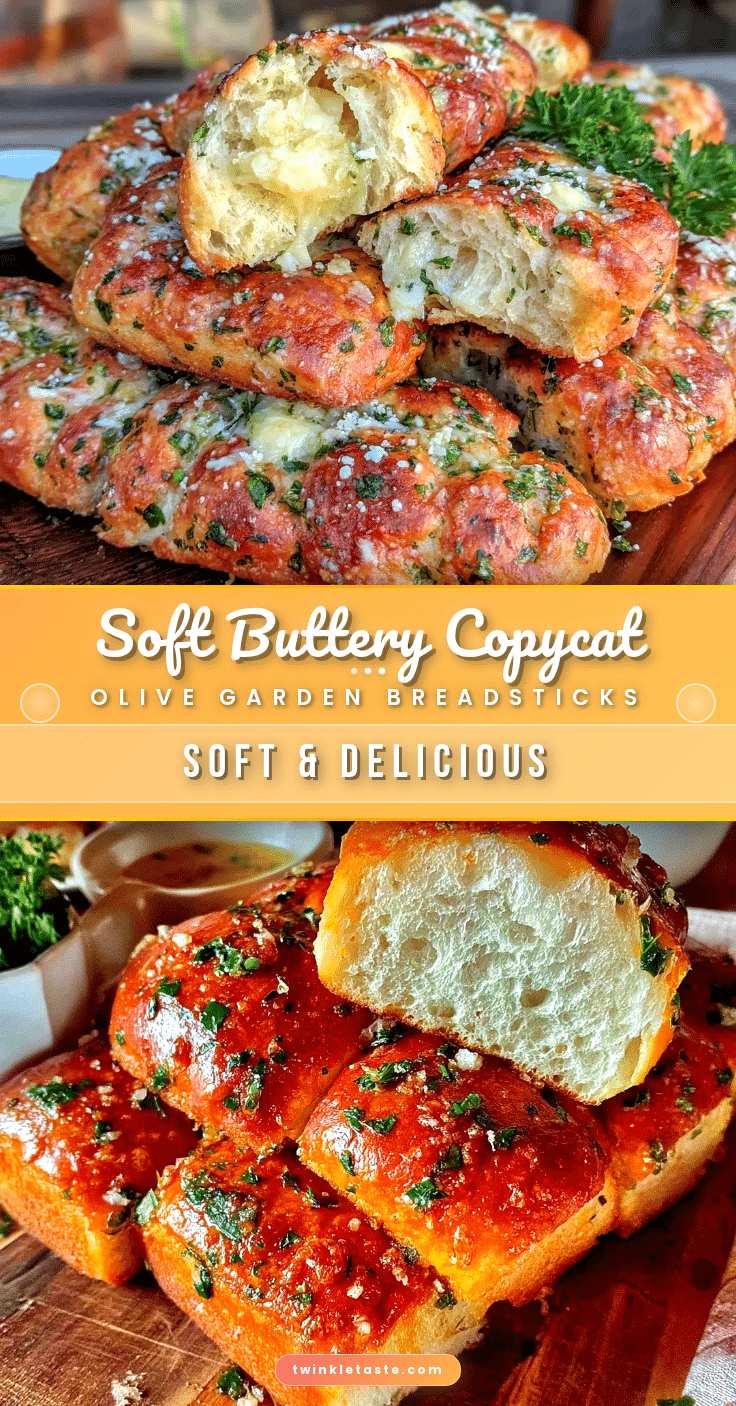
“You wouldn’t believe it, but these breadsticks almost didn’t happen,” I told my friend over text as I pulled a warm batch from the oven. It started with a craving after a long, hectic day — you know the kind where you just want something comforting, simple, but satisfying. I had some frozen dough leftover from a rushed pizza night and figured, why not try to recreate those famous Olive Garden breadsticks? Honestly, I was skeptical at first. Breadsticks? At home? Could they really get that soft, buttery, garlicky vibe without a restaurant kitchen?
Fast forward a couple of tries (and a few flour-covered kitchen disasters), and I ended up with breadsticks so good that my roommate basically refused to let me share the recipe. The smell alone—warm dough, melted butter, a hint of garlic and herbs—made our tiny apartment feel like a cozy Italian trattoria. It’s funny how something as simple as breadsticks can turn a chaotic evening into a calm, tasty moment. They’re soft, fluffy, and just the right amount of buttery, with a little sprinkle of salt that hits all the right spots.
Now, every time I make these soft copycat Olive Garden breadsticks, I remember that exhausted night when convenience and craving collided to create a new favorite. They’ve stuck around not just because they taste great, but because they remind me that sometimes comfort comes in the smallest, simplest bites. If you’re looking for a homemade breadstick that nails that classic Olive Garden softness and flavor, this recipe has your name on it.
Why You’ll Love This Recipe
After testing this recipe multiple times during a week-long breadstick obsession phase, I can say with confidence it’s one of the most satisfying homemade breadstick recipes I’ve tried. Here’s why it’s worth your kitchen time:
- Quick & Easy: The dough comes together in under 15 minutes with a simple rise, making it perfect for busy weeknights or last-minute guests.
- Simple Ingredients: You probably already have everything on hand—flour, yeast, butter, and a few pantry staples.
- Perfect for Any Occasion: Whether you’re hosting a casual dinner, prepping for a cozy night in, or need a side to your favorite pasta, these breadsticks fit right in.
- Crowd-Pleaser: Kids, adults, picky eaters—they all rave about the soft texture and buttery garlic flavor.
- Unbelievably Delicious: The buttery garlic herb topping sets these breadsticks apart, giving you that restaurant feel with homemade goodness.
What makes this recipe different? The secret lies in the dough’s softness, which comes from the right balance of yeast and a touch of sugar, and the topping—a mix of melted butter, garlic powder, and Italian herbs that you brush on right after baking. No fancy equipment, no complicated steps, just a straightforward recipe that delivers that signature Olive Garden breadstick experience.
Honestly, this isn’t just a side dish—it’s comfort food that makes you close your eyes and savor each bite. Plus, it pairs beautifully with homemade pasta dishes like a creamy garlic butter pasta or a quick shrimp stir fry. And if you’re on the hunt for easy dinner ideas, check out my quick shrimp stir fry recipe for a perfect meal pairing.
What Ingredients You Will Need
This recipe uses simple, wholesome ingredients to deliver bold flavor and that soft, fluffy texture without fuss. Most are pantry staples, so no special grocery trips required.
- All-purpose flour: About 3 cups (360g) for the dough. You can swap with bread flour for a chewier texture.
- Active dry yeast: 2 1/4 teaspoons (one packet). Look for fresh packets for best rise.
- Warm water: 1 cup (240ml), around 110°F (43°C) to activate the yeast.
- Sugar: 1 tablespoon to feed the yeast and add a touch of sweetness.
- Salt: 1 teaspoon, essential for flavor balance.
- Olive oil: 2 tablespoons, adds richness and helps with dough elasticity.
- Unsalted butter: 4 tablespoons, melted for brushing on top.
- Garlic powder: 1 teaspoon, for that signature garlic flavor.
- Dried Italian seasoning: 1 teaspoon, or a mix of dried oregano, basil, and parsley.
- Coarse sea salt or kosher salt: For sprinkling on top after baking (optional, but highly recommended).
If you want to make these gluten-free, try substituting the flour with a gluten-free all-purpose blend, though texture may vary slightly. For a dairy-free version, swap the butter with vegan margarine or olive oil. I recommend using quality olive oil like Colavita for that extra depth of flavor. And when it comes to yeast, Fleischmann’s active dry yeast has been my go-to for consistent results.
Equipment Needed
- Mixing bowl: A large one to comfortably mix and proof the dough.
- Measuring cups and spoons: For precise ingredient amounts.
- Wooden spoon or dough hook: To mix the dough—if you have a stand mixer, use the dough hook attachment for ease.
- Baking sheet: A rimmed sheet works best to hold the breadsticks in place.
- Parchment paper or silicone baking mat: Prevents sticking and eases cleanup.
- Pastry brush: For brushing melted butter and garlic mixture over the breadsticks.
If you’re on a budget, regular bowls and spoons work perfectly fine. I once tried shaping these breadsticks directly on a greased baking sheet without parchment, but they stuck a bit, making cleanup trickier. Silicone mats are a game changer if you bake often. Also, having a kitchen timer handy helps you keep track of rising times without getting distracted (which I often do!).
Preparation Method

- Activate the yeast: In your large mixing bowl, combine 1 cup (240ml) warm water (about 110°F/43°C), 1 tablespoon sugar, and 2 1/4 teaspoons active dry yeast. Stir lightly and let it sit for about 5 minutes until foamy. If it doesn’t foam, the yeast might be dead—start over with fresh yeast.
- Make the dough: Add 2 tablespoons olive oil, 1 teaspoon salt, and about 3 cups (360g) all-purpose flour to the yeast mixture. Using a wooden spoon or dough hook, mix until the dough pulls away from the sides but is still slightly sticky. Add more flour a tablespoon at a time if needed. This step usually takes about 5 minutes.
- Knead: Turn the dough onto a lightly floured surface and knead for 6-8 minutes until smooth and elastic. If using a stand mixer, knead with the dough hook for 5 minutes on medium speed.
- First rise: Place the dough in a lightly oiled bowl, cover with a clean towel or plastic wrap, and let it rise in a warm spot for 45-60 minutes until doubled in size. I usually pop mine in the oven with the light on for a cozy environment.
- Shape the breadsticks: Punch down the dough gently to release air. Divide it into 12 equal pieces (about 2 ounces or 57g each). Roll each piece into a 6-inch (15cm) long stick. Place them on a parchment-lined baking sheet, spaced about 1 inch (2.5cm) apart.
- Second rise: Cover the shaped breadsticks loosely with a towel and let rise for another 20-30 minutes until puffy.
- Bake: Preheat your oven to 400°F (200°C). Bake the breadsticks for 12-15 minutes until golden on top but still soft inside. You want them to look lightly browned, not crusty.
- Prepare the garlic butter topping: While baking, melt 4 tablespoons unsalted butter. Stir in 1 teaspoon garlic powder and 1 teaspoon dried Italian seasoning.
- Brush & serve: Remove breadsticks from oven and immediately brush generously with the garlic butter mixture. Sprinkle with coarse sea salt if desired. Serve warm.
Pro tip: If your dough feels too sticky during shaping, wet your hands slightly rather than adding more flour to keep the breadsticks tender. Also, don’t skip the second rise—it’s key for that soft, pillow-like texture. When baking, keep an eye on color; every oven varies, and a minute too long can dry them out.
Cooking Tips & Techniques
Getting these breadsticks just right took a few trials, so here are some tips I picked up along the way:
- Yeast activation: Always use warm water, not hot. Too hot, and the yeast dies; too cold, and it won’t activate. The 110°F mark is just right.
- Kneading: Proper kneading develops gluten, which gives the breadsticks their stretch and chew. If you skip this, they might be dense.
- Proofing environment: A warm, draft-free spot helps the dough rise properly. I sometimes use my microwave with a cup of hot water inside to create a steamy environment.
- Butter topping: Brush the breadsticks immediately after baking so the butter soaks in while they’re hot. It adds moisture and flavor.
- Don’t overbake: Unlike crusty bread, these breadsticks should remain soft and light. Pull them out as soon as the tops turn golden.
One time I accidentally overbaked the batch, and they turned out more like rolls—still tasty but not the soft breadstick magic I aimed for. Timing really is everything here. Also, multitasking by prepping the garlic butter while the breadsticks bake saves time and makes the process feel smoother.
Variations & Adaptations
Want to tweak this recipe? Here are some ideas I’ve tried and loved:
- Cheesy breadsticks: Sprinkle shredded mozzarella or Parmesan over the breadsticks before baking for a gooey twist.
- Herb variations: Swap Italian seasoning for fresh rosemary or thyme for a fragrant change.
- Whole wheat version: Replace half the all-purpose flour with whole wheat flour for a nuttier flavor and added fiber.
- Spicy kick: Mix a pinch of red pepper flakes into the garlic butter for some heat.
- Vegan option: Use olive oil instead of butter for the topping, and a plant-based milk if you want a richer dough.
I once made these breadsticks to go with a creamy garlic butter pasta dish, similar to my quick garlic butter pasta, and they were the perfect match. You can also bake them as knots or twists for a fun presentation.
Serving & Storage Suggestions
Serve these breadsticks warm, ideally fresh from the oven, brushed with that garlicky butter. They pair beautifully with pasta dishes, hearty soups, or salads. For an easy appetizer, serve alongside marinara or Alfredo sauces for dipping.
To store, place cooled breadsticks in an airtight container at room temperature for up to 2 days. For longer keeping, wrap them tightly in foil and freeze for up to 3 months. Reheat frozen breadsticks wrapped in foil at 350°F (175°C) for 10-15 minutes, then brush with fresh garlic butter after warming.
Flavors mellow and deepen if you let the breadsticks rest overnight, but I’m usually too impatient and prefer them warm and soft right away. They also make a great snack or side for a casual dinner, especially when paired with dishes like my simple baked salmon with lemon and herbs.
Nutritional Information & Benefits
Each breadstick (about 1/12th of the recipe) contains roughly 150-170 calories, depending on exact butter usage and flour type. They provide a moderate amount of carbohydrates and fats, primarily from the flour and butter.
Key ingredients like olive oil contribute heart-healthy monounsaturated fats, and the garlic powder offers antioxidant benefits. Using whole wheat flour in the variation adds fiber and micronutrients.
While these breadsticks do contain gluten and dairy, substitutions like gluten-free flour and vegan butter can make them suitable for different dietary needs. They’re a comforting, moderately indulgent treat best enjoyed in moderation with balanced meals.
Conclusion
Making soft copycat Olive Garden breadsticks at home isn’t just about replicating a popular restaurant favorite—it’s about creating a cozy, satisfying treat that turns simple ingredients into something memorable. Whether you’re a seasoned home baker or just looking for a quick side to complement your weeknight dinner, this recipe delivers that perfect soft, buttery, garlicky bite every time.
Feel free to customize the herbs, add cheese, or try the vegan version to fit your taste and lifestyle. I love these breadsticks because they bring a little bit of comfort and warmth to any meal, which is something we all need now and then.
If you try this recipe, I’d love to hear how it worked out for you or any fun twists you added. Sharing stories and tips makes cooking even more enjoyable, don’t you think? Wishing you soft, buttery breadstick bliss in your kitchen!
Frequently Asked Questions
Can I make the dough ahead of time?
Yes! After the first rise, you can refrigerate the dough for up to 24 hours. Just let it come to room temperature before shaping and the second rise.
What if I don’t have active dry yeast?
You can use instant yeast by reducing the amount by about 25% and mixing it directly with the flour. The rise time may be shorter.
How do I keep breadsticks soft the next day?
Store them in an airtight container and reheat gently with a damp paper towel wrapped around them in the microwave for 10-15 seconds to regain softness.
Can I freeze the breadsticks after baking?
Absolutely. Wrap cooled breadsticks tightly in foil or plastic wrap, freeze up to 3 months, and reheat in the oven wrapped in foil at 350°F (175°C) for 10-15 minutes.
Do I need to use garlic powder, or can I use fresh garlic?
Garlic powder is preferred for even flavor and no risk of burning. If using fresh garlic, mix it with melted butter and brush on after baking to avoid bitterness.
Pin This Recipe!
Soft Copycat Olive Garden Breadsticks

These soft, fluffy, and buttery breadsticks replicate the classic Olive Garden breadsticks with a simple homemade recipe featuring a garlic butter herb topping.
- Prep Time: 15 minutes
- Cook Time: 15 minutes
- Total Time: 1 hour 15 minutes
- Yield: 12 breadsticks 1x
- Category: Side Dish
- Cuisine: Italian-American
Ingredients
- 3 cups (360g) all-purpose flour (can substitute bread flour for chewier texture)
- 2 1/4 teaspoons active dry yeast (one packet)
- 1 cup (240ml) warm water (about 110°F/43°C)
- 1 tablespoon sugar
- 1 teaspoon salt
- 2 tablespoons olive oil
- 4 tablespoons unsalted butter, melted (for brushing)
- 1 teaspoon garlic powder
- 1 teaspoon dried Italian seasoning (or mix of oregano, basil, parsley)
- Coarse sea salt or kosher salt (for sprinkling, optional)
Instructions
- Activate the yeast: In a large mixing bowl, combine warm water, sugar, and active dry yeast. Stir lightly and let sit for about 5 minutes until foamy.
- Make the dough: Add olive oil, salt, and flour to the yeast mixture. Mix until dough pulls away from sides but is slightly sticky, adding more flour if needed.
- Knead the dough on a lightly floured surface for 6-8 minutes until smooth and elastic (or 5 minutes with stand mixer dough hook).
- First rise: Place dough in a lightly oiled bowl, cover, and let rise in a warm spot for 45-60 minutes until doubled in size.
- Shape the breadsticks: Punch down dough, divide into 12 equal pieces (~2 oz each), roll each into 6-inch sticks, and place on parchment-lined baking sheet spaced 1 inch apart.
- Second rise: Cover loosely and let rise for 20-30 minutes until puffy.
- Bake: Preheat oven to 400°F (200°C). Bake breadsticks for 12-15 minutes until golden but still soft.
- Prepare garlic butter topping: Melt butter and stir in garlic powder and Italian seasoning.
- Brush breadsticks immediately after baking with garlic butter mixture and sprinkle with coarse salt if desired. Serve warm.
Notes
Use warm water at about 110°F to activate yeast properly. Do not skip the second rise for soft texture. Brush breadsticks immediately after baking with garlic butter to keep them moist and flavorful. Avoid overbaking to maintain softness. Wet hands slightly when shaping dough if sticky instead of adding more flour.
Nutrition
- Serving Size: 1 breadstick
- Calories: 160
- Sugar: 2
- Sodium: 220
- Fat: 7
- Saturated Fat: 3.5
- Carbohydrates: 22
- Fiber: 1
- Protein: 4
Keywords: breadsticks, Olive Garden breadsticks, copycat recipe, homemade breadsticks, garlic breadsticks, soft breadsticks, easy breadsticks