“Hey, did you seriously just make dessert bars from a frozen mix?” my friend laughed over the phone, clearly skeptical but curious. I’d called her on a sweltering July afternoon, desperate to share the discovery of these easy make-ahead frozen dessert bars that had become my summer obsession. Honestly, I wasn’t expecting much myself when I first threw together this no-fuss treat—more of a last-minute hack than a carefully planned recipe.
That day, my freezer was stocked with random ingredients, and I was craving something sweet and refreshing without turning on the oven or waiting forever. I grabbed a few staples, layered them into a pan, and popped it in the freezer. A few hours later, I pulled out these frozen dessert bars that tasted like the perfect blend of creamy, fruity, and just the right amount of sweet. The texture was dreamy—like ice cream met a soft, chewy bar—and it was ready to go whenever I wanted.
Since then, these bars have shown up at backyard gatherings, late-night snacks, and even packed lunches. They’re that kind of recipe that’s forgiving, quick, and genuinely satisfying. I’m sharing this because, well, summer treats shouldn’t be complicated or messy. Plus, if you’re anything like me, juggling work and life in the heat, having a make-ahead frozen dessert feels like a small, cool victory.
So, while this recipe is simple, it stuck with me because it’s honest, practical, and delivers every time. No fuss, no guilt, just sweet moments you can grab and enjoy—whether it’s a quiet night or an unplanned get-together.
Why You’ll Love This Recipe
After making these easy make-ahead frozen dessert bars for summer over and over, I can say they’re a reliable crowd-pleaser. Here’s why this recipe earned a permanent spot in my freezer:
- Quick & Easy: You can whip these bars up in about 15 minutes and have them ready to freeze. Perfect for when you want dessert but don’t want to spend hours in the kitchen.
- Simple Ingredients: No need to hunt down fancy items. Most of these ingredients are pantry staples or basics you probably already have on hand.
- Perfect for Summer: These bars are cold, refreshing, and just sweet enough to beat the heat without feeling heavy.
- Crowd-Pleaser: I’ve brought these bars to potlucks and family BBQs, and they always get rave reviews from kids and adults alike.
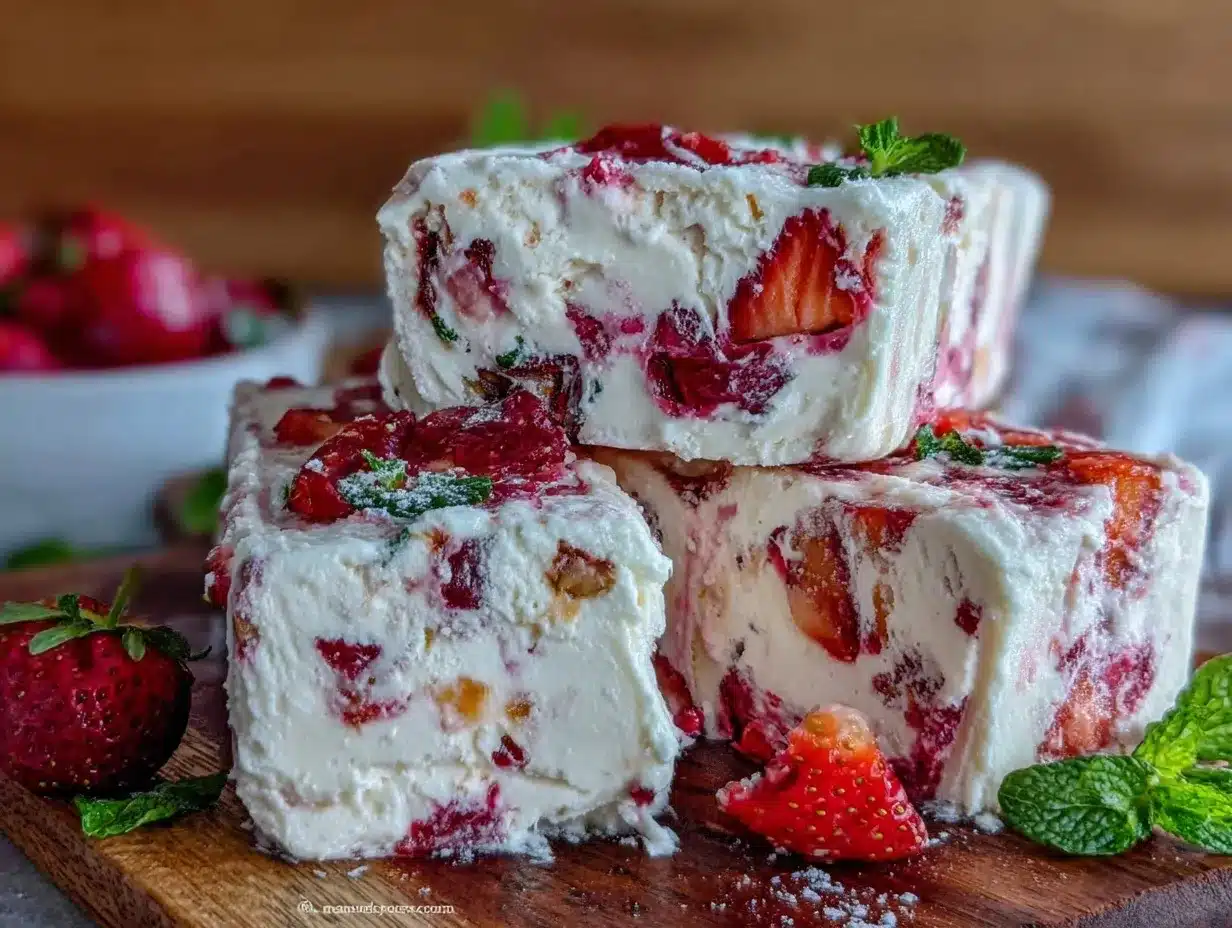
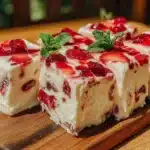
- Unbelievably Delicious: The creamy base combined with a crunchy crust and a hint of fruity brightness sets this apart from your average frozen treat.
What makes this recipe stand out is the layering technique and the use of a creamy component blended with real fruit, which gives it a smooth yet textured bite. It’s not just frozen sugar on a stick—it’s thoughtfully balanced for flavor and texture. Plus, the bars keep well in the freezer, so you can make a batch ahead of time and always have a summer treat ready to go.
For me, it’s about having something that feels both indulgent and manageable—comfort food that doesn’t come with stress or mess, just a little cool joy whenever I need it.
What Ingredients You Will Need
This recipe uses simple, wholesome ingredients to deliver bold flavor and satisfying texture without the fuss. Most are easy to find year-round, and you can swap a few to suit your preferences or dietary needs.
- For the crust:
- 1 ½ cups graham cracker crumbs (about 150g) – I like using Honey Maid for that perfect balance of sweetness and crunch
- ⅓ cup unsalted butter, melted (75g) – adds richness and helps bind the crust
- 2 tablespoons granulated sugar – just enough sweetness to balance the tangy filling
- For the creamy filling:
- 2 cups cream cheese, softened (450g) – room temperature for easy mixing
- ½ cup powdered sugar (60g) – to sweeten without gritty texture
- 1 teaspoon vanilla extract – brings out subtle warmth
- 1 cup Greek yogurt (240g) – for that tangy creaminess and a little protein boost
- For the fruit layer:
- 2 cups mixed berries (300g) – fresh or frozen, depending on the season (I love fresh blueberries and raspberries in summer)
- 2 tablespoons honey or maple syrup – adds natural sweetness
- 1 tablespoon lemon juice – brightens the fruit flavor and balances sweetness
- Optional toppings:
- Chopped nuts (like almonds or pistachios) for extra crunch
- Shredded coconut or chocolate chips for a fun twist
You can substitute the graham cracker crust with gluten-free cookies or almond flour for a gluten-free option. For dairy-free, swap cream cheese and yogurt with coconut cream or cashew-based alternatives. When I make these bars in winter, I sometimes swap berries for thawed frozen mango or peaches to keep it seasonal.
Equipment Needed
- 8×8 inch (20×20 cm) baking dish or pan – glass or metal works fine; I prefer glass for easier slicing and less sticking
- Mixing bowls – one large for the filling and one medium for the crust
- Electric mixer or stand mixer – helps get the cream cheese super smooth but you can also use a sturdy whisk if you’re patient
- Rubber spatula – great for scraping down the sides and folding ingredients gently
- Measuring cups and spoons – for accuracy, especially with sugar and vanilla
- Plastic wrap or foil – to cover the pan while freezing
No fancy appliances required. If you don’t have an electric mixer, just soften the cream cheese thoroughly and mix vigorously by hand; it takes a little elbow grease but it works. For slicing the frozen bars, a sharp knife warmed under hot water helps get clean cuts without crumbling.
Preparation Method
- Prepare the crust: In a medium bowl, combine graham cracker crumbs, melted butter, and granulated sugar. Stir until the crumbs are evenly coated and the mixture looks like wet sand. Press the mixture firmly into the bottom of your 8×8 inch pan, creating a compact layer. This usually takes about 5 minutes. Pop it into the freezer while you prepare the filling to help it set quickly.
- Make the creamy filling: In a large bowl, beat the softened cream cheese with powdered sugar and vanilla extract until smooth and fluffy—this should take around 3-4 minutes on medium speed with an electric mixer. Add the Greek yogurt and mix until fully combined. The texture should be creamy and slightly thick, not runny.
- Prepare the fruit layer: In a small bowl, toss the mixed berries with honey (or maple syrup) and lemon juice. Let it sit for 5-10 minutes to macerate and release some juices.
- Assemble the bars: Take the crust out of the freezer. Spread half of the cream cheese filling evenly over the crust. Spoon the berry mixture on top of the filling, gently pressing some berries down but keeping the layer distinct. Carefully spread the remaining cream cheese filling over the fruit—don’t worry if some berries peek through; it adds a nice look.
- Add toppings (optional): Sprinkle chopped nuts, shredded coconut, or chocolate chips over the top if desired. This adds texture and a little extra flair.
- Freeze: Cover the pan tightly with plastic wrap or foil. Freeze for at least 4 hours, ideally overnight, until the bars are firm and sliceable.
- Serving: Before slicing, let the bars sit at room temperature for about 5 minutes to soften slightly for easier cutting. Use a sharp knife warmed under hot water for neat slices.
Pro tip: If your bars are too hard straight from the freezer, a quick 10-minute thaw keeps them scoopable without melting. Also, if you want to speed things up, prepping the crust and filling in advance means you can assemble and freeze whenever you want—a real time saver on busy days.
Cooking Tips & Techniques
Making frozen dessert bars sounds simple, but a few tricks can make all the difference:
- Softening cream cheese: This can be a sticking point. I usually leave it out on the counter for at least 30 minutes before mixing or zap it in the microwave for 10 seconds. Too cold, and you’ll get lumps.
- Pressing the crust firmly: Don’t just sprinkle it on. Use the bottom of a glass or measuring cup to pack it tight. This helps it hold together when you slice the bars later.
- Layer gently: When adding the fruit and the second layer of filling, be careful not to mix layers. This keeps the bars visually appealing and texturally distinct.
- Freezing time: Don’t rush it! At least 4 hours is needed for bars to firm up properly. Overnight is best if you can wait.
- Cutting neat bars: Use a warm, sharp knife and wipe it clean between cuts to prevent sticking and crumbling.
One mistake I made early on was using frozen berries straight from the freezer without thawing or tossing them with sweetener. That led to icy, flavorless bites. Now, macerating the berries softens them and brings out their natural sweetness, which really transforms the bar.
Multitasking tip: While the crust chills in the freezer, whip up the filling and get the berries ready. This way, assembly feels quick and seamless, even on hectic days.
Variations & Adaptations
There’s plenty of room to make these frozen dessert bars your own:
- Dairy-free version: Swap cream cheese and Greek yogurt for coconut cream and dairy-free cream cheese alternatives. The bars stay creamy with a subtle coconut twist.
- Seasonal fruit swaps: In fall, try diced peaches or mango instead of berries. Fresh or frozen works, just adjust the sweetener to taste.
- Chocolate lover’s twist: Add a layer of melted dark chocolate over the crust before adding the filling, or swirl cocoa powder into the cream cheese mixture for a mocha vibe.
- Nut-free option: Skip any nuts in the topping and use gluten-free graham crackers to keep it allergy-friendly.
- Personal experiment: I once added a spoonful of matcha powder to the cream cheese filling for a subtle green tea flavor that paired surprisingly well with the berries—definitely worth a try if you like a little twist.
You can also adjust sweetness levels or add a splash of liqueur (like Grand Marnier) to the fruit for adult-only versions. The recipe is forgiving, so feel free to experiment!
Serving & Storage Suggestions
Serving these bars chilled is key—they’re best enjoyed straight from the freezer after a brief thaw. They make a refreshing dessert for summer BBQs, picnics, or even a casual dessert after a weeknight meal, pairing well with iced tea or lemonade.
For a fun presentation, you can slice them into small squares and arrange on a platter with fresh berries and mint leaves. They also complement savory dishes like grilled chicken or light salads. If you appreciate easy meals, these bars would make a nice finish after dishes such as the easy baked salmon with lemon and herbs.
To store, keep covered tightly in the freezer for up to 2 weeks. For longer storage, wrap individual bars in parchment paper and place them in a freezer-safe container or bag. When reheating or thawing, avoid microwave heating too long, as it can make the texture watery.
Interestingly, the flavors develop a bit over time, with the fruit becoming even juicier and the creamy filling mellowing. This makes these bars not just a quick fix but a great make-ahead treat to have on hand.
Nutritional Information & Benefits
Each serving of these frozen dessert bars (about one-eighth of the pan) contains approximately:
| Calories | 220 |
|---|---|
| Protein | 5g |
| Fat | 13g |
| Carbohydrates | 22g |
| Fiber | 2g |
Thanks to the Greek yogurt and cream cheese, these bars offer a modest protein boost compared to traditional frozen sweets. The berries contribute antioxidants and vitamins, especially vitamin C, making this dessert a bit more nourishing than your average treat.
The recipe is naturally gluten-free if you use gluten-free graham crackers and can be adapted for dairy-free diets. Just be mindful of the sweeteners if you’re watching sugar intake. I appreciate this recipe because it strikes a balance between indulgence and nutrition—a way to enjoy summer sweetness without feeling heavy or overly processed.
Conclusion
This recipe for easy make-ahead frozen dessert bars for summer has become my go-to for warm days when I want something cool, sweet, and fuss-free. The layers of creamy filling, tangy fruit, and crunchy crust come together in a way that feels both comforting and fresh.
What I love most is how adaptable it is—you can tweak ingredients, swap toppings, and customize flavors without stress. Whether you make it for a party or a quiet night in, it promises to satisfy those sweet cravings without taking over your day.
Give it a try, make it your own, and let me know how you like to serve yours. Here’s to cool, simple summer treats that bring a little happiness with every bite.
FAQs
Can I use other fruits besides berries for these dessert bars?
Absolutely! Peaches, mangoes, or even cherries work well. Just adjust the sweetener and lemon juice depending on the fruit’s sweetness and tartness.
How long do the frozen dessert bars last in the freezer?
They keep well for up to 2 weeks when covered tightly. Beyond that, texture and flavor may start to decline.
Can I make these bars without cream cheese?
You can substitute cream cheese with dairy-free cream cheese or blend silken tofu for a vegan alternative, though the texture will be a bit different.
Is it possible to prepare these bars without an electric mixer?
Yes, just make sure your cream cheese is very soft and mix thoroughly with a sturdy whisk or spoon. It might take a bit more time but still works.
Can I freeze these bars in individual portions?
Definitely! Wrapping each bar in parchment paper before freezing helps prevent sticking and makes grab-and-go treats easy.
Pin This Recipe!
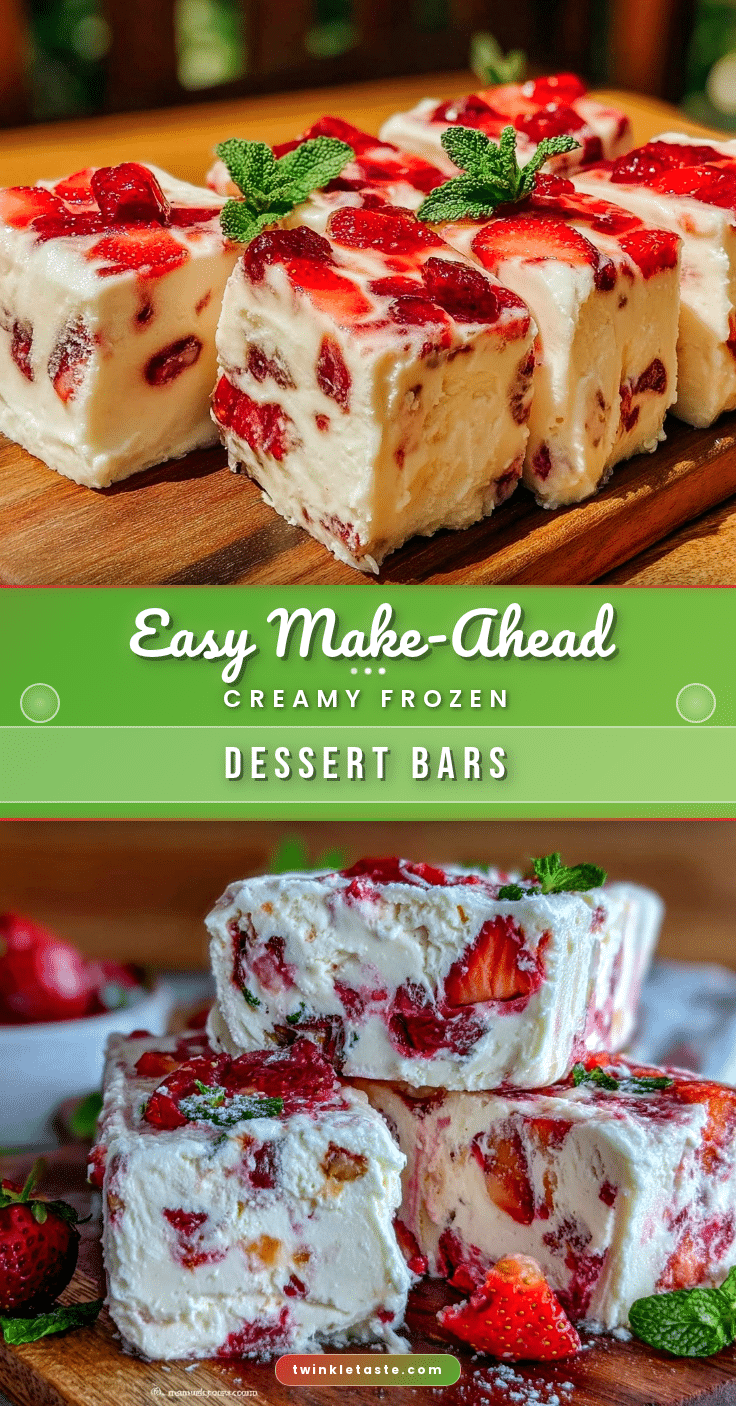
Easy Make-Ahead Frozen Dessert Bars Recipe Perfect for Summer Treats
These easy make-ahead frozen dessert bars are a quick, refreshing, and crowd-pleasing summer treat with a creamy filling, fruity layer, and crunchy crust.
- Prep Time: 15 minutes
- Cook Time: 0 minutes
- Total Time: 4 hours 15 minutes
- Yield: 8 servings 1x
- Category: Dessert
- Cuisine: American
Ingredients
- 1 ½ cups graham cracker crumbs (about 150g)
- ⅓ cup unsalted butter, melted (75g)
- 2 tablespoons granulated sugar
- 2 cups cream cheese, softened (450g)
- ½ cup powdered sugar (60g)
- 1 teaspoon vanilla extract
- 1 cup Greek yogurt (240g)
- 2 cups mixed berries (300g)
- 2 tablespoons honey or maple syrup
- 1 tablespoon lemon juice
- Optional toppings: chopped nuts (almonds or pistachios), shredded coconut, chocolate chips
Instructions
- Prepare the crust: In a medium bowl, combine graham cracker crumbs, melted butter, and granulated sugar. Stir until evenly coated and mixture looks like wet sand. Press firmly into bottom of 8×8 inch pan. Freeze while preparing filling.
- Make the creamy filling: Beat softened cream cheese with powdered sugar and vanilla extract until smooth and fluffy (3-4 minutes). Add Greek yogurt and mix until combined.
- Prepare the fruit layer: Toss mixed berries with honey (or maple syrup) and lemon juice. Let sit 5-10 minutes to macerate.
- Assemble the bars: Spread half the cream cheese filling over crust. Spoon berry mixture on top, gently pressing some berries down. Spread remaining cream cheese filling over fruit layer.
- Add optional toppings if desired.
- Cover pan tightly with plastic wrap or foil. Freeze at least 4 hours or overnight until firm.
- Before slicing, let bars sit at room temperature for 5 minutes. Use a sharp knife warmed under hot water for clean cuts.
Notes
Soften cream cheese before mixing to avoid lumps. Press crust firmly to hold together. Macerate berries to avoid icy bites. Use a warm knife for neat slicing. Bars keep well up to 2 weeks frozen. For dairy-free, substitute cream cheese and yogurt with coconut cream or cashew-based alternatives. For gluten-free, use gluten-free graham crackers or almond flour.
Nutrition
- Serving Size: One-eighth of the 8x
- Calories: 220
- Fat: 13
- Carbohydrates: 22
- Fiber: 2
- Protein: 5
Keywords: frozen dessert bars, summer dessert, make-ahead dessert, no-bake dessert, easy dessert, frozen treat, berry dessert