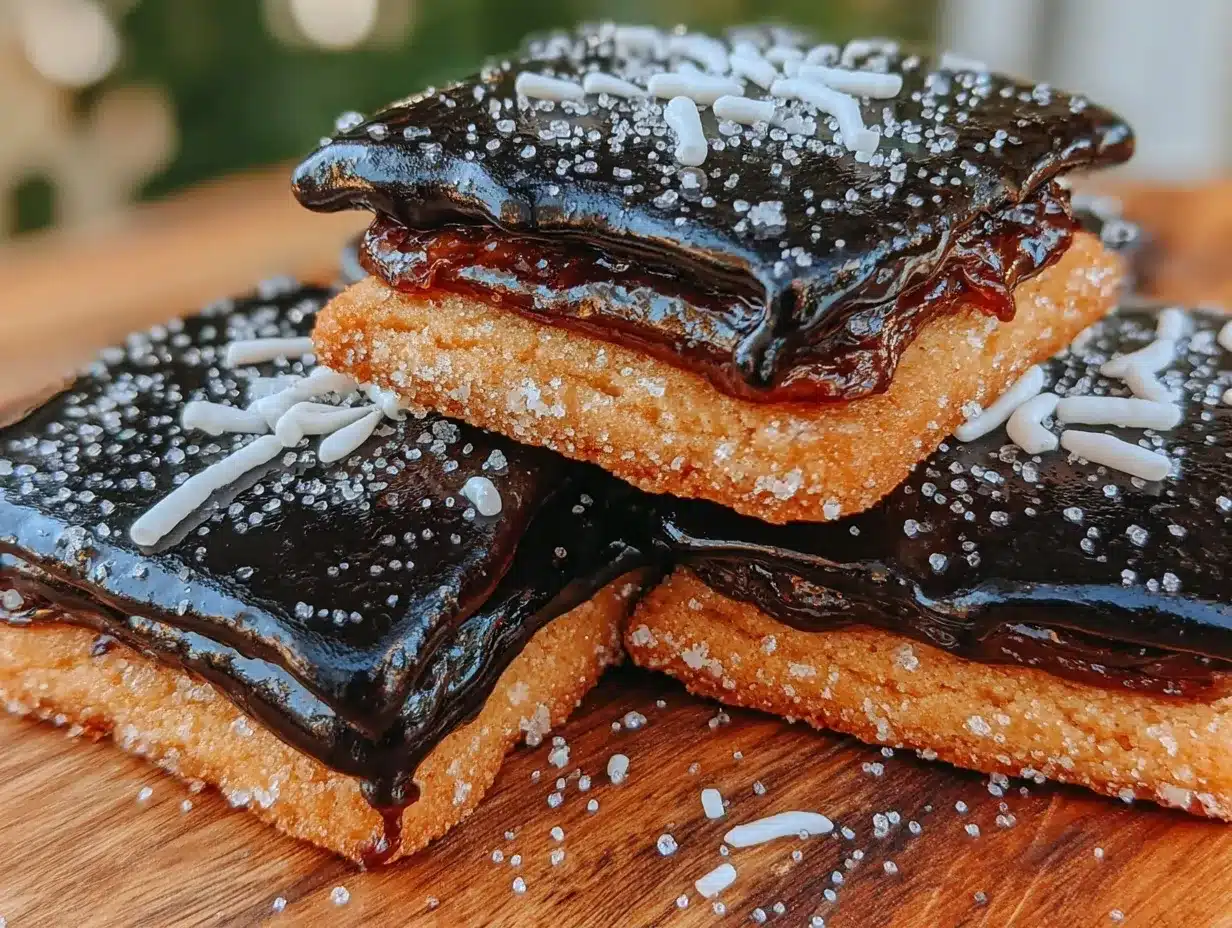
“You’re kidding, right? Tiny edible graduation caps?” That’s what my niece said when I first suggested baking these Easy Graduation Cap Sugar Cookies with Royal Icing Decoration for her high school graduation party. Honestly, I wasn’t even sure if I could pull off those tiny, perfect caps with royal icing. But, well, you know how it goes—last minute, a bit of stress, and a kitchen full of flour dust and laughter.
It all started on a chaotic Friday evening. I had just wrapped up a hectic week, and the idea was to whip up something festive yet simple. I found myself scrolling through cookie ideas, thinking, “What about something that looks sharp but tastes even better?” The graduation caps seemed like a fun, thematic challenge—plus, they fit perfectly alongside my niece’s love for all things sweet and celebratory.
The first batch wasn’t flawless—some caps looked more like tilted hats, and my piping skills were, let’s say, a work in progress. But the taste? Spot on. And after a few tweaks and a lot of icing practice, these cookies became the star of the party. The best part? They were easier to make than I expected, even with all that royal icing detail.
Now, whenever I see those little sugar caps, I’m reminded of that busy night filled with quick fixes, kiddo giggles, and the kind of sweet satisfaction that only baking can bring. These cookies aren’t just treats; they’re little celebrations you can eat, perfect for marking milestones with a smile and a sugar rush.
So, if you’re looking for a festive, fun, and surprisingly easy way to celebrate graduation day (or any big achievement), these easy graduation cap sugar cookies with royal icing decoration might just be your new go-to. They bring the party to the plate—without all the fuss.
Why You’ll Love This Easy Graduation Cap Sugar Cookies Recipe
Honestly, after making these cookies several times within just a couple of weeks, I can say this recipe truly balances simplicity and style. Here’s why this easy graduation cap sugar cookie recipe stands out:
- Quick & Easy: From mixing dough to decorating, it comes together in under 2 hours, perfect for last-minute celebrations.
- Simple Ingredients: Pantry staples like flour, sugar, and butter—no fancy or hard-to-find stuff needed.
- Perfect for Graduation Parties: Fun, thematic, and ideal for both kids and adults to enjoy at any celebration.
- Crowd-Pleaser: These cookies always get compliments on both their look and buttery, tender flavor.
- Unbelievably Delicious: The royal icing adds that smooth, glossy finish and sweet touch without overpowering the cookie flavor.
This isn’t just any sugar cookie recipe with a sprinkle of decoration. What sets it apart is the balance of a soft but sturdy cookie base that holds up perfectly under royal icing’s delicate, crisp finish. The secret? Chilling the dough long enough for clean cookie edges and using a tried-and-true royal icing recipe that dries fast and smooth.
Plus, decorating these caps brings a little bit of calm and creativity into the often hectic graduation season. Whether you’re a first-time baker or a seasoned pro, this recipe offers a rewarding way to celebrate that special day with a personal, edible touch. You’ll find yourself closing your eyes after the first bite, savoring that buttery sweetness and smooth icing glaze—because, let’s face it, celebrations deserve cookies that taste as good as they look.
What Ingredients You Will Need
This recipe uses simple, wholesome ingredients to deliver bold flavor and satisfying texture without the fuss. Most of these are pantry staples, and substitutions are easy if you need them.
- For the Sugar Cookie Dough:
- 2 ¾ cups (345g) all-purpose flour – I recommend King Arthur for consistent texture
- 1 teaspoon baking powder – helps the cookies keep a light crumb
- ½ teaspoon salt – balances the sweetness
- 1 cup (227g) unsalted butter, softened – for richness and tenderness
- 1 ½ cups (300g) granulated sugar – standard white sugar works perfectly
- 1 large egg, room temperature – binds the dough
- 1 ½ teaspoons pure vanilla extract – for warm, aromatic flavor
- 2 tablespoons heavy cream (or whole milk) – adds moisture for a tender bite
- For the Royal Icing:
- 3 cups (360g) powdered sugar, sifted – ensures smooth, lump-free icing
- 2 large egg whites or 4 tablespoons meringue powder + 6 tablespoons water – for that classic royal icing texture
- ½ teaspoon cream of tartar – stabilizes the icing
- Black gel food coloring – for the graduation cap base color
- Yellow or gold gel food coloring – to pipe the tassel
- Optional: white gel food coloring – for contrast details or letters
Substitutions? If you want a gluten-free option, almond flour or a gluten-free all-purpose blend can work, but the texture will be slightly different. For dairy-free baking, swap butter for vegan margarine and cream for almond or oat milk. I’ve tried both, and while the cookies are still tasty, the classic butter version has that unbeatable tenderness.
Look for small-curd powdered sugar to help the icing dry with a smooth, shiny finish. For the royal icing, meringue powder is a safer bet if you’re cautious about raw eggs. I usually keep a pack handy—it’s a lifesaver for quick cookie decorating sessions.
Equipment Needed
- Mixing bowls (medium and large) – glass or stainless steel work well
- Electric mixer (stand or handheld) – essential for creaming butter and beating icing
- Measuring cups and spoons – for precise ingredient amounts
- Rolling pin – a smooth, medium-weight one for even cookie thickness
- Graduation cap-shaped cookie cutter (about 3 inches) – makes shaping these cookies a breeze; if unavailable, a small square cutter and a triangle for the mortarboard work fine
- Parchment paper or silicone baking mats – prevents sticking and easy cleanup
- Piping bags and tips – small round tips (#1 or #2) for detailed royal icing work; or disposable bags with a tiny cut at the tip
- Cooling racks – crucial for letting cookies cool without sogginess
If you don’t have a cookie cutter, no worries! I once free-handed these by cutting squares and triangles with a sharp knife, and they still looked charmingly imperfect. Budget-wise, a basic rolling pin and reusable piping bags work just fine instead of expensive specialty tools. Just keep the tips clean and dry for best icing results.
Preparation Method
- Mix Dry Ingredients: In a medium bowl, whisk together 2 ¾ cups (345g) flour, 1 teaspoon baking powder, and ½ teaspoon salt. Set aside. (This keeps the leavening evenly distributed.)
- Cream Butter and Sugar: In a large bowl, beat 1 cup (227g) softened butter with 1 ½ cups (300g) sugar until light and fluffy—about 3-5 minutes with an electric mixer on medium speed. You’ll know it’s ready when the mixture looks pale and has a soft, creamy texture.
- Add Egg, Vanilla, and Cream: Beat in 1 large egg, 1 ½ teaspoons vanilla extract, and 2 tablespoons heavy cream until fully combined, scraping down the sides as needed.
- Combine Wet and Dry: Gradually add the dry ingredients to the wet mixture, mixing on low speed until just combined. Avoid overmixing to keep cookies tender.
- Chill the Dough: Divide dough into two discs, wrap each in plastic wrap, and refrigerate for at least 1 hour (or up to 24 hours). This step is key for clean cookie edges when rolling and cutting.
- Preheat Oven and Prepare Baking Sheets: Heat oven to 350°F (175°C). Line baking sheets with parchment paper or silicone mats.
- Roll and Cut: On a lightly floured surface, roll chilled dough to about ¼ inch (6 mm) thickness. Cut out graduation cap shapes using your cookie cutter. If using a square and triangle, cut those shapes separately and bake as individual pieces or gently join before baking.
- Bake Cookies: Place cookies 1 inch (2.5 cm) apart and bake for 8-10 minutes, until edges are just starting to turn golden. Be careful not to overbake or the cookies will become too hard.
- Cool Completely: Transfer cookies to cooling racks and let cool completely before decorating. Warm cookies will melt your royal icing (trust me, I learned that the hard way!).
- Prepare Royal Icing: Beat 3 cups (360g) powdered sugar, 2 large egg whites (or equivalent meringue powder mix), and ½ teaspoon cream of tartar until stiff peaks form—about 7-10 minutes on high speed. Divide icing into bowls for black, yellow, and optional white colors. Add gel color gradually until you get the perfect shade. Thin icing slightly with water (a few drops at a time) for flooding versus thicker icing for outlining.
- Decorate: Outline the cookie’s cap with thick black icing, then flood the surface with thinned black icing. Let dry 15-20 minutes. Pipe the yellow tassel and optional white details with thicker icing using a small round tip. Let cookies dry thoroughly—ideally overnight—for that smooth, glossy finish.
Pro tip: If your royal icing is too runny, add more powdered sugar; if too thick, add a tiny bit of water. I always keep a damp cloth over my icing bowls to prevent drying when decorating multiple cookies.
Cooking Tips & Techniques
Mastering these Easy Graduation Cap Sugar Cookies with Royal Icing is all about the details, and I’ve learned a few things along the way.
- Don’t Skip the Chill: Chilling the dough is crucial. It stops spreading and helps cookies keep that crisp-edge mortarboard shape.
- Flour Lightly: When rolling, dust your surface and rolling pin lightly with flour to prevent sticking, but too much flour dries out the dough—balance is key.
- Royal Icing Consistency: For the best royal icing, think two consistencies: thick for outlining and details, thinner for flooding large areas. Testing on parchment helps you see if the icing smooths out in 20 seconds or holds its shape.
- Practice Piping: If you’re new to royal icing, practice piping tassels on parchment paper first—small circles and lines get easier with a little muscle memory.
- Use Gel Colors: Gel food coloring won’t thin your icing like liquid colors do. A little goes a long way!
- Work in Small Batches: Royal icing dries quickly. Keep unused icing covered and work on a few cookies at a time.
- Fixing Mistakes: If you mess up piping, quickly scrape it off with a toothpick and smooth with a damp brush before it dries.
- Timing: Decorating takes time, so plan accordingly. I like to bake in the morning and decorate in the afternoon or the next day.
One time, I tried skipping chilling the dough to save time, and the cookies turned out flat and misshapen—not a good look for graduation caps! Lesson learned: patience here pays off big time.
Variations & Adaptations
These cookies are versatile, and you can easily switch things up to fit your style or dietary needs.
- Flavor Variations: Add a teaspoon of almond extract to the dough for a subtle nutty twist, or swap vanilla for lemon zest and juice for a fresh citrus note.
- Colorful Tassels: Use different gel colors for the tassels to match school colors or party themes—red, blue, green, you name it. You can even pipe little numbers or initials for personalization.
- Gluten-Free: Swap all-purpose flour for a gluten-free blend (I like Cup4Cup) and add an extra egg yolk for moisture. The texture changes slightly but still delicious.
- Dairy-Free: Use vegan butter and coconut milk instead of cream. The cookies remain tender but with a subtle coconut undertone.
- Alternative Shapes: Don’t have a graduation cap cutter? Make mortarboards from squares and add tassels from small rectangles or strips. Or try simple round sugar cookies with piped caps on top.
Personally, I once made these with a lemon-vanilla combo and added bright blue tassels for a summer grad party. They were a hit—both visually and flavor-wise!
Serving & Storage Suggestions
These graduation cap sugar cookies are best served at room temperature, letting the royal icing’s flavor shine without any chill dulling the sweetness or texture. Arrange them on a decorative platter or tiered stand to wow your guests.
They pair delightfully with a cup of coffee or tea—perfect for a graduation brunch or after-dinner treat. For a fun twist, serve alongside a fresh fruit salad like the vibrant fresh no-cook summer roll bowls with creamy peanut sauce, which offers a savory counterbalance.
Store leftover cookies in an airtight container at room temperature for up to 5 days. Royal icing keeps them sealed and fresh. For longer storage, freeze baked cookies before decorating. Thaw completely before adding icing. Decorated cookies freeze well if wrapped tightly in plastic wrap and stored in a sturdy container for up to 3 months.
When reheating, avoid the microwave as it can soften the royal icing. Instead, let cookies come to room temperature naturally to keep that crisp finish. Flavors often deepen a bit after resting overnight, so if you can wait, that’s even better.
Nutritional Information & Benefits
Each sugar cookie (about 3 inches) contains approximately:
| Calories | 150 |
|---|---|
| Fat | 7g |
| Saturated Fat | 4g |
| Carbohydrates | 21g |
| Sugars | 12g |
| Protein | 1g |
| Fiber | 0g |
| Sodium | 55mg |
While these cookies are definitely a treat, the use of real butter and whole eggs adds some quality fats and protein. The royal icing, made from egg whites or meringue powder, provides a light protein boost without heavy fats. If you prefer a lower-sugar version, try reducing powdered sugar slightly in the icing or pairing the cookies with low-sugar beverages.
This recipe is naturally gluten-based but can be adapted for gluten-free diets. It contains egg and dairy, so keep allergies in mind. If you want a dairy-free or vegan option, the dairy substitutions and aquafaba for egg whites in royal icing can work well.
From a wellness perspective, I think of these cookies as joyful celebrations in bite-sized form—perfect for marking milestones without overindulging. They remind me that treating yourself is part of life’s sweetness, especially during important moments.
Conclusion
These Easy Graduation Cap Sugar Cookies with Royal Icing Decoration are more than just cookies—they’re little symbols of achievement, fun, and family moments wrapped up in buttery dough and vibrant icing. Whether you’re baking for a grad party, a school event, or just to celebrate a personal victory, this recipe fits the bill with style and ease.
Don’t hesitate to tweak the flavors, colors, or shapes to match your vibe. I love how these cookies bring a bit of calm and creativity into the whirlwind of graduation season—it’s my go-to treat when I want something meaningful yet simple.
If you try this recipe, I’d love to hear how your decorations turn out or what variations you experiment with. Sharing those little successes makes the kitchen feel even warmer.
So grab your rolling pin, dust off that piping bag, and get ready to make some sweet memories—one graduation cap cookie at a time.
Frequently Asked Questions
Can I make the sugar cookie dough ahead of time?
Absolutely! The dough can be made and refrigerated for up to 24 hours or frozen for up to 3 months. Just thaw completely before rolling and cutting.
Is royal icing hard to make for beginners?
Not really. Using meringue powder instead of raw egg whites makes it safer and easier. The key is mixing until stiff peaks form and adjusting consistency with tiny amounts of water.
How do I prevent royal icing from cracking?
Make sure your cookies are completely cool before decorating, and avoid adding too much powdered sugar or water to the icing. Dry the decorated cookies at room temperature, not in the fridge.
Can I use other colors for the tassel besides yellow?
Definitely! Feel free to customize tassel colors to match school colors or your party theme using gel food coloring.
What if I don’t have a graduation cap cookie cutter?
No worries—you can cut squares and triangles with a knife or use small cookie cutters to piece together the cap shape. It adds a charming, handmade touch!
For a cozy comfort meal to follow your baking session, you might enjoy the quick creamy microwave mug mac and cheese—it’s an easy, warm-up treat after a busy day of decorating.
Pin This Recipe!
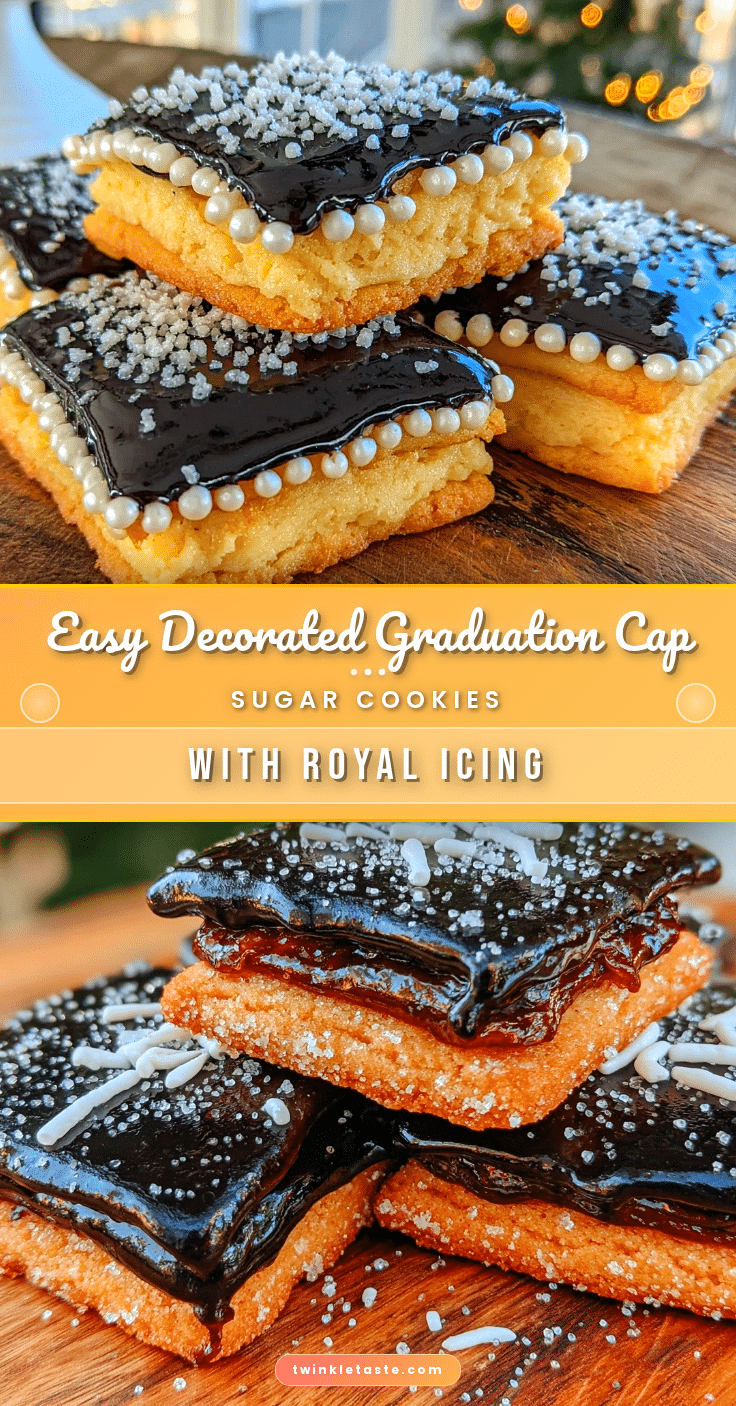
Easy Graduation Cap Sugar Cookies Recipe with Perfect Royal Icing Decoration Tutorial
Celebrate graduation day with these festive and easy-to-make graduation cap sugar cookies, featuring a soft but sturdy cookie base and smooth royal icing decoration.
- Prep Time: 20 minutes
- Cook Time: 10 minutes
- Total Time: 1 hour 30 minutes
- Yield: 24 cookies 1x
- Category: Dessert
- Cuisine: American
Ingredients
- 2 ¾ cups (345g) all-purpose flour
- 1 teaspoon baking powder
- ½ teaspoon salt
- 1 cup (227g) unsalted butter, softened
- 1 ½ cups (300g) granulated sugar
- 1 large egg, room temperature
- 1 ½ teaspoons pure vanilla extract
- 2 tablespoons heavy cream or whole milk
- 3 cups (360g) powdered sugar, sifted
- 2 large egg whites or 4 tablespoons meringue powder + 6 tablespoons water
- ½ teaspoon cream of tartar
- Black gel food coloring
- Yellow or gold gel food coloring
- Optional: white gel food coloring
Instructions
- Mix dry ingredients: whisk together flour, baking powder, and salt in a medium bowl; set aside.
- Cream butter and sugar: beat softened butter with sugar until light and fluffy, about 3-5 minutes.
- Add egg, vanilla, and cream: beat in egg, vanilla extract, and heavy cream until combined.
- Combine wet and dry ingredients: gradually add dry ingredients to wet mixture, mixing on low speed until just combined.
- Chill dough: divide dough into two discs, wrap in plastic wrap, and refrigerate for at least 1 hour.
- Preheat oven to 350°F (175°C) and line baking sheets with parchment paper or silicone mats.
- Roll and cut dough: roll chilled dough to ¼ inch thickness and cut out graduation cap shapes with cookie cutter or freehand.
- Bake cookies: place cookies 1 inch apart and bake for 8-10 minutes until edges start to turn golden.
- Cool completely on racks before decorating.
- Prepare royal icing: beat powdered sugar, egg whites (or meringue powder mix), and cream of tartar until stiff peaks form.
- Divide icing into bowls and color with gel food coloring as desired; thin icing with water for flooding or keep thick for outlining.
- Decorate cookies: outline caps with thick black icing, flood with thinned black icing, let dry 15-20 minutes, then pipe yellow tassels and optional white details.
- Let decorated cookies dry thoroughly, ideally overnight, for a smooth glossy finish.
Notes
Chill dough for at least 1 hour to prevent spreading and achieve clean edges. Use gel food coloring for vibrant colors without thinning icing. Practice piping tassels on parchment paper before decorating cookies. Let cookies cool completely before icing to avoid melting. Store decorated cookies in airtight container at room temperature for up to 5 days or freeze for up to 3 months.
Nutrition
- Serving Size: 1 cookie (about 3 in
- Calories: 150
- Sugar: 12
- Sodium: 55
- Fat: 7
- Saturated Fat: 4
- Carbohydrates: 21
- Protein: 1
Keywords: graduation cookies, sugar cookies, royal icing, graduation cap cookies, party cookies, easy sugar cookies, decorated cookies