“You sure this is going to work?” my friend texted me, skepticism practically dripping from her words. I was halfway through mixing the batter for these fresh gluten-free lemon bars with coconut flour crust, wondering the same thing myself. Honestly, I had grabbed coconut flour on a whim during a rushed grocery run, mostly because I figured it was worth a shot for something light and gluten-free. Little did I know it would turn into my go-to sweet fix for the entire week.
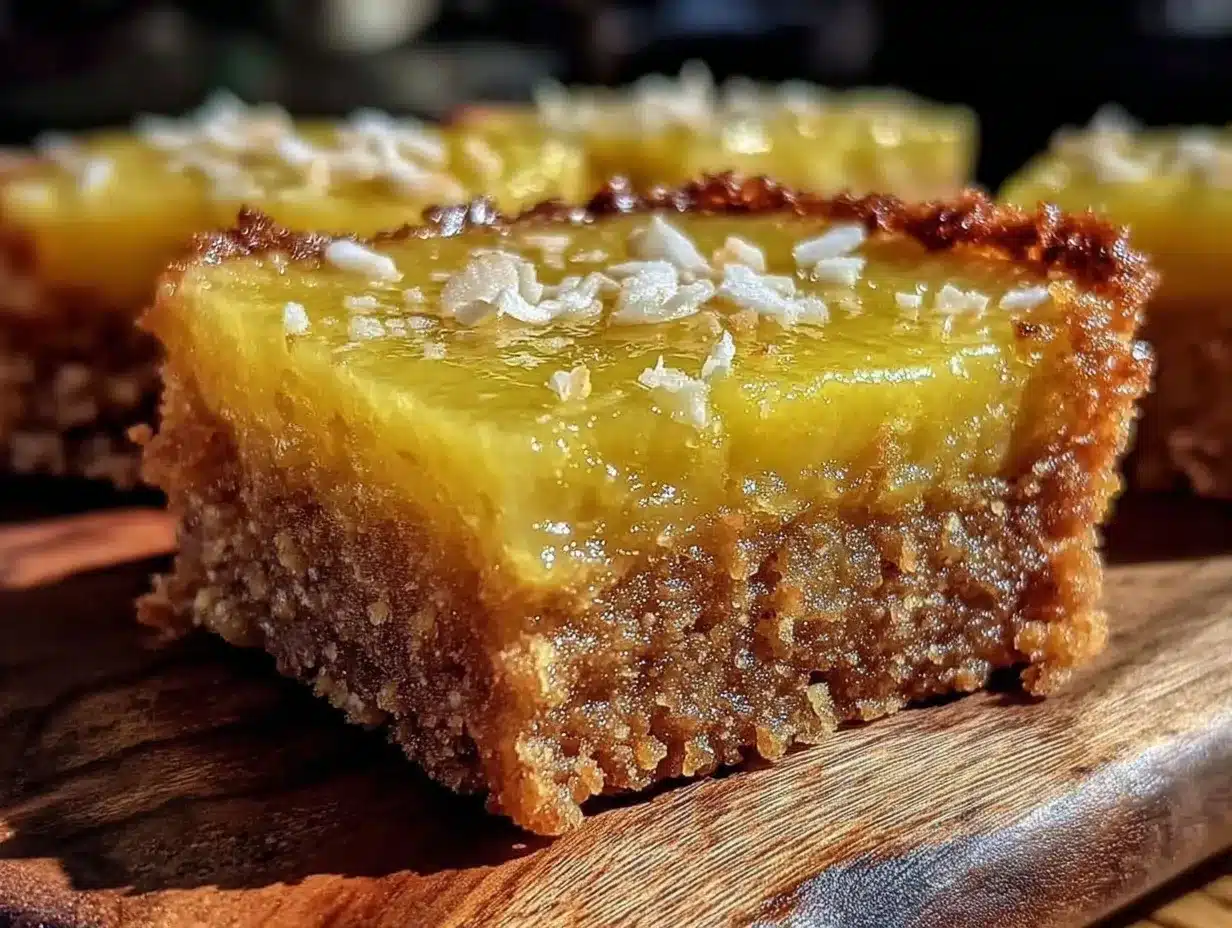
That afternoon, with a cluttered kitchen and a to-do list that felt endless, I just wanted a quick, refreshing dessert that wouldn’t make me feel like I needed a nap afterward. The moment I sliced into that zesty lemon filling set atop the subtly nutty coconut crust, all doubts melted away. The citrus aroma still lingers in my mind — the kind that wakes you up better than coffee on a slow morning.
What’s funny is that I wasn’t aiming for a fancy bake; I was just craving something bright and clean-tasting, but also gluten-free to keep things light. These lemon bars quickly became the kind of recipe I make again and again, whether for a casual weekend treat or for a last-minute dessert when friends pop over. They’re simple but feel special, and that coconut flour crust? It’s a game-changer for anyone avoiding gluten but missing that buttery base.
It’s the kind of bake that quietly makes you smile after the first bite, the tang and sweetness perfectly balanced without being too heavy. And that’s why these fresh gluten-free lemon bars with coconut flour crust stuck around in my kitchen rotation — a little spark of sunshine when you need it most.
Why You’ll Love This Recipe
After testing this recipe multiple times, I can genuinely say it’s one of those rare desserts that hits all the right spots. It’s not just gluten-free; it’s full of flavor and texture that don’t feel like a compromise. Here’s what makes these lemon bars stand out:
- Quick & Easy: You’ll have these bars baked and ready in about 40 minutes, which is perfect for busy weeknights or spontaneous dessert cravings.
- Simple Ingredients: No hunting for obscure items here—coconut flour, fresh lemons, eggs, and a few pantry staples make up the whole recipe.
- Perfect for Any Occasion: These bars shine at brunch, summer picnics, or even as a refreshing finish to a cozy dinner.
- Crowd-Pleaser: Whether gluten-sensitive or not, everyone seems to reach for seconds (or thirds!).
- Unique Crust: The coconut flour crust brings a subtle nutty flavor and a tender crumb that’s unlike your usual shortbread base.
- Bright, Fresh Flavor: The lemon filling is lively but not overpowering, balanced by the natural richness of the crust.
This isn’t your standard lemon bar recipe—you’ll notice a slight chewiness in the crust that pairs perfectly with the smooth, tangy topping. It’s a recipe I trust for impressing guests without any stress (and honestly, it’s become my go-to when I want to serve something a little different but still totally comforting). If you’ve ever enjoyed my easy creamy no-bake lemon cheesecake recipe, you’ll appreciate this fresh twist that’s lighter and easier to whip up.
What Ingredients You Will Need
This recipe relies on straightforward, wholesome ingredients that each play a key role in creating the perfect balance of flavor and texture. Most are pantry staples, so it’s likely you’ll have everything on hand.
- Coconut Flour (1/2 cup / 56 g): The star of the crust, it absorbs moisture differently than regular flour, so a little goes a long way. I prefer Bob’s Red Mill for consistent quality.
- Almond Flour (1/4 cup / 28 g): Adds moisture and a tender crumb to the crust; you can swap with more coconut flour for a nut-free version, but the texture changes slightly.
- Unsalted Butter (1/4 cup / 57 g), melted: Brings richness and helps bind the crust together. Use real butter for best flavor, but coconut oil can work as a dairy-free substitute.
- Maple Syrup (2 tablespoons): Adds subtle sweetness and keeps the crust from drying out.
- Fine Sea Salt (1/4 teaspoon): Balances the sweetness and enhances the flavors.
- Fresh Lemons (3 large): You’ll need both zest and juice for the filling. Freshly squeezed lemon juice is a must for that vibrant, tangy kick.
- Organic Cane Sugar or Coconut Sugar (3/4 cup / 150 g): Sweetens the filling without overpowering the citrus. Coconut sugar gives a slightly deeper flavor.
- Large Eggs (3), room temperature: These help set the lemon filling with a silky texture.
- Arrowroot Powder or Cornstarch (2 tablespoons): Thickens the filling for that perfect sliceable consistency.
- Vanilla Extract (1 teaspoon): A little warmth to round out the tartness.
In summer, you might try swapping lemon for fresh lime juice for a tangy twist, or add a sprinkle of toasted coconut flakes on top for extra texture. For a paleo-friendly option, replace sugar with raw honey, but adjust sweetness to taste. These bars are flexible without losing their signature fresh zing.
Equipment Needed
- 8×8-inch (20×20 cm) baking pan: Perfect size for lemon bars; lined with parchment paper for easy removal.
- Mixing bowls: One for crust ingredients and one for the filling.
- Zester or fine grater: To capture that bright lemon zest.
- Juicer: Handy for squeezing lemons efficiently, but you can use your hands if needed.
- Whisk and spatula: Essential for blending the filling smoothly.
- Fine mesh strainer (optional): To strain the lemon juice for a silky filling, especially if your lemons are pulpy.
- Measuring cups and spoons: Accuracy matters, especially with coconut flour.
If you’re like me and don’t have a dedicated zester, a microplane grater works just as well. Also, parchment paper is a lifesaver for lifting out the bars cleanly—makes slicing a breeze. For a budget-friendly twist, a glass baking dish works fine, but a metal pan gives a crisper crust. I learned that the hard way when a glass pan took a little longer to bake evenly!
Preparation Method
- Preheat your oven to 350°F (175°C). Line your 8×8-inch pan with parchment paper, leaving some overhang for easy lifting later. This step is key to avoid sticking and helps with neat slices.
- Make the crust: In a medium bowl, combine 1/2 cup coconut flour, 1/4 cup almond flour, 1/4 teaspoon sea salt, and 2 tablespoons maple syrup. Pour in 1/4 cup melted unsalted butter and stir until the mixture holds together when pressed. The dough should feel slightly crumbly but stick when you press it.
- Press the crust firmly into the prepared pan: Use your fingers or the bottom of a measuring cup to get an even layer. This ensures the crust bakes evenly and stays intact.
- Bake the crust for 12–15 minutes: It should be golden around the edges and smell nutty. Keep an eye on it; coconut flour browns quickly. Remove from oven and let cool slightly while preparing the filling.
- Prepare the lemon filling: In a large bowl, whisk together 3 large eggs, 3/4 cup sugar, 2 tablespoons arrowroot powder, and 1 teaspoon vanilla extract until smooth. Add the juice and zest of 3 large lemons (about 1/2 cup juice and 1 tablespoon zest). Whisk until fully combined and slightly thickened.
- Pour the filling over the warm crust: Spread evenly with a spatula. The crust might soften a bit, but that’s okay—it will firm up as it bakes.
- Bake for an additional 18–22 minutes: The filling should be set but still have a slight jiggle in the center. Avoid overbaking to keep that fresh, tender texture.
- Cool completely at room temperature: Then chill in the fridge for at least 2 hours before slicing. This step is crucial for clean cuts and perfect texture.
- Slice into bars and serve: Use a sharp knife, wiping it clean between cuts for neat edges. Dust with powdered sugar if desired, but I find these bars are sweet enough as is.
Pro tip: If your crust feels too dry when mixing, add a teaspoon of water or melted butter to help it bind. And if you find the filling a bit too tart, a sprinkle of powdered sugar on top balances it nicely. When I first made these, I skipped chilling time — big mistake! The bars were messy and soft. Lesson learned: patience pays off.
Cooking Tips & Techniques
Making gluten-free lemon bars with a coconut flour crust can be a little tricky if you’re new to coconut flour baking, but here are some tips to keep it smooth:
- Measure coconut flour carefully: It’s super absorbent, so spoon it into your measuring cup rather than scooping directly to avoid dense crusts.
- Don’t skip chilling: Coconut flour dough firms up as it cools, and chilling the bars before slicing helps the filling set perfectly.
- Use room temperature eggs: They blend more smoothly into the filling, giving you a silky texture.
- Watch your baking times: The crust can brown quickly, so set a timer and keep an eye on it to avoid burning.
- Press the crust firmly: This helps prevent crumbling and keeps that satisfying bite.
- Fresh lemons matter: Bottled juice just doesn’t have the same vibrant zing that makes this recipe shine.
Back when I first tried this recipe, I baked the crust too long and ended up with a dry base that crumbled apart. Since then, I learned to trust the oven’s aroma and color cues more than the timer alone. Also, mixing the filling gently but thoroughly helps avoid bubbles or cracks on top. If you want to multitask, you can prepare the crust while the oven preheats, then start the filling as it bakes — saves time without rushing.
Variations & Adaptations
This recipe is versatile and easy to adapt depending on your preferences or dietary needs:
- Paleo-Friendly: Swap the sugar with raw honey or pure maple syrup, adjusting for sweetness. Use coconut oil in place of butter.
- Dairy-Free: Use coconut oil instead of butter in the crust. Make sure your choice of sweetener fits your dietary needs.
- Low-Carb: Substitute sugar with erythritol or monk fruit sweetener. The texture and sweetness remain satisfying.
- Flavor Twists: Add a teaspoon of fresh grated ginger for a spicy kick, or fold in a handful of fresh raspberries before baking the filling for a fruity burst.
- Different Crust Options: For a nuttier crust, try swapping half the almond flour with finely chopped pecans or walnuts.
Personally, I’ve made these lemon bars with lime juice instead of lemon when summer hit, and it gave them a fun, slightly different tang that was a hit at a backyard gathering. If you want to experiment further, these bars pair beautifully with a dollop of whipped coconut cream or a sprinkle of toasted coconut flakes for extra texture.
Serving & Storage Suggestions
These fresh gluten-free lemon bars are best served chilled or at room temperature. I like to slice them into small squares for easy snacking or to serve alongside afternoon tea. The bright lemon flavor feels refreshing, especially on warm days.
For a pretty presentation, dust lightly with powdered sugar or garnish with thin lemon slices or zest curls. They also pair nicely with a cup of herbal tea or a cold sparkling water with a splash of lemon.
To store, keep the bars in an airtight container in the refrigerator for up to 5 days. They actually taste even better after a day or two as the flavors meld. For longer storage, you can freeze them — wrap individual bars tightly in plastic wrap and place in a freezer-safe container for up to 2 months. Thaw in the fridge overnight before serving.
Reheating isn’t necessary, but if you prefer them warm, pop a slice in the microwave for about 10 seconds. Just be careful not to melt the crust too much.
If you enjoy lighter comfort foods, you might appreciate my take on the cozy single serve chicken pot pie, which offers that same balance of satisfying and simple.
Nutritional Information & Benefits
Each serving of these lemon bars provides a moderate calorie count with a good balance of fats and protein from the almond and coconut flours, making them more satisfying than your average lemon treat. The fresh lemon juice delivers a dose of vitamin C, which supports immunity and skin health.
The recipe is naturally gluten-free and can be adapted to be dairy-free and low-carb. Coconut flour is rich in fiber, which aids digestion, and almond flour adds healthy monounsaturated fats.
Be mindful that the recipe contains eggs and nuts, so it’s not suitable for those with allergies to these ingredients. The natural sugars keep the bars sweet without refined sugars, offering a more wholesome dessert option.
From a wellness standpoint, I appreciate how this recipe balances indulgence with nourishing ingredients, making it a treat I feel good about sharing with family and friends.
Conclusion
These fresh gluten-free lemon bars with coconut flour crust have become one of my favorite recipes to pull out when I want something bright, tangy, and just a little bit special without a ton of fuss. They strike a perfect balance of ease, flavor, and texture that’s hard to beat.
Feel free to tweak the sweetness or crust ingredients to your liking — this recipe is forgiving and welcomes your personal touch. I love how it brings a pop of sunshine to my kitchen, whether it’s a quiet afternoon or a lively gathering.
If you give these lemon bars a try, I’d love to hear how you make them your own. Sharing your twists or questions helps keep the recipe growing and fresh for everyone.
Here’s to many bright bites ahead!
Frequently Asked Questions
Can I use regular flour instead of coconut flour for the crust?
You can, but the texture and moisture will be different. Coconut flour absorbs more liquid, so if you swap with regular flour, reduce the amount and adjust the butter to keep the crust tender.
How do I know when the lemon filling is done baking?
The filling should be mostly set with a slight jiggle in the center when you gently shake the pan. It will firm up completely as it cools and chills.
Can I make these lemon bars ahead of time?
Absolutely! They keep well in the fridge for up to 5 days and actually taste better after a day or two. You can also freeze them for longer storage.
Is there a substitute for eggs in this recipe?
Eggs help the filling set, so replacing them can be tricky. For a vegan version, try a commercial egg replacer or a mix of flaxseed and water, but texture will vary.
Why does the crust sometimes crumble when I cut the bars?
Pressing the crust firmly before baking and chilling the bars thoroughly helps prevent crumbling. Also, don’t overbake the crust, or it can become too dry.
Pin This Recipe!
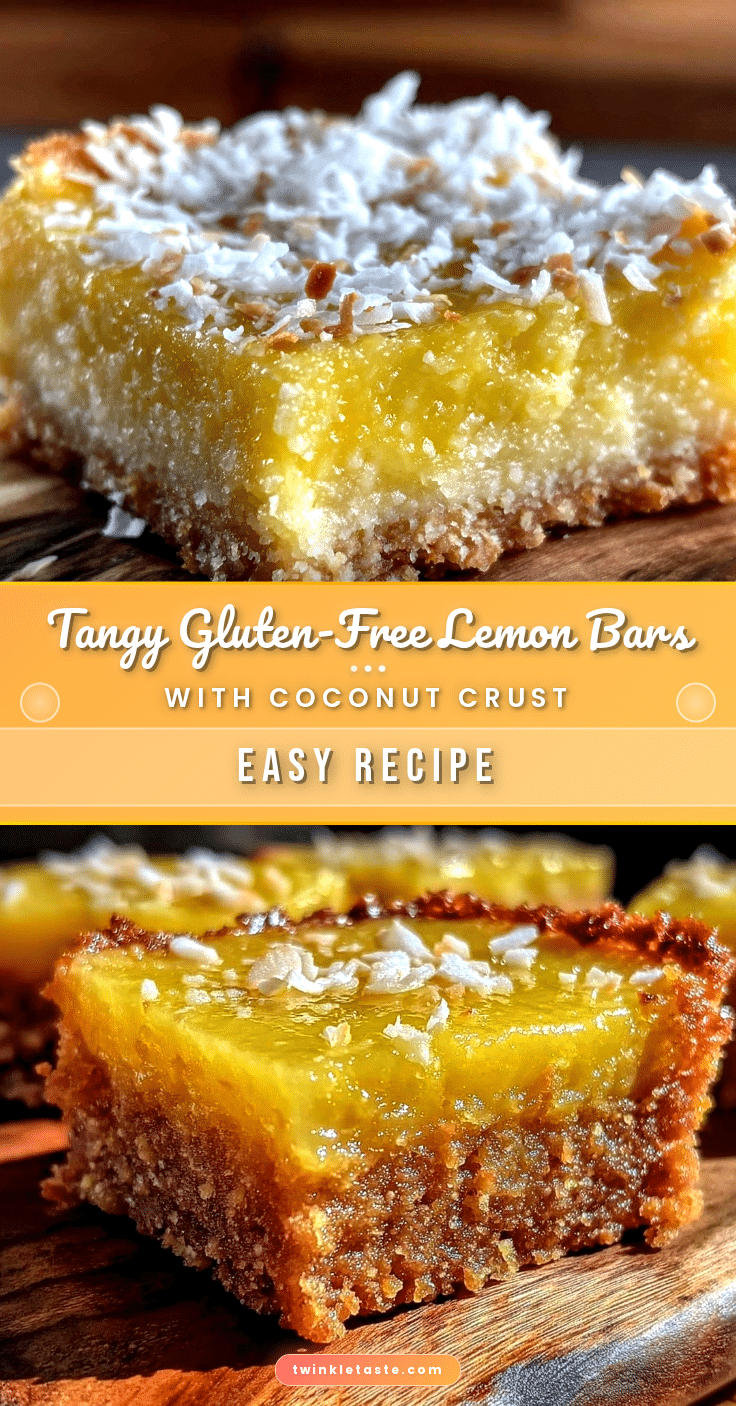
Fresh Gluten-Free Lemon Bars Easy Homemade Coconut Flour Crust Recipe

These fresh gluten-free lemon bars feature a unique coconut flour crust and a bright, tangy lemon filling. They are quick to make, flavorful, and perfect for a light, refreshing dessert.
- Prep Time: 10 minutes
- Cook Time: 35 minutes
- Total Time: 2 hours 45 minutes
- Yield: 16 servings 1x
- Category: Dessert
- Cuisine: American
Ingredients
- 1/2 cup (56 g) coconut flour
- 1/4 cup (28 g) almond flour
- 1/4 cup (57 g) unsalted butter, melted
- 2 tablespoons maple syrup
- 1/4 teaspoon fine sea salt
- 3 large fresh lemons (zest and juice)
- 3/4 cup (150 g) organic cane sugar or coconut sugar
- 3 large eggs, room temperature
- 2 tablespoons arrowroot powder or cornstarch
- 1 teaspoon vanilla extract
Instructions
- Preheat your oven to 350°F (175°C). Line an 8×8-inch baking pan with parchment paper, leaving some overhang for easy lifting.
- In a medium bowl, combine coconut flour, almond flour, sea salt, and maple syrup. Pour in melted butter and stir until the mixture holds together when pressed.
- Press the crust firmly into the prepared pan using your fingers or the bottom of a measuring cup to create an even layer.
- Bake the crust for 12–15 minutes until golden around the edges and nutty smelling. Remove from oven and let cool slightly.
- In a large bowl, whisk together eggs, sugar, arrowroot powder, and vanilla extract until smooth. Add lemon juice and zest and whisk until fully combined and slightly thickened.
- Pour the lemon filling over the warm crust and spread evenly with a spatula.
- Bake for an additional 18–22 minutes until the filling is set but still slightly jiggly in the center.
- Cool completely at room temperature, then chill in the refrigerator for at least 2 hours before slicing.
- Slice into bars using a sharp knife, wiping it clean between cuts. Optionally dust with powdered sugar before serving.
Notes
Measure coconut flour carefully by spooning into the measuring cup to avoid dense crusts. Press crust firmly to prevent crumbling. Chill bars for at least 2 hours before slicing for clean cuts. Use fresh lemons for best flavor. If crust is too dry, add a teaspoon of water or melted butter. Avoid overbaking the filling to keep a tender texture.
Nutrition
- Serving Size: 1 bar (assuming 16 b
- Calories: 150
- Sugar: 10
- Sodium: 70
- Fat: 10
- Saturated Fat: 5
- Carbohydrates: 15
- Fiber: 3
- Protein: 3
Keywords: gluten-free, lemon bars, coconut flour crust, easy dessert, homemade, dairy-free option, paleo-friendly, low-carb option