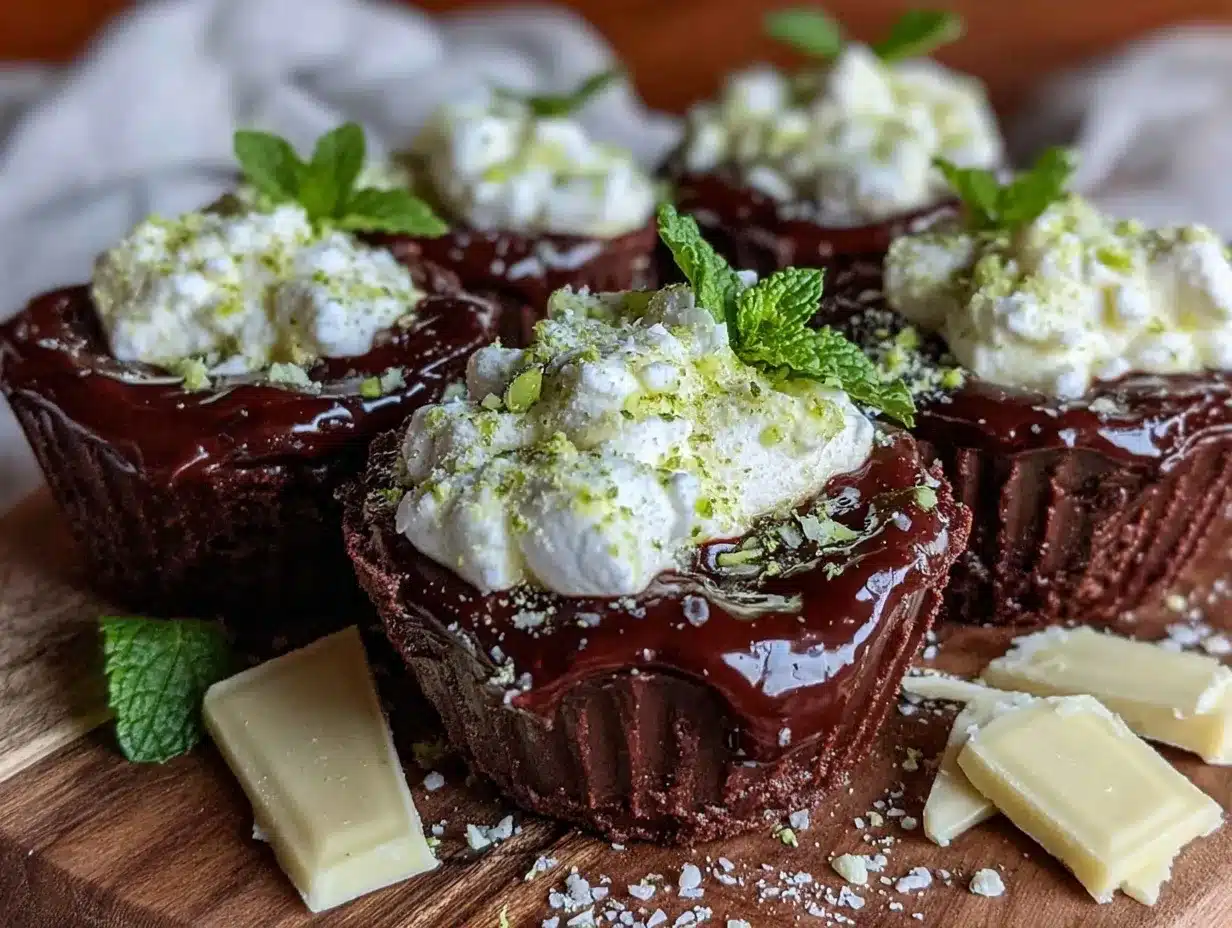
Let me tell you, the scent of rich chocolate melting together with fresh mint and fluffy marshmallows wafting from my kitchen is enough to make anyone’s mouth water. The first time I whipped up these Irish Mint Chocolate Marshmallow Cups, I was instantly hooked—the kind of moment where you pause, take a deep breath, and just smile because you know you’re onto something truly special. Years ago, when I was knee-high to a grasshopper, my grandma used to make minty chocolate treats for St. Patrick’s Day, but this recipe? It’s a fun, modern twist that I wish I’d discovered way back then.
Honestly, my family couldn’t stop sneaking them off the cooling rack (and I can’t really blame them). These cups have become a staple for our family gatherings and little holiday gifting projects. You know what makes them so dangerously easy? They combine pure, nostalgic comfort with a festive pop of mint that brightens up any party spread or sweet tooth craving. Whether you’re planning a cozy afternoon with friends or want to brighten up your Pinterest cookie board, these Irish Mint Chocolate Marshmallow Cups are just what you need.
I’ve tested this recipe multiple times—in the name of research, of course—and each batch feels like a warm hug wrapped in green and chocolatey goodness. You’re going to want to bookmark this one for every St. Patrick’s Day and beyond.
Why You’ll Love This Recipe
Having whipped up Irish Mint Chocolate Marshmallow Cups more times than I can count, I’ve learned a few things that make this recipe stand out. It’s not just about the mint and chocolate combo; there’s a bit of magic in how the marshmallows melt just right to create that perfect fluffy texture inside each cup. Here’s why you’ll find yourself coming back for seconds (and thirds!):
- Quick & Easy: Comes together in under 30 minutes, perfect for busy weeknights or last-minute holiday treats.
- Simple Ingredients: No fancy grocery trips needed; you likely already have everything in your kitchen pantry and fridge.
- Perfect for St. Patrick’s Day: Great for potlucks, classroom parties, or a festive family dessert.
- Crowd-Pleaser: Kids and adults alike rave about the minty freshness paired with gooey marshmallows and rich chocolate.
- Unbelievably Delicious: The texture and flavor combo is next-level comfort food with a seasonal twist.
This isn’t just another chocolate cup recipe. The secret is in using a fresh mint extract (not that artificial stuff) and layering the marshmallows carefully so they melt into pockets of pure bliss. Plus, I like to add a sprinkle of crushed peppermint candies on top for a little crunch that’ll keep your taste buds dancing. It’s comfort food reimagined—healthier, faster, but with the same soul-soothing satisfaction. Perfect for impressing guests without stress, or turning a simple treat into something memorable.
What Ingredients You Will Need
This recipe uses simple, wholesome ingredients to deliver bold flavor and satisfying texture without the fuss. Most are pantry staples, and a few seasonal touches make it feel special.
- Chocolate Chips (1 ½ cups / 270g): Semi-sweet or dark chocolate works best; I prefer Ghirardelli for rich flavor and smooth melting.
- Marshmallows (2 cups, mini marshmallows): Use fresh mini marshmallows for the best melt and fluffiness.
- Irish Cream Liqueur or Mint Extract (1 tsp): For that authentic Irish mint flavor, I usually go with mint extract if I want a non-alcoholic option.
- Heavy Cream (¼ cup / 60ml): Adds silkiness to the chocolate and helps it set perfectly.
- Butter (2 tbsp / 28g): Unsalted, softened, adds richness.
- Powdered Sugar (2 tbsp / 15g): Just a touch to balance flavors and add sweetness.
- Green Food Coloring (optional, a few drops): To bring out that festive St. Patrick’s Day vibe.
- Crushed Peppermint Candies or Candy Canes (2 tbsp): Optional, for a little crunch and extra mint punch on top.
- Mini Paper Candy Cups or Silicone Molds: To shape your marshmallow cups perfectly.
If you want to keep it dairy-free, swap the heavy cream and butter for coconut cream and coconut oil. For gluten-free, check your marshmallows as some brands add cornstarch containing gluten; most are safe but better to double-check. In summer, I sometimes swap crushed peppermint for chopped fresh mint leaves for a garden-fresh twist—delicious and unexpected!
Equipment Needed
- Mixing Bowls: At least two, medium and small, for melting and mixing chocolate and marshmallows.
- Microwave or Double Boiler: For gently melting chocolate without burning it. I favor the double boiler method for smoother results, but the microwave works if you stir often.
- Spoon or Small Silicone Spatula: For stirring and folding ingredients.
- Candy Cups or Silicone Molds: Mini paper candy cups are budget-friendly and easy to find; silicone molds give a nice shape and are reusable.
- Measuring Cups and Spoons: Precision matters for consistent results.
- Cooling Rack: To let your cups set without sticking.
If you don’t have a candy mold, no worries—you can shape these in mini muffin tins lined with paper liners. Just remember, silicone molds might require a bit longer chilling time. I’ve tried both, and honestly, paper cups are my go-to for easy cleanup and classic presentation. Also, keep your melting equipment clean and dry—any water can cause chocolate to seize, and trust me, that’s a nightmare you want to avoid!
Preparation Method
- Prepare Your Workstation (5 minutes): Line a baking sheet with parchment paper and set out mini paper candy cups or silicone molds. This helps the cups set properly without sticking.
- Melt the Chocolate (8-10 minutes): Place 1 ½ cups (270g) of chocolate chips in a heatproof bowl. Melt gently using a double boiler over simmering water, stirring constantly until smooth. Alternatively, microwave in 30-second bursts, stirring in between. Avoid overheating to prevent grainy texture.
- Add Flavor and Cream (2 minutes): Stir in ¼ cup (60ml) heavy cream, 2 tbsp (28g) softened butter, and 1 tsp mint extract or Irish cream liqueur. Mix until silky and fully combined. Add 2 tbsp (15g) powdered sugar and a few drops of green food coloring if you’re going festive.
- Fill the Candy Cups (5 minutes): Spoon a thin layer of chocolate mixture into each paper or silicone mold—about 1 teaspoon each. Use the back of the spoon to spread evenly. Pop into the fridge for 10 minutes to firm up slightly.
- Add Marshmallow Layer (5 minutes): Once the chocolate layers are set but still tacky, press a few mini marshmallows (about 3-4) onto each chocolate base. Don’t worry if they’re uneven; that’s part of the charm.
- Top with Remaining Chocolate (5 minutes): Spoon the remaining chocolate mixture over the marshmallows, covering them completely. Smooth the tops lightly with the spoon.
- Chill to Set (30-45 minutes): Place the tray in the refrigerator until the cups are completely firm. You’ll know they’re ready when the chocolate is glossy and snaps gently to the touch.
- Add Final Touch (Optional, 2 minutes): Sprinkle crushed peppermint candies or candy canes on top right after adding the last chocolate layer to stick perfectly.
- Serve and Enjoy: Once set, gently peel the cups from paper liners or pop silicone molds out. Store leftovers in an airtight container in the fridge.
A little tip: If your chocolate looks dull after melting, stir in a small knob of butter to bring back the shine. When spooning chocolate layers, work quickly but carefully—too slow, and the chocolate starts to harden, making it tricky to smooth.
Cooking Tips & Techniques
When making Irish Mint Chocolate Marshmallow Cups, patience is your best friend. Melting chocolate slowly over low heat keeps it smooth and glossy. I learned the hard way that rushing this step leads to grainy chocolate that just won’t set right. Use a double boiler if you can; it’s foolproof compared to the microwave, which can be tricky if you don’t stir often.
Don’t skip chilling the chocolate layers before adding marshmallows! If the base is too soft, marshmallows will sink and melt unevenly. Chilling helps keep those fluffy pockets intact. Also, be wary of humidity; marshmallows love to get sticky and clump in damp conditions, so try to make these on a dry day if possible.
When folding in mint extract, add it after the chocolate has melted and cooled slightly, or the flavor might dissipate. Also, if you want a stronger mint punch, start with less and add gradually—it’s easier than fixing an overpowering mint taste.
Finally, multitasking is key here. While the chocolate chills, clean up your station, prep crushed candy toppings, or even start brewing a fresh pot of Irish coffee to pair with your treats. This keeps the process smooth and fun, not frantic.
Variations & Adaptations
- Vegan Version: Use dairy-free chocolate chips, coconut cream instead of heavy cream, and vegan marshmallows. The texture shifts slightly but stays just as heavenly.
- Spicy Mint Twist: Add a pinch of cayenne pepper or cinnamon to the chocolate mixture for a warming, unexpected kick that contrasts beautifully with cool mint.
- Nutty Upgrade: Sprinkle chopped toasted pecans or walnuts on top before the final chill for a delightful crunch and earthy flavor.
- Seasonal Fruit Infusion: Swap marshmallows for thin slices of fresh strawberries or raspberries for a fruity surprise inside the chocolate cups.
- Alcohol-Free Option: Replace Irish cream liqueur with extra mint extract or a splash of vanilla extract to keep the flavor kid-friendly and festive.
One personal favorite variation I tried was adding a swirl of caramel sauce inside the cup before topping with chocolate—dangerously good! Just be sure to chill the caramel layer so it sets nicely alongside the chocolate.
Serving & Storage Suggestions
Serve these Irish Mint Chocolate Marshmallow Cups chilled or at room temperature. They hold their shape best when cold but soften beautifully if left out for 10-15 minutes—perfect for that melt-in-your-mouth experience. Arrange on a festive platter with gold or green napkins to bring out the St. Patrick’s Day spirit.
Pair with a cup of hot Irish coffee, creamy hot chocolate, or even a glass of milk to balance the rich flavors. For parties, they’re great finger food that don’t require forks or plates, making cleanup a breeze.
Store leftovers in an airtight container in the fridge for up to a week. If you want to keep them longer, freeze in a single layer on a baking sheet, then transfer to a freezer-safe bag for up to 3 months. Thaw in the fridge overnight and enjoy as if freshly made.
Keep in mind, the mint flavor intensifies after a day or two, so if you’re making these ahead, that might actually be a good thing. The chocolate also firms up nicely, giving a satisfying snap when bitten into.
Nutritional Information & Benefits
Each Irish Mint Chocolate Marshmallow Cup contains roughly 120-150 calories, depending on size and exact ingredients. The semi-sweet chocolate provides antioxidants, while the mint extract can aid digestion and freshen breath—nice little perks in a treat, right?
While this recipe is a sweet indulgence, you can make it a bit lighter by using dark chocolate with higher cocoa content and skipping the powdered sugar. The marshmallow adds fluff with minimal fat, and using real mint extract avoids artificial additives.
For those with dietary restrictions, it’s easy to adjust to gluten-free, dairy-free, or vegan preferences without sacrificing flavor. Just be sure to read labels carefully on marshmallows and chocolates to avoid hidden allergens.
Personally, I find these cups a lovely occasional treat that feels like a little celebration for my taste buds and spirit, especially on chilly March afternoons.
Conclusion
These Irish Mint Chocolate Marshmallow Cups are a must-try if you want a dangerously easy, delicious, and festive treat this St. Patrick’s Day. The combination of minty freshness, rich chocolate, and gooey marshmallow is honestly hard to beat. I love how customizable they are—you can tweak the flavors, add textures, or make them kid-friendly with just a few simple swaps.
Give this recipe a go, and I bet it’ll become a favorite in your holiday dessert lineup too. Don’t be shy about sharing your variations and thoughts—I’d love to hear how you make these your own. So, what are you waiting for? Time to get chocolatey, minty, and marshmallow-y in the best way possible!
FAQs About Irish Mint Chocolate Marshmallow Cups
Can I make these cups ahead of time?
Absolutely! They keep well in the fridge for up to a week and can be frozen for longer storage. Just thaw in the fridge before serving.
What if I don’t have mint extract?
You can substitute with Irish cream liqueur for a boozy twist or add a few fresh mint leaves finely chopped, though the flavor will be milder.
Can I use regular-sized marshmallows?
Mini marshmallows work best for even melting and layering, but you can chop regular ones into smaller pieces if needed.
How do I prevent the chocolate from seizing?
Make sure all your equipment is completely dry, and melt chocolate gently over low heat or in short microwave bursts, stirring often.
Are these suitable for kids?
Yes! Just skip the Irish cream liqueur and use mint extract instead for a kid-friendly version full of festive flavor.
Pin This Recipe!
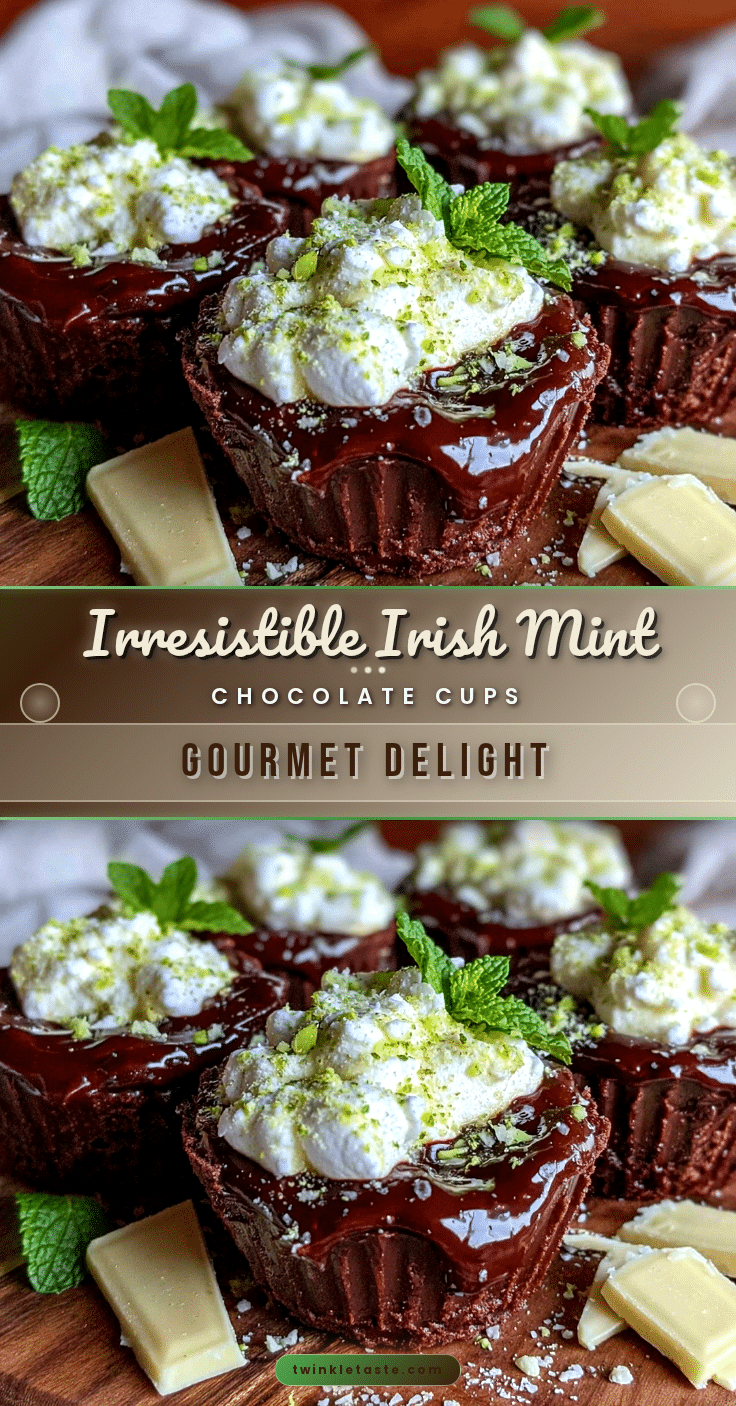
Irresistible Irish Mint Chocolate Marshmallow Cups

These Irish Mint Chocolate Marshmallow Cups combine rich chocolate, fresh mint, and fluffy marshmallows for a quick, easy, and festive treat perfect for St. Patrick’s Day and beyond.
- Prep Time: 15 minutes
- Cook Time: 15 minutes
- Total Time: 45 minutes
- Yield: 24 mini cups 1x
- Category: Dessert
- Cuisine: Irish
Ingredients
- 1 ½ cups (270g) semi-sweet or dark chocolate chips
- 2 cups mini marshmallows
- 1 tsp Irish cream liqueur or mint extract
- ¼ cup (60ml) heavy cream
- 2 tbsp (28g) unsalted butter, softened
- 2 tbsp (15g) powdered sugar
- Green food coloring (optional, a few drops)
- 2 tbsp crushed peppermint candies or candy canes (optional)
- Mini paper candy cups or silicone molds
Instructions
- Prepare your workstation by lining a baking sheet with parchment paper and setting out mini paper candy cups or silicone molds.
- Melt the chocolate chips gently using a double boiler over simmering water, stirring constantly until smooth, or microwave in 30-second bursts stirring in between.
- Stir in heavy cream, softened butter, and mint extract or Irish cream liqueur until silky and fully combined. Add powdered sugar and green food coloring if desired.
- Spoon a thin layer of chocolate mixture into each candy cup or mold (about 1 teaspoon each). Spread evenly and refrigerate for 10 minutes to firm up.
- Press 3-4 mini marshmallows onto each chocolate base once set but still tacky.
- Spoon the remaining chocolate mixture over the marshmallows, covering them completely and smoothing the tops lightly.
- Chill the cups in the refrigerator for 30-45 minutes until completely firm and glossy.
- Optionally, sprinkle crushed peppermint candies or candy canes on top immediately after adding the last chocolate layer.
- Once set, gently peel the cups from paper liners or pop silicone molds out. Store leftovers in an airtight container in the fridge.
Notes
Use fresh mint extract for best flavor. Chill chocolate layers before adding marshmallows to prevent sinking. Keep equipment dry to avoid chocolate seizing. For dairy-free, substitute heavy cream and butter with coconut cream and coconut oil. Check marshmallows for gluten if needed. Crushed peppermint candies add crunch. Variations include vegan, spicy mint twist, nutty upgrade, and seasonal fruit infusion.
Nutrition
- Serving Size: 1 mini cup
- Calories: 135
- Sugar: 14
- Sodium: 25
- Fat: 8
- Saturated Fat: 5
- Carbohydrates: 16
- Fiber: 1
- Protein: 1
Keywords: Irish mint chocolate, marshmallow cups, St. Patrick's Day dessert, mint chocolate treats, easy chocolate cups