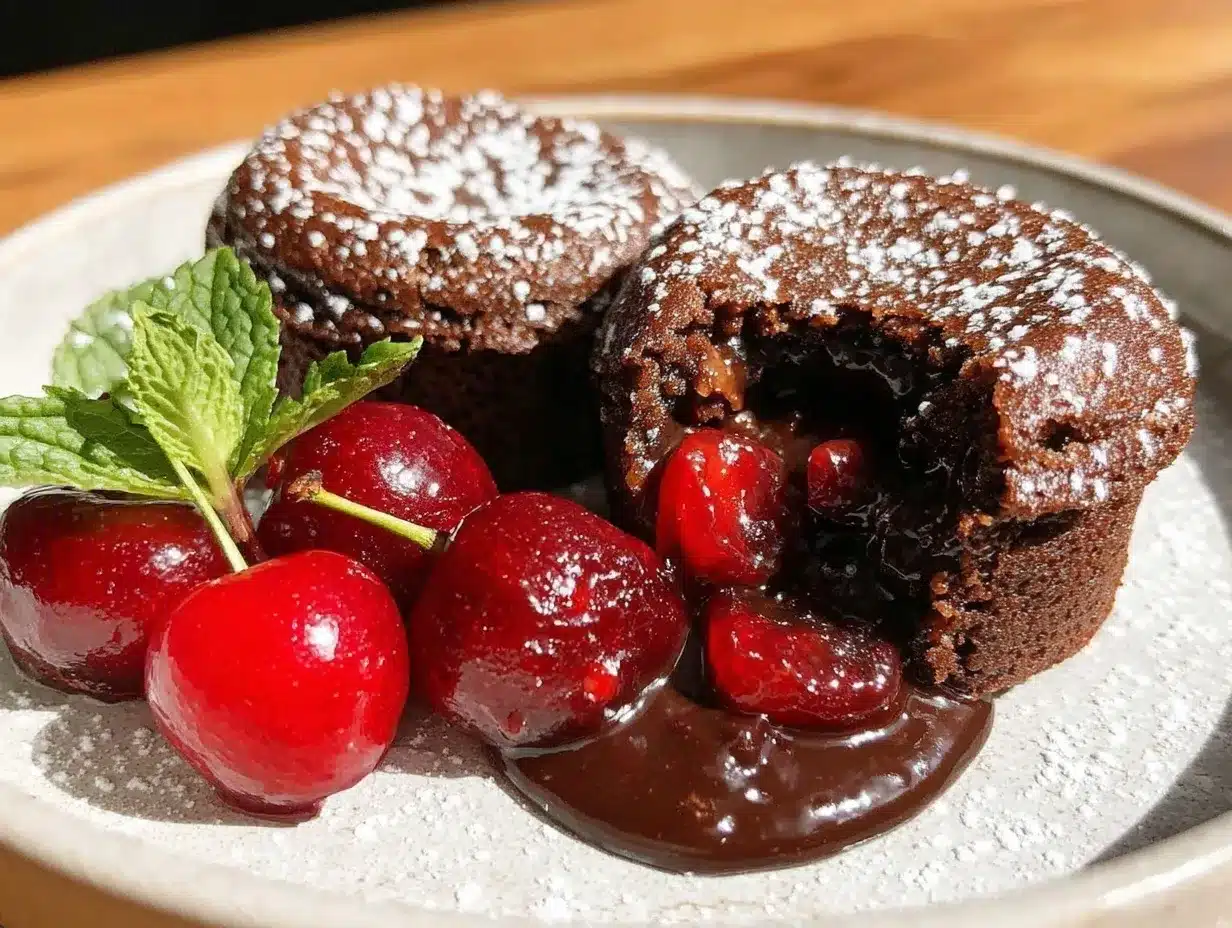
Oh, the aroma of rich, molten chocolate mingling with the sweet tang of cherries—let me tell you, the scent of these Decadent Valentine’s Chocolate Cherry Lava Cups fresh from the oven is enough to make anyone’s mouth water. The moment you break through that delicate chocolate shell and the warm cherry lava oozes out? Honestly, it’s the kind of moment where you pause, take a deep breath, and just smile because you know you’re onto something truly special.
The first time I baked these luscious lava cups was on a chilly February evening, years ago when I was knee-high to a grasshopper (okay, maybe not that long ago, but it feels like forever!). I was hunting for a romantic dessert that felt fancy but was dangerously easy to make. I was instantly hooked—and so was my family. They couldn’t stop sneaking these off the cooling rack (and I can’t really blame them). Each bite feels like a warm hug wrapped in chocolate and cherries—a pure, nostalgic comfort perfect for Valentine’s Day or any time you want to impress without stressing.
You know what? I wish I’d discovered this recipe years ago. It’s become a staple for family gatherings and gifting, and every time I make it, it brings joy and sweet smiles all around. Whether you’re aiming to brighten up your Pinterest cookie board or need a sweet treat for your kids, these lava cups deliver on all fronts. Let’s face it—romantic desserts don’t have to be complicated, and this recipe is proof. I tested it multiple times (in the name of research, of course), and it’s ready to become your go-to indulgence.
Why You’ll Love This Recipe
Honestly, these Decadent Valentine’s Chocolate Cherry Lava Cups are a game-changer for anyone who loves chocolate and cherries—a match made in dessert heaven. Here’s why this recipe stands out and why you’ll want to keep it close:
- Quick & Easy: Ready in under 30 minutes, perfect for busy weeknights or last-minute romantic surprises.
- Simple Ingredients: You likely already have all the ingredients in your pantry or fridge—no fancy grocery runs needed.
- Perfect for Romantic Occasions: Whether it’s Valentine’s Day, an anniversary, or just because, these lava cups set the mood beautifully.
- Crowd-Pleaser: Kids, adults, and even picky eaters rave about the gooey cherry center and decadent chocolate.
- Unbelievably Delicious: The combination of silky molten chocolate and tart cherries creates a flavor and texture combo that’s pure magic.
What makes this recipe different? Well, the secret lies in the cherry lava filling—made with real tart cherries and a hint of almond extract that adds a surprising depth without overpowering. Plus, the chocolate batter has a velvety smoothness thanks to a quick melt-and-mix method. This isn’t just any lava cake recipe; it’s my best version, tested and tweaked after countless batches to get that perfect balance between rich chocolate and bright cherry flavors. One bite, and you’ll close your eyes and savor it like a dream come true.
What Ingredients You Will Need
This recipe uses simple, wholesome ingredients to deliver bold flavor and a satisfying texture without the fuss. Most are pantry staples, with a few special touches to make the cherry lava shine.
- For the Chocolate Batter:
- Unsweetened cocoa powder (½ cup / 50g) – I recommend Valrhona for a rich, deep chocolate flavor.
- Semisweet or dark chocolate chips (6 oz / 170g) – Ghirardelli works wonderfully here.
- All-purpose flour (½ cup / 65g) – sifted for lightness.
- Granulated sugar (¾ cup / 150g) – balances the tartness of cherries.
- Unsalted butter (½ cup / 113g), melted and slightly cooled (adds richness).
- Large eggs (3), room temperature (helps with structure and moisture).
- Pure vanilla extract (1 tsp) – brings warmth to the batter.
- Salt (¼ tsp) – enhances the chocolate’s depth.
- For the Cherry Lava Filling:
- Fresh or frozen tart cherries (1 cup / 150g), pitted – frozen works great if fresh aren’t available.
- Granulated sugar (2 tbsp) – sweetens the cherries just right.
- Almond extract (½ tsp) – optional but adds that lovely nutty note.
- Cornstarch (1 tsp) – thickens the cherry lava.
- For Garnish:
- Powdered sugar, for dusting.
- Fresh cherries or mint leaves, optional but pretty!
If you want to make this gluten-free, swapping the all-purpose flour for almond flour is a tasty option, though the texture will be a bit denser. For a dairy-free version, use coconut oil instead of butter and dairy-free chocolate chips. I’ve tried both, and they work well without sacrificing flavor.
Equipment Needed
- Ramekins or a muffin tin – I prefer 6-ounce ramekins for perfect portions; a nonstick muffin tin works too.
- Mixing bowls – one for chocolate batter, one for cherry filling.
- Whisk and spatula – for smooth blending.
- Saucepan – to melt chocolate and butter gently.
- Electric mixer (optional) – handy but not necessary if you whisk well by hand.
- Cooling rack – helps cupcakes cool evenly without sogginess.
If you don’t have ramekins, small oven-safe custard cups or silicone muffin cups work just fine. I started with a basic muffin tin and upgraded to ramekins for a more elegant presentation. For melting chocolate, a double boiler is ideal but a microwave-safe bowl with short bursts works well too—just watch carefully to avoid burning. If you’re on a budget, silicone muffin cups are reusable and easy to clean.
Preparation Method
- Prepare the Cherry Lava Filling (10 minutes): In a small saucepan, combine the cherries, sugar, almond extract, and cornstarch. Cook over medium heat, stirring frequently until the mixture thickens and bubbles gently (about 5-7 minutes). Remove from heat and let cool slightly. This filling should be thick but still spoonable.
- Melt Chocolate and Butter (5 minutes): Using a double boiler or microwave in 30-second bursts, melt the chocolate chips and butter together until smooth. Stir well to combine and set aside to cool slightly.
- Make the Chocolate Batter (10 minutes): In a mixing bowl, whisk together the eggs, sugar, vanilla extract, and salt until smooth and slightly frothy. Add the melted chocolate mixture and stir until fully incorporated. Then, gently fold in the sifted cocoa powder and flour until just combined — be careful not to overmix, or your lava cups might turn out tough.
- Preheat Oven and Prepare Ramekins (5 minutes): Preheat your oven to 425°F (220°C). Grease your ramekins thoroughly with butter or nonstick spray and lightly dust with cocoa powder to prevent sticking.
- Assemble the Lava Cups (5 minutes): Spoon about 2 tablespoons (30g) of chocolate batter into each ramekin, then add a heaping teaspoon of the cherry lava filling in the center. Cover the filling with another 2 tablespoons of batter, smoothing the tops gently.
- Bake (12-14 minutes): Place ramekins on a baking sheet and bake in the preheated oven. The edges should be set, but the center will still jiggle slightly when you gently shake the pan—this is the molten magic.
- Cool and Serve (5 minutes): Let the lava cups rest for 5 minutes before carefully running a knife around the edges and inverting onto plates. Dust with powdered sugar and garnish with fresh cherries or mint if desired.
Pro tip: If your cherry lava seems too runny before baking, add a pinch more cornstarch. If the chocolate batter feels thick, a splash of milk can loosen it up. The key to success here is timing—don’t overbake or you’ll lose that luscious molten center!
Cooking Tips & Techniques
Let me share a few tricks I’ve learned while perfecting these lava cups. First, always use room temperature eggs and butter. It helps the chocolate batter come together smoothly and creates that tender crumb we all love. When melting chocolate, patience is key—low heat and gentle stirring prevent burning and grainy texture.
One common mistake is overbaking. I’ve been there, and it’s heartbreaking when your lava turns into a dry cake. The edges should be firm but the center still slightly wobbly when you take them out. They’ll firm up more as they cool, so err on the side of underbaking.
Multitasking is your friend here. While the cherry filling cooks, melt your chocolate and prep the batter. This keeps the process streamlined and prevents the filling from cooling too much before assembly. Lastly, greasing and dusting your ramekins well is essential to avoid any sticky situations when you turn out the lava cups.
Variations & Adaptations
- Berry Twist: Swap cherries for raspberries or blackberries for a different tangy fruit lava. You can even mix berries for a wild berry lava cup.
- Nutty Delight: Add a teaspoon of finely chopped toasted hazelnuts or almonds to the batter for a bit of crunch and added flavor dimension.
- Vegan Version: Use dairy-free chocolate, coconut oil instead of butter, and flax eggs (1 tbsp ground flaxseed + 3 tbsp water per egg). I’ve tested this version—still super tasty and perfect for plant-based diets.
You can also experiment with cooking methods like mini muffin pans for bite-sized treats or even microwave single servings for an instant fix. Just keep a close eye on cooking time. For a spicy kick, add a pinch of cayenne or cinnamon to the chocolate batter—it’s a subtle but delicious surprise.
Serving & Storage Suggestions
Serve these lava cups warm for that irresistibly gooey center, straight from the oven with a dusting of powdered sugar and a few fresh cherries for color. Pair them with a scoop of vanilla ice cream or a dollop of whipped cream for extra indulgence. A cup of rich espresso or a glass of sparkling rosé also complements the chocolate-cherry flavor beautifully.
To store, cover the lava cups tightly with plastic wrap and refrigerate for up to 3 days. Reheat gently in the microwave for 15-20 seconds or in a warm oven to bring back the molten center. You can freeze unbaked lava cups for up to a month; just thaw in the fridge overnight and bake as usual. Over time, the cherry flavor deepens, making leftovers even more luscious.
Nutritional Information & Benefits
Each Decadent Valentine’s Chocolate Cherry Lava Cup packs approximately 320 calories, with 18 grams of fat, 35 grams of carbohydrates, and 5 grams of protein (values may vary slightly depending on brands and portion sizes). Cherries bring antioxidants and vitamins, while dark chocolate offers heart-healthy flavonoids—so you’re getting a little indulgence with some perks.
This recipe is naturally gluten-containing, but with easy swaps, it can be adapted for gluten-free or vegan diets. Keep in mind the cherry filling is low in added sugar compared to typical dessert fillings, which balances the sweetness nicely. From a wellness perspective, this dessert feels like a treat that’s both satisfying and thoughtfully made, perfect for sharing love and joy.
Conclusion
If you’re looking for a romantic dessert that’s both impressive and easy, these Decadent Valentine’s Chocolate Cherry Lava Cups are a must-try. They bring together the best of smooth, rich chocolate and tangy cherry lava in a way that feels special but won’t keep you in the kitchen all night. Customize the cherry filling or try the variations to make it your own.
I absolutely adore this recipe because it’s proof that simple ingredients and a little care can create pure magic. I hope it becomes a favorite in your house, too. Don’t forget to share your results or any tweaks you make—I love hearing from fellow dessert lovers! Now, go ahead and treat yourself and yours to something truly unforgettable.
FAQs
- Can I use canned cherries for the lava filling?
Yes, but drain them well and reduce added sugar since canned cherries are often sweeter. - How do I know when the lava cups are perfectly baked?
The edges should look set and firm, but the center should jiggle slightly when you gently shake the ramekin. - Can I prepare the cherry filling ahead of time?
Absolutely! Make the filling a day ahead and keep it refrigerated. Warm slightly before assembling. - What if I don’t have ramekins?
Use a nonstick muffin tin or small oven-safe cups—adjust baking time slightly as needed. - Is it possible to make these ahead and freeze them?
Yes, you can freeze unbaked lava cups for up to a month. Thaw overnight in the fridge before baking.
Pin This Recipe!
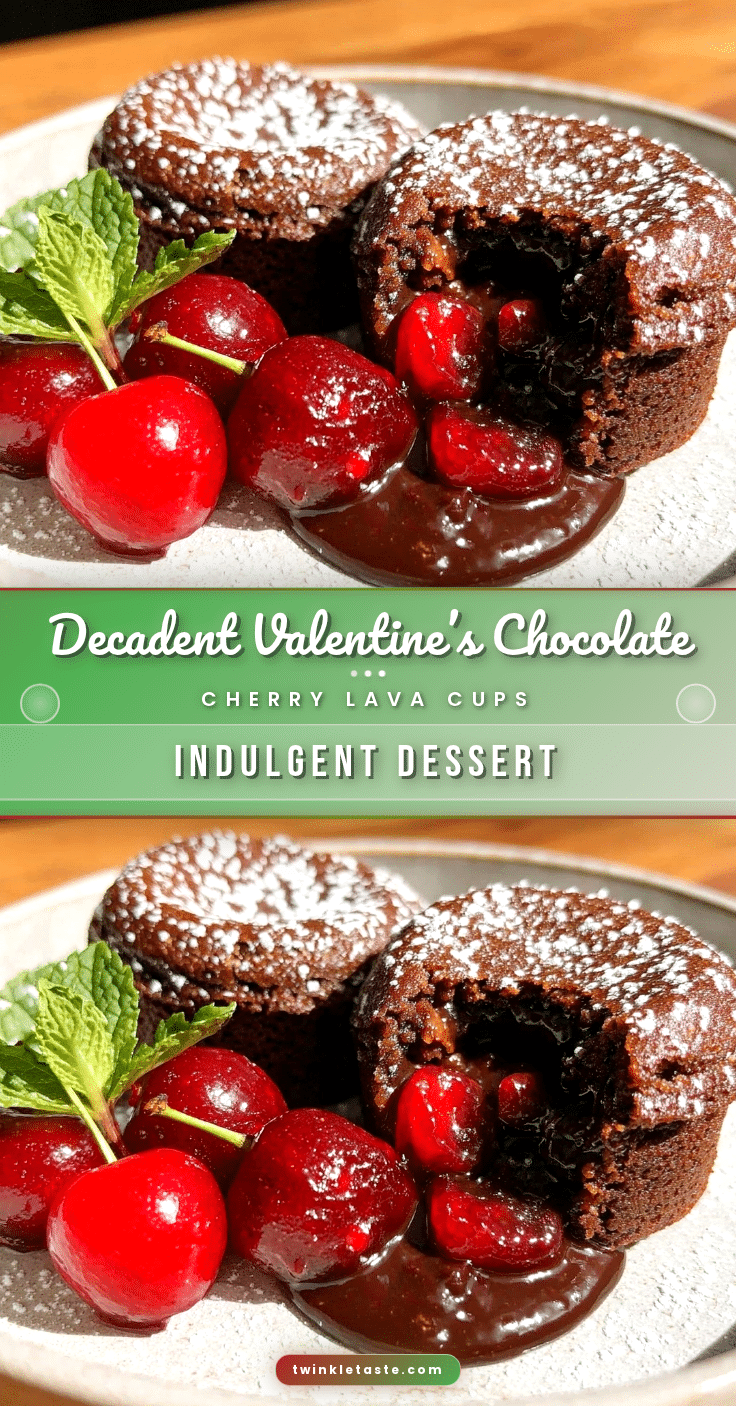
Decadent Valentine’s Chocolate Cherry Lava Cups
Rich molten chocolate lava cups with a sweet tart cherry filling, perfect for romantic occasions like Valentine’s Day. Easy to make with simple ingredients and delivers a gooey, indulgent dessert experience.
- Prep Time: 20 minutes
- Cook Time: 14 minutes
- Total Time: 34 minutes
- Yield: 6 servings 1x
- Category: Dessert
- Cuisine: American
Ingredients
- ½ cup unsweetened cocoa powder (50g)
- 6 oz semisweet or dark chocolate chips (170g)
- ½ cup all-purpose flour (65g), sifted
- ¾ cup granulated sugar (150g)
- ½ cup unsalted butter (113g), melted and slightly cooled
- 3 large eggs, room temperature
- 1 tsp pure vanilla extract
- ¼ tsp salt
- 1 cup fresh or frozen tart cherries (150g), pitted
- 2 tbsp granulated sugar
- ½ tsp almond extract (optional)
- 1 tsp cornstarch
- Powdered sugar, for dusting
- Fresh cherries or mint leaves for garnish (optional)
Instructions
- Prepare the Cherry Lava Filling: In a small saucepan, combine cherries, sugar, almond extract, and cornstarch. Cook over medium heat, stirring frequently until thickened and bubbling gently (5-7 minutes). Remove from heat and let cool slightly.
- Melt Chocolate and Butter: Using a double boiler or microwave in 30-second bursts, melt chocolate chips and butter together until smooth. Stir well and set aside to cool slightly.
- Make the Chocolate Batter: In a mixing bowl, whisk eggs, sugar, vanilla extract, and salt until smooth and slightly frothy. Add melted chocolate mixture and stir until incorporated. Gently fold in sifted cocoa powder and flour until just combined, being careful not to overmix.
- Preheat Oven and Prepare Ramekins: Preheat oven to 425°F (220°C). Grease ramekins thoroughly with butter or nonstick spray and dust lightly with cocoa powder.
- Assemble the Lava Cups: Spoon about 2 tablespoons (30g) of chocolate batter into each ramekin. Add a heaping teaspoon of cherry lava filling in the center. Cover with another 2 tablespoons of batter, smoothing the tops gently.
- Bake: Place ramekins on a baking sheet and bake for 12-14 minutes. Edges should be set but center should jiggle slightly when shaken.
- Cool and Serve: Let rest for 5 minutes. Run a knife around edges and invert onto plates. Dust with powdered sugar and garnish with fresh cherries or mint if desired.
Notes
Use room temperature eggs and butter for best texture. Avoid overbaking to keep the molten center. If cherry lava is too runny, add more cornstarch. If batter is too thick, add a splash of milk. For gluten-free, substitute almond flour for all-purpose flour. For dairy-free, use coconut oil and dairy-free chocolate chips.
Nutrition
- Serving Size: 1 lava cup
- Calories: 320
- Fat: 18
- Carbohydrates: 35
- Protein: 5
Keywords: chocolate lava cake, cherry lava cups, romantic dessert, Valentine's Day dessert, molten chocolate, easy chocolate dessert, cherry filling, homemade lava cake