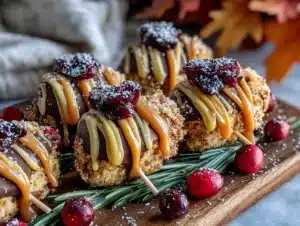
My neighbor Margot watched me wrestling with a piping bag last November, my third attempt at decorating Thanksgiving cupcakes ending in a sugary mess on my countertop. She didn’t say anything at first. Then she just pulled out her phone and showed me a photo of these little turkey cake pops her granddaughter had helped her make the week before. “Stop overcomplicating things,” she said with a shrug. “Kids can make these. You probably can too.”
Honestly, I was a little offended at first. But then I looked at my sad, lopsided cupcakes and back at her photo of these cheerful little turkey faces on sticks, and I knew she was right. I had been so focused on making something fancy for Thanksgiving that I forgot the whole point — sharing something fun and delicious without spending three days in the kitchen. So I asked her to show me how, right there in my messy kitchen, and these Easy Thanksgiving Turkey Cake Pops were born from that conversation.
The recipe itself is almost embarrassingly simple. You start with a basic cake — box mix or homemade, I won’t judge — crumble it up, mix it with frosting, roll it into balls, and then decorate them to look like adorable little turkeys. The magic is in the decorating, which uses candy melts, pretzels, and candy eyes to create faces that somehow manage to look both goofy and charming. I mean, they’re not going to win any awards at a pastry competition, but that’s kind of the point.
There was one batch where I accidentally used salted pretzels instead of regular ones, and let me tell you, the salty-sweet combo was actually amazing. A happy accident, you know? That’s the kind of recipe this is — forgiving, flexible, and perfect for when you want to make something special without the stress. Maybe you’ve been there, staring at Pinterest-perfect desserts and wondering how anyone has the time. These cake pops are your answer.
What keeps me coming back to this recipe year after year is how it brings people together. My niece and nephew now request “Turkey Pop Day” the weekend before Thanksgiving, and we spend an afternoon making a mess and laughing. That’s really why this recipe stayed with me — not because it’s fancy, but because it creates moments that matter.
Why You’ll Love This Recipe
Let me be straight with you — I’ve tested a lot of Thanksgiving dessert recipes over the years, and most of them end up being way more work than they’re worth. These Easy Thanksgiving Turkey Cake Pops are different. They’re the kind of recipe that makes you look like a hero without actually having to work like one.
- Quick & Easy: From start to finish, you’re looking at about 45 minutes of active time plus chilling. That’s it. No complicated piping, no temperamental ganache, no standing over a hot stove stirring something that might seize up on you.
- Simple Ingredients: You probably have most of these in your pantry right now. Cake mix, frosting, candy melts, pretzels, and candy eyes. Nothing weird or expensive.
- Perfect for Thanksgiving: These little guys are the ultimate holiday treat. They’re portable, they don’t require plates or forks, and kids absolutely lose their minds over them. Plus, they’re a great activity to do with the family the day before the big meal.
- Crowd-Pleaser: I’ve brought these to Friendsgiving, work potlucks, and family dinners, and they always disappear first. Adults pretend they’re for the kids, but I’ve caught more than a few sneaking seconds.
- Unbelievably Delicious: Here’s the thing about cake pops — the texture is incredible. The crumbled cake mixed with frosting creates this dense, fudgy bite that’s completely different from regular cake. It’s like the best parts of a birthday cake rolled into one perfect mouthful.
What makes this version different from every other turkey cake pop recipe out there? It’s designed for real people with real kitchens. I’ve simplified the decorating process so you don’t need any special tools or skills. The turkey faces come together in minutes, and I’ve included tips for keeping your candy melts smooth and your cake pops intact. No more cake pops sliding off their sticks or cracking when you dip them.
This recipe isn’t just good — it’s the kind that makes you close your eyes after the first bite. It’s comfort food reimagined for the holiday season, but without the stress that usually comes with Thanksgiving baking. Perfect for impressing guests without breaking a sweat, or turning a simple dessert into something memorable.
What Ingredients You Will Need
This recipe uses simple, everyday ingredients to create something that looks like it took way more effort than it actually did. Most of these are pantry staples or easily found at any grocery store, which is exactly what you want when you’re already planning a big holiday meal.
For the Cake Base
- 1 box yellow cake mix (15.25 oz) — I prefer Duncan Hines for its moist texture, but any brand works. You’ll also need the eggs and oil called for on the box.
- 1 container cream cheese frosting (16 oz) — Store-bought is totally fine here. In fact, I actually prefer it because the consistency is more predictable for cake pops.
- Optional: 1 teaspoon vanilla extract — Adds a little extra warmth to the flavor. Not necessary, but nice.
For the Turkey Decorations
- 1 bag orange candy melts (12 oz) — These create the turkey’s beak and feet. Wilton brand melts smoothly, but any brand works.
- 1 bag red candy melts (12 oz) — For the wattle (that red dangly bit under the beak). You won’t use the whole bag.
- 1 bag brown candy melts (12 oz) — This is for dipping the cake pops. You can also use milk chocolate melts if you prefer.
- 1 bag white candy melts (12 oz) — For the base of the eyes. Or you can just use the candy eyes directly.
- Candy eyes — The little white and black ones you find in the baking aisle. They come in different sizes; medium works best.
- Mini pretzel sticks — These become the turkey’s little legs. Break them in half for the perfect size.
- Pretzel twists — For the turkey’s tail feathers. You’ll need about 3-4 per cake pop.
- Orange jelly beans or orange M&Ms — For the beak. You can also pipe orange candy melts, but this is faster.
- Red M&Ms or red jelly beans — For the wattle. Same deal — faster than piping.
For Assembly
- Lollipop sticks — You can find these at craft stores or online. Get the 6-inch ones for standard cake pops.
- White chocolate chips or coconut oil — A tablespoon of coconut oil mixed into your melted candy helps thin it out for smoother dipping.
- Styrofoam block or cake pop stand — For drying the finished pops upright. A cardboard box with holes poked in it works in a pinch.
A quick note on substitutions: If you’re gluten-free, use a gluten-free cake mix and check that your candy melts are certified gluten-free. For a dairy-free version, use a dairy-free cake mix and frosting, and look for dairy-free candy melts (Enjoy Life brand makes good ones). I’ve tried both variations and they work beautifully.
Equipment Needed
You don’t need a professional bakery setup for these, which is honestly my favorite thing about this recipe. Here’s what you’ll need:
- Large mixing bowl — For crumbling the cake and mixing with frosting. I use my grandmother’s old ceramic bowl, but any large bowl works.
- 9×13 baking pan — Or two 8-inch round pans. Whatever you have on hand.
- Cookie scoop or melon baller — For portioning the cake mixture into uniform balls. A tablespoon works too, but the scoop makes it faster.
- Baking sheet lined with parchment paper — For chilling the cake balls before dipping.
- Microwave-safe bowls — For melting the candy. Glass or ceramic works best. Avoid plastic — it can hold onto flavors.
- Lollipop sticks — As mentioned above. I’ve also used thick straws in a pinch, but sticks are more stable.
- Styrofoam block or cake pop stand — For drying. I’ve used a shoebox with holes punched in it before, and it worked fine.
- Small piping bags or zip-top bags — For applying small amounts of melted candy for the details. Snip a tiny corner off the bag.
If you don’t have lollipop sticks, you can skip them entirely and make cake balls instead — just roll them into balls and decorate on a plate. They’re less cute but just as delicious. And if you don’t have a cookie scoop, just use your hands. I actually prefer hand-rolling because you can feel if the mixture is too dry or too wet.
Preparation Method
Alright, let’s get to the fun part. I’m going to walk you through this step by step, including all the little tricks I’ve learned from making these every year since Margot showed me how.
Step 1: Bake the Cake
Preheat your oven to 350°F (175°C). Prepare the cake mix according to the package directions — usually that means adding eggs, oil, and water. Pour the batter into your greased 9×13 pan and bake for about 25-30 minutes, or until a toothpick inserted in the center comes out clean. Let the cake cool completely in the pan. This is important — if the cake is even slightly warm, the frosting will melt and you’ll end up with a sticky mess instead of a workable dough. I usually bake mine the night before and let it cool overnight.
Step 2: Crumble the Cake
Once the cake is completely cool, use your hands to crumble it into a large bowl. You want fine, even crumbs — no big chunks. This takes about 3-4 minutes of rubbing the cake between your fingers. It’s messy but oddly satisfying. Think of it as stress relief after all that Thanksgiving planning.
Step 3: Mix with Frosting
Add about 3/4 of the container of cream cheese frosting to the crumbled cake. Start with less than you think you need — you can always add more. Use a spatula or your hands to mix everything together until it forms a dough-like consistency. The mixture should hold together when you squeeze it in your fist without being sticky. If it’s too dry, add more frosting a tablespoon at a time. If it’s too wet, add a little more crumbled cake or some crushed graham crackers.
Step 4: Roll the Balls
Scoop out portions of the cake mixture — about 1.5 tablespoons each — and roll them into smooth balls. You should get about 24-30 balls depending on how big you make them. Place them on a parchment-lined baking sheet. Pop the sheet in the refrigerator for at least 30 minutes, or up to 2 hours. Chilling is crucial — cold cake pops hold their shape when you dip them in warm candy.
Step 5: Melt the Candy
While the cake balls chill, melt your brown candy melts according to the package directions. I do mine in the microwave in 30-second bursts, stirring between each, until smooth. Stir in a teaspoon of coconut oil or vegetable shortening to thin the consistency — this makes dipping much easier and gives a smoother finish.
Step 6: Dip the Sticks
Take a few cake balls out of the fridge at a time (keep the rest cold). Dip the tip of a lollipop stick into the melted candy, then insert it about halfway into a cake ball. This acts like glue and helps the cake pop stay on the stick. Return the cake pop to the fridge for about 10 minutes to set the “glue.”
Step 7: Dip the Cake Pops
Now for the main event. Dip each cake pop into the melted brown candy, making sure it’s completely covered. Gently tap the stick against the side of the bowl to let excess drip off. Don’t swirl or spin the pop — this can cause it to fall off the stick. Just dip and tap. Place the dipped pop in your styrofoam block to dry.
Step 8: Decorate the Turkeys
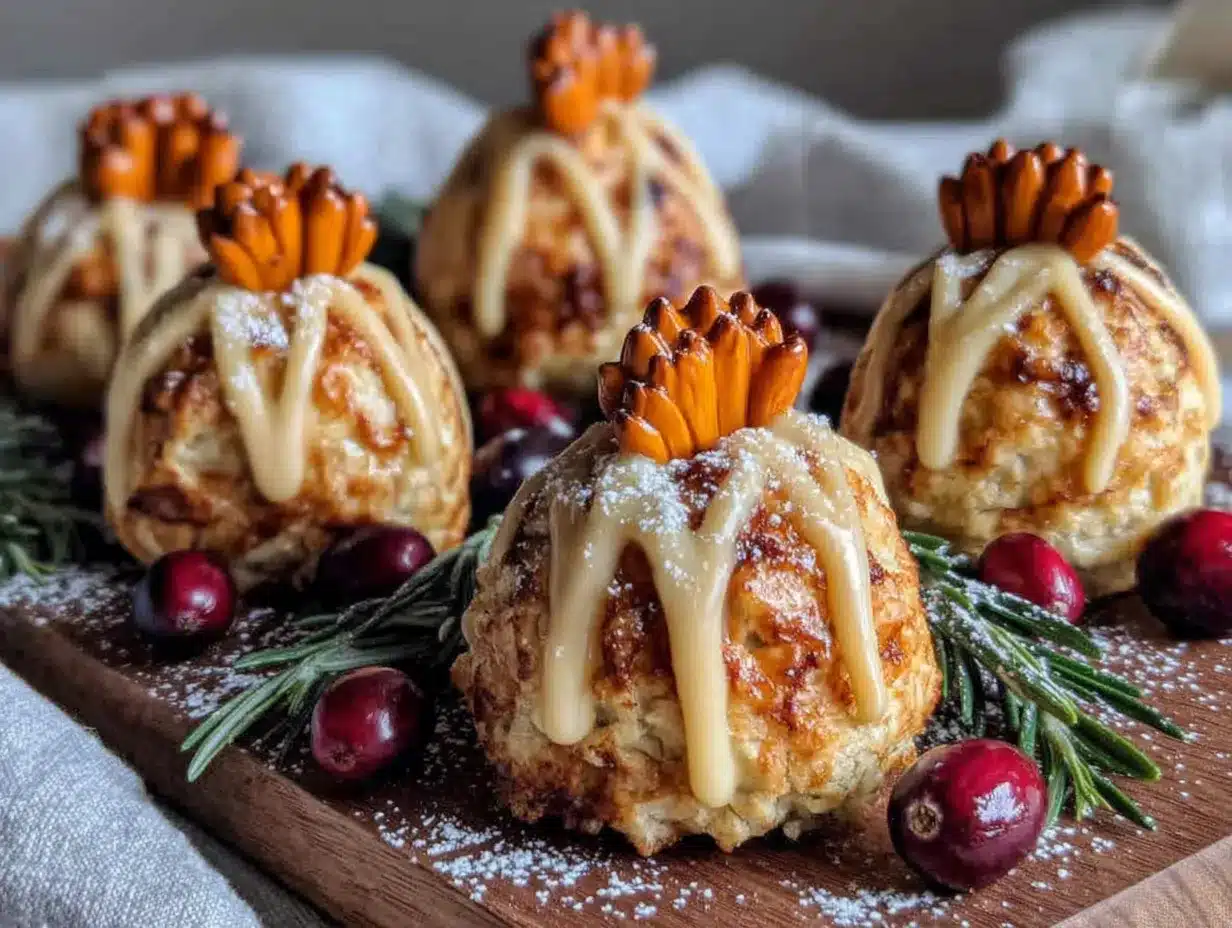
While the brown coating is still wet (but not dripping), attach the candy eyes, the orange jelly bean beak, and the red M&M wattle. Press them gently into the candy so they stick. For the tail feathers, break pretzel twists into pieces and arrange 3-4 behind the turkey’s head, pressing them into the wet candy. For the legs, insert two mini pretzel stick halves into the bottom of the cake pop. Let everything set completely — about 20 minutes at room temperature or 10 minutes in the fridge.
Step 9: Add Final Details
If you want to get fancy, use a toothpick dipped in melted white candy to add little highlights to the eyes, or pipe a tiny smile with orange candy melts. I usually skip this because the turkeys are plenty cute without it, but it’s a nice touch if you have the time.
Cooking Tips & Techniques
I’ve made these Easy Thanksgiving Turkey Cake Pops more times than I care to count, and I’ve learned a few things the hard way. Let me save you some trouble.
The biggest mistake people make is not chilling the cake balls long enough. I know you’re excited, but trust me on this — if the cake balls are even slightly warm, they’ll fall apart in the melted candy. I once tried to rush the process and ended up with cake crumbs floating in my candy melts. Not a good look. Give them a full 30 minutes in the fridge, minimum.
Another common issue is candy melts that are too thick. If your coating is lumpy or thick, add a teaspoon of coconut oil or vegetable shortening and stir. Don’t use butter or margarine — they contain water and will cause the candy to seize up. I learned this one the hard way too, and let me tell you, there’s nothing more frustrating than ruining a whole bag of candy melts.
For the smoothest coating, use a deep, narrow bowl for your melted candy. This lets you submerge the entire cake pop in one motion without having to rotate it. A tall drinking glass works surprisingly well for this. Just make sure it’s microwave-safe.
Timing tip: I like to bake the cake and make the cake balls the day before I plan to decorate. This breaks the project into manageable chunks and means I’m not rushing on Thanksgiving morning. The cake balls can sit in the fridge overnight, covered with plastic wrap.
If a cake pop falls off the stick while dipping, don’t panic. Just fish it out with a fork, let the candy set, and start over. You can re-roll the cake ball if needed. It happens to everyone — even professional bakers have cake pop disasters.
Variations & Adaptations
One of the best things about this recipe is how flexible it is. Here are some variations I’ve tried and loved:
Chocolate Turkey Cake Pops
Use a chocolate cake mix and chocolate frosting instead of yellow cake and cream cheese frosting. Dip in milk chocolate melts instead of brown candy. The chocolate version is richer and feels more decadent — perfect for serious chocolate lovers.
Pumpkin Spice Turkey Cake Pops
For a fall twist, use a spice cake mix and add 1/2 cup of pumpkin puree to the batter (reduce the oil slightly to compensate). Mix with cream cheese frosting as usual. The pumpkin and spice flavors scream Thanksgiving, and the orange coating (yes, orange candy melts) makes them extra festive.
Gluten-Free Version
Use your favorite gluten-free yellow cake mix and gluten-free frosting. Most candy melts are naturally gluten-free, but always check the label. I’ve made these for my gluten-sensitive friends and they couldn’t tell the difference.
Mini Turkey Cake Pops
Roll the cake mixture into teaspoon-sized balls instead of tablespoon-sized ones. Use shorter lollipop sticks or toothpicks. These are adorable for kids’ parties or as a Thanksgiving appetizer (yes, dessert appetizer — it’s a thing).
No-Stick Version (Cake Balls)
Skip the lollipop sticks entirely and just make cake balls. Decorate them lying flat on a plate with the turkey face on top and pretzel feathers sticking out from behind. These are less messy to eat and easier to transport.
Serving & Storage Suggestions
These turkey cake pops are best served at room temperature, which means you can make them ahead of time and just set them out when you’re ready. The flavors actually improve after a day in the fridge — the cake and frosting meld together into this amazing fudgy texture.
For presentation, arrange them on a platter with the turkey faces facing outward. You can also stick them into a pumpkin or a small hay bale for a fun centerpiece. I’ve seen people arrange them in a circle around a bowl of dip, which looks adorable.
Storage: Keep your cake pops in an airtight container in the refrigerator for up to 5 days. Layer them between sheets of wax paper to prevent sticking. Don’t leave them out at room temperature for more than 2 hours, especially if you’re using cream cheese frosting.
Freezer instructions: These freeze beautifully. Place the undecorated cake balls on a baking sheet and freeze until solid, then transfer to a freezer bag. They’ll keep for up to 3 months. When you’re ready to decorate, thaw them in the fridge overnight and proceed with dipping and decorating as usual.
Reheating: You don’t really need to reheat these — they’re meant to be served cold or at room temperature. But if you want to soften the candy coating slightly, let them sit at room temperature for 15-20 minutes before serving.
Nutritional Information & Benefits
Let’s be real — these are a treat, not a health food. But here’s the nutritional breakdown for one cake pop (based on the standard recipe, makes 24 pops):
- Calories: Approximately 180-220 per pop
- Fat: 8-10g
- Carbohydrates: 26-30g
- Sugar: 18-22g
- Protein: 2-3g
Health highlights: The cream cheese frosting does add some calcium and vitamin A from the dairy. The cake provides carbohydrates for energy (hey, you’ll need it for all that Thanksgiving cooking). And honestly, the mental health benefits of making something cute and delicious with your family are probably the best part.
Dietary considerations: This recipe contains gluten, dairy, and eggs. For a dairy-free version, use dairy-free cake mix, frosting, and candy melts. For an egg-free version, use an egg-replacer in the cake mix. The candy eyes may contain traces of soy, so check the label if you have allergies.
My personal perspective: I believe in balance. These cake pops are a special occasion treat, and I don’t stress about the sugar content when I’m celebrating with people I love. Make them, enjoy them, and don’t overthink it.
Conclusion
These Easy Thanksgiving Turkey Cake Pops have become a tradition in my house, and I think they deserve a spot in yours too. They’re fun, they’re forgiving, and they’re the kind of recipe that makes you feel like a baking superstar without the stress that usually comes with holiday desserts.
I love that this recipe came from a neighbor who didn’t try to impress me with fancy techniques or exotic ingredients. She just showed me something simple that worked, and that’s exactly what I’m passing on to you. Whether you make them with your kids, bring them to a Friendsgiving, or just make a batch for yourself because you deserve something cute and delicious, these little turkeys deliver.
So go ahead — grab a box of cake mix, some candy melts, and a bag of pretzels. Make a mess in your kitchen. Laugh at the ones that turn out a little wonky (they always do, and they’re always the best ones). And when someone asks where you got the recipe, tell them a neighbor showed you, and now you’re passing it on.
If you make these, I’d love to hear how they turn out. Drop a comment below or tag me in your photos. Happy Thanksgiving, friends!
Frequently Asked Questions
Can I use a different flavor of cake mix?
Absolutely! Chocolate, spice, red velvet, or even lemon cake mix all work great. Just match your frosting flavor to the cake for best results.
Why did my cake pops crack when I dipped them?
This usually happens when the cake balls are too cold and the candy melts are too hot. Let the cake balls sit at room temperature for 5 minutes after coming out of the fridge, and make sure your candy melts aren’t scorching hot.
Can I make these without lollipop sticks?
Yes! Just skip the sticks and make cake balls instead. Decorate them flat on a plate with the turkey face on top and pretzel feathers sticking out from behind.
How far in advance can I make these?
You can make the cake balls up to 3 days ahead and keep them in the fridge. Or freeze them undecorated for up to 3 months. The fully decorated cake pops are best within 2-3 days.
My candy melts are too thick — what should I do?
Add a teaspoon of coconut oil or vegetable shortening and stir until smooth. Don’t add water, butter, or milk — they’ll cause the candy to seize up and become unusable.
Pin This Recipe!
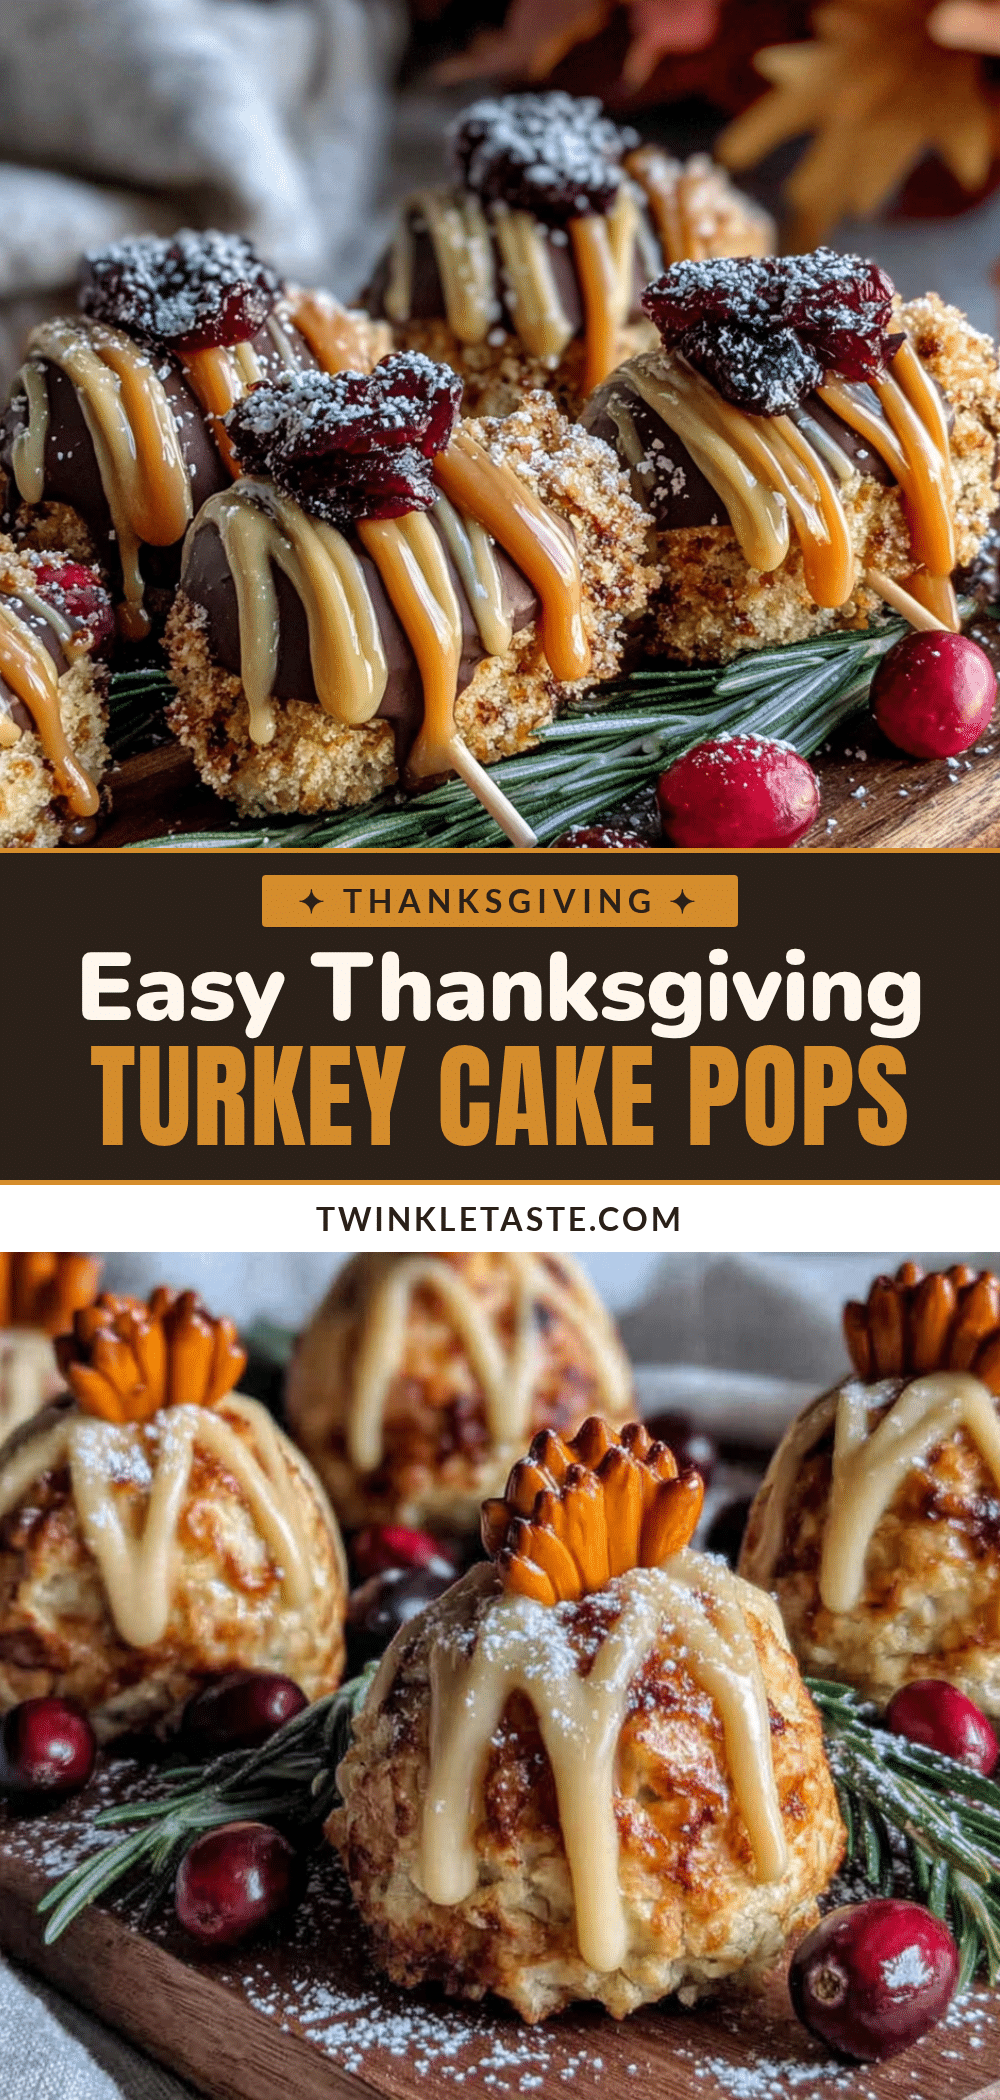
Easy Thanksgiving Turkey Cake Pops: Best Homemade Treat

These adorable turkey cake pops are made with simple ingredients like cake mix, frosting, candy melts, and pretzels. They’re fun, forgiving, and perfect for Thanksgiving celebrations with family and friends.
- Prep Time: 45 minutes
- Cook Time: 30 minutes
- Total Time: 1 hour 15 minutes (plus chilling)
- Yield: 24-30 cake pops 1x
- Category: Dessert
- Cuisine: American
Ingredients
- 1 box yellow cake mix (15.25 oz), plus eggs and oil as directed on box
- 1 container cream cheese frosting (16 oz)
- 1 teaspoon vanilla extract (optional)
- 1 bag orange candy melts (12 oz)
- 1 bag red candy melts (12 oz)
- 1 bag brown candy melts (12 oz)
- 1 bag white candy melts (12 oz)
- Candy eyes (medium size)
- Mini pretzel sticks
- Pretzel twists
- Orange jelly beans or orange M&Ms
- Red M&Ms or red jelly beans
- Lollipop sticks (6-inch)
- White chocolate chips or coconut oil (for thinning candy melts)
- Styrofoam block or cake pop stand
Instructions
- Preheat oven to 350°F (175°C). Prepare cake mix according to package directions and bake in a greased 9×13 pan for 25-30 minutes until a toothpick comes out clean. Cool completely.
- Crumble the cooled cake into fine crumbs in a large bowl using your hands.
- Add about 3/4 of the cream cheese frosting to the crumbs and mix until a dough-like consistency forms. Add more frosting if needed.
- Scoop 1.5-tablespoon portions and roll into smooth balls. Place on a parchment-lined baking sheet and refrigerate for at least 30 minutes.
- Melt brown candy melts in a microwave-safe bowl in 30-second bursts, stirring between each. Stir in 1 teaspoon coconut oil or vegetable shortening to thin.
- Dip the tip of a lollipop stick into melted candy, then insert halfway into a cake ball. Return to fridge for 10 minutes to set.
- Dip each cake pop into melted brown candy, covering completely. Gently tap stick to remove excess. Place in styrofoam block to dry.
- While coating is still wet, attach candy eyes, orange jelly bean beak, and red M&M wattle. Press pretzel twist pieces into the back for tail feathers and insert two mini pretzel stick halves into the bottom for legs.
- Let set completely (20 minutes at room temperature or 10 minutes in fridge). Optionally add highlights with white candy melts using a toothpick.
Notes
Chill cake balls thoroughly to prevent them from falling apart when dipping. If candy melts are too thick, add a teaspoon of coconut oil or vegetable shortening. For gluten-free, use gluten-free cake mix and check candy melts. For dairy-free, use dairy-free cake mix, frosting, and candy melts. Cake balls can be made ahead and refrigerated for up to 3 days or frozen for up to 3 months.
Nutrition
- Serving Size: 1 cake pop
- Calories: 200
- Sugar: 20
- Sodium: 180
- Fat: 9
- Saturated Fat: 4
- Carbohydrates: 28
- Protein: 2.5
Keywords: Thanksgiving, turkey cake pops, easy dessert, holiday treat, cake pops, turkey pops, fall dessert